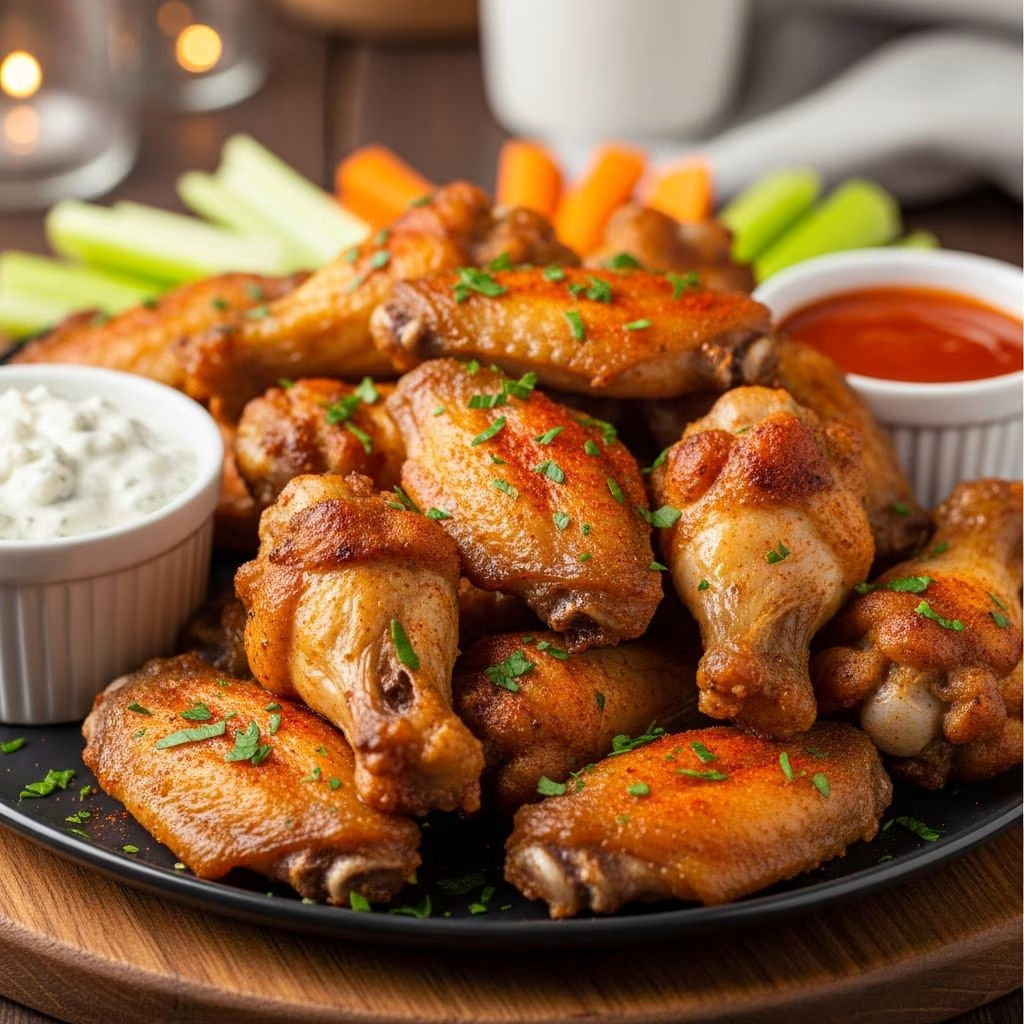
Creating perfectly crispy chicken wings without a deep fryer is entirely achievable in a standard home oven. The key lies in understanding the chemistry of moisture removal, proper ingredient selection, and precise temperature control. This comprehensive guide reveals the professional techniques that transform ordinary baked wings into a dish worthy of any restaurant kitchen.
Understanding the Science Behind Crispy Wings
Achieving crispy exteriors on baked chicken wings depends on removing surface moisture while cooking the meat through. When chicken skin contains excess water, steam forms during baking, preventing the Maillard reaction—the chemical process that creates brown, flavorful crusts. Professional kitchens and home cooks alike have discovered that certain dry ingredients work synergistically to extract moisture while building texture.
The most effective approach combines baking powder with additional dry ingredients. Baking powder contains sodium bicarbonate, which raises the pH level of chicken skin, allowing it to brown more efficiently and develop a crackly surface. Additionally, baking powder reacts with the proteins in the chicken skin, creating a microscopically textured surface that becomes exceptionally crispy when exposed to high heat.
Essential Ingredients for Maximum Crispiness
The Foundation: Quality Chicken Wings
Begin with fresh, high-quality chicken wings separated into two primary parts: drumettes and flats. Some recipes include wing tips, though these smaller pieces tend to dry out faster than their larger counterparts. When purchasing wings, look for pieces with intact skin and minimal blemishes. Fresh wings consistently outperform frozen varieties in texture and flavor development.
The Moisture-Removal Duo: Baking Powder and Cornstarch
Aluminum-free baking powder serves as the critical ingredient that transforms ordinary baked wings into crispy delights. Traditional baking powder containing aluminum can impart metallic or bitter flavors, so carefully read labels before purchasing. When combined with cornstarch, baking powder creates an exceptionally effective moisture-removal system. Cornstarch absorbs surface moisture while baking powder continues its work throughout the cooking process, resulting in wings that rival deep-fried versions in texture.
Seasoning Considerations
A well-balanced dry rub forms the flavor foundation. Essential components typically include:
- Kosher salt for flavor enhancement and additional moisture extraction
- Ground black pepper for pungency and complexity
- Garlic powder for savory depth without burning concerns
- Onion powder for additional umami qualities
- Paprika or smoked paprika for color and subtle sweetness
Avoid fresh garlic or onion, which can scorch in the oven’s high heat, creating unpleasant flavors. Powdered versions distribute evenly and tolerate high temperatures without degradation.
The Role of Fat
While some recipes omit added fat entirely, lightly coating wings with neutral oil such as vegetable, canola, or avocado oil promotes even browning and helps seasonings adhere. A light spray or brush application—rather than excessive coating—maintains crispiness while preventing greasiness. Olive oil, though flavorful, can impart strong tastes that overpower the wings’ natural flavors.
Preparation Techniques That Ensure Success
The Critical Drying Step
Perhaps the most essential preparation phase involves thoroughly drying the chicken wings with paper towels. Pat each piece multiple times, ensuring no surface moisture remains. This single step represents the difference between crispy and soggy results. For maximum crispiness, refrigerate patted-dry wings uncovered for 30 minutes up to 24 hours before baking, allowing residual moisture to evaporate from the surface.
Creating an Even Coating
Combine all dry ingredients in a small bowl before adding to wings. This ensures even distribution of leavening agents and seasonings. Place wings in a large mixing bowl, add the dry mixture, and toss thoroughly until each piece receives an even coating. Alternatively, place wings and seasoning in a zip-top bag, seal, and shake vigorously for uniform coverage with minimal effort.
Proper Arrangement on Baking Sheets
How wings are positioned during baking significantly impacts final texture. Arrange wings on wire racks set atop baking sheets lined with aluminum foil or parchment paper. The elevated position allows heat to circulate completely around each piece, promoting even browning on all sides. Wings should not touch each other, as contact prevents proper air circulation and browning. Line a single layer of wings per rack; crowding the pan forces steam to remain near the wings, creating moisture rather than crispiness.
The Baking Process Explained
Optimal Temperature Settings
Most recipes recommend preheating ovens between 400°F and 450°F, with 425°F serving as an ideal middle ground. Higher temperatures accelerate the browning process and moisture evaporation. Position the oven rack in the upper-middle position to ensure wings receive sufficient heat from above, promoting skin crisping. Allow the oven to fully preheat before introducing wings.
Timing and Rotation Strategy
Wings typically require 45 to 60 minutes at 425°F, though the exact duration depends on wing size and oven characteristics. Plan to turn wings every 15 to 20 minutes, ensuring both skin-side-up and skin-side-down positions receive adequate heat exposure. This rotation prevents uneven browning and ensures consistent crispiness throughout each batch.
Testing for Doneness
Wings are fully cooked when the internal temperature reaches 165°F as measured by an instant-read thermometer inserted into the thickest portion without touching bone. The skin should display a deep golden-brown color with slight charring at the edges. If wings appear insufficiently crispy after the initial bake time, increase oven temperature to 475°F for the final 5-10 minutes, or briefly place under the broiler for 1-2 minutes per side.
Advanced Techniques for Enhanced Results
The Butter Enhancement Method
Tossing wings in melted butter before seasoning and baking creates exceptionally rich, golden results. The butter’s milk solids encourage browning while its fat content aids in seasoning adhesion. Melt 2 tablespoons of butter, toss wings to coat, then proceed with the standard seasoning and baking process.
The Two-Stage Bake Approach
Some techniques employ an initial bake at moderate temperature followed by a high-heat finish. Begin at 375°F for 35-40 minutes, then increase temperature to 450°F for the final 10-15 minutes. This method renders fat gradually while allowing skin proteins to coagulate properly before final crisping occurs.
The Broiler Finish
For maximum crispiness, broil wings for approximately 1 minute per side after the primary baking phase. This intense, direct heat creates an exceptionally crunchy exterior without overcooking the interior. Monitor closely during broiling, as the proximity to heating elements can cause rapid charring.
Ingredient Comparison Table
| Ingredient | Function | Recommended Amount (per 3 lbs wings) | Notes |
|---|---|---|---|
| Aluminum-Free Baking Powder | Moisture extraction and browning enhancement | 1-1.5 tablespoons | Never substitute with baking soda |
| Cornstarch | Additional moisture removal | 2-3 tablespoons | Optional but highly effective |
| Kosher Salt | Flavor and moisture control | 1-2 teaspoons | Use fine sea salt or Diamond Crystal |
| Garlic Powder | Savory flavor development | 1 teaspoon | Preferable to fresh garlic |
| Paprika (Standard or Smoked) | Color and subtle sweetness | 1 teaspoon | Adds visual appeal and depth |
| Neutral Oil | Browning and seasoning adhesion | Light spray or 1-2 tablespoons | Canola, vegetable, or avocado oil |
Serving and Sauce Pairing Guide
Perfectly baked wings shine when served with complementary accompaniments. Traditional buffalo sauce, created by combining hot sauce with melted butter, provides classic heat and richness. For Asian-inspired profiles, combine soy sauce, honey, ginger, and garlic. Barbecue enthusiasts appreciate wings tossed in their preferred sauce after baking, maintaining crispiness while adding flavor. Serve wings immediately from the oven while skin remains at peak crispiness. Place finished wings on a clean plate lined with paper towels to absorb any residual moisture before serving.
Frequently Asked Questions
Can I prepare wings in advance?
Yes. Pat wings dry, coat with seasoning, and refrigerate on a wire rack uncovered for up to 24 hours before baking. This extended drying time actually improves final crispiness. Proceed with baking using standard instructions.
Why are my wings still soggy after baking?
Inadequate drying, crowded baking sheets preventing proper air circulation, or insufficient oven temperature typically cause soggy results. Ensure wings are thoroughly dried, arranged with space between pieces, and baked at 425°F or higher.
Can I use baking soda instead of baking powder?
No. Baking soda lacks the acidic components necessary for proper browning and crispy skin development. Baking powder specifically contains these components and should not be substituted.
How do I prevent wings from sticking to foil or parchment?
Arrange wings on wire racks rather than directly on baking sheets. The elevated position prevents contact with the cooking surface while allowing complete heat circulation.
What’s the best way to reheat leftover wings?
Place wings on a wire rack set over a baking sheet and reheat at 375°F for 10-15 minutes. This method restores crispiness better than microwave reheating, which tends to create soggy results.
Do I need both baking powder and cornstarch?
While baking powder alone creates crispy wings, combining it with cornstarch produces even superior results. The dual-ingredient approach maximizes moisture extraction for exceptionally crunchy exteriors.
Troubleshooting Common Issues
If wings taste bitter or metallic, aluminum-containing baking powder caused the problem. Purchase aluminum-free varieties for future batches. Should wings burn before cooking through, reduce oven temperature to 400°F and extend cooking time. Conversely, if wings require excessive time to brown, increase temperature slightly to 450°F. Uneven browning typically results from crowded pans; ensure adequate spacing between wings for proper air circulation.
Conclusion: Mastering the Art of Baked Chicken Wings
Achieving restaurant-quality crispy baked chicken wings requires understanding moisture management, proper ingredient selection, and precise temperature control. By thoroughly drying wings, combining baking powder with complementary dry ingredients, using elevated wire racks, and maintaining consistent heat, home cooks can produce wings rivaling deep-fried versions. The technique proves simple once understood, requiring no special equipment beyond a standard oven and wire racks. Practice these methods, experiment with seasoning variations, and soon crispy baked wings will become a reliable favorite in your cooking repertoire.
References
- Crispy Baked Chicken Wings — Natasha’s Kitchen. Retrieved from https://natashaskitchen.com/baked-chicken-wings/
- Crispy Baked Chicken Wings — Dinner in 321. Retrieved from https://www.dinnerin321.com/crispy-baked-chicken-wings/
- Crispy Baked Chicken Wings — Tastes Better From Scratch. Retrieved from https://tastesbetterfromscratch.com/crispy-baked-chicken-wings/
- Easy & Crispy Baked Chicken Wings — Everyday Family Cooking. Retrieved from https://www.everydayfamilycooking.com/crispy-baked-chicken-wings/
- Crispy Baked Chicken Wings — Healthy Recipes Blog. Retrieved from https://healthyrecipesblogs.com/baked-chicken-wings/