Buttermilk has long been a staple ingredient in baking and cooking, prized for its tangy flavor and ability to create tender, moist baked goods. However, many home cooks find themselves without this ingredient when a recipe calls for it, leading to last-minute grocery store trips or recipe modifications. The good news is that making buttermilk at home is remarkably straightforward and requires only basic pantry items most households already have on hand. Whether you prefer a quick five-minute solution or a cultured version that develops over time, understanding these methods empowers you to always have buttermilk available whenever you need it.
Understanding What Buttermilk Is and Why It Matters
Traditional buttermilk is a byproduct of butter production, though modern commercial buttermilk is typically made through culturing milk with specific bacterial strains. This culturing process breaks down lactose and creates lactic acid, which gives buttermilk its distinctive tangy taste and acidic properties. The acidity in buttermilk serves multiple purposes in recipes: it reacts with baking soda to create lift in baked goods, tenderizes proteins in marinades, and adds moisture to cakes and quick breads.
Understanding the chemistry behind buttermilk helps explain why both quick substitutes and cultured versions work effectively. The key is the acidic component, whether it comes from added vinegar or lemon juice, or develops naturally through bacterial fermentation. Both approaches achieve similar results in your recipes, though they differ in preparation time and final flavor profiles.
The Quick-Fix Method: Acid-Based Buttermilk in Minutes
Basic Recipe and Ratios
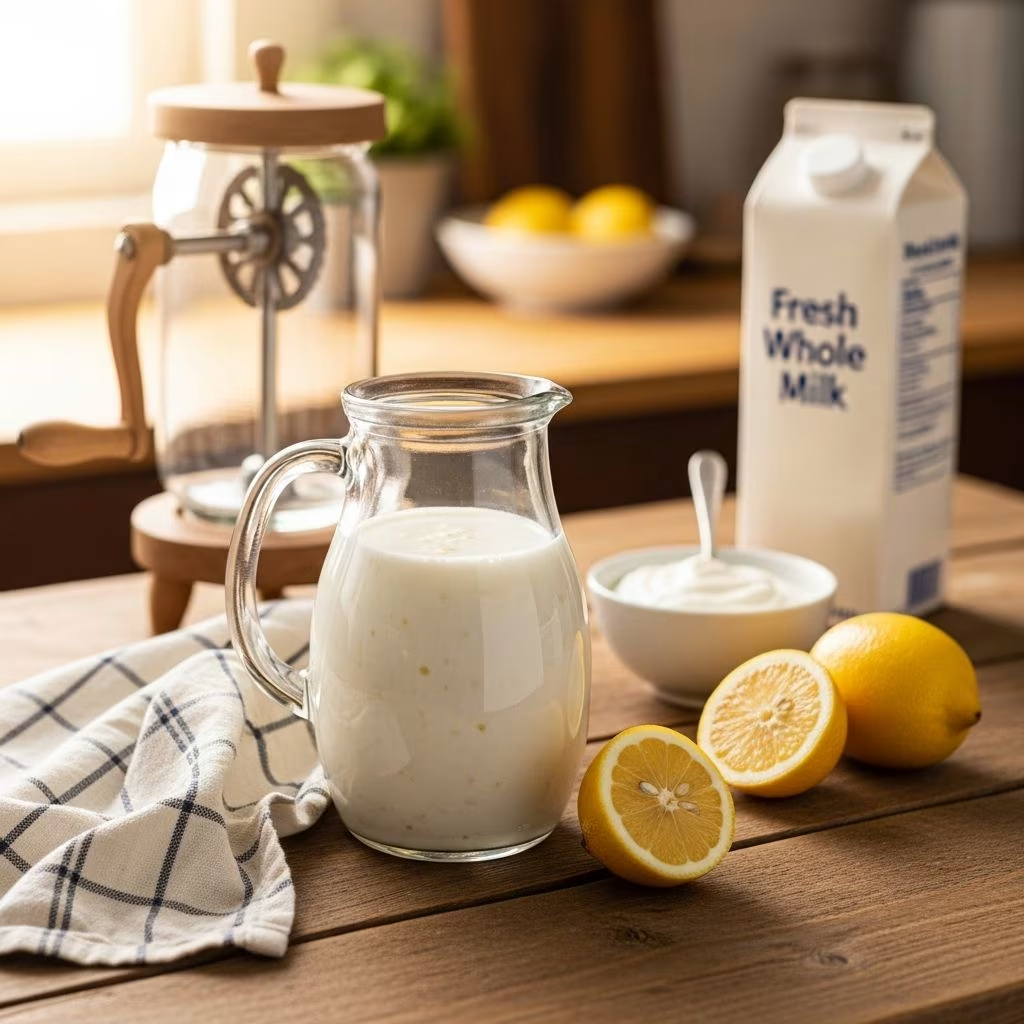
The most accessible way to create buttermilk requires only two ingredients and takes approximately five to ten minutes from start to finish. This method uses either vinegar or lemon juice to acidify milk, creating a substitute that works exceptionally well in baking applications.
The fundamental ratio is simple: one tablespoon of acidic ingredient combined with one cup of milk yields one cup of buttermilk substitute. This straightforward proportion makes scaling up or down for any recipe effortless. You can easily create smaller quantities for recipes requiring just a quarter cup or larger batches for more ambitious baking projects.
Step-by-Step Instructions
Begin by measuring your acidic component into a liquid measuring cup. Whether you choose white vinegar or freshly squeezed lemon juice, the effect is essentially identical. Pour exactly one tablespoon into the bottom of your measuring cup. Next, add milk directly to the measuring cup until the liquid reaches the one-cup line. The milk volume will be slightly less than a full cup since you’ve already added the acidic ingredient, but this is precisely correct.
Stir the mixture gently but thoroughly to combine both ingredients. You may notice the milk beginning to thicken and curdle slightly—this is exactly the desired result. Allow the mixture to rest at room temperature for five to ten minutes. During this resting period, the milk develops a buttermilk-like consistency and tanginess. After this brief waiting period, your homemade buttermilk is ready to use in any recipe calling for the ingredient.
Important Notes on the Quick Method
It’s completely normal to observe light separation and curdling during the resting phase. This visual change indicates that the acid is working properly. Some batches may show more obvious curdling than others, and this variation doesn’t affect the final result. Additionally, using a non-metallic container is preferable, as acidic ingredients can sometimes interact with metal surfaces.
Scaling the Quick Method for Various Quantities
The beauty of the quick-fix method lies in its flexibility. Different recipes require different amounts of buttermilk, and the basic ratio scales proportionally:
| Desired Amount | Acid Ingredient | Milk |
|---|---|---|
| 1/4 cup | 3/4 teaspoon | 1/4 cup |
| 1/3 cup | 1 teaspoon | 1/3 cup |
| 1/2 cup | 1.5 teaspoons | 1/2 cup |
| 2/3 cup | 2 teaspoons | 2/3 cup |
| 3/4 cup | 2.25 teaspoons | 3/4 cup |
| 1 cup | 1 tablespoon | 1 cup |
This scalability makes the quick method ideal for any baking situation, whether you need a small amount for a single recipe or larger quantities for multiple batches of baked goods.
The Cultured Method: Creating Buttermilk Through Fermentation
Understanding Cultured Buttermilk
For those seeking a more authentic buttermilk experience and willing to wait approximately 24 hours, the cultured method produces results that closely mimic traditional commercial buttermilk. This technique relies on bacterial cultures to naturally develop the tangy flavor and creamy texture characteristic of real cultured buttermilk. The advantage of this method is that each batch serves as a starter culture for the next batch, creating an ongoing supply once you’ve made your first batch.
Essential Ingredients and Proportions
To create cultured buttermilk, you’ll need fresh milk, store-bought cultured buttermilk containing live cultures, and salt for flavor. The basic proportion is one part cultured buttermilk starter to four parts fresh milk. For example, a common recipe combines one-half cup of commercial cultured buttermilk with two cups of fresh milk and one-quarter teaspoon of kosher salt.
When selecting store-bought starter buttermilk, verify that it contains live active cultures, as some products have been heat-treated and won’t function as effective cultures. Look for packaging that explicitly states “live cultures” or check the nutrition label for active bacterial strains.
Cultured Method Instructions
Pour your fresh milk into a clean glass container, ideally one that has been recently sanitized. The container should be large enough to accommodate expansion during fermentation. Add the correct proportion of cultured buttermilk starter to your fresh milk. Stir the mixture thoroughly to distribute the cultures evenly throughout the milk. Adding salt at this stage seasons the final product, though this step is optional if you prefer unsalted buttermilk.
Cover the container loosely—ideally with a lid that isn’t tightly sealed—and place it in a warm location away from direct sunlight or other fermenting foods. A kitchen counter, cupboard, or warm corner of your home works well. The temperature should be relatively stable and warm, ideally between 70 and 77 degrees Fahrenheit for optimal culturing. Allow the mixture to rest undisturbed for approximately 24 hours.
During this fermentation period, the bacterial cultures gradually consume lactose and produce lactic acid, thickening the milk and developing the characteristic tangy buttermilk flavor. After 24 hours, check the consistency and taste. The buttermilk should be noticeably thicker and have a pleasant tangy flavor. If it needs more time, allow it to ferment for several additional hours before refrigerating.
Perpetual Culturing: The Self-Sustaining System
One significant advantage of the cultured method is that each batch contains active cultures that can seed the next batch. After your initial cultured buttermilk is ready, reserve approximately one cup to serve as starter for your next batch. Combine this reserved cultured buttermilk with three cups of fresh milk in a clean jar, stir to combine, loosely cover, and let it culture for another 24 hours. You can repeat this process indefinitely, creating a self-perpetuating source of buttermilk without needing to purchase new starter each time.
This perpetual culturing system proves economical over time and allows you to develop a buttermilk that becomes increasingly tailored to your environment and preferences as the cultures adapt to your kitchen conditions.
Choosing the Right Method for Your Needs
When to Use the Quick Method
The acid-based quick method excels when you need buttermilk immediately or have unexpected baking plans. If a recipe calls for buttermilk but you have none on hand, this method delivers results in less than 15 minutes. It also works well if you bake only occasionally and don’t want to maintain cultures between uses. The quick method is equally effective whether you need one batch or multiple quantities for different recipes.
When to Use the Cultured Method
The cultured method suits those who bake regularly and appreciate developing a continuous buttermilk supply. If you enjoy traditional flavors and don’t mind planning ahead, the longer fermentation period creates buttermilk with more complex tanginess than the quick method. The cultured version also becomes increasingly economical if you use buttermilk frequently, as each batch serves as starter for the next without additional ingredient purchases.
Selecting Your Milk: A Critical Decision
Both methods work successfully with various milk types, offering flexibility based on your preferences and dietary needs. Whole milk produces the creamiest final product with the richest flavor. Skim milk creates buttermilk with lower fat content, suitable for those watching calorie intake. Goat milk produces a distinctive tangy buttermilk with a flavor profile unique from cow milk versions. Plant-based alternatives including coconut milk and soy milk work effectively in the quick acid method, yielding dairy-free buttermilk suitable for vegan baking.
The milk choice doesn’t significantly affect how well either method works; rather, it determines the final flavor and nutritional profile of your finished buttermilk. Experiment with different milk varieties to discover your preferred version.
Storage and Shelf Life Considerations
Homemade buttermilk made through the quick acid method can be used immediately or refrigerated for later use. This type of buttermilk keeps refrigerated for approximately one to two weeks, similar to store-bought buttermilk. Cultured buttermilk continues developing in the refrigerator but at a greatly slowed rate. Properly stored cultured buttermilk remains usable for two to three weeks and can potentially be used longer if it shows no signs of mold or off-flavors.
Always store homemade buttermilk in clean containers and keep it refrigerated. If you notice any mold, unusual odors, or other signs of spoilage, discard the batch and start fresh.
Troubleshooting Common Issues
Quick Method Problems
If your quick-method buttermilk doesn’t thicken after five to ten minutes, ensure you’re using adequate acid relative to milk volume. Also verify that your vinegar is true white vinegar and not diluted; fresh lemon juice works best compared to bottled lemon juice concentrates. Allow additional resting time if needed, as some milk types require longer than others.
Cultured Method Challenges
If cultured buttermilk isn’t thickening within 24 hours, your culturing environment may be too cold. Try placing the jar in a warmer location or wrapping it in a kitchen towel to maintain temperature. Ensure your starter buttermilk actually contains live cultures by checking the packaging. If mold appears during culturing, discard the entire batch and start over with fresh ingredients and a sanitized container.
Beyond Baking: Other Uses for Homemade Buttermilk
While buttermilk serves valuable purposes in baking, its applications extend far beyond cookies and cakes. Use buttermilk as a marinade base for chicken or fish, where its acidity tenderizes meat while adding subtle flavor. Incorporate it into salad dressings for creamy tang without requiring sour cream or mayonnaise. Homemade buttermilk adds moisture and flavor to pancakes, waffles, biscuits, and scones. Certain savory applications including Indian curries and Middle Eastern dishes benefit from buttermilk’s unique flavor profile and acidic properties.
Frequently Asked Questions
Can I use the quick-method buttermilk in recipes requiring cultured buttermilk?
Yes, the quick method works effectively as a substitute in most recipes. While cultured buttermilk offers more complex flavor from longer fermentation, both versions provide the acidity needed for baking chemistry. The main difference is in nuanced flavor rather than functional performance.
Does homemade buttermilk taste different from store-bought?
Quick-method buttermilk tastes quite similar to store-bought products. Cultured homemade buttermilk often develops more pronounced tanginess and complexity, potentially tasting different depending on your specific culturing conditions and milk source.
Is cultured buttermilk starter actually necessary, or can I use something else?
You technically need cultured buttermilk or specific buttermilk cultures for fermentation. Regular commercial milk contains minimal viable cultures. Some people experiment with yogurt or kefir as starter cultures with variable results, though commercial buttermilk cultures remain most reliable.
What if I only need buttermilk for one specific recipe?
The quick acid method is ideal for single-use situations. Make exactly the amount you need, use it immediately, and you’re finished. This approach requires no advance planning or culture maintenance.
Can I make buttermilk without vinegar or lemon juice?
Yes, cream of tartar works effectively, combining one and three-quarter teaspoons of cream of tartar with one cup of milk. This option suits those preferring alternatives to vinegar or lemon juice. Plain yogurt also works as a one-to-one buttermilk substitute, though it produces slightly different texture.
References
- Kitchen Parade – Homemade Buttermilk — Kitchen Parade. Accessed via https://www.kitchenparade.com/2012/07/homemade-buttermilk.html
- How to Make Homemade Buttermilk: Easy Tips and Recipes — Betty Crocker. Accessed via https://www.bettycrocker.com/how-to/ingredients-and-preparation/how-to-make-homemade-buttermilk-easy-tips-and-recipes
- How to Make Real Buttermilk (Cultured Buttermilk Recipe) — Melissa K. Norris. Accessed via https://melissaknorris.com/how-to-make-real-buttermilk/
- How to make the best and creamiest buttermilk ever at half the cost — Gramma Rose’s Open Pantry (YouTube). Accessed via https://www.youtube.com/watch?v=8MEZaOTpwos
- How to Make Buttermilk (Recipe & Tips) — Cookie and Kate. Updated August 15, 2025. Accessed via https://cookieandkate.com/buttermilk-recipe/
- How To Make Buttermilk | at home — YouTube. Accessed via https://www.youtube.com/watch?v=YmLD7DRMPfc
- Buttermilk Substitute (& When to Use It) — Sally’s Baking Addiction. Accessed via https://sallysbakingaddiction.com/buttermilk-substitute/
- Easy Homemade Buttermilk Substitute — A Modern Homestead. Accessed via https://www.amodernhomestead.com/how-to-make-buttermilk-substitute/
- How to make Buttermilk — Tastes Better From Scratch. Accessed via https://tastesbetterfromscratch.com/how-to-make-buttermilk/