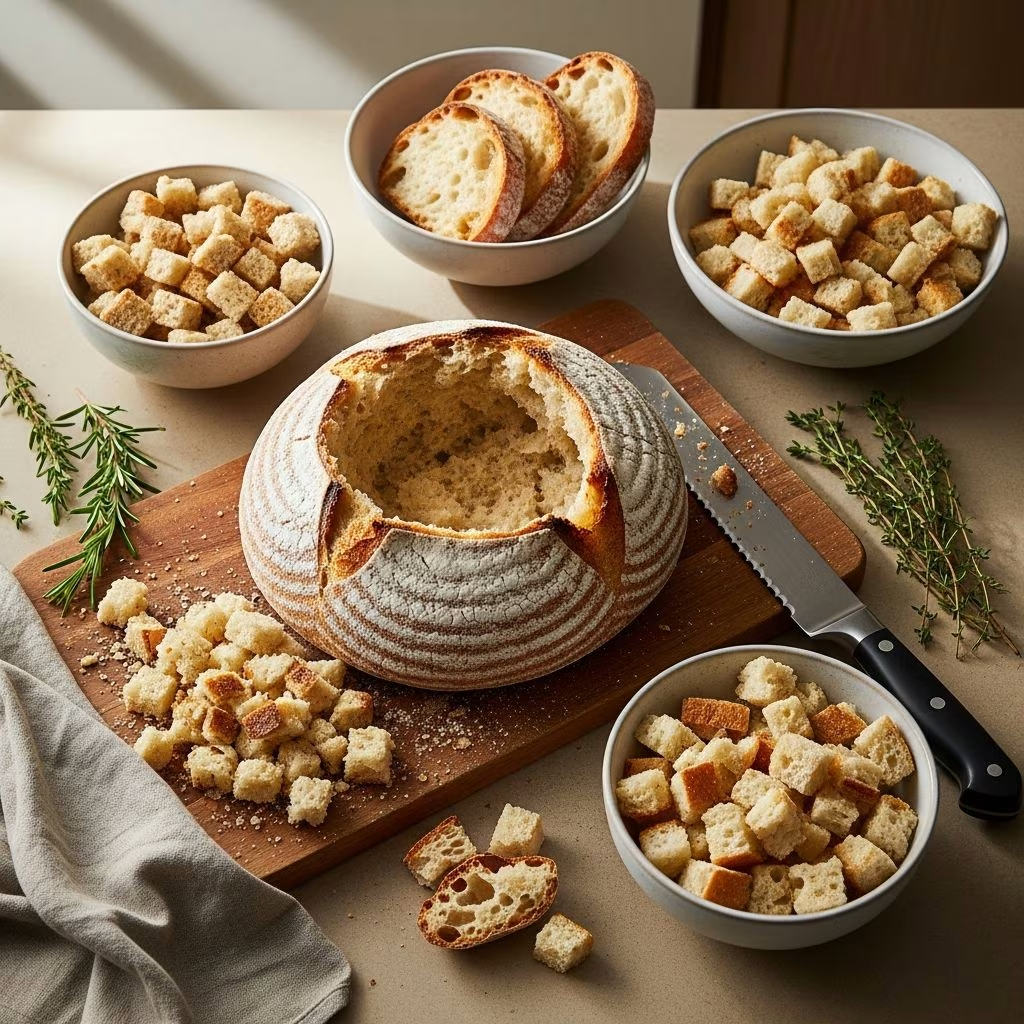
Creating exceptional stuffing begins long before you combine ingredients with broth and aromatics. The foundation of truly outstanding stuffing lies in properly preparing your bread, a step many home cooks overlook or rush through. Understanding how to adequately dry your bread ensures that your final dish achieves the ideal balance between moisture and structural integrity, preventing the common pitfall of soggy, mushy stuffing that lacks character and appeal.
Why Bread Preparation Matters for Stuffing Quality
The texture and quality of your stuffing depend fundamentally on starting with appropriately dried bread. When bread contains excess moisture, it cannot effectively absorb the flavorful broth and other liquid components that define traditional stuffing. Instead of soaking up these liquids, overly moist bread becomes waterlogged and breaks down into an unappealing paste. Conversely, bread that is properly dried maintains its structure while developing a subtle crispness that contributes to textural complexity in the finished dish.
Additionally, dried bread cubes lose approximately 20% of their original volume, a factor that significantly impacts recipe measurements and ingredient proportions. This volume reduction means that properly prepared bread takes up less space in your mixing bowl, allowing for better distribution of seasonings, vegetables, and binding ingredients throughout your stuffing mixture.
Selecting Appropriate Bread Varieties
Not all breads are created equal when it comes to stuffing preparation. The choice of bread variety influences both the drying process and the final flavor profile of your dish. Standard white bread represents the most accessible and widely used option, offering a neutral flavor foundation that complements traditional stuffing seasonings. However, adventurous cooks can experiment with numerous alternatives to customize their stuffing experience.
Sourdough bread brings tangy complexity and superior structural integrity to stuffing, making it an excellent choice for those seeking more sophisticated flavor dimensions. Challah, with its slightly sweet character and tender crumb structure, creates a unique variation that pairs particularly well with poultry. Whole wheat bread contributes nuttier undertones and additional nutritional value, though it typically requires slightly less drying time due to its denser composition. Some innovative cooks have successfully employed day-old dinner rolls, bagels, and even cornbread to create distinctive stuffing variations tailored to personal preferences.
The critical factor across all bread selections remains consistency: select bread that you enjoy eating on its own, as that bread will form the textural and flavor backbone of your finished stuffing.
Preparing Bread Cubes for the Drying Process
Before initiating either drying method, proper bread cutting techniques ensure uniform drying and optimal results. Begin with bread that is at least one day old, as slightly stale bread proves significantly easier to cut than freshly baked loaves. A sharp bread knife allows for clean cuts without crushing or tearing the bread structure, though some practitioners prefer kitchen shears for creating uniformly sized cubes.
Cut bread into approximately ½-inch cubes, maintaining consistency in size to ensure even drying throughout your batch. Uniform cube dimensions prevent smaller pieces from drying too quickly and becoming overly hard while larger pieces remain insufficiently dried. This attention to detail, though seemingly minor, substantially impacts the final stuffing texture.
Counter-Top Drying: The Patient Approach
For home cooks with flexible timelines, drying bread cubes at room temperature represents the most passive and energy-efficient method. This approach requires minimal equipment and active attention while delivering consistently excellent results.
Counter-Top Drying Process:
- Spread prepared bread cubes in a single layer on a rimmed baking sheet, ensuring cubes do not overlap or pile upon one another
- Cover the baking sheet with a clean, dry kitchen towel to protect cubes from dust and airborne contaminants while allowing adequate air circulation
- Position the baking sheet in a cool, dry location away from direct sunlight and heat sources such as stoves or heating vents
- Allow cubes to dry for 2 to 3 days at room temperature, stirring occasionally to promote even moisture evaporation
- Test cubes for appropriate dryness by cutting or breaking one in half; the interior should feel firm without excessive hardness
This patient methodology works particularly well for those planning ahead, as dried cubes maintain quality for up to 4 days when stored in a cool, dry location in an airtight container. The extended drying period allows bread to lose moisture gradually and evenly, resulting in cubes with superior texture compared to rapidly dried alternatives.
Oven Drying: The Expedited Solution
When time constraints necessitate faster preparation, oven drying provides a practical alternative that produces quality results within hours rather than days. This method offers greater control over the drying process and allows for same-day preparation if necessary.
Oven Drying Process:
- Preheat your oven to 300 degrees Fahrenheit, a temperature low enough to dry bread without browning or toasting
- Spread bread cubes in a single layer across an ungreased rimmed baking sheet, maintaining adequate space between individual cubes
- Transfer the baking sheet to the center oven rack and bake for 10 minutes
- Remove the sheet from the oven and use a spatula to stir the bread cubes, ensuring even exposure to ambient oven heat
- Return to the oven and continue baking for approximately 5 additional minutes
- Check cubes for crispness; if they still feel slightly soft, return to the oven in 5-minute intervals until reaching desired dryness
- Allow cubes to cool completely before using or storing
The entire oven-drying process typically requires 30 to 40 minutes of total time, including stirring intervals. This relatively quick turnaround makes oven drying ideal for last-minute preparations or situations where advance planning was not feasible. Importantly, maintain the 300-degree temperature to prevent browning, which would introduce unwanted toasted flavors that compromise the intended stuffing profile.
Comparative Analysis of Drying Methods
| Drying Method | Time Required | Energy Usage | Active Attention | Best For |
|---|---|---|---|---|
| Counter-Top | 2-3 days | None | Minimal (occasional stirring) | Advance planning, energy efficiency |
| Oven | 30-40 minutes | Moderate | Moderate (stirring required) | Same-day preparation, time-sensitive situations |
Storage and Make-Ahead Considerations
Properly dried bread cubes maintain excellent quality when stored correctly, enabling significant meal preparation flexibility. Store cooled cubes in airtight containers positioned in cool, dry locations away from humidity and temperature fluctuations. Under these conditions, dried cubes remain suitable for use up to 4 days following preparation.
This extended storage window enables home cooks to prepare bread cubes well in advance of major holidays or entertaining occasions, reducing last-minute kitchen stress. Additionally, once cubes are combined with other stuffing components, the assembled mixture can be refrigerated for up to 1 day before cooking, providing even greater flexibility in meal timing.
Troubleshooting Common Drying Challenges
Bread Remains Too Moist After Drying: Extend the counter-drying period by an additional day, or increase oven drying time in 5-minute increments. Ensure cubes are arranged in a single layer without overlapping, as stacking prevents adequate air circulation.
Bread Becomes Over-Dried or Hard: Reduce oven drying time during future preparations. When using counter-top drying, ensure cubes are not positioned in direct sunlight or near heat sources that accelerate moisture loss excessively.
Uneven Drying Within Batches: Stir cubes more frequently during both drying methods to ensure all sides receive equal exposure to drying air. Cut bread into more uniform sizes to prevent variability in drying rates.
Mold or Off-Odors Developing: This indicates inadequate air circulation or environmental humidity issues. Ensure storage containers are truly airtight and positioned in dry locations. Discard affected batches and adjust storage location.
Integration with Stuffing Assembly
Properly dried bread cubes provide the ideal foundation for assembling exceptional stuffing. The dried cubes effectively absorb broth and seasonings while maintaining structural integrity throughout mixing and cooking processes. When combining dried cubes with sautéed aromatics, fresh herbs, and broth, the bread functions as an active ingredient that develops flavor and achieves desired textural balance rather than merely absorbing excess liquid.
The 20% volume reduction that occurs during drying necessitates measuring bread after the drying process concludes to ensure accurate recipe proportions and ingredient ratios. This seemingly technical detail contributes significantly to achieving consistent results across multiple preparations.
Frequently Asked Questions
Can I use store-bought pre-dried bread cubes? Yes, commercially prepared bread cubes work effectively as starting points, though freshly dried homemade cubes often provide superior flavor and texture. If using store-bought options, reduce added salt slightly, particularly if the cubes are seasoned.
What temperature should I use for oven drying? Maintain 300 degrees Fahrenheit to dry bread without browning. Higher temperatures will toast the bread, introducing flavors incompatible with traditional stuffing profiles.
Can I dry different bread types together? Yes, though slightly different drying times may apply. Combine bread varieties only if they have similar moisture content and density profiles. Denser breads like sourdough may require slightly extended drying periods.
How can I tell when bread is adequately dried? Break a sample cube in half; the interior should feel firm without excessive hardness or brittleness. Cubes should hold together when handled but should not feel damp or spongy.
What if I forget to dry bread in advance? Utilize oven drying for same-day preparation. Though counter-drying produces marginally superior results, properly executed oven drying delivers excellent outcomes within hours.
References
- Bread Cubes for Stuffing — Culinary Hill. 2024. https://www.culinaryhill.com/how-to-make-bread-cubes-for-stuffing/
- Easy Stuffing Recipe — Spend With Pennies. 2024. https://www.spendwithpennies.com/easy-stuffing-recipe/
- How to Make Bread Cubes for Stuffing — Sugar Spun Run. 2024. https://sugarspunrun.com/how-to-make-bread-cubes-for-stuffing/