Steel-cut oats represent one of the most versatile and nutritious breakfast options available to home cooks. Unlike instant or rolled oats, steel-cut varieties maintain a firmer texture and deliver a more satisfying eating experience. Understanding the various cooking methods allows you to adapt preparation to your schedule, whether you have time for active cooking or prefer overnight convenience.
Understanding Steel-Cut Oats and Their Characteristics
Steel-cut oats are created by chopping whole oat groats into smaller pieces using steel blades, a process that distinguishes them from other oat varieties. This mechanical treatment preserves more of the grain’s structure, resulting in a chewier texture and slower cooking time compared to rolled oats. The extended cooking process allows the outer layers to gradually soften while the interior maintains its distinctive bite.
The nutritional profile of steel-cut oats includes beneficial fiber content that supports digestive health and provides sustained energy throughout the morning. The natural starches within steel-cut oats develop a creamy consistency when cooked properly, eliminating the need for excessive added cream or milk.
Essential Ingredients and Proportions
Creating perfectly cooked steel-cut oatmeal begins with understanding the correct ingredient ratios. The standard foundation consists of:
- One cup of steel-cut oats as the base measurement
- Three to four cups of liquid (water, broth, or milk combinations)
- A pinch of salt for flavor enhancement
- Optional butter or oil for richness
- Additional milk for finishing touches
The liquid-to-oats ratio proves crucial for achieving the desired consistency. Using three cups of water produces firmer oatmeal with a slight bite, while four cups creates a creamier, more luxurious texture. Some cooks prefer combining water and milk in equal parts for added richness without overwhelming dairy flavors.
The Traditional Stovetop Method
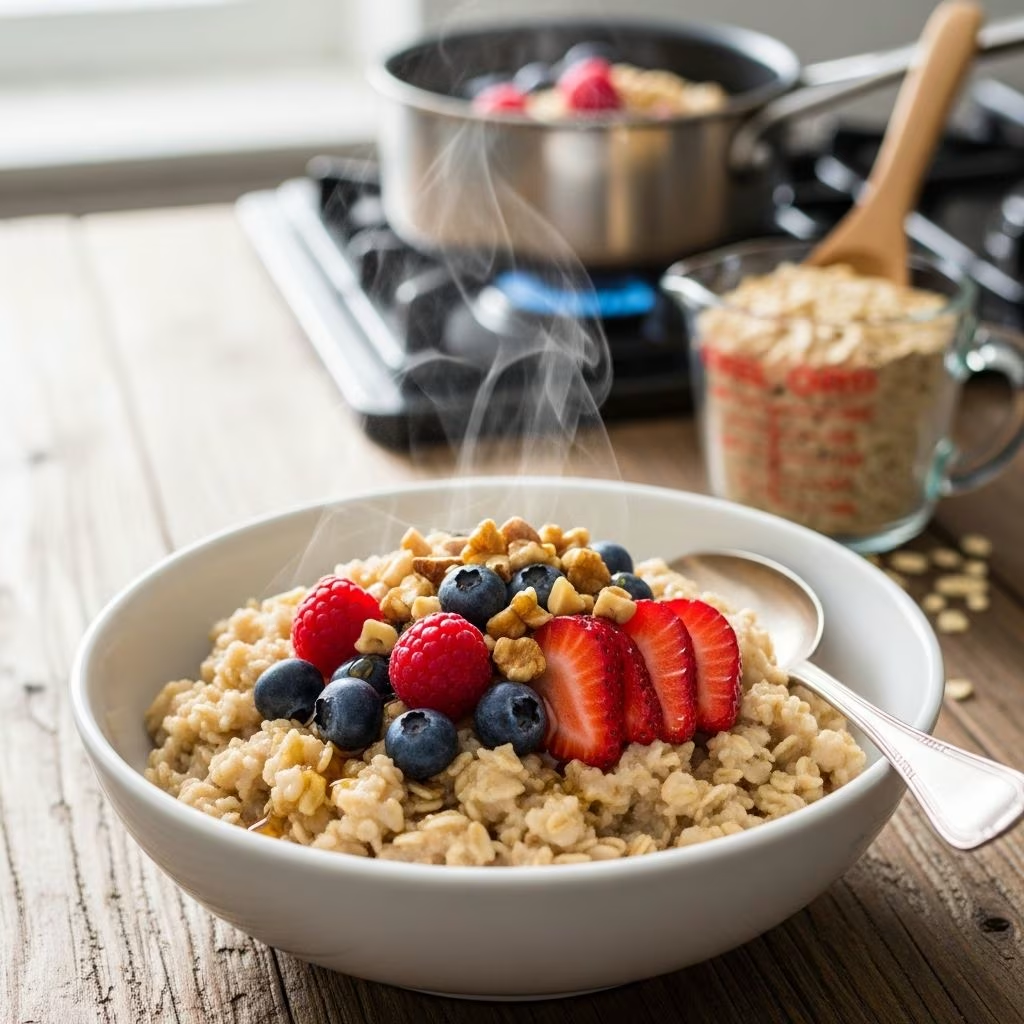
The stovetop approach remains the most direct path to finished steel-cut oatmeal. This method offers active control over cooking time and texture development, though it requires your attention during the cooking process.
Initial Setup: Bring your measured liquid to a rolling boil in a medium to large saucepan. The water temperature should reach a vigorous boil before adding oats to ensure even hydration and cooking.
Adding Oats: Pour the dry steel-cut oats directly into the boiling liquid while stirring continuously. This action prevents clumping and ensures each oat piece begins absorbing moisture evenly. Add your salt at this stage, using approximately one-quarter teaspoon for a full batch.
Heat Adjustment: Once the oat mixture returns to a boil, reduce the heat to medium-low to maintain a gentle simmer. This gradual cooking process typically spans twenty to thirty minutes, depending on your desired final consistency and oat processing style.
Stirring Technique: Occasional stirring prevents the bottom layer from scorching while allowing the oats to develop their characteristic creaminess. Stir gently every few minutes using a wooden spoon, paying particular attention to the pan’s bottom. Reduce heat further if you notice vigorous bubbling or sticking.
Doneness Assessment: The oatmeal reaches completion when most liquid has been absorbed and the grains achieve a tender, creamy texture. The mixture should flow slightly on the spoon rather than appearing soupy or rigid. Remember that steel-cut oatmeal continues thickening after removal from heat, so slight looseness at completion is preferable.
The Overnight Soaking Strategy
For those preferring minimal morning effort, the overnight soaking method eliminates extended cooking times while delivering exceptional creaminess. This approach works particularly well for busy mornings when breakfast preparation must occur quickly.
Evening Preparation: Bring your liquid to a boil in a saucepan and add the steel-cut oats along with salt. Allow the mixture to boil for approximately one minute, then remove from heat and cover with a tight-fitting lid. Leave the covered pot on your kitchen counter overnight, allowing eight to twelve hours for full hydration.
Morning Completion: When you wake, the oats will have absorbed most of the liquid and softened considerably. Place the saucepan back on the stove over medium-high heat and add your preferred finishing milk. Stir the mixture for three to five minutes until it reaches the desired consistency and heats through completely.
Timing Advantage: This method reduces active cooking time to approximately five minutes in the morning, making it ideal for time-constrained schedules. The overnight soaking initiates the cooking process without requiring stove time, so the morning completion step mainly reheats and adjusts consistency.
Slow Cooker and Make-Ahead Approaches
The slow cooker provides an exceptional solution for hands-off preparation, particularly when you want breakfast ready upon waking. This method suits meal-prep situations where you prepare multiple servings simultaneously.
Slow Cooker Setup: Combine vegetable stock or water with steel-cut oats and salt directly in your slow cooker. The ratio remains similar to stovetop cooking—approximately three to four parts liquid to one part oats. Cover and set to low heat for four to five hours, allowing the gentle heat to gradually cook the oats without requiring attention.
Storage and Reheating: Once cooked, steel-cut oatmeal stores well in refrigerated containers for up to five days. Simply portion the cooled oatmeal into individual containers and refrigerate. During the week, reheat single portions in the microwave with a splash of additional milk or water to restore creaminess.
Flavor Development Through Strategic Additions
While plain steel-cut oatmeal provides satisfying nutrition, intentional flavor building transforms a simple breakfast into an anticipated daily ritual. Consider adding ingredients during different cooking stages to maximize flavor integration:
| Addition Type | Best Timing | Quantity Guidelines |
|---|---|---|
| Warm Spices (cinnamon, nutmeg, cardamom) | During cooking or finishing stage | ¼ to ½ teaspoon per serving |
| Dried Fruits (cranberries, dates, raisins) | During last five minutes of cooking | 2 to 3 tablespoons per serving |
| Fresh Fruits (berries, sliced bananas) | After plating, as garnish | ¼ to ½ cup per serving |
| Nuts and Seeds (walnuts, almonds, chia) | After plating or toasted beforehand | 2 tablespoons per serving |
| Citrus Zest (lemon or orange) | Finishing stage or as garnish | ½ to 1 teaspoon per serving |
| Maple Syrup or Honey | After plating for individual preference | ½ to 1 tablespoon per serving |
Savory Variations and Vegetable Pairings
Steel-cut oats extend beyond sweet breakfast applications, functioning beautifully as a savory canvas for vegetables, herbs, and proteins. This versatility appeals to cooks seeking breakfast alternatives or those pursuing plant-forward eating patterns.
Vegetable Topping Foundation: Prepare steel-cut oats using vegetable stock instead of water, creating a naturally savory base. Cook mushrooms, spinach, and aromatics separately in olive oil with cumin and paprika, then combine with finished oatmeal.
Protein Integration: Top your finished oatmeal with a fried or poached egg, providing additional protein and richness. Alternatively, incorporate cooked legumes directly into the oatmeal during the final cooking stages.
Herb and Seasoning Layers: Finish savory preparations with fresh herbs like cilantro or parsley, red pepper flakes for heat, and a final seasoning adjustment with sea salt and cracked black pepper.
Troubleshooting Common Preparation Issues
Excessive Thickness: If your finished oatmeal appears too dense, add liquid incrementally in quarter-cup amounts. Warm milk integrates more smoothly than cold water, preserving the creamy texture you’ve developed. Stir vigorously after each addition to distribute moisture evenly.
Scorching or Burning: Should the bottom of your pan show browning, reduce heat immediately and transfer the oatmeal to a different vessel if possible. Prevent future scorching by using a heavy-bottomed pan that distributes heat evenly and stirring more frequently during cooking.
Undercooked Grains: If your oatmeal retains excessive firmness after the standard cooking period, continue simmering with heat reduced to low. Steel-cut oats vary in processing, so some batches may require five to ten additional minutes.
Separation or Grainy Texture: Constant stirring prevents separation and ensures creamy results. If separation occurs, whisk vigorously or use an immersion blender briefly to reintegrate the components.
Quick-Cooking Steel-Cut Varieties
Certain manufacturers produce quick-cooking steel-cut oat varieties that reduce preparation time without sacrificing texture quality. These products undergo additional processing to accelerate moisture absorption while maintaining the characteristic chewiness of steel-cut grains.
Quick-cooking varieties prepare in five to seven minutes using the standard stovetop method, eliminating the need for overnight soaking or extended cooking periods. Follow the package instructions for specific liquid ratios, as these pre-processed oats may require different proportions than traditional steel-cut varieties.
Optimizing Milk and Liquid Selections
Your choice of cooking liquid significantly influences both flavor development and final texture. Water provides a neutral canvas allowing other ingredients to shine, while milk additions create richness and creaminess. Alternative milk options including almond, coconut, and oat-based varieties each contribute distinct flavor profiles.
Consider using broth—vegetable or chicken—as your primary cooking liquid for savory preparations. Combination approaches, such as using two parts water to one part milk, balance richness with ingredient prominence.
Frequently Asked Questions
How long do steel-cut oats require to cook using the traditional stovetop method?
Stovetop preparation typically requires twenty to thirty minutes of simmering after bringing the liquid to a boil. Exact timing depends on your preferred consistency, the specific oat brand, and environmental factors like altitude and pan type.
Can I prepare steel-cut oats in advance for meal planning purposes?
Yes, cooked steel-cut oatmeal stores well in the refrigerator for five to seven days. Portion into individual containers and reheat with additional milk when ready to consume.
What distinguishes steel-cut oats from rolled oats in terms of nutritional value?
Steel-cut oats maintain more of the whole grain structure, potentially preserving additional fiber and nutrients. Both varieties provide beneficial soluble fiber and satisfy breakfast nutritional needs effectively.
Is the overnight soaking method completely hands-off?
The overnight phase is hands-off, but morning completion requires approximately five minutes of active cooking and stirring to heat through and adjust consistency.
Can I double or triple steel-cut oatmeal recipes for larger servings?
Yes, recipes scale successfully when you maintain consistent liquid-to-oat ratios. Doubled batches may require slightly longer cooking times, particularly during the final hydration phase.
References
- Perfect Steel-Cut Oats Recipe — Cookie and Kate. Accessed April 2026. https://cookieandkate.com/perfect-steel-cut-oats-recipe/
- Steel Cut Oats Recipe — Love and Lemons. Accessed April 2026. https://www.loveandlemons.com/steel-cut-oats/
- 5-Minute Overnight Steel Cut Oatmeal — Making Thyme for Health. Accessed April 2026. https://www.makingthymeforhealth.com/5-minute-overnight-steel-cut-oatmeal/
- How To Cook Steel Cut Oats On The Stovetop — One Lovely Life. Accessed April 2026. https://www.onelovelylife.com/how-to-cook-steel-cut-oats/
- Savory Steel Cut Oatmeal — Foolproof Living. Accessed April 2026. https://foolproofliving.com/one-pot-savory-steel-cut-oats/
- Creamy, Toasty Steel-Cut Oats — Lukas Volger. Accessed April 2026. https://www.lukasvolger.com/recipes/creamy-toasty-steel-cut-oats
- Steel Cut Oats: Make Once – Eat All Week — Hodgson Mill. Accessed April 2026. https://www.hodgsonmill.com/blogs/blog/steel-cut-oats-make-once-eat-all-week-three-topping-ideas-included