Cooking pork at elevated temperatures has become increasingly popular among home cooks and professional chefs alike. This method delivers impressive results that transform an ordinary dinner into something exceptional. The combination of high heat and proper preparation creates a distinctive contrast between a caramelized exterior and succulent interior meat. Understanding the science and technique behind this approach allows anyone to achieve restaurant-quality results in their own kitchen.
Understanding the Chemistry of High-Temperature Cooking
When pork reaches high temperatures, several chemical processes occur simultaneously that enhance flavor and texture. The Maillard reaction begins when proteins and sugars on the meat’s surface interact with heat, creating complex flavor compounds and browning. This reaction typically starts around 300 degrees Fahrenheit and intensifies as temperatures climb. The result is a deeply flavorful crust that contrasts beautifully with the tender meat underneath.
Fat rendering represents another crucial element in high-heat pork cooking. As temperature increases, fat beneath the skin and throughout the meat begins to break down and liquefy. This process not only adds moisture to the meat but also contributes substantially to flavor development. The rendered fat bastes the meat during cooking, preventing dryness while enhancing overall palatability. Understanding this process helps cooks make informed decisions about cut selection and preparation methods.
Selecting the Right Pork Cut for High-Heat Roasting
Not all pork cuts perform equally well under intense heat. The ideal candidates for high-temperature roasting possess sufficient fat content and appropriate dimensions for the cooking method. Pork shoulder and pork butt contain enough intramuscular fat to withstand high heat without becoming dry. These cuts also have enough thickness to allow the interior to cook through while the exterior develops an attractive crust.
Pork loin presents a leaner option that requires careful attention to prevent overcooking. While this cut can produce excellent results with high-heat methods, the cook must monitor internal temperature closely. The fatty cap on certain cuts helps protect the meat during cooking and adds richness to the final dish. Center-cut sections with the bone intact offer superior flavor and moisture retention compared to boneless options.
| Pork Cut | Fat Content | Ideal Weight | Best Use |
|---|---|---|---|
| Pork Shoulder | Moderate to High | 6-10 lbs | High-heat roasting, pulled pork |
| Pork Butt | High | 8-12 lbs | Slow cooking, high-heat methods |
| Pork Loin | Low | 3-6 lbs | Quick roasting, careful monitoring |
| Pork Rib Roast | Moderate | 5-8 lbs | Special occasions, high-heat finish |
Comprehensive Preparation Steps
Proper preparation determines success before the pork ever enters the oven. Beginning with a quality cut from a reputable butcher ensures better results than pre-packaged options. Allow the meat to reach room temperature before cooking, typically requiring 45 minutes to an hour depending on size. This promotes even cooking throughout and allows the exterior to develop a proper crust without the interior remaining cool.
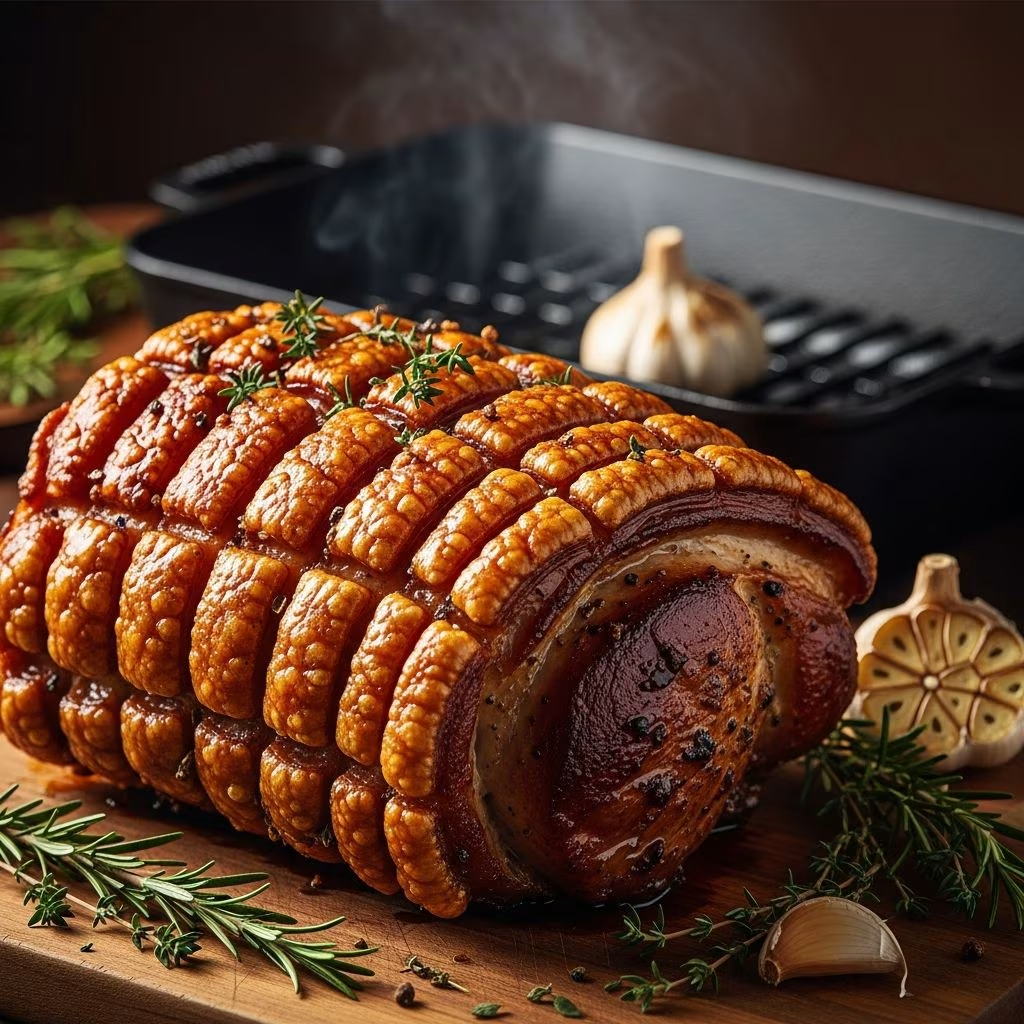
Scoring the fat cap creates pathways for heat penetration and helps render fat more effectively. Using a sharp knife, make shallow cuts in a crosshatch pattern without cutting into the meat beneath. This simple step dramatically improves texture and appearance. Pat the meat thoroughly dry with paper towels, as moisture on the surface inhibits browning and crust formation.
Seasoning Strategy
Seasoning should happen well in advance of cooking, allowing flavors to penetrate the meat rather than simply sitting on the surface. A simple combination of salt, pepper, and fresh herbs like rosemary or thyme provides excellent results. Garlic cloves inserted into slits throughout the meat add flavor depth without overpowering other ingredients. Consider regional flavor profiles—Italian seasonings with sage, or Asian-inspired rubs with ginger and five-spice create different taste experiences.
Oil and Heat Preparation
Lightly coating the prepared meat with neutral oil like canola or vegetable oil promotes browning and prevents sticking. Ensure the oven reaches the target temperature before introducing the meat. Many home cooks make the mistake of placing cold meat into an oven that is still preheating, resulting in uneven cooking and poor crust development.
Temperature Management and Cooking Process
High-temperature pork roasting typically begins at 450-475 degrees Fahrenheit. This initial high heat creates the desired crust through the Maillard reaction. The specific duration at this temperature depends on meat size and thickness but typically ranges from 15-25 minutes. The goal is developing a golden-brown exterior before the meat spends additional time at moderate temperatures.
After achieving the desired exterior color, reduce the oven temperature to 350-375 degrees Fahrenheit to gently finish cooking the interior. This two-stage approach ensures both exterior quality and interior doneness without burning the surface. The meat should reach an internal temperature of 145 degrees Fahrenheit for pork according to food safety guidelines, allowing for slight carryover cooking after removal from the oven.
Monitoring Doneness
An instant-read thermometer provides the most accurate method for determining doneness. Insert the probe into the thickest part of the meat without touching bone, as bone conducts heat differently than flesh. Several readings at different locations ensure consistency. Color indicators provide secondary confirmation—fully cooked pork should show no pink in the thickest section when cut.
Resting and Carryover Cooking
Removing the pork from the oven when internal temperature reaches 140-142 degrees allows for carryover cooking as residual heat continues raising the temperature to the safe 145-degree mark. During this resting period, muscle fibers relax and redistributed moisture throughout the meat rather than draining away when cut. This step, often overlooked by home cooks, dramatically improves juiciness and tenderness. Allow at least 15-20 minutes of resting time for larger cuts, during which the meat remains loosely tented with foil.
Troubleshooting Common Issues
Dry pork results from either cooking too long or selecting an inappropriately lean cut. Using a meat thermometer eliminates guesswork about doneness, preventing overcooking. If dryness occurs despite proper timing, slicing thinly and serving with a pan sauce or gravy adds moisture and improves eating experience.
Inadequate browning indicates insufficient initial heat or inadequate meat surface preparation. Ensure complete dryness before cooking, use high enough temperatures during the initial searing phase, and avoid crowding the roasting pan with too many vegetables that create steam. A second brief blast at high temperature before serving can revive a disappointing crust.
Unevenly cooked meat suggests poor heat distribution or insufficient initial room-temperature resting. Rotating the pan halfway through cooking promotes more uniform browning. Some ovens have hot spots requiring attention to ensure consistent results.
Flavor Enhancement Through Accompaniments
Pan drippings transformed into gravy add tremendous value to the finished dish. After removing meat, carefully pour off excess fat while retaining flavorful browned bits stuck to the pan. Deglazing with wine, broth, or water loosens these fond particles, which become integral to a luxurious sauce.
Vegetable additions during roasting—root vegetables like carrots, potatoes, and parsnips—absorb rendered fat and meat flavors while cooking alongside the protein. Add these roughly halfway through the total cooking time to prevent them from becoming too soft.
Variations and Creative Approaches
Herb infusions create distinctive flavor profiles by embedding fresh herbs or citrus zest into the meat before roasting. Fennel bulbs, thyme branches, and lemon slices placed in a cavity created within a butterflied roast impart subtle but sophisticated flavors.
Spice rubs ranging from Mediterranean to Asian-inspired options demonstrate the versatility of the high-heat roasting method. Coffee-rubbed pork develops rich, complex flavors through the combination of spices and roasting technique.
Frequently Asked Questions
Should I cover the pork with foil during cooking?
Covering with foil during the entire cooking process traps steam, preventing crust development. Many cooks use a partial cover approach, protecting the meat during initial high-heat browning to focus on crust formation, then partially covering during the lower-temperature finishing phase if browning becomes excessive. This balances browning with preventing surface burning.
Can I cook a smaller pork roast using this method?
Smaller roasts, typically under three pounds, require temperature and timing adjustments. Reduce initial high-heat time to 10-15 minutes, then lower temperature earlier to avoid overcooking. The fundamental technique remains valid regardless of size, though proportionally higher surface-to-volume ratios mean less total cooking time required.
What oven temperature is truly considered high for pork roasting?
The culinary definition of high-temperature roasting for pork generally starts at 425-450 degrees Fahrenheit. Some techniques employ even hotter initial temperatures up to 500 degrees, though this requires careful monitoring to prevent burning before the interior cooks sufficiently.
How does cooking method affect total time required?
High-heat roasting typically requires 20-30 minutes total cooking time for smaller cuts, while larger roasts may need 1.5-2 hours. The higher initial temperatures accelerate exterior cooking, but a general estimate of 12-15 minutes per pound at the reduced temperature phase applies after the initial crust develops.
Can I prepare the pork the day before cooking?
Seasoning the pork the day before and refrigerating overnight actually improves results, allowing salt and seasonings to penetrate deeper. Remove from refrigeration at least 45 minutes before cooking to restore room temperature, ensuring even cooking throughout.
Advanced Tips for Consistent Excellence
Professional kitchen techniques translate readily to home cooking contexts. Using a convection setting in ovens equipped with this feature promotes more even air circulation and browning. Convection cooking may require reducing temperature by 25 degrees and potentially shortening cooking time, though careful monitoring confirms actual requirements for specific ovens.
Investing in an oven thermometer identifies temperature discrepancies between dial settings and actual oven heat. Many home ovens run hotter or cooler than indicated, explaining inconsistent results. Calibration or adjustment information appears in owner’s manuals, though purchasing an external thermometer provides economical verification.
Experimenting with different wood smoke additions, either through dedicated smoker boxes or by presoaking wood chips in boiling water before scattering on high-heat coals if using a grill, introduces additional flavor dimensions not achievable through oven roasting alone.
References
- Safe Minimum Internal Temperature Chart — United States Department of Agriculture Food Safety and Inspection Service. 2024. https://www.fsis.usda.gov/food-safe-minimum-internal-temperature-chart
- The Maillard Reaction: Chemistry, Composition and Applications — Journal of Agricultural and Food Chemistry, American Chemical Society. 2023. https://doi.org/10.1021/acs.jafc.2c07032
- Meat Cooking Techniques and Temperature Management — North Carolina State University Cooperative Extension. 2023. https://www.ces.ncsu.edu
- Pork Quality Standards and Selection Guide — National Pork Board Official Publications. 2024. https://www.pork.org