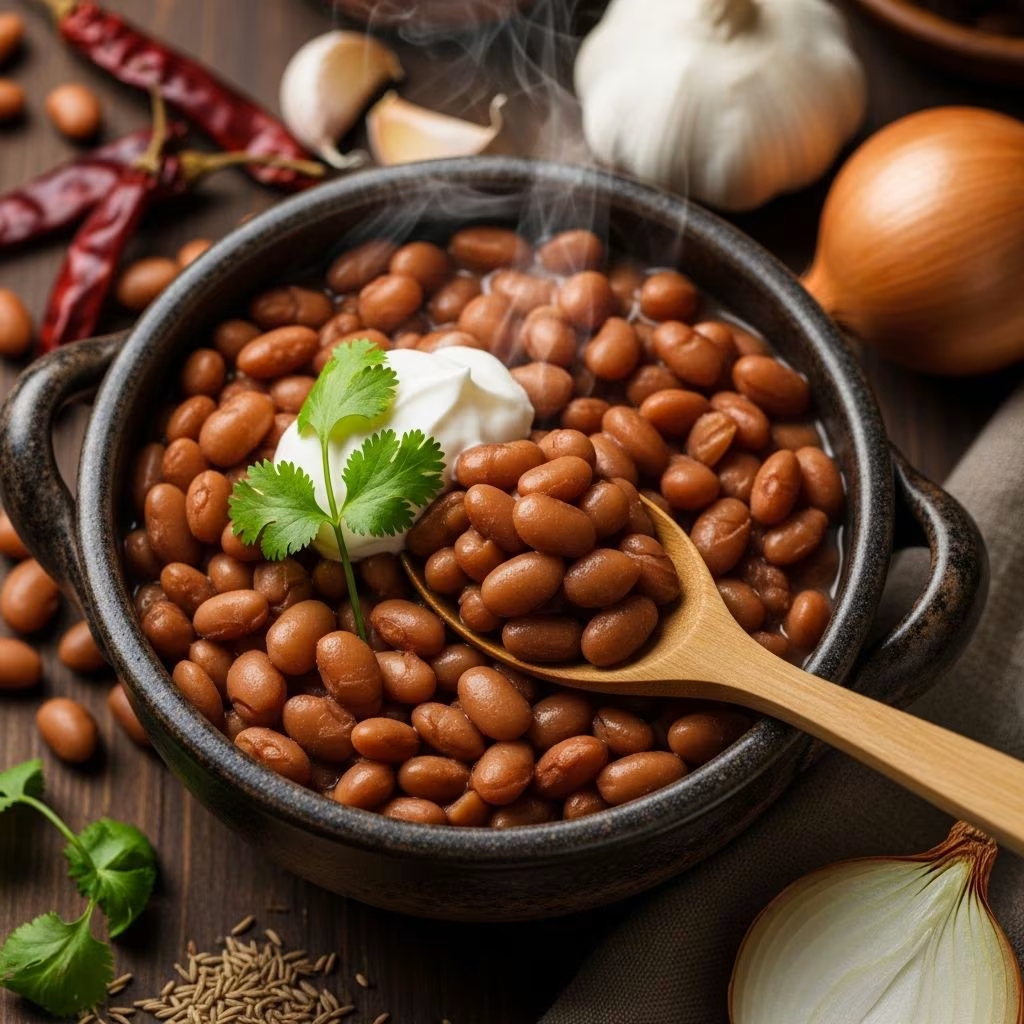
Pinto beans represent one of the most versatile and nourishing ingredients available to home cooks, yet many people struggle to transform dried legumes into dishes with genuine depth of flavor and ideal texture. The difference between mediocre beans and exceptional ones often lies not in expensive ingredients but in understanding proper preparation methods and respecting the cooking process. Whether you prefer traditional stovetop simmering, the convenience of slow-cooker preparation, or innovative oven-based approaches, mastering pinto bean cookery opens doors to countless culinary possibilities.
Understanding Pinto Beans and Their Culinary Significance
Pinto beans possess a distinctly earthy flavor profile complemented by a naturally creamy texture when cooked properly. Their mottled appearance—with reddish-brown speckles across a pale background—makes them visually distinctive among legume varieties. Beyond their appealing characteristics, pinto beans deliver substantial nutritional benefits, providing plant-based protein, dietary fiber, and essential minerals that support overall wellness. The neutral flavor foundation of these beans makes them remarkably adaptable to various culinary traditions and seasoning approaches, from Mexican-inspired preparations to Southern comfort food applications.
The Essential First Step: Preparation and Soaking
Beginning with proper preparation establishes the foundation for successful bean cookery. Start by rinsing dried pinto beans thoroughly in a colander, using your fingers to gently rub the beans while water flows through. This washing removes surface dust and debris accumulated during storage. More importantly, this step allows you to visually inspect the beans, removing any that appear damaged, discolored, or obviously defective.
After rinsing, transfer the beans to a large bowl and cover them generously with cold water, ensuring at least 2-3 inches of water above the bean level. Allow them to soak for a minimum of 8 hours, though overnight soaking (approximately 12-16 hours) produces optimal results. This extended soaking period accomplishes multiple objectives: it rehydrates the beans, begins breaking down complex carbohydrates that can cause digestive discomfort, and significantly reduces overall cooking time.
For those working with limited time, quick-soaking provides an alternative approach. Bring beans and water to a boil for 2 minutes, then remove from heat and allow them to sit, covered, for one hour. While this method proves faster, traditional overnight soaking generally yields superior texture and cooking consistency.
Stovetop Simmering: The Traditional Method
After soaking completes, drain and rinse the beans once more. Add them to a substantial pot—a Dutch oven works particularly well—and cover with fresh water to a depth of approximately 3 inches above the beans. This generous water coverage accommodates absorption and evaporation during cooking without requiring constant monitoring.
Building flavor into the cooking liquid establishes the foundation for truly delicious beans. Add a halved yellow onion, smashed garlic cloves, and bay leaves to the pot. Drizzle generously with extra-virgin olive oil, which not only contributes rich flavor but also helps maintain the beans’ structural integrity during extended cooking. Season with kosher salt—approximately 1 tablespoon per pound of dried beans—distributing it evenly throughout the liquid.
Bring the entire mixture to a rolling boil over high heat. As the beans cook, foam and impurities rise to the surface. Using a skimmer or spoon, remove this foam and discard it. This step, often overlooked by casual cooks, significantly improves the final bean broth’s clarity and flavor intensity.
Once you’ve removed the initial foam, reduce the heat to medium-low, maintaining a gentle, steady simmer rather than a vigorous boil. Cover the pot partially or leave it uncovered, depending on whether you prefer to reduce the cooking liquid. For most preparations, gentle simmering for 1.5 to 2.5 hours produces tender beans with creamy interiors and intact skins. Cooking time varies considerably depending on bean age, storage conditions, and altitude. Younger beans cook faster, while beans stored for extended periods may require additional time.
Periodically check the pot during cooking, ensuring beans remain submerged beneath liquid. If water levels drop significantly, add more hot water rather than cold, which helps maintain consistent cooking temperatures. Begin testing beans for doneness after one hour by removing a few and pressing them between your fingers. They should yield easily without remaining hard or chalky in the center.
Slow Cooker Method: Hands-Off Convenience
For those preferring minimal active cooking time, slow cooker preparation delivers exceptional results without requiring stovetop monitoring. This method proves particularly advantageous during warm weather when avoiding stove heat becomes desirable. Interestingly, slow cooker preparation eliminates the need for overnight soaking, though soaking still produces superior results if time permits.
Begin by rinsing unsoaked beans thoroughly and transferring them to a 6-quart or larger slow cooker. In a separate skillet, heat olive oil over medium-high heat and sauté diced onion, minced jalapeño, and fresh garlic until fragrant and softened—approximately 2-3 minutes total. This pre-cooking step develops deeper flavors compared to simply adding raw aromatics to the slow cooker.
Transfer the sautéed vegetables to the slow cooker along with the beans. Add bay leaves, ground cumin, dried oregano, and kosher salt. Pour chicken or vegetable broth combined with water over everything—approximately 3 cups water and 4 cups broth per pound of beans. The broth contribution significantly enhances the finished bean flavor compared to using water exclusively.
Cover and cook on high for 8-10 hours, though cooking times vary among slow cooker models. Some units run considerably hotter than others, so check beans earlier if your particular slow cooker tends toward aggressive heating. The beans achieve the ideal consistency when they’re completely tender but haven’t begun breaking apart excessively. Discard bay leaves before serving or storing.
Oven-Based Preparation for Rich, Complex Flavors
A lesser-known but exceptionally effective preparation method involves cooking beans in a covered pot within the oven. This approach delivers remarkably even heat distribution and often produces the richest, most complex bean broths. Pre-soak beans using the standard overnight method, then transfer drained beans to a heavy Dutch oven.
Layer in your aromatics—chopped onion, smashed garlic, and bay leaves—followed by salt and olive oil. Pour in water or broth to cover the beans by 3 inches. Cover the pot with a tight-fitting lid and place in a preheated 275-degree Fahrenheit oven. Cook for approximately 2-3 hours, depending on bean age and desired tenderness. The enclosed environment creates steam that cooks beans gently and evenly while concentrating flavors in the surrounding liquid.
Mastering the Seasoning Foundation
While salt remains essential for flavor development, the true complexity in pinto bean cookery emerges through thoughtful seasoning layering. Ground cumin provides warm, earthy notes that complement beans’ natural flavor without overwhelming it. Dried oregano contributes subtle herbaceous qualities, while bay leaves impart a sophisticated depth that disappears entirely before serving.
For those enjoying bolder flavors, ground chili powder, smoked paprika, or cayenne pepper add warmth and complexity. Fresh lime juice squeezed over finished beans brightens the overall flavor profile, particularly in Mexican-inspired preparations. Freshly ground black pepper, added both during cooking and as a final garnish, provides essential brightness and sophistication.
The decision between cooking beans with or without meat products reflects both personal preference and cultural tradition. Smoked ham hocks, country ham, or bacon impart rich, smoky dimensions that permeate the entire pot, creating what many consider the definitive Southern bean preparation. Those preferring vegetarian versions achieve equally satisfying results through generous olive oil and enhanced seasoning strategies.
Texture Preferences and Cooking Duration
Individual preferences regarding bean texture dramatically influence cooking decisions. Some cooks prefer beans that remain completely intact, holding their shape throughout serving and accompanying dishes. Others favor beans that have begun losing their structural integrity, with edges slightly softened and the surrounding liquid thickened by released starches—a texture that creates naturally creamy dishes.
Extended cooking beyond the basic tenderness stage produces this desirable creamy consistency. Rather than draining cooked beans immediately when they reach initial tenderness, continue cooking for an additional 15-30 minutes, allowing the liquid to reduce and thicken while beans gradually soften further. This technique transforms simple cooked beans into restaurant-quality preparations without requiring additional cream or dairy products.
Storage and Make-Ahead Strategies
Cooked pinto beans store remarkably well, making advance preparation an excellent strategy for busy households. Cooled beans keep refrigerated for up to five days when stored in airtight containers with their cooking liquid. The beans actually develop deeper, more complex flavors during this resting period as seasonings continue infusing throughout the beans and broth.
For extended storage, freeze cooked beans along with their liquid in freezer-safe containers for up to three months. Thaw overnight in the refrigerator before reheating, or reheat from frozen over gentle heat, adding additional water if the liquid has thickened excessively during freezing.
Versatile Applications Beyond Simple Sides
Properly prepared pinto beans transition seamlessly across numerous dishes. Mash cooled beans into a smooth or chunky consistency for refried beans, bean dips, or burger components. Combine warm beans with sautéed vegetables, rice, and fresh herbs for complete one-pot meals. Layer beans in burritos, tacos, or enchiladas for protein-rich preparations. Blend cooled beans with broth, vegetables, and spices for hearty, satisfying soups that improve with time as flavors meld.
Troubleshooting Common Challenges
Beans remain hard after extended cooking: This typically indicates older beans that have been stored for extended periods. Extended cooking time—sometimes up to 3-4 hours—may be necessary. Ensure adequate liquid coverage throughout cooking.
Beans fall apart or become mushy: This results from overcooking or excessive stirring, which damages bean skins. Reduce cooking time and minimize stirring, allowing beans to cook undisturbed whenever possible.
Cooking liquid remains thin and watery: Extend cooking time to allow starches to release and thicken the surrounding liquid naturally. Alternatively, mash a portion of the beans into the liquid, which binds additional starch into suspension.
Insufficient flavor in finished beans: Add seasonings gradually during cooking rather than all at once, allowing flavors to develop progressively. Consider adding salt partway through cooking rather than exclusively at the beginning, which helps develop deeper seasoning penetration.
Frequently Asked Questions
Can I cook pinto beans without soaking?
Yes, though soaking produces superior texture and reduces cooking time. Unsoaked beans require 30-60 minutes longer to cook and may result in less consistent texture throughout the pot. Quick-soaking (boiling 2 minutes, then sitting 1 hour) provides a compromise approach.
What causes the foam that appears during cooking?
This foam consists of proteins and impurities released during the initial cooking stages. Removing it clarifies the bean broth and improves the final flavor profile. This step proves particularly important for preparations where the cooking liquid will be consumed, as in soups or stews.
Should beans be salted during cooking or after?
Salt can be added during cooking without negatively affecting texture if added early enough—it actually helps beans cook more evenly. However, adding salt midway through cooking or exclusively at the end produces beans with more uniform seasoning throughout.
How do I know when beans are perfectly cooked?
Remove a bean and press it between your fingers—it should yield completely with no hard center remaining. The cooking liquid should have thickened slightly and turned a deeper color as starches are released.
Can I substitute canned beans in recipes calling for dried beans?
Yes, though the flavor depth differs significantly. One pound dried beans yields approximately 6-7 cups cooked beans, equivalent to four 15-ounce cans. Canned beans require only draining, rinsing, and gentle reheating in finished dishes.
References
- Pinto Beans Nutritional Composition and Preparation Methods — USDA FoodData Central. 2024. https://fdc.nal.usda.gov/
- Legume Preparation and Digestibility — International Journal of Molecular Sciences, peer-reviewed research on bean soaking techniques. 2023. https://www.mdpi.com/journal/ijms
- Culinary Techniques for Bean Cookery — America’s Test Kitchen, published methodology. 2024. https://www.americastestkitchen.com/
- Food Safety Guidelines for Bean Storage and Preparation — FDA Food Safety Modernization Act Resources. 2024. https://www.fda.gov/
- Slow Cooker Safety and Cooking Temperature Standards — USDA Meat and Poultry Hotline Documentation. 2024. https://www.usda.gov/