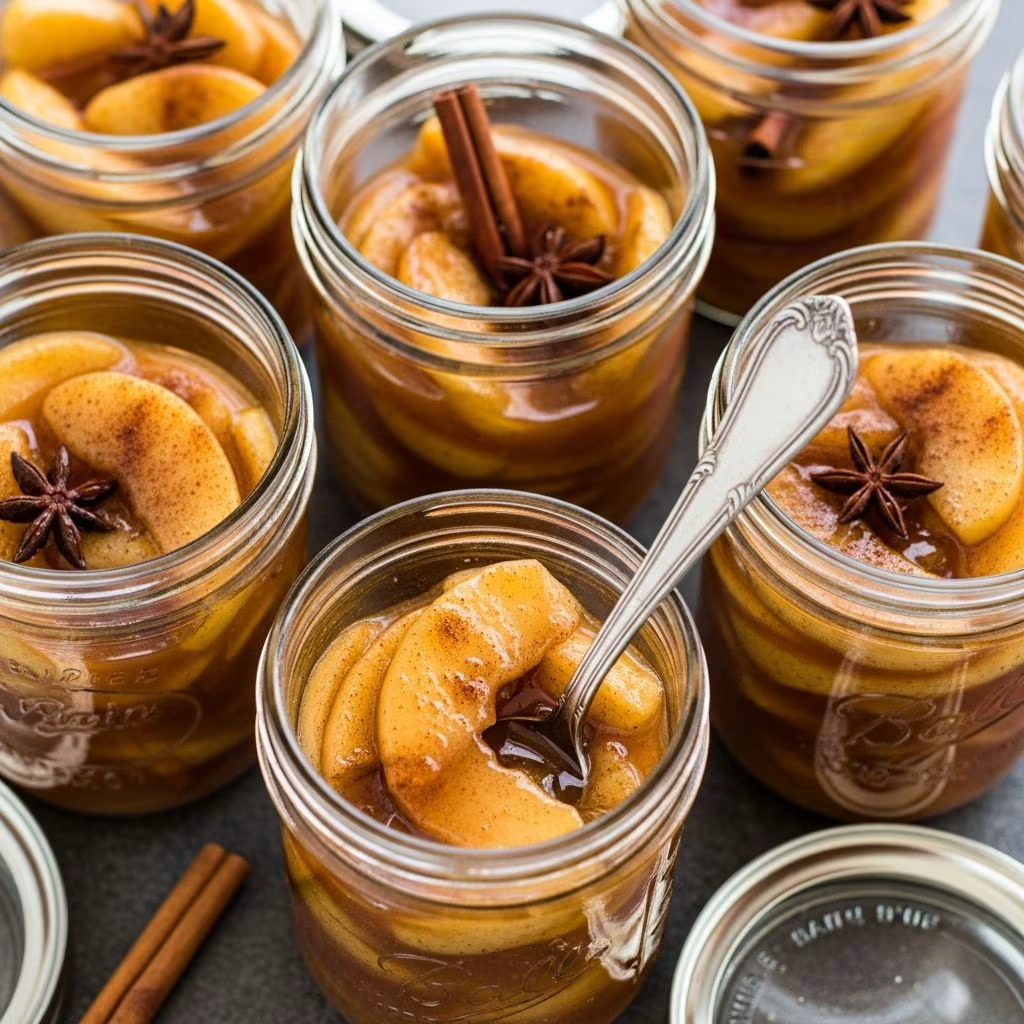
When autumn arrives and apple orchards overflow with fresh fruit, many home cooks face the challenge of preserving their harvest before the season passes. Canned apple pie filling offers an elegant solution, allowing you to capture the essence of fall and enjoy homemade desserts throughout the year. This traditional preservation method requires minimal specialized equipment and yields delicious results that rival any commercial product.
Understanding the Fundamentals of Apple Preservation
Canning apple pie filling differs from simply preserving raw apples. The process involves combining fresh fruit with carefully measured ingredients—including sugar, spices, and thickening agents—before processing in a water bath canner. This approach creates a ready-to-use filling that requires no additional preparation beyond pouring into a pie crust.
The beauty of this preservation method lies in its accessibility. Unlike pressure canning, which requires specialized equipment and precise pressure monitoring, water bath canning relies on basic kitchen tools found in most homes. The heat from boiling water creates a seal that prevents bacterial growth, ensuring your preserved filling remains safe for consumption across multiple seasons.
Essential Ingredients for Your Apple Pie Filling
Creating exceptional canned apple pie filling begins with selecting quality ingredients. Each component plays a specific role in developing flavor, texture, and safety.
| Ingredient | Amount (per batch) | Purpose |
|---|---|---|
| Fresh apples | 6-7 pounds | Main fruit base; provides texture and natural flavor |
| Granulated sugar | 4½ cups | Sweetener; aids preservation through osmosis |
| Water | 10 cups | Creates syrup base for consistent texture |
| Thickening agent | 1 cup cornstarch or ClearJel | Thickens filling; ClearJel preferred for food safety |
| Cinnamon | 2 teaspoons | Warm spice; traditional apple pie flavor |
| Nutmeg | ½ teaspoon | Adds depth and subtle earthiness |
| Lemon juice | 3 tablespoons | Critical for food safety; provides acidity |
| Kosher salt | 1½ teaspoons | Enhances flavors; balances sweetness |
Selecting the Right Apples
Apple variety significantly impacts your finished product. Choose firm, unblemished apples without soft spots or bruising. A combination of sweet and tart varieties creates the most complex flavor profile. Granny Smith apples provide necessary acidity, while sweeter varieties like Honeycrisp or Gala contribute natural sweetness. Avoid overripe apples, as they become mushy during cooking and result in a filling that lacks textural appeal.
The Critical Role of Lemon Juice
Never adjust the lemon juice quantity in your recipe. This ingredient serves as more than a flavor enhancer; it maintains the acidity level necessary for safe preservation. The acidic environment prevents the growth of harmful bacteria, making this measurement non-negotiable from a food safety perspective. Always use fresh lemon juice rather than bottled varieties, which may contain additives affecting the preservation chemistry.
Thickening Agent Considerations
While cornstarch works effectively, ClearJel represents the superior choice for canned apple pie filling. This modified food starch remains stable during processing and storage, creating a consistent texture that doesn’t weep liquid after jarring. ClearJel substitutes at a 1:1 ratio with cornstarch, making the transition simple. Regular cornstarch may break down during the canning process, resulting in a runnier filling than desired.
Preparing Your Equipment and Workspace
Success in canning depends largely on proper preparation. Before beginning, assemble all necessary equipment and establish a clean, organized workspace. This preparation prevents contamination and ensures the process flows smoothly.
- Mason jars in quart or pint sizes, specifically designed for canning
- Canning lids and bands (rings) in the corresponding size
- Large stainless steel pot for boiling water bath
- Jar lifter to safely remove hot jars from boiling water
- Bubble remover and headspace tool for filling jars properly
- Wide-mouth funnel to prevent spills when filling
- Clean kitchen towels for handling and drying jars
- Large stainless steel pot for cooking apples and filling mixture
- Wooden spoon for stirring and packing apples into jars
Inspect all jars carefully for chips or cracks around the rim, as damaged jars won’t seal properly. Wash jars, lids, and bands in hot soapy water and rinse thoroughly. Some cooks sterilize jars by running them through the dishwasher or boiling them for ten minutes; this step becomes unnecessary if your jars will process for ten minutes or longer, as the heat kills any bacteria.
The Step-by-Step Canning Process
Preparing Your Apples
Begin by washing apples thoroughly under cool running water. Peel each apple using a vegetable peeler or sharp knife, removing the skin completely. Cut apples in half and remove the core using a small knife or apple corer. Slice the prepared apples into uniform pieces approximately ¼ inch thick. Uniform sizing ensures even cooking and creates a more appealing texture in the finished filling. Place sliced apples in a large bowl to prevent oxidation and browning.
Creating the Cooking Base
In a large stainless steel pot, combine water and sugar over medium-high heat. Stir frequently until the sugar dissolves completely and the mixture reaches a gentle boil. This syrup base will become the liquid component of your filling. Once boiling, carefully add your prepared apple slices, stirring gently to coat them evenly with the syrup. Return the mixture to a boil, then reduce heat and simmer for approximately five minutes, allowing apples to soften slightly without becoming mushy.
Adding Spices and Thickeners
While apples simmer, combine the thickening agent, cinnamon, nutmeg, and salt in a small bowl. Add just enough cold water to create a smooth paste without lumps. This slurry prevents clumping when added to the hot mixture. Slowly pour the thickened spice mixture into the apple pot, stirring constantly. Continue cooking for approximately two minutes, allowing the thickener to activate and the filling to reach the desired consistency. The mixture should coat the back of a spoon and flow slowly when tipped, indicating proper thickness.
Final Preparation Before Jarring
Remove the filling from heat and stir in the fresh lemon juice immediately. This final addition brightens the flavors and confirms your acidity level. Allow the filling to cool for approximately five minutes; this brief cooling period prevents breakage when the hot mixture contacts jar glass. The filling should still be hot enough to pour easily but cool enough to handle the jars safely.
Filling and Processing Your Jars
Working quickly with hot filling, use a wide-mouth funnel to pour the apple mixture into prepared jars, leaving exactly ½ inch of headspace (the empty space between the filling and the jar rim). Use a wooden spoon to firmly pack as many apple slices as possible into each jar, removing air pockets as you work. Run a bubble remover around the inside edge of each jar, tapping gently to release trapped air. Wipe the jar rims carefully with a clean, damp cloth, removing any spilled filling or syrup. Any residue prevents proper seal formation. Center a hot lid on each jar and screw the band on until fingertip-tight—the band should be snug but not compressed with full hand strength.
Place the filled jars into a pot of boiling water, ensuring they remain completely submerged with approximately one inch of water covering the jar tops. For pint jars, process for twenty minutes; for quart jars, extend processing time to twenty-five minutes. Maintain a rolling boil throughout the entire processing period. If you live at high altitude above 1,000 feet, add one minute of processing time for every 1,000 feet of elevation.
Cooling, Storing, and Testing Your Seal
After the processing time completes, carefully remove jars from the boiling water using a jar lifter. Place them on a clean kitchen towel in a location away from drafts or temperature fluctuations. Allow jars to cool completely at room temperature for a minimum of twelve hours, preferably twenty-four hours. During this cooling period, you’ll hear distinctive “popping” sounds as the jars seal—each pop indicates the lid creating a vacuum seal.
Once completely cool, check the seals by pressing the center of each lid. Properly sealed lids remain concave and don’t flex when pressed. Any jar with a lid that pops back up has failed to seal and requires refrigeration for immediate use or reprocessing with a new lid. Remove bands and store sealed jars in a cool, dark place such as a basement, pantry, or closet. Properly canned apple pie filling maintains quality for up to one year, though most cooks use their supply within six to eight months for optimal flavor.
Enhancing Your Canned Filling
While the basic recipe creates delicious results, several simple modifications allow customization based on personal preferences. Some cooks add vanilla extract or almond extract during the final cooking stages for additional depth. Others incorporate additional spices like cardamom or allspice for complexity. Brown sugar substituted for half the granulated sugar creates a deeper, more caramelized flavor profile. These variations maintain the food safety requirements while allowing creative expression.
Frequently Asked Questions About Canned Apple Pie Filling
- Can I use a pressure canner instead of water bath canning?
- Yes, pressure canning works effectively for apple pie filling and reduces processing time. Follow your pressure canner manufacturer’s guidelines for the recommended pressure and duration based on your altitude and jar size.
- What causes cloudiness in stored jars?
- Cloudiness typically results from starch crystals or residual thickening agent. This doesn’t affect flavor or safety and gradually settles during storage. Gentle shaking before opening redistributes the mixture.
- How do I know if my canned filling has spoiled?
- Discard any jars showing mold, cloudiness extending beyond initial starch settling, or off-odors when opened. A properly sealed jar that remains sealed throughout storage indicates successful preservation.
- Can I use frozen apples for canning?
- Fresh apples produce superior results and are recommended for canning. Frozen apples may release excess water during cooking, affecting the filling consistency.
- What’s the difference between ClearJel and cornstarch?
- ClearJel maintains stability during heat processing and storage, while cornstarch may break down, creating a watery filling. ClearJel is specifically formulated for safe canning applications.
Creative Uses Beyond Traditional Pie
Your homemade canned apple pie filling extends far beyond standard apple pies. Pour filling into half-pint mason jars with simple pie dough for individual hand pies. Layer filling with vanilla yogurt and granola for impressive parfaits. Create cobblers by topping filling with biscuit dough or cake batter and baking until golden. Mix filling into oatmeal for breakfast, blend into smoothies, or use as a topping for cheesecake or ice cream. The versatility of properly preserved apple filling makes year-round baking simple and rewarding.
References
- Complete Guide to Home Canning and Preserving — U.S. Department of Agriculture, National Center for Home Food Preservation. 2024. https://nchfp.uga.edu/how/can_home/canning_guide_complete.html
- Canning Fruits and Fruit Products — University of Georgia Cooperative Extension. 2023. https://nchfp.uga.edu/how/can_home/index.html
- Safe Canning Methods and Recipes — Ball Corporation, Official Canning Resources. 2024. https://www.freshpreserving.com/
- Water Bath Canning Explained — National Center for Home Food Preservation, University of Georgia. 2023. https://nchfp.uga.edu/how/can_water/index.html
- ClearJel as a Safe Thickening Agent — Pomona’s Universal Pectin, Food Safety Standards. 2024. https://pomonas.com/