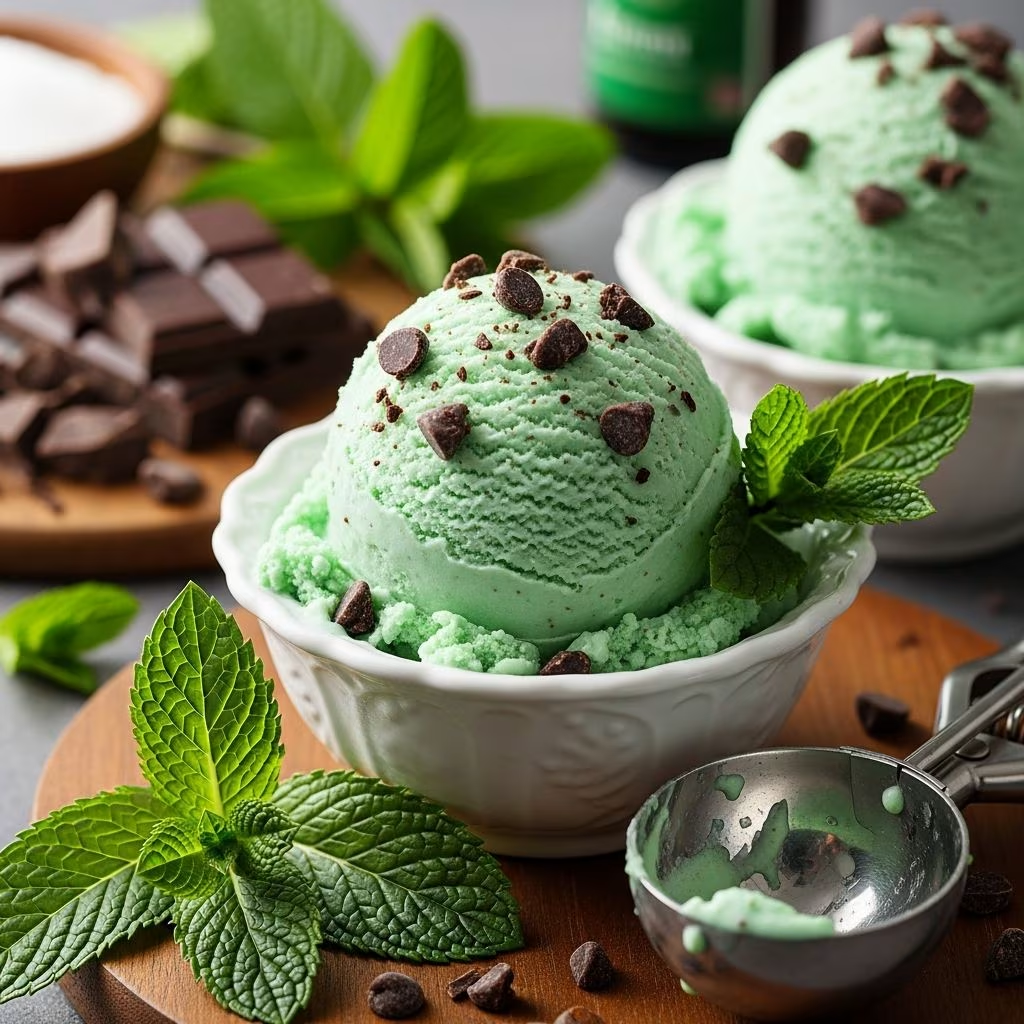
Making ice cream from scratch transforms a simple dessert into a personal culinary achievement. When combining the cool, refreshing qualities of mint with the indulgent richness of chocolate, the result becomes something truly extraordinary. Unlike commercially produced versions that often rely on artificial colorants and synthetic flavors, homemade mint chocolate ice cream delivers authentic taste and a luxurious texture that rivals any professional establishment.
Understanding the Foundation: Core Components of Quality Ice Cream
The structure of exceptional ice cream rests on three fundamental elements: fat content, air incorporation, and freezing temperature. The fat component comes primarily from heavy cream and milk, which provides the smooth, creamy mouthfeel that distinguishes quality ice cream from icy frozen treats. The ratio of cream to milk determines how rich and dense the final product becomes.
Air incorporation happens during the churning process, which breaks down ice crystals and creates a light, scoopable consistency. Without proper churning, ice cream becomes rock-solid and difficult to serve. The freezing temperature must remain consistently cold to prevent melting while maintaining palatability.
When infusing these components with mint and chocolate, understanding how each ingredient interacts becomes essential for achieving balanced flavor and desirable texture.
The Art of Extracting Mint Flavor Through Steeping
Fresh mint leaves contain volatile compounds that release their aromatic qualities through heat and time. The steeping process is where homemade ice cream distinguishes itself from store-bought alternatives. Rather than relying on mint extract, which provides artificial taste notes, fresh mint creates authentic flavor complexity.
The traditional steeping method begins by gently warming cream and milk together with fresh mint leaves. As the mixture heats, the mint’s essential oils begin transferring into the dairy base. The key is recognizing when steeping reaches its optimal point—usually when the mixture begins to steam but before it reaches a full boil. This temperature range activates the flavor compounds without destroying their delicate characteristics.
After removing from heat, allowing the mixture to rest undisturbed for 20 to 30 minutes permits maximum flavor extraction. Some recipes recommend steeping overnight in the refrigerator for a more pronounced mint taste and subtle green hue. Extended steeping periods intensify the flavor profile, making this technique ideal for mint enthusiasts.
Once steeping completes, straining becomes critical. Using a fine-mesh strainer removes all mint particle fragments that could create an unpleasant gritty texture in the final product. Some recipes employ immersion blenders before straining to further break down the mint leaves and increase flavor saturation.
Ingredient Selection and Measurement Guidelines
| Component | Standard Quantity | Effect on Final Product |
|---|---|---|
| Heavy Cream | 1.5 to 2 cups | Creates richness and smooth texture |
| Whole Milk | 1 to 1.5 cups | Balances richness; prevents overly dense consistency |
| Fresh Mint | 0.66 to 2.5 cups packed | Higher amounts intensify mint flavor |
| Granulated Sugar | 0.75 to 1 cup | Sweetness; affects freezing point |
| Salt | Pinch to 0.125 teaspoon | Enhances flavor perception |
Quality matters significantly with each ingredient. Whole milk and heavy cream should come from reliable sources, as ultra-pasteurization can sometimes affect texture. Fresh mint must be vibrant green without browning or wilting, indicating optimal flavor potential. Organic mint eliminates pesticide concerns and often delivers superior taste.
Chocolate Selection and Integration Methods
Chocolate plays a crucial supporting role in this frozen dessert, and the variety chosen dramatically influences the final result. Dark chocolate provides sophisticated bitterness that contrasts beautifully with mint’s coolness. Semi-sweet chocolate offers balanced sweetness and cocoa notes. White chocolate creates unexpected elegance when used in swirls or layers.
Integration methods vary based on desired texture. Chocolate chips can be folded into soft-serve consistency ice cream just before final freezing, creating distinct chocolate pieces throughout. Alternatively, chopping dark or semi-sweet chocolate into fine shards produces a more refined mouthfeel. Some recipes incorporate cocoa powder directly into the base mixture, creating a uniform chocolate-mint blend rather than distinct pieces.
For a more luxurious approach, tempering chocolate and drizzling it into the churning ice cream creates elegant ribbons. This technique requires more skill but produces visually stunning results with controlled chocolate distribution.
Two Essential Preparation Methods
The No-Cook Eggless Approach
This method prioritizes simplicity and food safety. Combine cocoa powder, sugars, and milk in a bowl, whisking until the dry ingredients fully dissolve. Add heavy cream, vanilla extract, and mint extract, blending thoroughly. Pour the mixture into an ice cream maker and process according to manufacturer instructions. This approach produces results in under an hour and requires no cooking equipment beyond basic mixing bowls and whisks.
The Custard-Based Method
Creating a custard base produces denser, more luxurious ice cream. Whisk egg yolks with sugar until pale and fluffy. Heat cream and milk separately, then slowly temper the eggs by adding hot cream in small amounts while whisking constantly. Return the mixture to the saucepan and cook over medium heat until it reaches 160°F (71°C) internal temperature, stirring constantly. This temperature ensures food safety while developing rich vanilla notes. Chill the custard thoroughly before churning.
Step-by-Step Processing Instructions
- Prepare the base mixture: Whether using fresh mint steeping or extract methods, ensure your base is completely chilled before churning. Most recipes recommend at least 2 hours of refrigeration, though overnight chilling produces superior results.
- Prepare the ice cream maker: Freeze the churning bowl according to manufacturer specifications, typically 24 hours before use. Having the bowl adequately cold ensures rapid freezing and proper texture development.
- Begin churning: Pour the chilled mixture into the frozen bowl and activate the machine. The mixture should gradually thicken, reaching soft-serve consistency in approximately 20 to 25 minutes.
- Add chocolate components: About five minutes before churning completes, add chocolate chips or finely chopped chocolate. This timing prevents the chocolate from breaking apart excessively while ensuring even distribution.
- Transfer to storage: Once the ice cream reaches desired consistency, transfer it to a freezer-safe container. For softer ice cream, enjoy immediately. For firmer texture, freeze for at least 2 hours.
Flavor Enhancement Techniques
Beyond basic ingredients, several techniques elevate mint chocolate ice cream into truly remarkable territory. Adding a small amount of light corn syrup prevents harsh ice crystal formation, creating a smoother scoop. Incorporating mascarpone cheese adds subtle richness and prevents icing over time. Vanilla bean paste provides depth that complements both mint and chocolate without overwhelming either flavor.
For those seeking complexity, mixing milk chocolate with dark chocolate creates nuanced flavor layers. Adding a pinch of cayenne pepper creates an unexpected spice that heightens chocolate perception without identifiable heat. A touch of rum or peppermint schnapps adds sophistication for adult versions.
Troubleshooting Common Issues
Grainy texture: This results from ice crystal formation. Ensure adequate fat content and use corn syrup or glucose syrup to reduce crystal size. Avoid opening the freezer frequently after storing.
Weak mint flavor: Increase steeping time or use more fresh mint leaves. If using mint extract, add additional drops gradually, tasting as you go, since extract strength varies by brand.
Overly hard ice cream: Remove from freezer 10 to 15 minutes before serving for better scoopability. Store in the coldest freezer section rather than the door, where temperature fluctuates.
Chocolate separation: Fine chocolate pieces integrate better than large chunks. Ensure chocolate is completely dry before adding, as moisture causes separation.
Storage Guidelines and Longevity
Properly stored homemade ice cream maintains quality for up to two weeks, though flavor peaks within the first few days. Store in an airtight container in the coldest section of your freezer. Press plastic wrap directly onto the surface before sealing the container to prevent frost formation and oxidation.
Freezer burn becomes visible as white crystalline coating and indicates moisture loss. While freezer-burned ice cream remains safe to consume, texture and flavor deteriorate noticeably. Consuming within one week provides the optimal balance between convenience and quality.
Frequently Asked Questions
Can I make mint chocolate ice cream without an ice cream maker?
Yes, though results differ slightly. Freeze the mixture in a shallow pan, stirring every 30 minutes for 3 to 4 hours until frozen. This manual method produces icier texture but still delivers pleasant flavor. Alternatively, blend partially frozen mixture with an immersion blender for a smoother consistency.
How do I achieve that vibrant green color without artificial food coloring?
Steeping fresh mint for extended periods (overnight) creates subtle natural green tint. Blending the mixture with an immersion blender before straining intensifies this effect. Accept that homemade versions won’t match commercial brightness—natural coloring produces more sophisticated appearance.
Which type of chocolate works best?
Dark chocolate (60 to 70 percent cacao) provides sophisticated flavor balance, though personal preference determines the ideal choice. Semi-sweet chocolate offers familiar sweetness. Avoid chocolate chips with additives; use high-quality baking chocolate instead.
How does homemade ice cream differ nutritionally from store-bought versions?
Homemade versions typically contain fewer additives and stabilizers but similar fat content. You control ingredient quality and can adjust sugar content to preference. Neither version qualifies as healthy dessert, but homemade allows transparency in ingredient sourcing.
Can I substitute milk alternatives for dairy?
Coconut milk, oat milk, and cashew cream produce acceptable results, though texture differs from traditional versions. Coconut milk creates lighter texture but distinct coconut flavor. Oat milk provides neutral taste and reasonable creaminess. Experiment with small batches to determine your preference.
Creative Variations Worth Exploring
Once mastering the basic recipe, numerous variations maintain the mint-chocolate foundation while introducing new dimensions. Chocolate-mint swirl incorporates white chocolate sauce ribboned through dark chocolate ice cream base. Mint-Oreo versions add crushed cookies for textural contrast. Espresso-mint-chocolate combines cold brew coffee with both traditional flavoring components, creating sophisticated depth.
For holiday entertaining, consider peppermint bark ice cream featuring crushed candy canes folded into the base, or create mint-chocolate ice cream sandwiches using homemade cookies. Layering different chocolate percentages creates visual appeal and flavor complexity that impresses guests.
Homemade mint chocolate ice cream represents more than just frozen dessert—it embodies culinary creativity accessible to any home cook. From selecting quality ingredients to mastering steeping techniques, each step builds toward a final product that surpasses commercial counterparts. Whether enjoyed simply in a bowl or incorporated into more elaborate desserts, this frozen treat demonstrates how fundamental techniques and thoughtful ingredient choices create extraordinary results.
References
- Mint Chocolate Chunk Ice Cream Recipe — Barefeet In The Kitchen. Accessed April 2026. https://barefeetinthekitchen.com/mint-ice-cream/
- L’s Fresh Mint Chocolate Chip Ice Cream — Tastes & Treks. Accessed April 2026. https://www.tastesandtreks.com/blog-3-1/mint-chocolate-chip-ice-cream-4fgjc
- Fresh Mint Dark Chocolate Chip Ice Cream — CaliGirl Cooking. Accessed April 2026. https://www.caligirlcooking.com/fresh-mint-dark-chocolate-chip-ice-cream/
- Chocolate Mint Swirl Ice Cream — SugarHero. Accessed April 2026. https://www.sugarhero.com/chocolate-mint-swirl-ice-cream/
- Chocolate Mint Ice Cream (Eggless) — I Wash You Dry. Accessed April 2026. https://iwashyoudry.com/chocolate-mint-ice-cream-eggless/
- Fresh Mint and Chocolate Ice Cream — PBS Food. Accessed April 2026. https://www.youtube.com/watch?v=kKWiojGkaDY