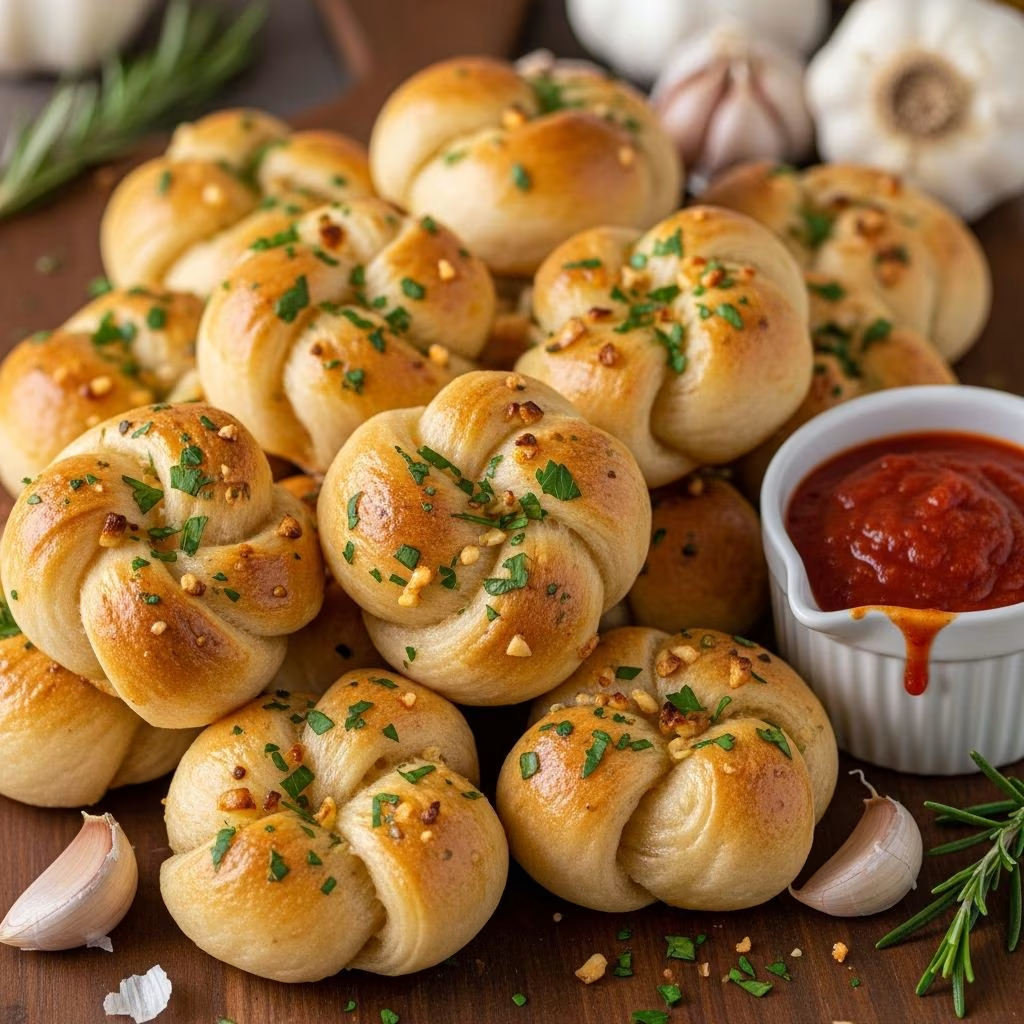
Garlic knots stand out as a beloved classic in the world of comfort foods, combining the simplicity of yeasted dough with the bold punch of garlic-infused butter. These golden, pull-apart treats originated from pizzeria traditions, where leftover pizza dough gets transformed into garlicky delights. Today, they grace dinner tables, game-day spreads, and holiday feasts, offering a satisfying chew and explosive flavor in every bite.
Why Homemade Garlic Knots Beat Store-Bought
Making garlic knots from scratch unlocks flavors and textures impossible to find in pre-packaged versions. Fresh dough rises to fluffy perfection, while a custom garlic butter—melted with real minced cloves—delivers unmatched aroma and taste. Unlike frozen options, which often rely on artificial seasonings, homemade versions let you control the garlic intensity, herb balance, and even add-ins like cheese or parsley. The process builds skills in bread-making, yielding knots that are pillowy inside and crisp outside, all while filling your kitchen with an irresistible scent.
Beyond taste, the satisfaction of tying and baking your own creates a fun, hands-on experience suitable for all ages. They’re versatile too—pair with pasta, salads, or dips like marinara for a complete meal enhancer. With minimal equipment and pantry staples, anyone can achieve professional results without a mixer.
Essential Ingredients for Perfect Garlic Knots
The beauty of this recipe lies in its straightforward list, focusing on quality basics that amplify natural flavors. Here’s what you’ll need for about 12-16 knots:
- Warm water (1 cup, 110°F): Activates yeast without killing it; too hot scalds, too cold slows rising.
- Active dry yeast (2¼ tsp or 1 packet): The leavening powerhouse; ensure it’s fresh for optimal lift.
- Sugar (1 tsp): Feeds yeast and tenderizes dough for softness.
- Bread flour (3-3½ cups): Higher protein content creates chewy structure; all-purpose works but yields softer results.
- Olive oil (2 tbsp): Adds richness and helps dough stay moist.
- Salt (1 tsp): Enhances all flavors; don’t skip it.
- For garlic butter: Unsalted butter (4 tbsp), minced garlic (4 cloves), olive oil (2 tbsp), fresh parsley (¼ cup chopped), optional Parmesan (¼ cup grated).
These components ensure a balanced dough that’s easy to handle and a topping that’s fragrant and golden. Pro tip: Use fresh garlic for the best punch—pre-minced lacks vibrancy.
Step-by-Step Guide to Dough Preparation
Start with yeast proofing for foolproof results. In a large bowl, combine warm water, yeast, and sugar. Stir gently and let sit 5-10 minutes until foamy. This confirms viability; flat mixture means replace the yeast.
Next, incorporate 1 cup flour, oil, salt, and garlic powder (1 tsp optional for dough flavor). Mix until smooth, then gradually add remaining flour, ½ cup at a time. Knead on a floured surface for 6-8 minutes until elastic and smooth—not sticky. If too dry, add water 1 tsp at a time; if sticky, more flour.
Place in an oiled bowl, cover with plastic wrap or a damp cloth, and let rise in a warm spot (like near a preheated oven) for 30-60 minutes until doubled. Punch down gently to release air, preparing for shaping.
Mastering the Knot-Tying Technique
Shaping defines the iconic look and even baking. Divide risen dough into 12-16 equal pieces (golf ball-sized). Roll each into an 8-10 inch rope, about ½-inch thick. To tie:
- Cross ends to form a loop.
- Tuck one end through the loop from underneath.
- Wrap the other end around and tuck through the top.
- Place seam-side down on a parchment-lined baking sheet, spaced 2 inches apart.
Brush lightly with oil, cover loosely, and rest 10-15 minutes. This second rise ensures fluffiness. For visual learners, simple hand-tying mimics a basic shoelace knot—practice makes perfect.
Crafting the Signature Garlic Butter Topping
While knots rest, prepare the star element. In a small saucepan over low heat, melt butter with olive oil. Add minced garlic and cook 2-3 minutes until fragrant and lightly golden—avoid browning to prevent bitterness. Stir in chopped parsley, a pinch of salt, and optional Italian seasoning (1 tsp).
This emulsion clings beautifully, infusing every crevice. Reserve half for post-bake brushing to lock in moisture and boost shine. For variations, mix in grated Parmesan or red pepper flakes for heat.
Baking to Golden Perfection
Preheat oven to 400°F (200°C). Brush resting knots generously with half the garlic butter. Bake 12-15 minutes on the middle rack until puffed and lightly golden. Rotate sheet halfway for even color.
Immediately brush with remaining butter, sprinkle Parmesan if using, and let cool 5 minutes on a wire rack. Serve warm for peak texture—the interior stays soft while exteriors crisp slightly.
| Common Baking Issues | Solution |
|---|---|
| Dough too sticky | Add flour 1 tbsp at a time during kneading. |
| Knots dense/flat | Check yeast freshness; ensure warm rise spot. |
| Garlic burns | Cook on low heat; use more oil for buffer. |
| Not golden | Extend bake 2-3 min; broil briefly if needed. |
Flavor Variations and Customizations
Elevate basics with twists:
- Cheesy overload: Stuff dough with mozzarella before tying.
- Spicy kick: Add chili flakes to butter.
- Herb garden: Mix oregano, basil, or rosemary into topping.
- Sweet-savory: Dust with cinnamon-sugar post-bake for dessert knots.
- Vegan option: Use plant-based butter and oil; skip cheese.
Experiment seasonally—pumpkin spice butter for fall or everything bagel seasoning for brunch.
Pairing Ideas and Serving Suggestions
Garlic knots shine as appetizers with marinara or Alfredo dips. Complement Italian mains like spaghetti or lasagna, or casual fare like soups and salads. For parties, serve in a bread basket with extra butter for dipping.
Make-ahead: Shape and freeze pre-baked knots up to a month; thaw, rise, and bake fresh. Leftovers? Reheat at 350°F for 5 minutes to revive crispness—store airtight up to 2 days.
Nutrition and Dietary Notes
Per knot (based on 16 servings): ~150 calories, 6g fat, 20g carbs, 3g protein. High in carbs for energy, garlic offers antioxidants. Adapt for low-carb with almond flour dough or gluten-free blends.
Frequently Asked Questions (FAQs)
Can I make garlic knots without yeast?
Yes, use baking powder quick dough for 30-minute results, though less chewy.
How do I store leftovers?
Room temp in airtight container 1-2 days; freeze up to 3 months.
Why use bread flour over all-purpose?
Bread flour’s higher gluten yields better chew and structure.
Instant yeast vs. active dry?
Instant skips proofing; use same amount, mix directly.
Can I air-fry them?
Yes, 375°F for 8-10 minutes, shaking halfway; brush butter after.
Pro Tips for Next-Level Results
– Warm your bowl for faster rising.
– Semolina flour on sheets prevents sticking.
– Double garlic for pizzeria boldness.
– Test one knot first to perfect tying.
– Infuse butter overnight for deeper flavor.
With practice, these become a staple. Share your twists and enjoy the homemade magic!
References
- Homemade Garlic Knots Recipe — Sugar Spun Run. 2023-05-15. https://sugarspunrun.com/homemade-garlic-knots-recipe/
- Homemade Garlic Knots — Sally’s Baking Addiction. 2024-02-10. https://sallysbakingaddiction.com/garlic-knots-recipe/
- Garlic Knots Recipe EASY HOMEMADE — White On Rice Couple. 2022-11-20. https://whiteonricecouple.com/garlic-knots/
- Homemade Garlic Knots Recipe (The Best Soft and Fluffy) — Baker by Nature. 2023-08-05. https://bakerbynature.com/homemade-garlic-knots/
- Soft, Homemade Garlic Knots Recipe — Tastes Better From Scratch. 2024-01-12. https://tastesbetterfromscratch.com/garlic-knots/