The convenience of store-bought energy bars comes with a catch—they often contain excessive sugar, artificial additives, and processing that strips away nutritional value. Creating your own energy bars at home eliminates these concerns while offering complete control over ingredients, flavors, and nutritional content. Whether you’re seeking a pre-workout boost, a grab-and-go breakfast option, or a wholesome afternoon snack for your family, homemade energy bars provide an economical and satisfying solution.
The beauty of crafting these bars lies in their simplicity. No specialized baking equipment, culinary expertise, or time-consuming processes are required. In fact, most recipes come together in under 30 minutes, with the majority of time spent simply waiting for the mixture to set in your refrigerator or freezer.
Understanding the Foundation: Core Components of Energy Bars
Every successful energy bar recipe relies on a few essential building blocks that work together to create texture, nutrition, and sustained energy release. Understanding these components allows you to adapt recipes to your preferences and dietary needs.
The Binder: Holding Everything Together
The binding ingredient serves as the structural foundation of your bars, ensuring all components stay cohesively pressed together. Natural nut and seed butters—particularly peanut butter, almond butter, or mixed seed butters—work exceptionally well in this capacity. These proteins and healthy fats create a naturally sticky matrix that holds dry ingredients in place. When selecting a binder, opt for versions without added sugars or oils, as the natural fat content is sufficient for binding purposes.
Honey and maple syrup function as secondary binders while simultaneously adding sweetness and nutritional benefits. These liquid sweeteners help distribute moisture evenly throughout the mixture, creating a chewy texture rather than a crumbly one. For best results, warm these binders slightly before mixing to improve their spreadability.
The Structural Base: Grains and Seeds
Quick-cooking rolled oats form the backbone of most energy bar recipes, providing carbohydrates, fiber, and a pleasant texture. Unlike steel-cut oats, rolled oats blend more smoothly and create a more compact bar structure. The fiber content in oats supports digestive health and helps regulate blood sugar levels, providing sustained energy rather than quick spikes followed by crashes.
Seeds add both nutritional density and textural interest. Hemp seeds, chia seeds, pumpkin seeds, and sunflower seeds contribute complete or complementary proteins, omega-3 fatty acids, and minerals including magnesium and zinc. These tiny nutritional powerhouses require no additional processing and distribute evenly throughout your mixture.
Natural Sweeteners and Flavor Enhancers
Rather than relying on refined sugar, quality homemade bars utilize whole food sweeteners. Pitted Medjool dates provide intense natural sweetness, fiber, and minerals while creating a fudgy texture when blended. Dried fruit—including raisins, cranberries, cherries, and apricots—adds sweetness, flavor complexity, and nutritional benefits without refined sugars.
Vanilla extract, cinnamon, and cocoa powder elevate flavor profiles without adding empty calories. These aromatics create satisfaction and flavor depth that makes homemade bars taste like indulgences rather than health foods.
Equipment and Preparation: Streamlining Your Process
Creating energy bars requires minimal equipment. A food processor simplifies ingredient combining, though a large mixing bowl and sturdy spoon work adequately. The most important preparation step involves lining your baking pan with parchment paper, which prevents sticking and allows easy removal of the finished bars.
An 8-by-8-inch baking dish represents the standard size for most recipes, yielding 16 bars of convenient serving size. For firmer bars that cut cleanly, use a freezer; for softer, chewier bars, refrigeration suffices. Pressing the mixture firmly into the pan ensures bars stay together during storage and serving.
The Basic Recipe Framework: Your Starting Point
All energy bar recipes follow a similar formula that you can customize infinitely:
- 1 cup of nut or seed butter
- 2 cups of rolled oats
- ½ to ¾ cup of liquid sweetener (honey or maple syrup)
- ½ cup of additional mix-ins (dried fruit, seeds, or nuts)
- 1 teaspoon of vanilla extract
- ½ teaspoon of salt (balances sweetness)
- Optional: ½ cup of add-ins like chocolate chips, coconut flakes, or cacao nibs
Combine all dry ingredients first, then add wet ingredients and mix until the consistency becomes thick and moldable. Transfer to your prepared pan, press firmly, and refrigerate for at least two hours before cutting.
Flavor Variations: Customizing Your Bars
The Date and Almond Classic
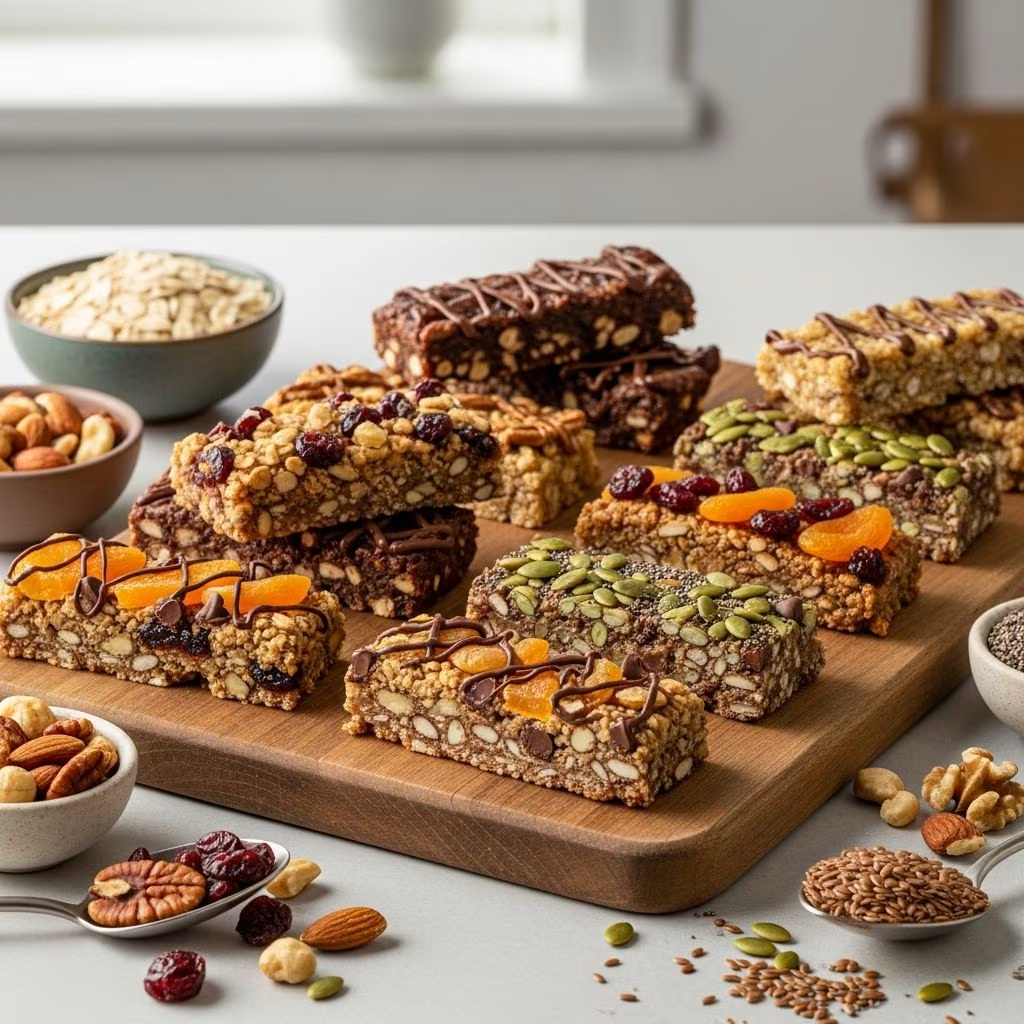
This variation emphasizes natural sweetness and nutritional density. Combine pitted Medjool dates, sliced almonds, rolled oats, and almond butter in a food processor. Process until the mixture becomes sticky and cohesive. The dates provide creaminess while almonds contribute protein and a pleasant crunch. Optional dark chocolate coating adds indulgence without requiring additional sweetener.
Superfood-Loaded Variation
Designed for maximum nutritional impact, this version combines quick-cooking rolled oats, unsweetened coconut, hemp seeds, chia seeds, and pumpkin seeds with tart dried cherries. The combination of seeds creates complete amino acid profiles, while the tart fruit balances the richness of nut butter. This variation appeals to health-conscious snackers seeking maximum nutritional return from their snack choices.
Simple Three-Ingredient Approach
For those seeking absolute simplicity, combine just rolled oats, peanut butter, and honey. Mix thoroughly until every oat particle coats in peanut buttery goodness, then press into your pan and refrigerate. This minimalist version requires only 15 minutes of hands-on time and produces soft, chewy bars perfect for meal prep.
Chocolate-Topped Elegance
Layer a base of nuts, dates, and oats with a chocolate coating for restaurant-quality presentation. After pressing your base mixture firmly into the pan and chilling, melt dark chocolate with coconut oil and pour over the top. The cocoa butter in dark chocolate creates a smooth, snappy coating that sets quickly. Sprinkle with flaky sea salt for sophisticated contrast.
Comparative Analysis: Storage Methods and Texture Outcomes
| Storage Method | Chilling Duration | Texture Result | Longevity |
|---|---|---|---|
| Refrigerator (40°F) | 2-4 hours minimum | Chewy, slightly soft | 5-7 days |
| Freezer (0°F) | 30 minutes minimum | Firm, clean cuts | 2-3 months |
| Counter (Room Temperature) | Not recommended | Soft and sticky | 1-2 days |
Refrigerated bars develop a chewy texture ideal for those preferring tender bites, while frozen bars slice cleanly and maintain structural integrity during transport. The choice depends on your lifestyle and texture preferences.
Nutritional Benefits: Why Homemade Bars Excel
Creating bars at home provides nutritional advantages that commercial products cannot match. You eliminate preservatives, artificial sweeteners, and processing additives while incorporating whole foods recognized by your body. The fiber content from oats, seeds, and dried fruit supports digestive health and creates satiety, meaning fewer calories satisfy hunger longer.
Natural nut butters provide monounsaturated fats that support brain function and cardiovascular health. Dates and dried fruit deliver minerals including potassium, magnesium, and iron that support energy metabolism and muscle function. Seeds contribute complete proteins and micronutrients often lacking in modern diets.
When consumed 30 minutes before exercise, these bars provide carbohydrates for immediate energy and protein for sustained endurance. After workouts, they replenish glycogen stores and provide amino acids for muscle recovery.
Practical Implementation: Meal Prep and Daily Integration
Batch preparation makes these bars ideal for structured meal planning. Dedicate one hour per week to creating a large batch, then portion and store in your preferred method. Pre-cut bars stored in freezer bags prevent decision fatigue during busy mornings.
Pack bars in school lunches, fitness gym bags, or office drawers for convenient access to wholesome snacking. Individual portions prevent overeating while ensuring you always have a nutritious option available. Parents appreciate bars’ appeal to children, who often reject traditional health foods but accept these indulgence-style snacks.
Troubleshooting Common Issues
If your bars crumble during cutting, they likely need additional pressing or longer chilling time. Firm, even pressure distributed across the entire surface ensures cohesion. If bars remain too soft after chilling, increase nut butter slightly in future batches or extend freezing duration.
Separation between layers indicates insufficient pressing before chilling. Always use the bottom of a glass or your palm to press mixture down firmly and evenly. If your mixture seems too dry, add additional honey or nut butter by the tablespoon until it reaches proper consistency.
Frequently Asked Questions
Can I substitute nut butters?
Yes. Almond butter, cashew butter, seed butter, and tahini work excellently. Each creates slightly different textures and flavors. Seed butters work well for those with nut allergies.
How long do homemade energy bars last?
Refrigerated bars last 5-7 days; frozen bars last 2-3 months. Room temperature storage shortens shelf life significantly due to the natural fat content in nut butters.
Are these bars suitable for specific diets?
Yes. These recipes adapt easily for vegan, gluten-free, paleo, and keto diets by selecting appropriate ingredients. Verify all components align with your dietary framework.
Can I use instant oats instead of rolled oats?
Instant oats create a finer texture and less distinct oat flavor. They work but produce less chewy results. Rolled oats provide superior texture in energy bars.
What’s the best pre-workout timing for these bars?
Consume 30 minutes before exercise for optimal performance, allowing digestive processes to convert ingredients into accessible energy.
Conclusion: Reclaiming Snack Control
Homemade energy bars represent the intersection of convenience, nutrition, and satisfaction. By mastering basic recipes and understanding core components, you create customized snacks aligned with your preferences, dietary needs, and health goals. The minimal time investment yields maximum returns in the form of sustained energy, improved nutrition, and the satisfaction of creating your own food.
References
- Nutritional Benefits of Nut Butters — Harvard School of Public Health. 2024. https://www.hsph.harvard.edu/nutritionsource/nuts-seeds/
- Dietary Fiber: Essential for Health — U.S. Department of Agriculture (USDA). 2023. https://www.usda.gov/media/blog/2017/11/16/fiber-intake-and-health
- Dates as Natural Sweeteners and Their Nutritional Profile — Journal of Agricultural and Food Chemistry. 2022. https://pubs.acs.org/doi/10.1021/jf049946k
- Simple No-Bake Snack Recipes for Busy Families — Academy of Nutrition and Dietetics. 2023. https://www.eatright.org/
- Pre-Workout Nutrition Timing and Performance — American College of Sports Medicine. 2024. https://www.acsm.org/
- Carbohydrate Loading for Athletic Performance — International Society of Sports Nutrition. 2023. https://ijsn.biomedcentral.com/