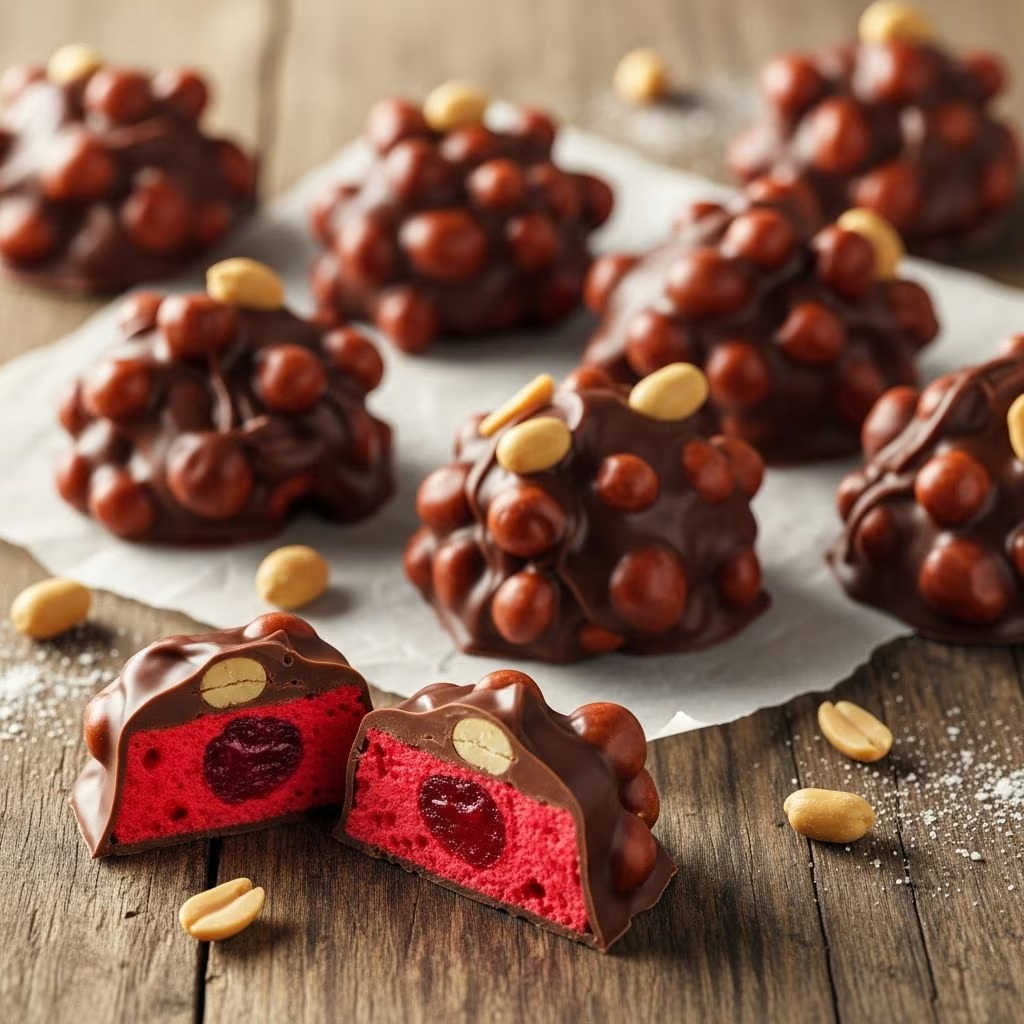
Cherry mash candy represents one of America’s most beloved nostalgic confections, combining the elegance of chocolate coating with the delicate sweetness of cherry filling. This classic treat, once primarily available through specialty candy shops, has become increasingly popular for home confectioners seeking to recreate authentic vintage flavors in their own kitchens. The combination of soft, cherry-infused centers encased in rich chocolate creates a sensory experience that appeals to both casual candy enthusiasts and serious confectionery artisans.
Understanding the Fundamental Components
Cherry mash candy consists of three essential layers that work in harmony to create the final product. The foundation begins with a cherry-flavored filling that forms the heart of each piece. This filling typically incorporates a mixture of powdered sugar, butter, sweetened condensed milk, and either fresh or preserved cherries. The second component involves preparing the chocolate coating, which serves as both protection and flavor enhancement. Finally, the assembly process—freezing the filling and dipping it into melted chocolate—represents the technical skill required to achieve professional-quality results.
Assembling Your Ingredient Arsenal
Success in candy-making begins with understanding the precise ingredients required and their individual roles in the final product. Different recipes offer varying proportions, allowing bakers to customize their creations based on personal preferences and dietary considerations.
The Core Filling Ingredients
- Powdered Sugar: Serves as the primary structural ingredient, providing volume and sweetness. Most recipes call for 2.5 to 4.5 cups, depending on desired consistency and filling density.
- Butter: Typically ranging from 2 to 6 tablespoons, butter contributes richness and helps bind ingredients while improving texture.
- Sweetened Condensed Milk: Usually 3 to 8 ounces, this ingredient adds creaminess, moisture control, and enhanced sweetness without introducing additional liquid that could compromise filling stability.
- Maraschino Cherries: The signature element, typically one 10-ounce jar, provides both visual appeal and distinctive flavor. Proper preparation—draining and drying—prevents excess moisture.
- Vanilla Extract: A small amount, generally one-half to one tablespoon, enhances the overall flavor profile without overwhelming the cherry essence.
Chocolate and Coating Elements
- Melting Chocolate or Almond Bark: The primary coating medium, typically 24 to 32 ounces. Options include milk chocolate, dark chocolate, or almond bark, each offering distinct flavor characteristics.
- Chopped Nuts: Pecans or peanuts, usually one-half to one cup, mixed into the melted chocolate coating for textural contrast and additional flavor depth.
Mastering the Filling Preparation Process
Creating the perfect filling foundation requires attention to technique and ingredient composition. The process begins by properly preparing the cherries, which form the flavor core of the entire candy.
Cherry Processing and Moisture Management
Remove the stems from your maraschino cherries and place them in a blender along with their liquid. Blend until completely liquefied, creating a smooth cherry puree. This pureed mixture becomes the flavorful foundation of your filling. However, excess moisture must be managed carefully, as too much liquid compromises the filling’s ability to hold its shape during freezing and chocolate coating. Some confectioners prefer to drain the cherries more thoroughly and chop them finely rather than fully liquefying them, which provides textural variation while reducing moisture content.
Combining the Filling Elements
In a large mixing bowl, combine your softened butter with powdered sugar. Begin mixing these two ingredients thoroughly until they achieve a uniform consistency. Gradually incorporate the sweetened condensed milk in small increments, stirring constantly to prevent lumps from forming. Add your liquefied or finely chopped cherries along with vanilla extract, continuing to mix until all ingredients are evenly distributed throughout the filling mixture. The final consistency should resemble thick frosting—moist enough to hold together but not so wet that it becomes impossible to shape.
Refrigeration and Readiness
Cover your mixing bowl with plastic wrap and place it in the refrigerator for a minimum of 30 minutes. This resting period allows the filling to firm up, making it significantly easier to shape into uniform balls. Importantly, many confectioners note that the filling can remain refrigerated for 24 to 48 hours before chocolate coating, allowing for flexible scheduling and advanced preparation. This extended storage capability makes cherry mash candy particularly suitable for batch production and gift preparation.
The Chocolate Melting Technique
Properly melting chocolate represents one of the most critical steps in candy making, as overheated chocolate becomes grainy, scorched, or develops an unappealing texture. The traditional double-boiler method offers a reliable approach for home confectioners.
Double-Boiler Chocolate Melting
Fill a crock pot or large pot with four cups of water and set it to low heat. Place a heat-safe metal bowl inside the crock pot, ensuring the bowl doesn’t touch the water directly. Pour chocolate discs or almond bark into the metal bowl. As the water heats gently, the chocolate will gradually soften. Stir occasionally with a spatula, continuing until complete melting occurs. This gentle, indirect heating method prevents the chocolate from reaching temperatures that would damage its texture and flavor profile.
Adding Texture and Flavor
Once your chocolate reaches complete melting, stir in one-half to one cup of chopped nuts directly into the chocolate. Pecans offer a more refined flavor, while peanuts provide a classic, bold taste that evokes the original commercial cherry mash candy. The nuts distribute evenly throughout the chocolate coating, creating the characteristic texture that defines this confection.
Shaping and Freezing the Filling
While chocolate melts, prepare your filling for coating by forming it into uniform balls.
Creating Consistent Portions
Using a cookie scoop or measuring spoon, create tablespoon-sized portions of the refrigerated filling. Roll each portion between your hands to form compact balls approximately one inch in diameter. Consistency in sizing ensures even chocolate coating and professional presentation. Place each formed ball on a parchment-lined plate or baking sheet.
Flash Freezing for Optimal Coating
Freeze the filled balls for 20 to 30 minutes. This brief freezing period solidifies the filling sufficiently to prevent it from falling apart during chocolate dipping, yet doesn’t freeze so completely that the chocolate coating develops a thick, uneven layer. The frozen center maintains its integrity while the warm chocolate coating can bond effectively to the exterior.
The Chocolate Dipping Process
Dipping represents the final transformation, converting your prepared filling into finished candy through precise technique.
Equipment and Setup
Insert a toothpick into each frozen cherry ball through its center, creating a handle for dipping. Have a sheet of wax paper or parchment paper nearby for setting the coated pieces. Working quickly is essential, as the frozen filling will gradually warm and become susceptible to collapsing or leaking if held at room temperature too long.
Dipping Technique
Holding the toothpick, submerge each frozen cherry ball into the warm chocolate-nut mixture, ensuring complete coating coverage. Remove excess chocolate by rotating the toothpick slowly, allowing the coating to settle evenly around the filling. Place each dipped candy on the prepared wax paper, removing the toothpick carefully once the chocolate begins setting. Continue this process with remaining filling balls until all pieces are coated.
Storage and Long-Term Preservation
Once the chocolate coating has completely set at room temperature—typically within 30 to 45 minutes—transfer finished candies to an airtight container. Store at room temperature away from direct sunlight and heat sources. Properly stored cherry mash candies maintain their quality for several weeks, making them ideal for advance gift preparation or batch production throughout the holiday season.
Frequently Asked Questions
Can I use different types of chocolate for coating?
Yes. Milk chocolate provides a sweeter, more approachable coating, while dark chocolate offers sophistication and reduced sweetness. Almond bark serves as an excellent alternative, offering ease of melting and a neutral flavor that doesn’t compete with the cherry filling. White chocolate creates a striking visual contrast, though it offers less traditional flavor.
What alternatives exist for maraschino cherries?
Fresh cherries can replace preserved maraschino cherries, though they require pitting and careful moisture management. Dried cherries, rehydrated in warm water, offer concentrated flavor. Cherry juice or cherry extract provides pure cherry flavor without the texture element.
How can I prevent the filling from leaking during chocolate coating?
Ensure sufficient freezing time before dipping—exactly 20 to 30 minutes provides optimal firmness without over-freezing. Use a double-boiler or crock pot for chocolate melting to maintain proper temperature, preventing excess heat from destabilizing the filling.
Is this recipe suitable for commercial production?
While the basic process scales well, commercial production requires additional considerations including food safety certification, precise temperature control equipment, and specialized dipping stations designed for high-volume production.
References
- Cherry Mash Candy: 5 Steps — Instructables. Accessed April 2026. https://www.instructables.com/Cherry-Mash-Candy/
- Homemade Cherry Mash Candy — Flipside Baking. November 30, 2019. https://flipsidebaking.com/2019/11/30/homemade-cherry-mash-candy/
- Cherry Mash Truffles — Strawberry Blondie Kitchen. Accessed April 2026. https://www.strawberryblondiekitchen.com/cherry-mash-truffles/
- Cherry Mashers Recipe — Down Shiloh Road. Accessed April 2026. https://www.downshilohroad.com/cherry-mashers/