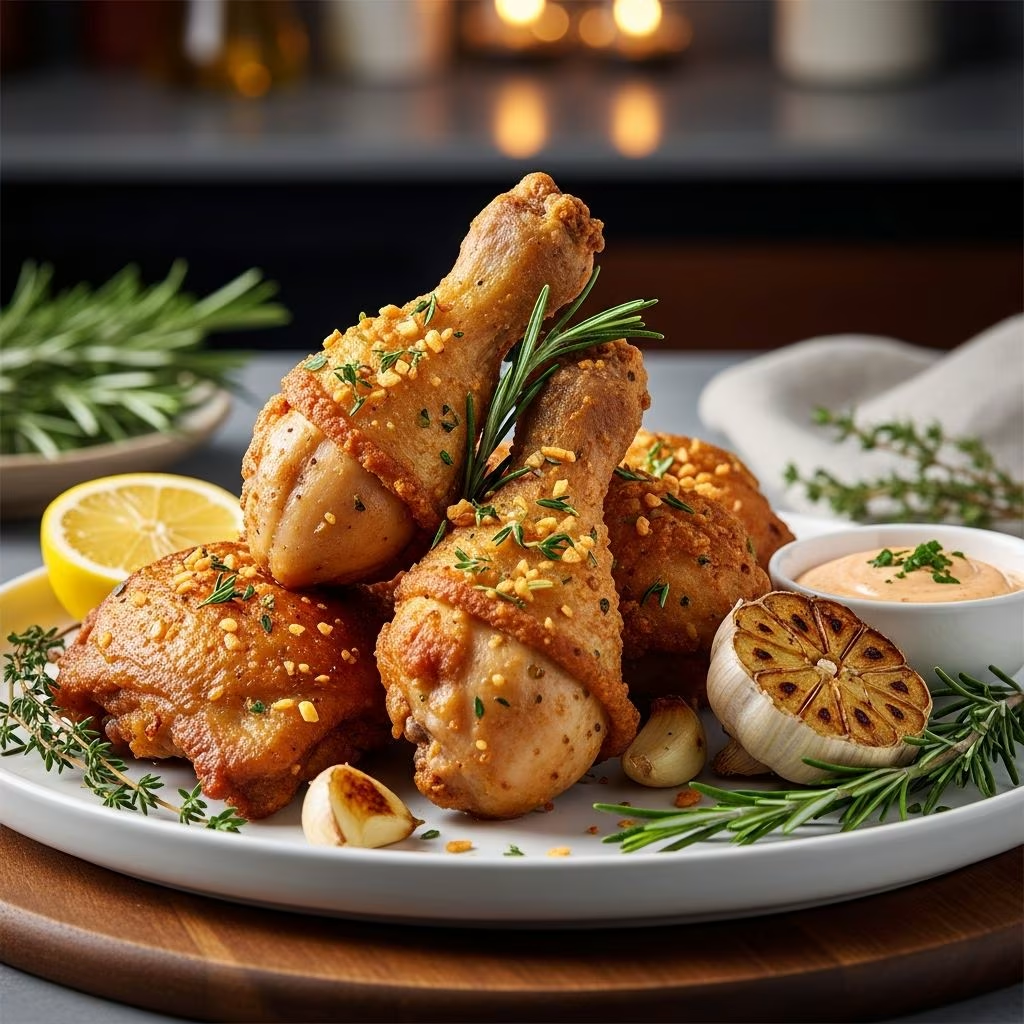
Garlic fried chicken represents a delicious intersection of comfort food and sophisticated flavor. This dish combines the satisfaction of crispy, golden-brown chicken with the aromatic complexity of fresh and powdered garlic. Whether you’re preparing a weeknight dinner or impressing guests at a gathering, mastering this recipe opens doors to countless variations and applications.
The Foundation: Understanding Garlic Fried Chicken
Garlic fried chicken is more than just chicken coated in garlic powder. The most successful versions layer garlic flavor through multiple stages: the marinade, the seasoning blend, and often a finishing garlic sauce or oil drizzle. This multi-dimensional approach ensures that garlic permeates every element of the dish, creating a harmonious and memorable eating experience.
The appeal of garlic fried chicken lies in its versatility. It can be prepared simply with just a dry rub and garlic oil, or developed into a more complex dish with savory sauces and additional aromatics. The cooking technique significantly influences the final result, with options ranging from traditional pan-frying to double-frying methods that maximize crispness.
Essential Ingredients and Their Roles
Protein Selection
The foundation of any excellent garlic fried chicken begins with quality poultry. Most recipes call for bone-in, skin-on chicken pieces, which provide superior flavor and texture compared to boneless varieties. Drumsticks, thighs, wings, and halved breasts all work well, though each piece cooks at a different rate. Thighs and drumsticks remain juicier during the frying process due to their higher fat content, while breast meat requires careful attention to prevent drying out.
Flavor Building Components
The aromatic profile combines fresh and powdered garlic for maximum impact. Fresh minced garlic contributes bright, sharp notes, while garlic powder provides a more mellow, integrated flavor that seasons the batter and coating thoroughly. Complementary spices create depth:
- Smoked paprika adds subtle sweetness and smokiness
- Red chili or cayenne introduces measured heat
- Turmeric contributes earthy tones and golden color
- Onion powder enhances savory complexity
- Black pepper and salt provide foundational seasoning
Additional aromatics like fresh ginger, minced garlic, and green onions can be incorporated into sauces or marinades for extra dimension.
Coating and Batter Materials
The crispy exterior depends on the flour mixture and batter composition. Traditional recipes combine all-purpose flour with cornstarch, creating a lighter, crispier crust than flour alone. For gluten-free preparations, substituting rice flour and cornstarch produces equally satisfactory results. Egg whites or whole eggs bind the coating to the chicken and create a seal that locks in moisture during frying.
The Marinating Process
Marinating represents a crucial step that distinguishes good garlic fried chicken from exceptional versions. A proper marinade accomplishes three goals: seasoning the meat throughout, tenderizing the protein, and allowing flavor compounds to penetrate deep into the flesh.
Basic Marinade Composition
An effective marinade combines oil, acid, salt, and aromatics. Extra virgin olive oil serves as the base, carrying fat-soluble flavor compounds and maintaining moisture. Minced garlic and garlic powder infuse the meat with essential garlic character, while soy sauce or tamari provides umami depth and salty seasoning. A small amount of water or cooking wine helps distribute flavors evenly and prevents the garlic from burning during storage.
The typical marinating period ranges from one to twenty-four hours. Shorter marination (one to two hours) results in surface-level flavor, while extended marination (up to twenty-four hours) allows the seasoning to penetrate more deeply. However, extended soaking in salt can begin breaking down proteins excessively, potentially leading to mushy texture if extended beyond the recommended timeframe.
Marinating Best Practices
Cover the bowl with plastic wrap to prevent contamination and maintain moisture. Turn the chicken pieces occasionally to ensure even distribution of the marinade. Store the marinating chicken in the refrigerator throughout the process, never at room temperature, to prevent bacterial growth. Remove the chicken from refrigeration approximately fifteen minutes before frying to allow pieces to approach room temperature, which promotes more even cooking.
Preparing the Coating
After marination, the coating stage transforms the seasoned chicken into the crispy masterpiece. This step requires attention to timing and technique to achieve optimal texture.
The Batter Formula
Mix cornstarch and flour in proportions favoring cornstarch (approximately two parts flour to one part cornstarch) for maximum crispness. Whisk in salt, black pepper, garlic powder, paprika, and any additional spices. For gluten-free versions, rice flour replaces all-purpose flour while maintaining structural integrity and crunch.
Prepare the liquid component by beating egg whites or whole eggs with ice-cold soda water or club soda. The carbonation in the soda water creates tiny bubbles that result in an exceptionally light, crispy coating. Mix the dry ingredients with the wet ingredients just before use, leaving some small lumps in the batter. Overmixing develops gluten in regular flour or creates a dense coating.
Resting the Coated Chicken
After dipping each piece in the batter, place the coated chicken on a plate and refrigerate for thirty minutes. This resting period allows the coating to adhere firmly to the surface and sets the structure. Cold chicken also cooks more evenly when introduced to hot oil, with the exterior achieving crispness before the interior dries out.
Mastering the Frying Technique
The cooking method dramatically affects the final result. Several approaches yield excellent garlic fried chicken, each with distinct advantages.
Temperature and Oil Selection
Maintain oil temperature between 315 and 350 degrees Fahrenheit for optimal results. Vegetable oil, grapeseed oil, and peanut oil all withstand high temperatures without breaking down. Use enough oil to submerge the chicken pieces halfway, typically four inches in a heavy-bottomed pot or Dutch oven.
Temperature control proves critical. Oil that’s too cool results in greasy, soggy chicken, while excessively hot oil burns the exterior before the interior cooks through. Use a reliable thermometer to monitor temperature throughout the cooking process.
Batch Frying Method
Never overcrowd the frying vessel. Adding too many pieces at once causes the oil temperature to drop significantly, resulting in the chicken absorbing oil rather than frying. Work in batches, maintaining adequate spacing between pieces. This approach requires patience but produces superior results.
Two-Stage Frying Process
Some recipes employ a double-frying technique that maximizes crispness. Initially fry chicken at a lower temperature (approximately 315 degrees) for six to seven minutes, which cooks the interior thoroughly. Remove the chicken and increase the oil temperature to 380 degrees. Reintroduce the chicken for two to three minutes, which creates an extra-crispy, golden exterior without compromising the tender interior.
Covered Cooking Method
For stovetop frying in a covered skillet, fry the chicken covered for seven minutes. Turn the pieces and cover again for another seven minutes, allowing the interior to cook before the exterior becomes overly crispy. Uncover the pan for the final few minutes, allowing the crust to deepen in color and crispness. This method reduces spattering and yields consistently juicy meat.
Creating Garlic-Forward Sauces and Finishes
The sauce or finishing oil elevates garlic fried chicken from good to unforgettable. Multiple approaches accommodate different flavor preferences and meal contexts.
Garlic Oil Finish
The simplest finishing technique involves heating extra virgin olive oil in a skillet over medium heat. Add minced garlic and cook just until fragrant, approximately thirty seconds. Remove the pan from heat immediately to prevent the garlic from browning or becoming bitter. Add fresh parsley and toss lightly. Drizzle this fragrant oil over the finished chicken pieces just before serving. This approach preserves the crispness of the fried coating while adding rich garlic flavor.
Savory Garlic Sauce
For a more substantial sauce, sauté minced garlic and grated ginger in oil used for frying the chicken over medium-high heat. Add prepared sauce (combining soy sauce, lime juice, fish sauce, and a touch of sugar), stirring well to combine. Increase heat to high and add the fried chicken pieces, tossing gently to coat evenly. Add green onions and sesame seeds, continuing to move the chicken until the sauce thickens and water content evaporates. Transfer to a serving plate and garnish with additional green onions or sesame seeds.
Buttery Garlic Glaze
Combine melted butter with minced garlic, crushed red pepper flakes, and fresh parsley. Brush this mixture over the warm fried chicken, allowing it to adhere to the crispy surface. The butter enriches the dish while the garlic provides concentrated flavor and the red pepper adds subtle heat.
Cooking Troubleshooting Guide
| Problem | Likely Cause | Solution |
|---|---|---|
| Soggy, greasy chicken | Oil temperature too low or overcrowded pan | Maintain 325-350°F temperature, fry in smaller batches |
| Burnt exterior, undercooked interior | Oil temperature too high | Reduce heat, use thermometer to monitor temperature |
| Pale, dull coating | Batter insufficiently seasoned or rested too long before frying | Increase spices in coating mixture, fry sooner after battering |
| Coating separating from chicken | Marinated chicken not thoroughly dried, inadequate resting time | Pat chicken dry before battering, refrigerate coated chicken for 30 minutes |
| Tough, dry meat | Overcooking, lean cuts selected, oil temperature too high | Reduce cooking time, use thighs and drumsticks, monitor temperature |
Serving Suggestions and Pairings
Garlic fried chicken pairs excellently with simple sides that complement rather than compete with its aromatic profile. Consider serving alongside steamed or roasted vegetables, creamy mashed potatoes, crispy french fries, or fragrant jasmine rice. Light pickled vegetables cut through the richness of the fried coating, while fresh herb salads provide brightness. For a complete meal, combine the chicken with crusty bread, which serves as an ideal vehicle for any remaining sauce.
Storage and Make-Ahead Options
Properly stored garlic fried chicken maintains quality for three to four days in the refrigerator. Allow cooked chicken to cool to room temperature before transferring to an airtight container. Reheat gently in a 350-degree oven for approximately ten minutes, which restores crispness better than microwave reheating. The raw marinade can be prepared up to two days in advance, while coated, unbaked chicken keeps refrigerated for up to eight hours before frying.
Frequently Asked Questions
Can I prepare garlic fried chicken without a thermometer?
While a thermometer provides accuracy, experienced cooks can gauge oil temperature by observing how quickly a small piece of batter sizzles and rises. However, investing in an inexpensive kitchen thermometer ensures consistent results and removes guesswork from the cooking process.
Is there a healthier preparation method for garlic fried chicken?
Air frying represents a lower-fat alternative to traditional deep-frying. Apply the same marinade and batter, then cook at 380-400 degrees for approximately twenty minutes, shaking the basket halfway through. While the texture differs slightly from oil-fried versions, air-fried chicken remains crispy and flavorful.
How can I adapt this recipe for dietary restrictions?
For gluten-free preparations, substitute rice flour and cornstarch in equal proportions for all-purpose flour. Tamari replaces standard soy sauce for a gluten-free marinade. Dairy-free versions work well using oil-based finishes instead of buttery glazes.
What makes chicken stay crispy after frying?
Immediately after frying, transfer chicken to a wire rack rather than paper towels, which trap steam and soften the coating. The elevated position allows air circulation around all surfaces, maintaining crispness until serving.
Can I freeze prepared garlic fried chicken?
Yes, cooled fried chicken freezes well for up to three months. Place pieces on a baking sheet and freeze individually before transferring to freezer bags. Thaw in the refrigerator overnight and reheat in a 350-degree oven until warmed through.
References
- Garlic Fried Chicken Recipe | Crispy Outside, Juicy Inside — Abena Tina (YouTube). Accessed April 2026. https://www.youtube.com/watch?v=WT_q-SQISoY
- Garlic Fried Chicken – Life’s Ambrosia — Life’s Ambrosia. Accessed April 2026. https://www.lifesambrosia.com/garlic-fried-chicken-recipe/
- Fried Garlic Chicken – Lord Byron’s Kitchen — Lord Byron’s Kitchen. Accessed April 2026. https://www.lordbyronskitchen.com/fried-garlic-chicken/
- Garlic Fried Chicken (Gluten-Free) – Tiffy Cooks — Tiffy Cooks. Accessed April 2026. https://tiffycooks.com/garlic-fried-chicken-gluten-free/
- CRISPY Garlic Fried Chicken – Nomadette — Nomadette. Accessed April 2026. https://nomadette.com/crispy-garlic-fried-chicken/