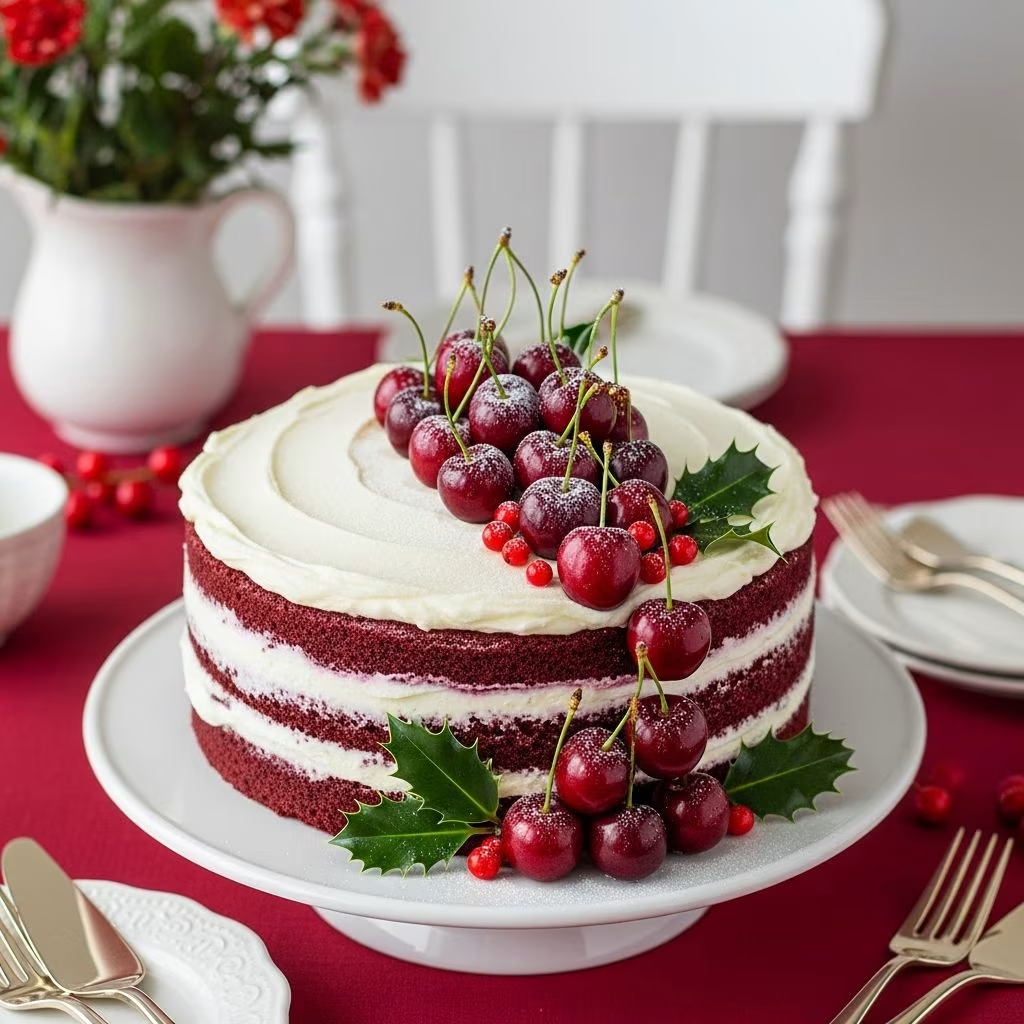
When the holiday season arrives, the desire to bake something truly special becomes irresistible. A cherry-topped cake serves as both a centerpiece and a delicious finale to memorable gatherings. This sophisticated dessert combines tender cake layers with jewel-toned fruit and luxurious frosting, making it an impressive choice for anyone seeking to elevate their baking repertoire. Whether you’re hosting a formal dinner or a casual family celebration, this cake delivers visual appeal alongside exceptional flavor.
Understanding the Components of This Festive Dessert
A successful cherry cake consists of three distinct elements working in harmony: the foundation cake, the fruit component, and the finishing frosting. Each layer plays a crucial role in creating a cohesive and memorable dessert experience.
The Foundation: Crafting a Light and Airy Cake Base
The cake itself should be delicate enough to support the weight of cherries and frosting without becoming heavy or dense. An aerated sponge method works exceptionally well for this purpose. This technique involves whipping eggs with granulated sugar until the mixture reaches a thick, ribbon-like consistency, which typically requires 7 to 8 minutes of vigorous beating on high speed. This process incorporates air into the batter, creating a naturally light crumb structure.
Once the egg mixture achieves proper volume, sifted flour and baking powder are folded in gently using a spatula technique. The folding motion preserves the air bubbles while ensuring even distribution of dry ingredients throughout the batter. This careful approach prevents overdeveloping gluten, which would result in a tough, compact cake rather than the desired tender texture.
Transforming Fresh Cherries Into Glossy Compote
Rather than simply topping the cake with whole fruit, preparing a cherry syrup creates a more refined presentation and enhances moisture throughout the cake. This involves combining water, lemon juice, sugar, and cornstarch in a saucepan over medium heat. As this mixture thickens, frozen cherries are added and brought to a gentle boil. The cornstarch acts as a thickening agent, transforming the liquid into a glossy coating that clings beautifully to the fruit while remaining pourable enough to soak into the cake layers.
The lemon juice serves a dual purpose: it brightens the cherry flavor while the natural acidity helps prevent the sauce from becoming overly sweet. Once the compote cools completely, it becomes the ideal topping that both enhances flavor and creates an elegant visual effect.
Building a Luxurious Frosting Layer
A combination frosting made from both whipped cream and softened cream cheese provides richness alongside a light texture. Heavy cream is beaten until it reaches a spreadable consistency, then folded together with sweetened cream cheese that has been whipped until fluffy. This marriage of ingredients creates a frosting that’s neither too dense nor too airy, offering the perfect structural support for fruit while remaining delightfully creamy on the palate.
Reserving a portion of this frosting base and tinting it with food coloring allows for decorative piping. Holly-inspired designs or other festive patterns add a professional touch that transforms a homemade cake into a bakery-quality creation.
Step-by-Step Preparation Guide
Preparing Your Workspace and Equipment
Success begins before mixing any ingredients. Line your baking pan with parchment paper on the bottom only, leaving the sides unbuttered. This approach allows the cake to rise evenly without sticking while ensuring clean, straight edges. Gather all equipment in advance, including mixing bowls, measuring implements, and baking tools. Having everything prepared prevents interruptions during the critical stages of cake preparation.
Creating the Egg Foam Base
Begin by cracking three large eggs into the bowl of a stand mixer fitted with the whisk attachment. Beat at high speed for approximately one minute until the mixture becomes foamy. Gradually add sugar while continuing to beat. The mixture should be beaten for 7 to 8 minutes total until it transforms into a thick, pale ribbon that holds its shape when the beaters are lifted. This aeration is fundamental to achieving the desired light texture.
Incorporating Dry Ingredients
Sift the flour with baking powder in a separate bowl to distribute the leavening agent evenly and remove any lumps. Divide this dry mixture into two equal portions. Sprinkle the first portion over the egg mixture and fold gently using a rubber spatula, scraping from the bottom of the bowl to ensure complete incorporation. Repeat with the second portion, folding just until no streaks of flour remain visible. Avoid overworking, as excessive mixing at this stage develops gluten and compromises the tender crumb.
Baking and Cooling Procedures
Transfer the batter to the prepared pan and place it in a preheated 350-degree Fahrenheit oven. Bake for approximately 25 minutes until a toothpick inserted near the center comes out clean. Allow the cake to cool in the pan for 5 minutes, then run a thin spatula around the edges to loosen it from the pan sides. Invert onto a wire rack and peel away the parchment paper. Allow the cake to cool completely to room temperature before frosting. This cooling period is essential for the cake to set properly and prevents melting the frosting layer.
Mastering the Frosting Technique
Proper frosting application requires attention to temperature and technique. Chill the heavy cream before whipping to ensure it reaches the desired consistency quickly. Beat it for approximately two minutes until soft peaks form and the mixture becomes spreadable. Simultaneously, beat the softened cream cheese with sugar in the same mixer bowl (no rinsing required) until light and fluffy, which takes about two minutes on high speed.
Gently fold the whipped cream into the cream cheese mixture using a spatula. Work deliberately to maintain the aeration in both components while ensuring thorough blending. The resulting frosting should be light, fluffy, and easily spreadable.
For decorative elements, reserve about a quarter cup of the frosting base and tint it with green food coloring using a toothpick or small whisk to distribute color evenly. Transfer this tinted frosting into a piping bag fitted with an appropriate tip designed for creating leaf-like designs. This allows for professional-looking garnishes that enhance the festive presentation.
Assembly and Presentation Strategies
Creating the Final Cake Structure
Place the completely cooled cake on your serving platter or cake stand. Using a fork, poke tiny holes across the entire top surface. These punctures create channels for the cherry syrup to permeate the cake, enriching the flavor throughout. Immediately top with the cooled cherry compote, allowing it to rest for about five minutes so the cake absorbs some of the syrup, which adds moisture and cherry flavor to every bite.
Applying Frosting and Garnishes
Spread the cream cheese frosting over the cherry layer using an offset spatula or regular knife, working smoothly from the center outward. The frosting should cover the cherries generously while creating a clean surface. Once the base frosting is applied, sprinkle finely grated chocolate over the top, which adds visual contrast and subtle cocoa flavor. Finally, pipe the green-tinted frosting into holly-leaf designs around the edges or across the top surface.
Crown the cake with bright maraschino cherries placed strategically among the piped frosting leaves. These add pops of color and serve as indicators of the delicious cherry filling within.
Ingredient Considerations and Substitutions
| Ingredient | Standard Option | Alternative Choices |
|---|---|---|
| Cherries | Frozen sweet cherries | Fresh cherries (when in season), canned cherries, or dried cherries rehydrated in liquid |
| Thickening Agent | Cornstarch | Arrowroot powder or tapioca starch for a glossier finish |
| Sweetener | Granulated sugar | Caster sugar, turbinado, or honey (adjust liquid ratios accordingly) |
| Frosting Base | Cream cheese and heavy cream | Mascarpone for richness, or whipped Greek yogurt for tanginess |
| Decoration | Grated chocolate and maraschino cherries | Fresh berries, candied fruit peel, or toasted nuts |
Baking Tips for Consistent Success
Temperature and Timing Considerations
Oven temperatures vary significantly between appliances, so investing in an oven thermometer ensures accuracy. Position the cake in the center rack where heat circulates evenly, and avoid opening the oven door during the first 20 minutes of baking, as temperature fluctuations can affect rising. The toothpick test remains the most reliable indicator of doneness—when a wooden pick inserted near the center emerges clean without crumbs clinging to it, the cake has baked sufficiently.
Ingredient Preparation
Measure flour correctly by spooning it into measuring cups and leveling with a knife rather than scooping directly from the bag, which compacts the flour and results in excessive amounts. Use room-temperature eggs, as they incorporate air more efficiently during beating. Ensure cream cheese is properly softened but not melted, as overly warm cream cheese becomes grainy when mixed.
Common Pitfalls to Avoid
Overbeating the batter after adding flour develops gluten, creating a tough, dense cake. Conversely, underbeating results in inadequate aeration and a heavy texture. Cooling the cake completely before frosting prevents the frosting from melting into puddles. Skipping the syrup-soaking step by poking holes in the cake results in a drier finished product that lacks moisture and cherry flavor penetration.
Storage and Make-Ahead Strategies
This cake stores beautifully when properly covered, maintaining its quality for several days. Keep it at room temperature covered with plastic wrap or a cake dome, or refrigerate for extended storage of up to one week. The frosting and cherries may be prepared one day in advance and stored separately, with assembly occurring just before serving. The unfrosted cake can be baked two days ahead and wrapped tightly until needed. These make-ahead options prove invaluable for holiday entertaining when time becomes precious.
Frequently Asked Questions
Can frozen cherries be substituted for fresh?
Yes, frozen cherries work excellently and often provide more consistent results than fresh. They require no pitting and maintain their integrity during cooking. Thaw them before measuring for accuracy in the syrup preparation.
What should I do if my cake sinks in the middle?
A sunken center typically indicates underbaking or oven temperature inaccuracy. Ensure your oven is properly calibrated and use the toothpick test reliably. Additionally, opening the oven door before the cake sets can cause this issue.
How far in advance can I make this cake?
The unfrosted cake keeps for two days covered tightly, while the complete frosted cake lasts up to one week refrigerated. Individual components can be prepared separately and combined on the day of serving.
Is there a dairy-free frosting option?
Yes, consider using coconut cream as a substitute for heavy cream and cashew-based cream cheese alternatives. The texture and taste will differ slightly but remain delicious.
Can this cake be frozen?
Freeze the unfrosted cake wrapped in plastic wrap and aluminum foil for up to three months. The frosted cake doesn’t freeze as successfully due to texture changes in the cream cheese component, though it can be frozen for short periods of one to two weeks.
Variations to Explore
Once comfortable with the basic recipe, numerous variations offer exciting possibilities. Add almond extract to the batter for subtle nuttiness, or incorporate dried cherries into the cake layers alongside the syrup topping. Layer the cake with a thin ganache between cake layers and frosting for added richness. Substitute the cherry syrup with other berry compotes like raspberry or blackberry for seasonal variations.
For a more elaborate presentation, consider splitting the cooled cake horizontally and layering frosting between the halves along with the cherry compote. This creates a more dramatic cross-section and increases the fruit throughout the entire cake.
Conclusion
Creating a cherry cake that impresses guests requires understanding the interplay between technique, timing, and ingredient quality. By mastering the foundational skills of aeration, careful folding, and proper frosting application, you’ll consistently produce a dessert that looks as stunning as it tastes. The combination of light cake, vibrant cherries, and luxurious frosting creates a celebration-worthy treat that becomes a treasured addition to your holiday baking traditions. With practice and attention to detail, this recipe becomes an accessible way to demonstrate your baking prowess and create lasting memories around the table.
References
- All Recipes Christmas Cherry Cake — Meredith Corporation. Accessed April 2026. https://www.allrecipes.com/recipe/9266/christmas-cherry-cake/
- Cherry Christmas Cake — Natasha’s Kitchen. 2024. https://natashaskitchen.com/cherry-christmas-cake/
- Festive Cherry Pound Cake — Wishes and Dishes. 2024. https://wishesndishes.com/festive-cherry-pound-cake/
- Newfoundland Cherry Cake — Rock Recipes. 2024. https://www.rockrecipes.com/newfoundland-cherry-cake/
- Italian Cherry Pound Cake Recipe — Giadzy. 2024. https://giadzy.com/blogs/recipes/italian-cherry-pound-cake