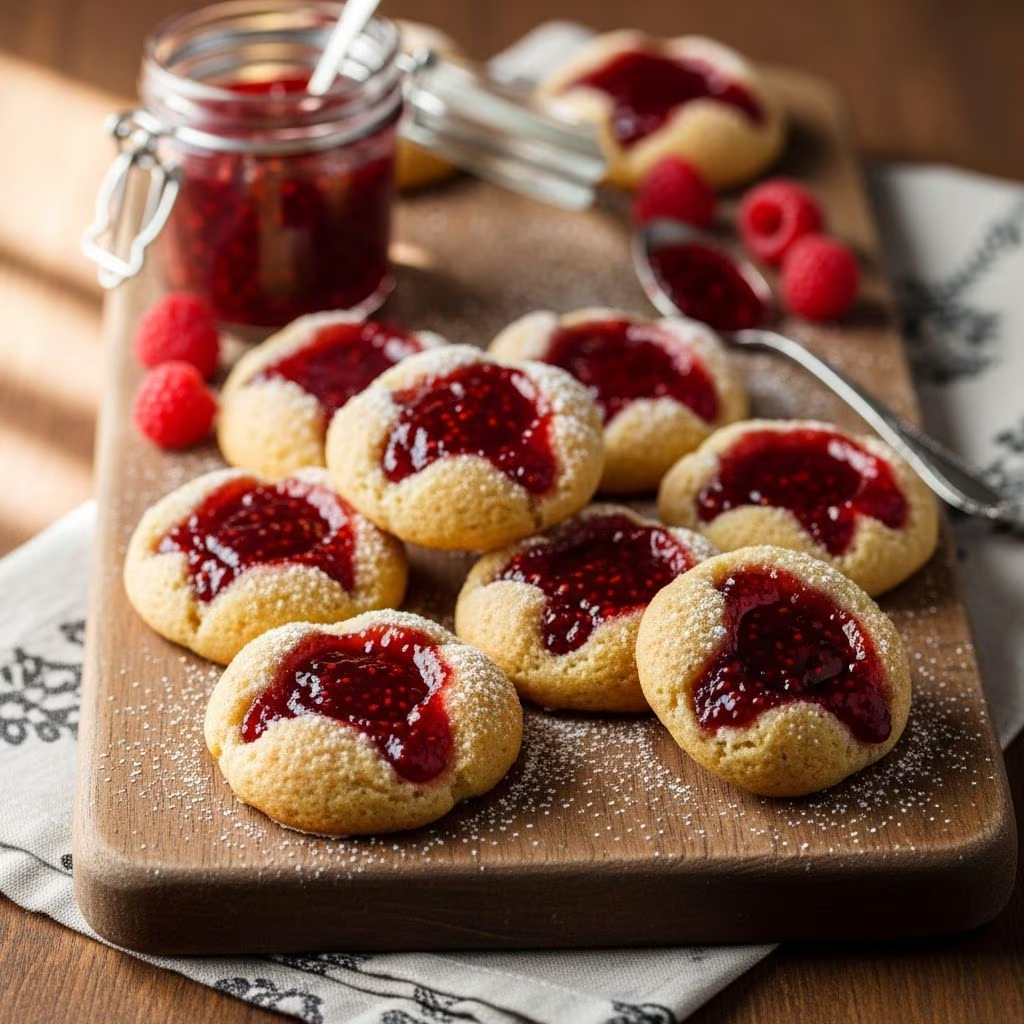
Thumbprint bars represent a timeless dessert that combines the comforting flavors of peanut butter with the tartness of fruit preserves. These handheld treats offer the nostalgic appeal of a classic childhood sandwich transformed into an elegant bar format. Whether you’re preparing for a gathering or seeking a satisfying homemade snack, mastering this recipe will elevate your baking repertoire.
Understanding the Essence of Thumbprint Bars
Thumbprint bars differ from traditional cookies through their distinctive indented center and bar presentation. The peanut butter base provides a rich, nutty foundation that pairs harmoniously with various jam fillings. The beauty of this recipe lies in its versatility—you can customize flavors while maintaining consistent results through proper technique.
These bars offer several advantages over conventional baking projects. The preparation requires minimal specialized equipment, making them accessible to bakers of all skill levels. The texture profile combines a slightly crispy exterior with a tender interior, creating a satisfying contrast that keeps people returning for more.
Essential Ingredients for Success
Creating exceptional thumbprint bars begins with selecting quality components. Each ingredient contributes specific qualities to the final product:
- Peanut butter: Creamy, shelf-stable varieties work best for consistent texture and binding properties
- Sugar: Provides sweetness and helps achieve the desired crumb structure
- Baking powder: Creates lift and ensures bars achieve the proper rise during baking
- Kosher salt: Enhances peanut butter flavor without making bars taste overly salty
- Jam or jelly: Serves as the signature filling, offering tartness and visual appeal
- Coating sugar: Creates an attractive sparkle and textural contrast on the exterior
The choice between different peanut butter types significantly affects results. Natural peanut butters containing separated oils can produce greasy, dense bars with undesirable texture. Standard creamy peanut butter from mainstream brands ensures even distribution of fat and consistent moisture throughout the dough.
Preparation Essentials Before Baking
Successful baking depends on thorough preparation before mixing ingredients. Begin by preheating your oven to the recommended temperature, allowing it to reach consistent heat distribution throughout the cavity. This step ensures even baking and prevents undercooked centers or overdone edges.
Prepare your baking surface by lining it with parchment paper or silicone baking mats. This prevents sticking and simplifies cleanup while creating a non-stick surface for dough portions. Arrange your workspace with all ingredients measured and readily accessible—this practice, known as mise en place, prevents mixing interruptions and ensures nothing gets forgotten.
Gather your tools before beginning. A measuring spoon collection proves essential for creating uniform portions and indents. Having everything organized streamlines the process and reduces stress during preparation.
The Mixing Process: Building Your Base
Begin by combining peanut butter with softening agents and dry ingredients. Mix thoroughly until the dough develops a cohesive texture without visible streaks of unmixed peanut butter. The mixture should hold together when squeezed but remain crumbly enough to portion into individual pieces.
Proper mixing develops the gluten network slightly while distributing leavening agents evenly throughout the dough. This balanced approach prevents dense, gummy bars while avoiding excessive toughness. Overmixing can result in dense bars, so mix only until ingredients are completely incorporated.
Forming and Coating Your Bars
Portion the dough into rounded tablespoon amounts, then roll each portion between your palms until it forms a smooth sphere. This technique creates uniform bars that bake evenly and present professionally.
Rolling each ball in granulated sugar before placement on the baking sheet accomplishes multiple objectives. The sugar provides visual appeal through sparkle and texture, creates a slightly crisp exterior layer, and prevents bars from sticking together during storage. Ensure even sugar coating by rolling gently and pressing the coating into the dough surface.
Spacing bars approximately two inches apart on your prepared baking sheet allows air circulation during baking. Inadequate spacing causes bars to merge together, while excessive spacing may create overly crisp edges.
The Professional Indenting Technique
Creating uniform indents represents a critical step that distinguishes professional-quality bars from amateur attempts. Rather than using your thumb, which produces inconsistent cavity depths, employ the bottom of a half-teaspoon measuring spoon to create standardized indents.
The timing of this step proves crucial for success. Bake the bars for seven minutes initially, allowing the exterior to set while the interior remains soft enough to indent without cracking excessively. Remove the pan from the oven and, working quickly while the dough retains warmth, press the measuring spoon into the center of each bar. Press firmly but gently to create a cavity approximately the depth of the spoon’s bowl.
Minor edge cracking during this process is completely normal and adds rustic charm to the finished product. These small imperfections indicate handcrafted quality rather than factory uniformity.
Filling and Final Baking
Portion exactly one-half teaspoon of jam into each indent using the same measuring spoon. This consistency ensures even distribution of flavor across all bars while maintaining neat presentation. Avoid overfilling, as excess jam may overflow during final baking and create burnt spots.
Return the pan to the oven for an additional eight minutes of baking. During this phase, the bars’ edges set completely while the peanut butter maintains its tender crumb structure. The jam heats slightly, creating a protective surface layer that prevents smearing during handling and cooling.
Cooling for Optimal Texture
Allow bars to rest on the baking sheet for five minutes after removal from the oven. This resting period permits residual heat to distribute throughout each bar, completing the cooking process through carryover heating. The jam’s protective skin forms during this critical window, stabilizing the filling.
Transfer bars to a wire cooling rack using an offset spatula or knife to prevent sticking. The wire rack provides air circulation underneath, preventing moisture from accumulating and creating soggy bottoms. Complete cooling on the rack ensures bars achieve their final texture without residual warmth causing structural changes.
Creative Filling Variations
The fundamental bar recipe accommodates numerous filling options beyond traditional raspberry jam:
| Filling Option | Characteristics | Baking Adjustment |
|---|---|---|
| Raspberry Jam | Tart, classic pairing with peanut butter | Standard 8-minute second bake |
| Strawberry Preserve | Sweet, mild berry flavor | Standard 8-minute second bake |
| Chocolate Ganache | Rich, decadent option | Bake 10 minutes, indent, cool completely before piping |
| Caramel Drizzle | Buttery, indulgent complement | Bake 10 minutes, indent, cool completely before piping |
| Apricot Jam | Subtle fruity notes | Standard 8-minute second bake |
Storage and Shelf Life
Properly stored bars maintain optimal quality for two to four days at room temperature. Place cooled bars in an airtight container, separating layers with parchment paper to prevent sticking. Avoid storing warm bars, as trapped moisture creates condensation that softens the exterior and promotes mold growth.
For extended storage, freeze bars in a freezer-safe container for up to two weeks. Thaw at room temperature for approximately thirty minutes before serving. Frozen bars actually develop improved texture during thawing, as moisture redistributes throughout the structure.
Troubleshooting Common Issues
Greasy or Dense Texture: This typically results from using natural peanut butter with separated oils. Switch to standard creamy peanut butter brands for consistent results.
Uneven Baking: Rotate the pan halfway through the second baking phase to ensure even heat exposure. Oven hot spots may require this adjustment for consistent browning.
Jam Leaking During Baking: Overfilling the indents or using too-soft jam causes this issue. Measure filling precisely and ensure jam is thick enough to hold its shape.
Bars Spreading Excessively: This indicates insufficient baking time during the first phase. Ensure the first seven-minute bake is complete before indenting.
Scaling Your Recipe
Doubling the recipe produces sixteen bars suitable for larger gatherings or extended enjoyment. All proportions scale linearly, though baking time may increase slightly when using larger baking pans. Monitor browning carefully and adjust timing as needed for your specific oven.
Serving Suggestions
These bars pair beautifully with beverages including coffee, tea, and milk. Their handheld format makes them ideal for afternoon gatherings, bake sales, or lunchbox inclusions. Serve at room temperature for optimal texture and flavor development.
References
- The Little Epicurean – Peanut Butter Thumbprint Cookies — Maryanne Cabrera. Accessed 2026-04-08. https://www.thelittleepicurean.com/peanut-butter-thumbprint-cookies/
- Official USDA Food Safety Guidelines for Homemade Baked Goods — United States Department of Agriculture. https://www.usda.gov/