Preparing beef brisket doesn’t require expensive equipment or advanced culinary training. With the right approach, home cooks can produce exceptionally tender and flavorful results using standard oven techniques. This guide walks you through everything needed to transform a tough cut of meat into a memorable centerpiece dish.
Understanding Your Ingredient: What Makes Brisket Unique
Beef brisket comes from the lower chest area of the cow, a heavily-exercised muscle group that naturally contains considerable connective tissue and fat. This anatomical reality means brisket benefits significantly from slow, moist cooking methods that break down collagen into gelatin, creating that desirable tender texture. The meat’s marbling—intramuscular fat distribution—contributes rich flavor when properly rendered during extended cooking.
The cut typically arrives at your butcher counter in two configurations. The flat cut features a leaner profile with a single fat cap, making it ideal for slicing into uniform portions. The point cut contains more marbling and irregular shape, suited for shredding or chunking. Many home cooks prefer the flat cut for its presentation qualities, though either works beautifully with the techniques described here.
Essential Preparation: Setting Yourself Up for Success
Trimming and Seasoning Foundations
Before cooking begins, proper preparation establishes your foundation for success. Remove brisket from refrigeration and pat thoroughly dry using paper towels—this moisture removal allows seasonings to adhere and encourages better browning if you choose that preparation step. Next, trim the fat cap to approximately one-quarter inch thickness. This thin layer protects the meat during cooking while allowing rendered fat to self-baste the surface, but excess fat prevents proper seasoning penetration and can result in a greasy final product.
Seasoning options range from minimalist to complex. A basic approach uses only salt and freshly ground black pepper applied generously to all surfaces. For enhanced flavor depth, create a spice rub combining salt, pepper, garlic powder, onion powder, and paprika. Some cooks add cayenne pepper or smoked paprika for subtle heat and smokehouse character. Regardless of your choice, apply seasonings at least 30 minutes before cooking, allowing them to permeate the meat’s surface. For optimal results, season 6 to 8 hours ahead, or even overnight, permitting deeper flavor integration.
Preparation Techniques to Consider
Dry brining through extended seasoning creates a flavorful crust and helps retain moisture during the long cooking process. Another optional step involves searing the brisket in a hot skillet with minimal oil before oven cooking. This Maillard reaction development creates complex caramelized flavors and an appealing browned exterior. However, this step adds preparation time and isn’t strictly necessary for achieving tender, flavorful results—many successful recipes skip this step entirely.
The Core Cooking Method: Temperature and Timing Strategies
Standard Oven-Roasting Approach
The most straightforward technique involves steady, low-temperature oven cooking. Preheat your oven to 325°F and arrange oven racks to accommodate your roasting pan with clearance above it. Place a roasting rack inside your pan and add liquid to the bottom—beef broth, chicken broth, vegetable broth, water, or even beer all work effectively. The liquid should reach approximately one-half inch depth, creating steam that keeps the brisket moist without submerging the meat directly in liquid.
Position your seasoned brisket fat-side up on the roasting rack, then cover the pan securely with aluminum foil or a fitted lid. This covering traps steam, creating an environment that gently breaks down connective tissue. Cook at 325°F for approximately one hour, then reduce the oven temperature to 275°F and continue cooking for three additional hours. Total cooking time averages four hours for a four-pound brisket, though individual oven variations and meat thickness may require adjustment.
Temperature-Based Cooking Strategy
An alternative approach uses meat temperature rather than strict time guidelines. Cook your brisket covered at 275°F until the thickest portion reaches an internal temperature of 140°F to 145°F. At this point, remove the foil or lid and continue cooking uncovered until the meat reaches 190°F to 200°F internally. This method provides greater precision, particularly for unusually thick or thin cuts. Use an instant-read meat thermometer inserted into the thickest section, away from fat deposits, for accurate readings.
Monitoring Liquid Levels
Throughout the cooking process, check liquid levels periodically—some ovens run particularly hot and may evaporate the cooking liquid faster than expected. If the pan appears dry, add additional broth to maintain that one-half inch depth. Insufficient liquid can result in uneven cooking and dried-out exterior edges, so this monitoring step proves essential for consistent results.
Alternative Cooking Methods: Exploring Your Options
Slow Cooker Preparation
For maximum convenience, slow cooker cooking produces exceptional results with minimal active involvement. Apply your seasoning rub to the brisket and allow it to rest for at least 30 minutes. Place the seasoned meat in your slow cooker along with one-half cup to one cup of beef broth, depending on your cooker’s size. Cook on the low setting for 8 to 10 hours until the meat reaches fork-tender consistency. Some cooks prefer slicing the brisket halfway through cooking and returning the slices to the liquid, which accelerates tenderness development in the second half of cooking and ensures more even texture throughout.
Pressure Cooker Alternative
Modern pressure cookers and instant pots dramatically reduce cooking time while maintaining quality results. A 2.5 to 3-pound brisket cooks completely in approximately one hour under high pressure. Season your meat and allow it to rest, then add it to the pressure cooker along with 6 cups of beef stock and one stick of butter. Seal the pressure valve and select high pressure cooking. Once the timer sounds, carefully release pressure according to your appliance’s instructions. This method works exceptionally well for busy weeknight dinners when traditional low-and-slow methods aren’t feasible.
Flavor Enhancement: Sauce and Accompaniment Ideas
Barbecue Sauce Integration
For barbecue-style preparation, coat your seasoned brisket with one cup of barbecue sauce before covering and baking. The sauce caramelizes during cooking, creating a flavorful glaze. In the final minutes before serving, brush additional sauce on the surface and briefly broil under high heat until the sauce develops a charred, caramelized crust. Watch carefully during this step, as sauce can burn quickly under direct broiler heat.
Pan Sauce Utilization
The flavorful liquid remaining in your roasting pan after cooking creates a natural gravy for serving. Skim excess fat from the surface if desired, though the rendered fat contributes authentic flavor. Drizzle this pan sauce over sliced brisket, or allow slices to soak in the sauce before plating. Some cooks reduce the pan liquid by simmering on the stovetop, concentrating flavors and creating a more substantial sauce consistency.
Serving Condiments and Sides
Traditional accompaniments complement brisket beautifully. Sharp mustard provides tangy contrast to rich meat flavors. Horseradish-sour cream sauce offers peppery heat with cooling dairy elements. Straight horseradish appeals to adventurous palates seeking significant flavor impact. Vegetable side dishes like roasted potatoes and carrots or steamed green vegetables balance the meal’s richness and add nutritional variety.
Professional Tips for Consistent Success
Slicing Technique Matters
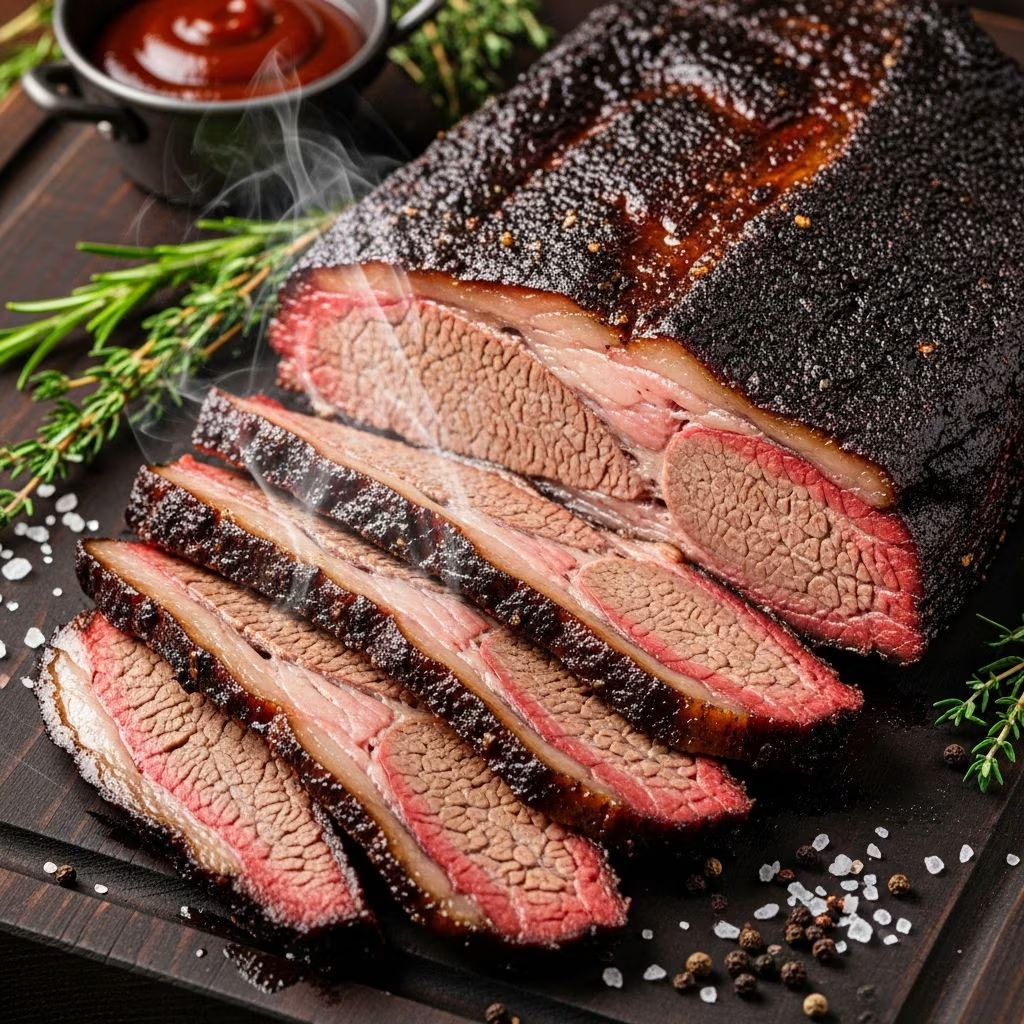
After cooking completes and the brisket has rested for 10 to 15 minutes, slicing technique significantly impacts the eating experience. Identify the direction of the muscle fibers running through the meat, then slice perpendicular to this grain direction. Thin slices—approximately one-eighth inch thickness—maximize tenderness perception and allow easier chewing. Thick slices, while impressive in presentation, can feel tough despite the meat’s actual tenderness.
Rest Period Importance
Allowing the cooked brisket to rest covered for 10 to 15 minutes before slicing permits meat juices to redistribute throughout the tissue rather than running onto your cutting board and plate. This seemingly minor step noticeably improves moistness and flavor in the final result.
Fat Management Strategies
After cooking and before slicing, trim any excess fat from the surface if desired. Some cooks prefer leaving a thin fat layer for additional richness and protection during storage and reheating. The choice reflects personal preferences and dietary considerations.
Frequently Asked Questions
Can I prepare brisket ahead of time?
Yes, brisket actually improves when prepared a day ahead. Cook completely, cool, then refrigerate covered. The flavors continue developing, and the texture firms slightly for easier slicing. Reheat gently in a 325°F oven, covered, until warmed through. Add the pan sauce back to the meat to prevent drying during reheating.
What if my brisket remains tough after cooking?
Toughness indicates insufficient cooking time. Return the meat to the oven, add additional liquid if needed, cover securely, and continue cooking at 275°F until fork-tender. Most briskets require between 3 to 5 hours total cooking time depending on thickness and starting temperature.
How should I store leftover brisket?
Cool completely, then transfer to an airtight container along with pan sauce. Refrigerate for up to four days, or freeze for up to three months. When freezing, ensure sufficient liquid surrounds the meat to protect it from freezer burn.
Can I cook brisket at higher temperatures for faster results?
Higher temperatures cook faster but risk uneven results, with exterior portions overcooked while interiors remain tough. The low-and-slow method allows connective tissue adequate time to break down uniformly throughout the meat.
Conclusion: Mastering This Rewarding Technique
Cooking beef brisket successfully requires patience, attention to detail, and understanding the science behind tender meat development. Whether you choose traditional oven roasting, convenient slow cooker preparation, or rapid pressure cooking methods, the fundamental principles remain constant: low heat, extended cooking time, and maintenance of adequate moisture create the tender, flavorful results that make brisket such a rewarding centerpiece for memorable meals. Start with these guidelines, then adjust based on your oven’s characteristics and personal preferences to develop your signature preparation method.
References
- Simple Oven Roasted Beef Brisket — Eat Simple Food. https://eatsimplefood.com/simple-oven-roasted-beef-brisket/
- Braised Beef Brisket Recipe with Potatoes & Carrots — Skinnytaste. https://www.skinnytaste.com/braised-brisket-with-potatoes-and/
- Beef Brisket Recipe — Dinner at the Zoo. https://www.dinneratthezoo.com/beef-brisket-recipe/
- Simple Oven Baked Brisket Recipe — Hostess At Heart. https://hostessatheart.com/oven-brisket-recipe/
- Easy Baked Beef Brisket Recipe — Ask Chef Dennis. https://www.askchefdennis.com/oven-roasted-brisket/