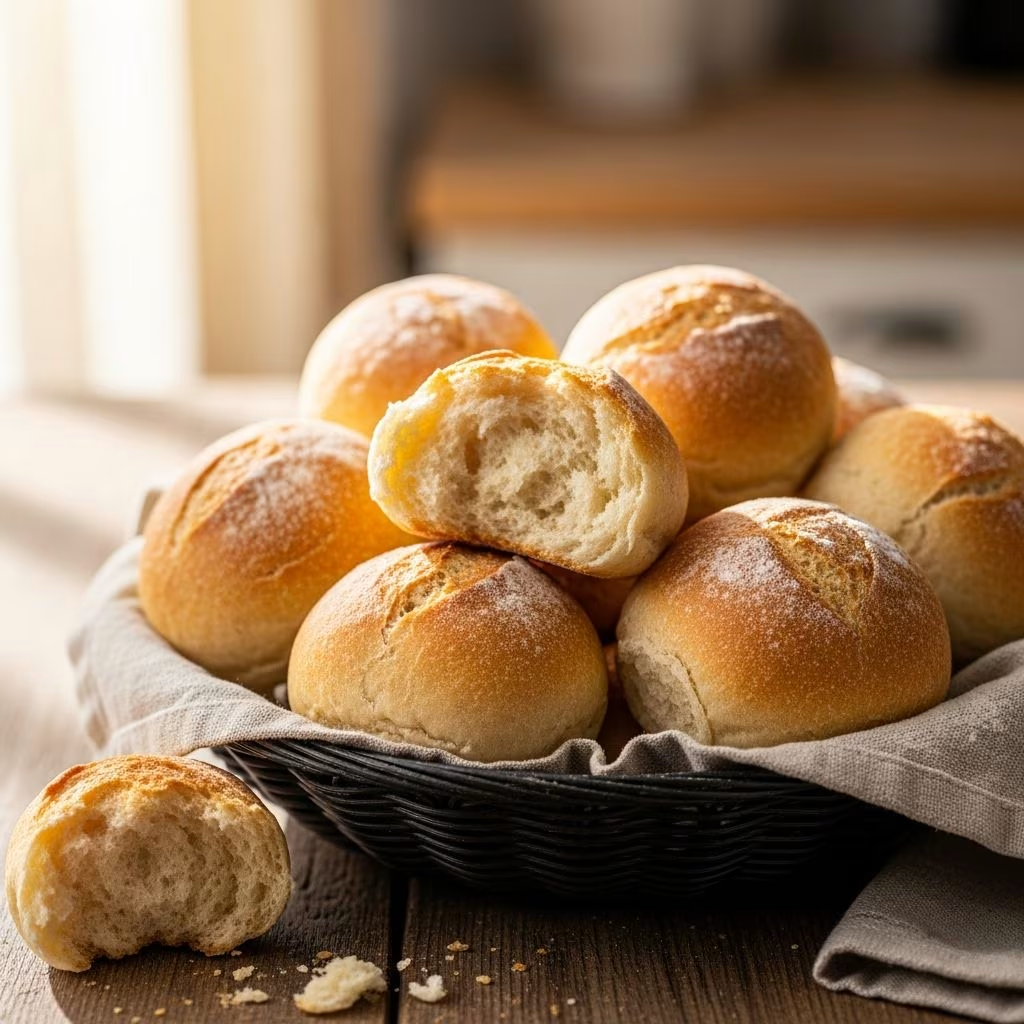
Creating fresh, warm dinner rolls at home doesn’t require advanced baking skills or hours of kneading and proofing. With a bread machine handling the heavy lifting, you can produce bakery-quality rolls that impress your family and guests. This comprehensive guide walks you through everything you need to know about making exceptional bread machine rolls, from ingredient selection to troubleshooting common issues.
Understanding the Bread Machine Advantage
A bread machine revolutionizes the roll-making process by automating the most time-consuming stages of dough preparation. The machine mixes, kneads, and performs the initial rise—all without requiring your intervention. This means you can have fresh rolls on your table with minimal active work time. The dough cycle feature is specifically designed for roll recipes, stopping before baking so you can shape and rise the rolls to your desired size.
The consistent temperature control within a bread machine environment creates ideal conditions for yeast activation and dough development. This uniformity produces reliable results, making it an excellent choice for both experienced bakers and newcomers to bread making.
Essential Ingredients for Perfect Rolls
Quality ingredients form the foundation of exceptional rolls. Understanding each component and its role ensures you achieve the best possible outcomes.
The Flour Foundation
Bread flour contains higher protein content than all-purpose flour, developing a stronger gluten network that creates light, airy rolls with superior texture. While all-purpose flour works in a pinch, substituting it may result in denser rolls. The protein structure in bread flour provides elasticity that traps air bubbles during fermentation, yielding that desirable fluffy interior.
Liquid Components
Whole milk adds richness and flavor depth to your rolls compared to water alone. Warm milk—between 110-120°F—activates the yeast while helping distribute other ingredients evenly. Some recipes call for milk at room temperature depending on your bread machine model’s specifications. Allow cold milk to warm naturally or submerge the container in warm water rather than microwaving, which can create hot spots that damage yeast.
Fat and Richness
Butter contributes essential flavor and creates a tender crumb structure. Most recipes use melted butter for the dough cycle and softened butter for greasing pans. The fat coats flour particles, preventing excessive gluten development and resulting in rolls that remain soft rather than chewy.
Sweetener and Salt
Sugar serves multiple purposes: it feeds the yeast, enhances browning during baking, and adds subtle sweetness. Salt strengthens gluten development and controls fermentation speed—use it consistently to avoid flat or overly-risen rolls. Never let salt contact yeast directly, as salt can inhibit yeast activity.
The Leavening Agent
Bread machine yeast (also called instant yeast) differs from active dry yeast in particle size, allowing faster hydration and fermentation. This type performs optimally in bread machines without requiring prior activation. If substituting active dry yeast, slightly increase the quantity and expect longer rising times.
The Binder
Eggs add structure, richness, and golden color to baked rolls. Bring eggs to room temperature before use—cold eggs don’t incorporate smoothly into the dough. If you forget, submerge the egg in warm water for 5-7 minutes to bring it to the proper temperature.
Ingredient Measurements and Proportions
| Ingredient | Standard Batch | Notes |
|---|---|---|
| Whole Milk | 1 to 1.25 cups | Warm, not hot |
| Bread Flour | 3 to 4 cups | Measure by spooning and leveling |
| Butter (melted) | ¼ to ½ cup | Cooled slightly before adding |
| Sugar | 2 to ½ cup | Feeds yeast and aids browning |
| Salt | 1 teaspoon | Keep away from yeast |
| Bread Machine Yeast | 2 to 3 teaspoons | Place near sugar, not salt |
| Eggs | 1 to 2 large | Room temperature |
Step-by-Step Preparation Process
Step 1: Assembling Ingredients in the Bread Machine
Ingredient order matters significantly in bread machine baking. The manufacturer’s recommendations should guide your process, as pan and heating element placements vary by model. Generally, start with liquids (milk and melted butter) on the bottom, followed by the egg. Add flour next, creating a small mound over the liquids. Place sugar and salt on opposite corners of the flour mound, keeping them separated. Finally, create a small indentation in the flour and place yeast inside, ensuring it doesn’t touch the salt or liquids directly.
This layering method prevents premature yeast activation while wet ingredients are absent, ensuring optimal fermentation once the cycle begins.
Step 2: Activating the Dough Cycle
Select the dough cycle on your bread machine—this is critical, as choosing the full bread cycle will bake your dough prematurely. The dough cycle typically runs 90-120 minutes, completing mixing, kneading, and a single rise. Press start and let the machine work without interruption. You may hear the machine pause momentarily during transitions between mixing and kneading phases—this is normal.
Some machines allow you to pause mid-cycle to add forgotten ingredients. If you realize you’ve omitted something during the first five minutes, pause the machine, add the ingredient, and resume. After the first ten minutes, it becomes difficult to incorporate additional ingredients evenly.
Step 3: Removing and Inspecting the Dough
When the dough cycle completes, remove the dough immediately and place it on a lightly floured work surface. The dough should feel soft, supple, and slightly tacky but not sticky. If it appears wet and sticky, you may need to add a tablespoon of flour; if it seems dry and stiff, a teaspoon of water helps achieve proper consistency. Gently deflate the dough using your fingertips—don’t knead it or work it excessively, as the gluten has already developed sufficiently.
Shaping Rolls to Perfection
Dividing the Dough
Most recipes yield 16 rolls from a standard batch. Divide the dough evenly for consistent baking. One effective method involves cutting the dough in half, then dividing each half into 8 pieces. Alternatively, divide the entire mass into quarters and further subdivide each quarter into four pieces. This approach ensures uniform sizing better than attempting to eyeball equal portions.
A bench scraper or dough cutter makes this process cleaner and faster than using a knife, which tends to compress the dough. Work gently to maintain the air bubbles already developed during the machine cycle.
Rolling Techniques
Round rolls require gentle handling. Take each piece and tuck the edges underneath, creating tension on the surface. Place seam-side down on your prepared pan. For crescent-shaped rolls, some bakers prefer dividing the dough into two halves, rolling each into a circle, cutting pie-shaped wedges, and rolling from the wide end toward the point. This technique creates an attractive spiral appearance and different texture than round rolls.
Pan Preparation
Use a 9×13-inch baking pan—the standard size for 16 rolls. Grease thoroughly with softened butter or cooking spray, or line with parchment paper for easy release. Arrange rolls in four rows of four, positioning them so they just touch. This spacing allows heat to penetrate evenly while the rolls rise and expand to meet their neighbors, creating soft sides.
The Critical Rising Period
After shaping, rolls must undergo a second rise—the most important phase for developing the light, fluffy texture that defines quality dinner rolls. Cover the pan with a kitchen towel or plastic wrap to prevent a crust from forming on the dough surface.
Temperature significantly affects rising time. At room temperature (68-72°F), expect 45 minutes to 2 hours of rising until the rolls nearly double in size. Warmer environments accelerate fermentation—placing the pan in an unheated oven with the light on creates an ideal environment at approximately 75-80°F, reducing rising time to about 60 minutes.
Check rolls by pressing gently with your finger—the dough should slowly spring back partially but retain a slight indentation. If it springs back completely, it needs more time; if it doesn’t spring back at all, you’ve reached the limit of fermentation.
Baking Your Rolls
Preheating the Oven
Preheat your oven to 350°F (175°C) approximately 15-20 minutes before placing rolls inside. Proper preheating ensures even browning and prevents dense, pale rolls. Use an oven thermometer to verify accuracy, as many ovens run hotter or cooler than their dial indicates.
Baking Duration
Bake rolls for 16-20 minutes, depending on your oven and roll size. Rolls are finished when the tops achieve a light golden-brown color. Insert a toothpick into the thickest roll—it should come out clean with no doughy residue, indicating the interior has cooked through.
The Finishing Touch
Brush hot rolls immediately after removing them from the oven with melted butter, creating a glossy finish and enhancing flavor. This step seals moisture inside while adding richness. Some bakers prefer brushing with a mixture of butter and herbs (such as garlic powder, parsley, or Italian seasoning) for savory variations.
Storage and Serving Suggestions
Allow rolls to cool slightly—approximately 10 minutes—before serving. They’re best enjoyed warm but not piping hot. For storage, place completely cooled rolls in an airtight container at room temperature for up to 3 days. Seal them quickly to maintain moisture.
Freeze baked rolls in freezer-safe containers for up to 3 months. Thaw at room temperature for several hours or warm gently in a 300°F oven for 10-15 minutes. You can also freeze shaped, unrisen dough balls for up to one month—thaw overnight in the refrigerator and allow them to rise before baking.
Troubleshooting Common Issues
Dense, Heavy Rolls
- Ensure you’re using bread flour, not all-purpose flour
- Verify your yeast is fresh (check the expiration date)
- Allow adequate rising time before baking
- Confirm oven temperature accuracy with a thermometer
Rolls That Won’t Rise
- Check that water or milk temperature was within the proper range (too hot kills yeast, too cold won’t activate it)
- Ensure salt didn’t contact the yeast directly
- Place pan in a warmer location, such as an oven with the light on
- Verify yeast hasn’t expired
Uneven Browning
- Rotate the baking pan halfway through baking
- Ensure oven racks are positioned in the middle, not too high or low
- Check that rolls are shaped uniformly
- Lower oven temperature slightly if tops brown before interiors cook
Dry or Tough Texture
- Reduce baking time by 1-2 minutes
- Brush with butter immediately after baking to seal moisture
- Store in an airtight container to prevent drying
- Ensure proper milk-to-flour ratio hasn’t been altered
Variations and Flavor Enhancements
Honey Rolls: Replace ¼ cup of sugar with ¼ cup honey for subtle sweetness and improved browning.
Herb-Flavored Rolls: Add 1-2 teaspoons of dried herbs (Italian seasoning, garlic powder, or rosemary) to the flour before starting the machine cycle.
Whole Wheat Variation: Substitute up to ½ cup of bread flour with whole wheat flour, though this creates denser rolls.
Cheese Rolls: Knead ½ cup shredded cheddar or parmesan cheese into the dough after the machine cycle completes, just before final shaping.
Why Bread Machine Rolls Succeed
The combination of automated mixing, consistent temperature control, and straightforward techniques makes bread machine rolls an achievable goal for any home baker. Unlike traditional bread-making requiring multiple hand-knead sessions and precise timing, this method removes technical barriers while maintaining professional-quality results. The versatility allows seasonal variations and dietary adjustments, ensuring rolls work for any meal or occasion.
Frequently Asked Questions
Can I make this recipe without a bread machine?
Yes. Mix ingredients by hand, knead for 8-10 minutes, and allow a single rise (approximately 60-90 minutes) before shaping. The dough will require more effort but produces similar results.
Why shouldn’t I use the full bread cycle?
The full bread cycle includes baking, which would cook your dough before you’ve shaped and risen the rolls. The dough cycle stops after the first rise, allowing manual shaping and a second rise for proper texture development.
How do I know when rolls have risen enough?
Rolls should nearly double in size. Press gently—the dough should slowly spring back but retain a slight indentation. Avoid over-rising, which causes flat, dense rolls.
Can I use active dry yeast instead of bread machine yeast?
Yes, though results may vary. Use the same quantity or slightly increase it, and expect longer fermentation times. Instant yeast’s smaller particles allow faster hydration in bread machines.
How far in advance can I prepare rolls?
You can prepare dough through shaping and freezing for up to one month. Thaw overnight and allow the final rise before baking. Baked rolls keep for 3 days at room temperature in an airtight container.
References
- Bread Machine Dinner Rolls Recipe — Southern Kissed. 2024. https://www.southernkissed.com/bread-machine-dinner-rolls-recipe/
- Dinner Rolls For Breadmaker — Hamilton Beach. 2024. https://hamiltonbeach.com/dinner-rolls-for-breadmaker
- Perfect Bread Machine Dinner Rolls — Happy Healthy Mama. 2024. https://happyhealthymama.com/perfect-bread-machine-dinner-rolls.html
- Fluffy Bread Machine Rolls — Brooklyn Farm Girl. 2024. https://brooklynfarmgirl.com/fluffy-bread-machine-rolls/
- Homemade Yeast Rolls (with Bread Machine or Stand Mixer) — The Fresh Cooky. 2024. https://www.thefreshcooky.com/easy-yeast-rolls/
- How to Make Soft & Fluffy Honey Yeast Rolls in a Bread Machine — Robyn On The Farm. YouTube. 2024. https://www.youtube.com/watch?v=MAbztSi_xH8