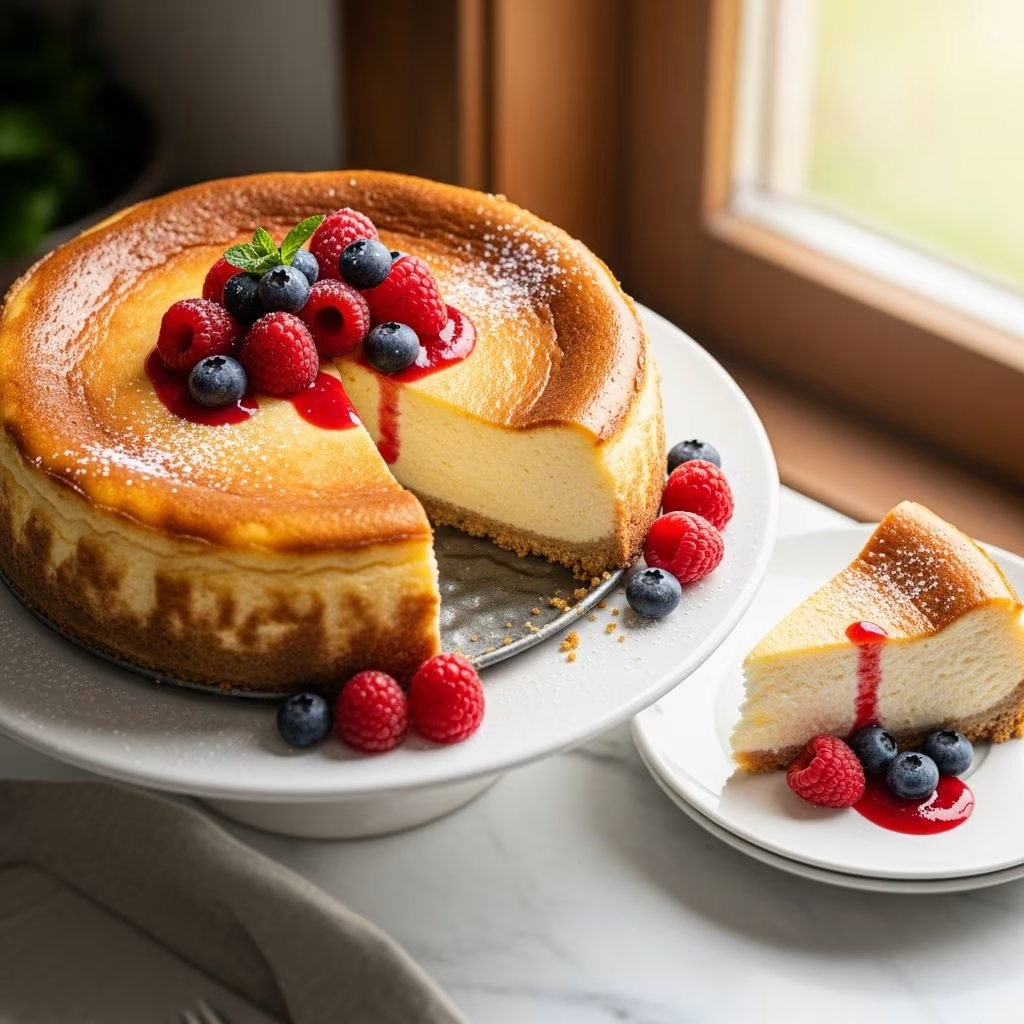
Authentic New York-style cheesecake stands out for its dense yet velvety texture, subtle tanginess, and buttery graham cracker base. This dessert, iconic in American baking, combines simple ingredients with precise techniques to yield a showstopping treat suitable for any occasion.
Why New York Cheesecake Captivates Bakers
New York cheesecake differs from lighter varieties through its use of full-fat cream cheese in generous quantities, creating a rich mouthfeel. The addition of elements like lemon and sour cream introduces a balancing brightness that prevents cloying sweetness. Bakers prize it for its versatility—serve plain, with fruit compotes, or chocolate drizzles—while its reputation for cracking intimidates novices. Mastering it builds confidence in handling delicate custards.
Essential Ingredients for Success
Selecting premium components ensures optimal flavor and structure. Focus on room-temperature dairy to achieve smoothness without overmixing.
- Full-fat cream cheese: Typically 24-32 ounces (3-4 blocks), provides the signature density.
- Granulated sugar: 1-1.5 cups sweetens without graininess when beaten properly.
- Eggs: 3-6 whole eggs plus yolks for custardy richness and lift.
- Sour cream or heavy cream: Adds tang and creaminess, often 0.5-1 cup.
- Flavor enhancers: Vanilla extract (1-4 tsp), lemon zest/juice (1-2 tsp), and a pinch of salt.
- Cornstarch or flour: 1-3 tbsp stabilizes the batter against cracks.
For the crust: Graham cracker crumbs (2 cups), melted butter (0.5 cup), sugar (1/3 cup), and cinnamon or salt for depth.
Building the Perfect Graham Cracker Crust
The crust anchors the cheesecake, offering crunch against the soft filling. Pulse graham crackers into fine crumbs, avoiding overprocessing to prevent a pasty texture.
- Mix 2 cups crumbs, 1/3 cup sugar, 1/2 tsp cinnamon, pinch of salt, and 1/2 cup melted unsalted butter until it resembles wet sand.
- Press firmly into a 9-inch springform pan’s bottom and 1-inch up the sides using a measuring cup’s flat base for evenness.
- Bake at 350°F (175°C) for 8-10 minutes until golden. Cool completely to set.
This pre-bake step enhances crispness and prevents sogginess from the filling.
Crafting the Silky Cheesecake Filling
The filling demands patience: gradual incorporation preserves air pockets for even rising.
| Step | Ingredients Added | Technique | Purpose |
|---|---|---|---|
| 1. Cream cheese base | 24-32 oz cream cheese + sugar | Beat on medium 1-2 min, scrape bowl | Achieve lump-free smoothness |
| 2. Dry stabilizers | Cornstarch/flour (1-3 tbsp) | Mix until just combined | Prevent cracks by binding proteins |
| 3. Flavorings | Vanilla, lemon zest/juice, salt | Low speed to incorporate | Balance richness with brightness |
| 4. Eggs & dairy | Eggs one-by-one, sour cream | Lowest speed, no overmixing | Build structure without excess air |
Pour into cooled crust, smoothing the top with an offset spatula. Tap the pan gently to release bubbles.
Baking Methods: Water Bath vs. No-Bath
Even baking is crucial to avoid a dry exterior or sunken center. Two approaches dominate.
Water Bath Technique
Wrap the springform pan in heavy-duty foil (triple-layered) to prevent leaks. Place in a larger roasting pan with 1-2 inches of boiling water. Bake at 325°F (160°C) for 60-90 minutes until edges set but center jiggles slightly.
- Pros: Superior moisture retention, crack prevention.
- Cons: Risk of water seepage; requires foil prep.
No Water Bath Approach
Some recipes rely on lower temperatures (225-250°F) and longer bakes, or sour cream topping for humidity. Turn off oven post-bake, cracking the door for gradual cooling.
- Pros: Simpler setup.
- Cons: Higher crack risk without practice.
Monitor with an oven thermometer—true temperatures vary by model.
Cooling and Chilling Strategies
Rapid temperature shifts cause cracks. After baking:
- Run a knife around edges to release from pan.
- Cool at room temp 1 hour, then refrigerate 6-24 hours uncovered initially to firm up.
- Chill fully before unmolding for clean slices.
A sour cream topping—mix 1 cup sour cream, 1/4 cup sugar, 1 tsp vanilla—bakes on for 10 minutes at 450°F adds a tangy crown.
Common Pitfalls and Fixes
Avoid these errors for pro-level results:
- Cracks: Overmixing incorporates air; fix with cornstarch and gentle folding. Uneven baking from skipped water bath.
- Lumps: Cold cream cheese; soften fully and scrape bowl often.
- Soggy crust: Insufficient butter or unbaked crust; press tightly and pre-bake longer.
- Overflow: Overbeating eggs; add slowly on low speed.
Test doneness: 2-3 inch center should wobble like Jell-O; overbaked yields dry texture.
Creative Toppings and Variations
Elevate plain cheesecake:
- Berry compote: Simmer strawberries, sugar, lemon—spoon over slices.
- Chocolate ganache: Pour warm mix for glossy finish.
- Nutty crunch: Toasted pecans with caramel.
- Swirls: Ribbon raspberry puree into batter pre-bake.
For gluten-free: Substitute GF graham crumbs. Reduced-fat versions sacrifice density—stick to full-fat for authenticity.
Storage and Freezing Tips
Cheesecake lasts 5 days refrigerated, tightly wrapped. Freeze whole or sliced up to 2 months: cool fully, wrap in plastic then foil. Thaw overnight in fridge for best texture.
Nutrition Snapshot
Per slice (12 servings): ~450 calories, 35g fat, 25g carbs, 8g protein. Rich indulgence—portion mindfully.
Frequently Asked Questions
Can I use low-fat cream cheese?
No— it results in watery texture and poor rise. Full-fat is essential.
Why use a springform pan?
Allows easy release without inverting, preserving height.
How do I prevent foil leaks in water bath?
Use 18-inch heavy-duty foil; fold edges up and test submersion first.
Is cornstarch necessary?
Yes, it stabilizes proteins for crack-free results without altering taste.
Can I bake ahead?
Ideal—flavor deepens after 24 hours chill.
Mastering Slicing Technique
For clean cuts: Use unwaxed dental floss or hot knife dipped in hot water, wiped dry between slices. Chill fully first.
With these steps, your New York cheesecake will rival bakery versions—dense, creamy, and unforgettable.
References
- Rich & Creamy New York Cheesecake WITH VIDEO — Butternut Bakery Blog. 2023. https://butternutbakeryblog.com/new-york-style-cheesecake/
- Classic New York Cheesecake Recipe (Video) — Once Upon a Chef. 2023. https://www.onceuponachef.com/recipes/new-york-style-cheesecake.html
- The Best New York-Style Cheesecake — Baker by Nature. 2023. https://bakerbynature.com/the-best-new-york-style-cheesecake/
- new york cheesecake (rich & creamy!) — Blue Bowl Recipes. 2023. https://bluebowlrecipes.com/perfect-classic-cheesecake-recipe-new-york-style/
- New York Cheesecake — Sugar Spun Run. 2023. https://sugarspunrun.com/new-york-cheesecake-recipe/