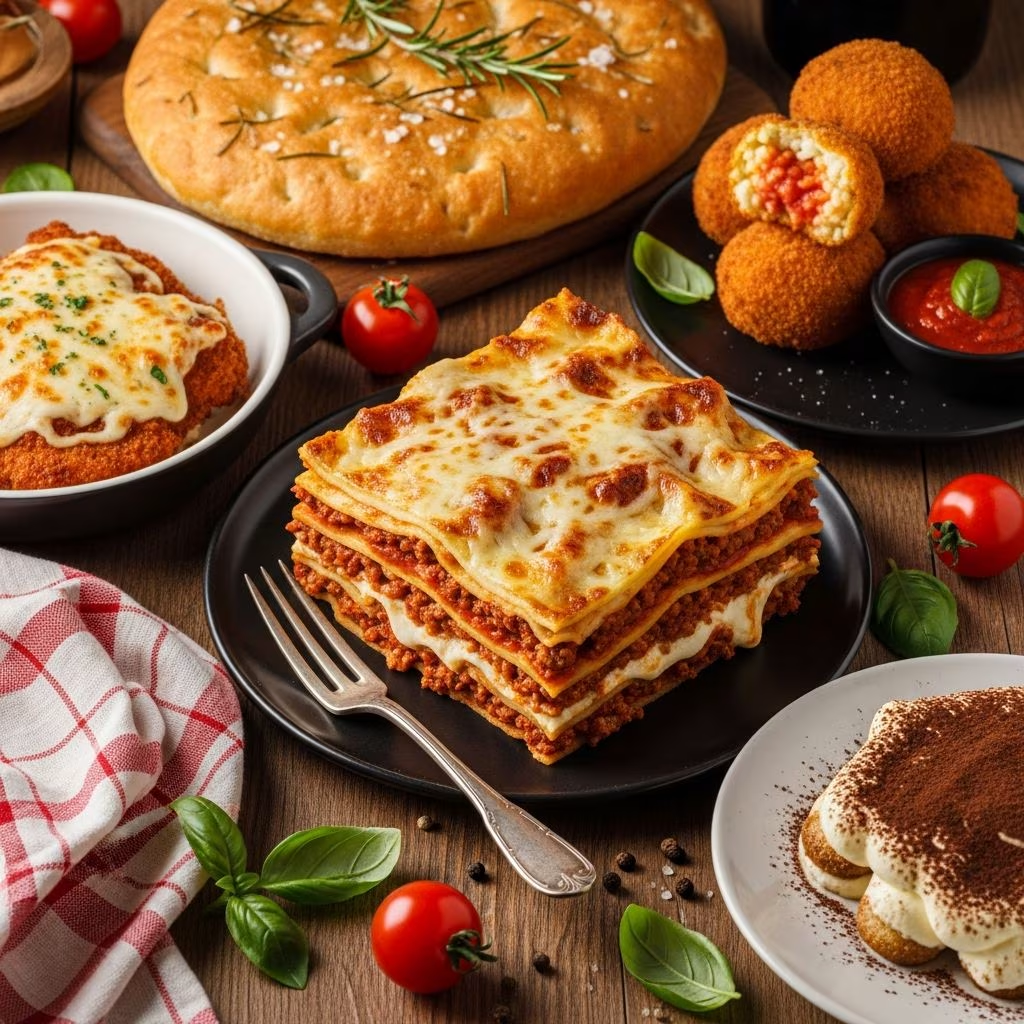
Few dishes evoke the warmth and satisfaction of home-cooked Italian cuisine quite like a towering, deeply gratifying baked pasta casserole. This classic comfort food has graced family tables for generations, bringing together simple ingredients in a harmonious blend of flavors and textures. Understanding the fundamentals of construction and preparation transforms this seemingly complex dish into an achievable masterpiece that impresses family and guests alike.
Understanding the Foundation: Essential Ingredients and Their Roles
Creating an exceptional baked pasta dish begins with understanding each ingredient’s contribution to the final product. The foundation rests upon quality components that work synergistically to produce depth, richness, and satisfying flavor complexity.
Selecting Your Protein Components
The meat selection significantly influences the dish’s character and taste profile. Ground beef provides a lean foundation with straightforward umami notes, while Italian sausage contributes bolder, more herbaceous flavors with subtle fennel undertones. Many traditional preparations combine both proteins, allowing each to complement the other’s strengths. When selecting ground meats, choose products with moderate fat content—typically 15-20% for beef and natural fat distribution for sausage—ensuring the final dish achieves optimal moisture and flavor retention during extended cooking.
The Tomato Base and Sauce Development
The tomato sauce represents the structural backbone of layered pasta preparations. Using both crushed tomatoes and tomato paste creates dimensional flavor development. Crushed tomatoes provide texture and natural acidity, while concentrated paste intensifies tomato character without excessive liquid. Many recipes benefit from combining canned diced tomatoes with paste components, allowing different textural elements to contribute throughout cooking. Fresh herbs like basil and oregano—whether dried or incorporated toward cooking’s conclusion—add aromatic complexity that distinguishes homemade preparations from commercial alternatives.
Cheese Components and Their Contributions
Three primary cheese types work together in traditional layered preparations:
- Ricotta cheese creates the creamy middle layers, providing cool richness and mild flavor that doesn’t overpower other components
- Mozzarella cheese serves as the primary melting agent, creating those desirable strings of molten cheese that define the eating experience
- Parmesan cheese adds sharp, crystalline texture and aged complexity that brightens the overall flavor profile
Using freshly grated cheeses rather than pre-shredded varieties ensures optimal melting and prevents separation during cooking.
Mastering the Sauce Preparation Process
Creating an exceptional sauce requires understanding the sequence of flavor development and extraction. This isn’t merely combining ingredients—it’s a methodical process of building complexity through controlled heat and timing.
The Browning Process
Begin by heating your skillet over medium-high heat, adding ground meats gradually to allow proper browning rather than steaming. Breaking meat into small, uniform pieces ensures even cooking and prevents large clumps that create uneven texture. As the meat releases its juices and begins caramelizing, the rendered fat becomes the foundation for flavor development. This browning stage typically requires 8-12 minutes of attentive cooking, with occasional stirring to ensure even heat distribution.
Building Aromatic Layers
Once meat achieves proper browning, drain excess fat carefully, reserving approximately one tablespoon per pound of meat for flavor retention. Finely diced onions should be added to the remaining fat, allowing them to soften and release their sugars through gentle heat exposure—a process that requires approximately 5 minutes of patient cooking. This aromatic foundation creates the flavor backbone for everything that follows.
Creating Depth Through Reduction
After incorporating tomato products and seasonings, the sauce enters an extended simmering phase. Cooking uncovered for 30-45 minutes allows excess moisture to evaporate while flavors concentrate and marry. This reduction process transforms separate ingredients into a cohesive, rich sauce that clings perfectly to pasta layers. Adding sugar or maple syrup in small amounts—typically one to two tablespoons—helps balance tomato acidity, creating rounder flavor profiles that feel more refined and complete.
Preparing the Creamy Cheese Filling
The ricotta mixture requires minimal preparation but deserves careful attention to achieve proper consistency and flavor balance.
Essential Components of the Filling
Combine room-temperature ricotta cheese with lightly beaten eggs, which serve as a binding agent ensuring the filling sets properly during baking rather than remaining separated or overly liquid. Freshly grated Parmesan cheese adds sharpness and helps the filling maintain structure through multiple layers. Fresh basil, when available, provides aromatic brightness, though dried basil works adequately in off-season preparations. Kosher salt enhances cheese flavors while pepper adds subtle heat without dominating the profile.
Achieving Optimal Texture
Mix all filling components thoroughly but gently, ensuring even distribution without overworking the mixture, which can create an undesirable dense texture. The completed filling should achieve a spreadable consistency that maintains its form when spooned onto pasta layers but yields easily to a knife during serving.
Noodle Selection and Preparation Considerations
Pasta noodles form the structural framework supporting all other components. Selection between traditional boiled noodles and no-boil varieties depends on your preferred texture and technique.
Traditional Boiled Noodles
Cooking lasagna noodles in abundantly salted boiling water until they reach al dente consistency—typically 8-10 minutes depending on thickness—ensures they’ll retain sufficient firmness through the baking process. Overcooking results in mushiness when combined with sauce moisture, while undercooking produces unpleasantly rigid textures. Immediately after draining, lay noodles on clean kitchen towels to prevent sticking, which makes assembly considerably easier.
No-Boil Alternative
Pre-manufactured no-boil noodles absorb moisture during the baking process, expanding to achieve proper tenderness. This option reduces preparation time significantly but requires ensuring adequate sauce moisture throughout the assembled dish to prevent overly firm noodles. Many experienced cooks prefer traditional boiled noodles for more predictable results, though no-boil varieties work admirably when moisture levels are carefully managed.
The Assembly Process: Creating Balanced Layers
Strategic layering creates texture variation and ensures every forkful contains proportional amounts of each component.
Establishing Your Foundation
Coat the bottom of your baking vessel—typically a 9×13-inch rectangular dish or equivalent deep casserole—with approximately 1.5 cups of meat sauce. This base layer prevents sticking while establishing flavor from the dish’s lowest point. Arrange noodles in a single layer, overlapping slightly to ensure complete coverage without excessive overlap that creates thick, doughy sections.
Building Successive Layers
Distribute approximately one-third of the ricotta mixture over the noodle layer, spreading evenly with the back of a spoon. Rather than forcing the mixture, allow it to settle naturally into gaps between noodles. Distribute mozzarella cheese over the ricotta layer—approximately 1.5 cups for traditional recipes—followed by additional meat sauce. Repeat this sequence twice more, reserving your final noodle layer for the topmost position.
The Finishing Layer
Top your final noodle layer with remaining meat sauce, ensuring all exposed noodles become saturated with liquid to prevent drying during baking. Distribute remaining mozzarella across the surface, then crown with freshly grated Parmesan cheese, which will brown beautifully during cooking and create an appetizing, crispy-edged top.
Baking Techniques and Temperature Control
Proper baking transforms separate ingredients into an integrated, cohesive dish while achieving the perfect balance between melted cheese and tender noodles.
Preheat and Initial Setup
Establish your oven at 350°F approximately 15 minutes before baking, allowing even heat distribution throughout the baking chamber. This moderate temperature permits thorough heating of the dish’s center without burning the top layer. Some recipes employ 375°F for slightly faster baking; experimentation determines your preference based on your specific oven’s characteristics.
Baking Duration and Indicators
Bake uncovered for 35-45 minutes, depending on dish depth and oven characteristics. The completed dish should display: a bubbly meat sauce visible at the pan’s edges, a golden-brown cheese top with slight browning at the corners, and full heat penetration to the center—verify by inserting a knife that should feel hot to the touch when removed. If browning occurs too quickly while the center remains cool, cover loosely with foil for the remaining cooking time.
Resting After Cooking
Allow the baked dish to rest for 10-15 minutes after removal from heat. This seemingly simple step permits the cheese to set slightly, sauce to stabilize, and noodles to finish absorbing residual moisture, resulting in cleaner slices and superior texture compared to cutting immediately.
Frequently Asked Questions
Can I prepare this dish in advance?
Absolutely. Assemble completely, cover with plastic wrap, and refrigerate up to 24 hours before baking. Add 10-15 minutes to the baking time when baking directly from refrigerated state. Alternatively, bake completely, cool, refrigerate, and reheat covered at 325°F until warmed throughout.
How do I prevent a watery final dish?
Ensure your meat sauce simmers sufficiently to reduce excess liquid. Use full-fat ricotta rather than low-fat varieties, which contain more water. Don’t add extra sauce beyond recipe amounts, and bake uncovered so surface moisture can evaporate.
Can I freeze this dish?
Yes. Assemble and freeze uncooked in a freezer-safe dish up to three months. Thaw in the refrigerator overnight, then bake at 350°F for 50-60 minutes. Alternatively, bake completely, cool, and freeze the finished dish up to three months.
What vegetable additions work well?
Finely chopped mushrooms, diced bell peppers, and minced spinach all integrate beautifully. Add mushrooms during the initial cooking phase to allow their moisture to evaporate. Incorporate pre-cooked vegetables to prevent excess liquid accumulation.
How many servings does this yield?
A standard 9×13-inch dish typically yields eight substantial servings or twelve smaller portions, depending on your preferred portion size.
Storage and Make-Ahead Strategies
Planning ahead transforms this dish from day-of-cooking endeavor into a manageable preparation. The meat sauce can be prepared 2-3 days in advance and refrigerated in an airtight container, allowing flavors to deepen through storage. The cheese filling mixture stores refrigerated up to 24 hours, allowing you to prepare components on separate days, significantly reducing cooking day stress. Cooked noodles can be separated by parchment squares, sealed in freezer bags, and frozen up to one month, ready for quick assembly when needed.
Customization Options for Dietary Preferences
Modern preparations accommodate various dietary requirements without sacrificing satisfaction. Vegetarian versions substitute crumbled firm tofu mixed with nutritional yeast and lemon juice for meat layers, creating a protein-rich alternative with comparable texture. Gluten-free lasagna noodles maintain structural integrity when sauce moisture remains appropriate. Dairy-free adaptations use cashew-based ricotta substitutes and nutritional yeast-fortified plant-based mozzarella alternatives, though results vary by brand quality.
Mastering the Art Through Practice
Creating exceptional baked pasta dishes improves considerably with repeated preparation. Each attempt teaches you about your specific oven’s characteristics, your preferred texture preferences, and the timing adjustments that produce optimal results. Noting variations—slightly increased cooking time, sauce adjustments, or layering modifications—creates a personalized technique that becomes second nature through practice.
References
- How to Make Deep Dish Lasagna | Pasta Recipes — Allrecipes.com. Video tutorial. https://www.allrecipes.com/recipe/23710/deep-dish-lasagna/
- Deep Dish Meat Lasagna — The Fancy Pants Kitchen. Recipe guide with detailed instructions. https://thefancypantskitchen.com/recipe/deep-dish-meat-lasagna/
- Deep Dish Lasagna — Dina’s Diner. Traditional preparation methods. https://dinasdiner.com/deep-dish-lasagna/
- The Best Homemade Lasagna Recipe — TidyMom. Comprehensive cooking techniques. https://tidymom.net/best-homemade-lasagna/
- Grandma’s Sunday Lasagna — Le Creuset. Traditional baking guidance. https://www.lecreuset.com/grandma’s-sunday-lasagna/LCR-2506.html