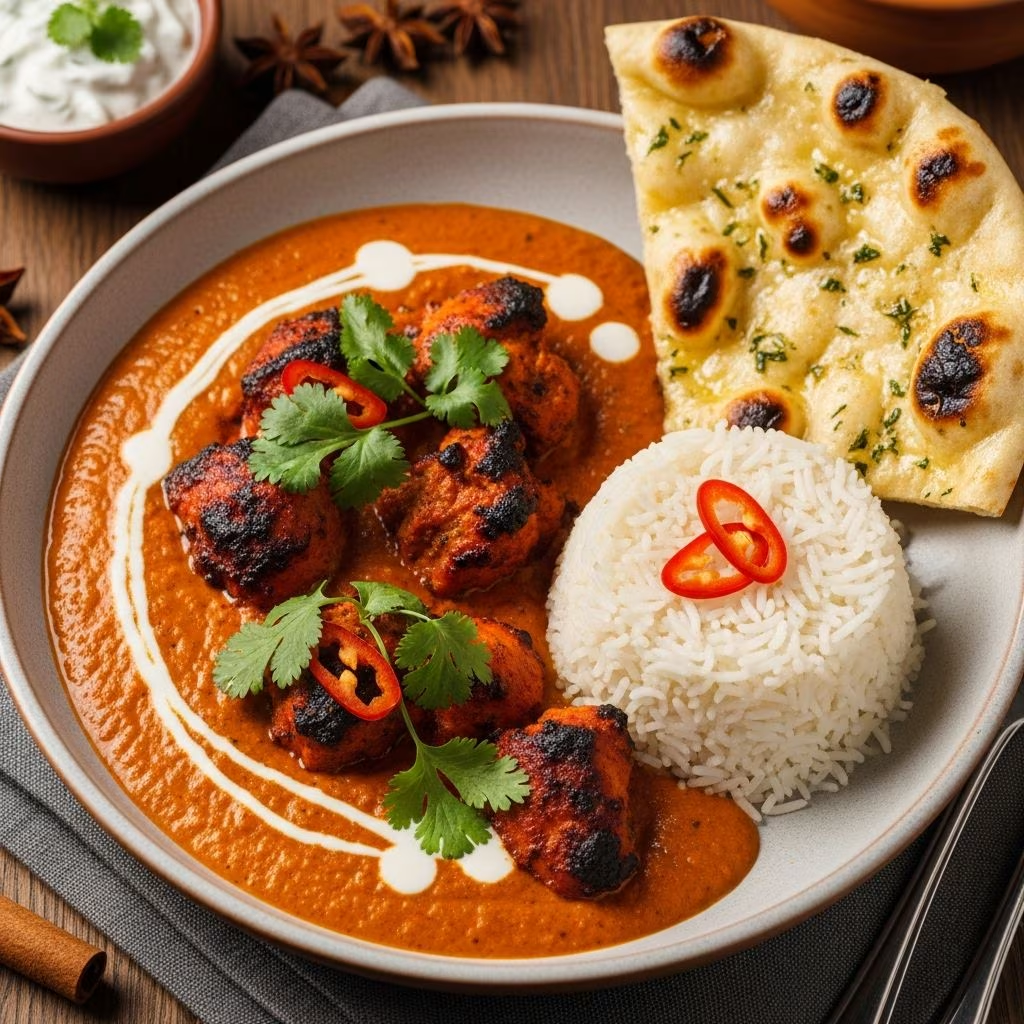
Chicken tikka masala represents one of the most beloved dishes in contemporary Indian cuisine, valued for its harmonious balance of aromatic spices, tender protein, and creamy sauce. This British-Indian hybrid has transcended geographical boundaries to become a global favorite, appearing on restaurant menus from London to New York. Understanding the fundamentals of this dish allows home cooks to recreate the complex flavors typically found only in specialized restaurants.
Understanding the Dish’s Foundation
The essence of chicken tikka masala lies in its two-stage cooking process: first, the protein is seasoned and seared to develop a flavorful crust, then it’s incorporated into a rich, aromatic sauce. This method ensures the chicken remains moist while absorbing the sauce’s complex flavors. The dish achieves its signature taste through the strategic combination of warm spices like garam masala, cumin, and turmeric, tempered by the coolness of coconut milk and enriched by tomato-based components.
Selecting Quality Ingredients
The foundation of exceptional chicken tikka masala begins with ingredient selection. Chicken thighs are preferred over breast meat because they contain more fat and connective tissue, which translates to superior moisture retention and tenderness during the cooking process. When purchasing poultry, choose pieces that are uniform in size to ensure even cooking throughout.
For the spice blend, sourcing individual spices rather than pre-mixed curry powders allows for greater control over the final flavor profile. Garam masala, ground cumin, and ground coriander form the aromatic backbone, while smoked paprika and cayenne pepper contribute depth and heat respectively. Ground cardamom and black pepper add complexity and subtle sweetness to the overall composition.
The liquid components deserve equal attention. Full-fat coconut milk creates the characteristic creamy texture, while crushed tomatoes or tomato paste provide acidity and umami depth. Clarified butter, known as ghee, becomes the cooking fat of choice due to its high smoke point and nutty flavor contribution.
Spice Blend Essentials
| Spice Component | Function in Dish | Typical Quantity (4 servings) |
|---|---|---|
| Garam Masala | Core aromatic blend providing warmth and complexity | 2 teaspoons |
| Ground Cumin | Earthy undertone with slightly nutty character | 2 teaspoons |
| Ground Coriander | Citrus notes and floral sweetness | 1 teaspoon |
| Turmeric | Golden color and subtle bitterness | 1 teaspoon |
| Smoked Paprika | Depth and smoky character | 1 teaspoon |
| Cayenne Pepper | Heat and pungency | ¼ teaspoon |
| Ground Cardamom | Sweet, floral notes | ⅛ teaspoon |
Preparation and Pre-cooking Steps
Proper preparation significantly influences the final outcome. Begin by combining all dry spices in a small bowl before applying them to the protein. This ensures even distribution and prevents any single spice from overwhelming the dish. Pat the chicken dry before adding the spice mixture, as moisture creates steam that prevents proper browning and crust formation.
Coat the chicken thoroughly with the spice blend and vegetable oil, ensuring every surface receives adequate seasoning. Allow the coated chicken to rest for several minutes before cooking, which allows the spices to adhere more effectively. Finely grate garlic and ginger rather than mincing them, as this technique releases more aromatic compounds and creates a more integrated flavor throughout the sauce.
The Searing Process
Searing the spiced chicken in clarified butter serves multiple purposes: it develops a flavorful brown crust through the Maillard reaction, seals in juices, and builds the fond—caramelized bits that dissolve into the sauce and intensify its flavor. Heat the clarified butter until it shimmers, then carefully add the chicken pieces. Allow them to cook undisturbed for 5-7 minutes before flipping, promoting even browning on both sides. The total browning time typically ranges from 10-15 minutes for uniform pieces.
Resist the temptation to crowd the pan, as this reduces temperature and creates steam rather than the desired caramelization. If necessary, work in batches to maintain adequate spacing between pieces. Once the chicken achieves a golden-brown exterior, transfer it to a clean bowl, allowing it to rest and cool slightly before cutting into manageable pieces.
Building the Sauce Foundation
The same pan used for searing becomes the vessel for sauce development. Leave the flavorful fond undisturbed and reduce the heat to medium. Add chopped onions to the hot pan, where they’ll soften and gradually turn translucent over 5-6 minutes. This gentle cooking process caramelizes the natural sugars and allows the onions to absorb the remaining spice residue.
Next, introduce tomato paste, stirring it into the softened onions. This ingredient requires special attention: cook it for approximately 5-6 minutes, allowing it to caramelize and deepen in color. This step concentrates the tomato flavor and removes excess moisture, preventing the final sauce from becoming watery. The tomato paste will initially stick slightly to the pan bottom, which is the desired outcome.
Incorporating Aromatics and Liquid Components
Once the tomato paste has caramelized, add the finely grated garlic and ginger, stirring continuously for 1-2 minutes to prevent scorching. These aromatic elements release their volatile compounds when heated, infusing the sauce with depth and complexity. Follow immediately with crushed tomatoes, stirring thoroughly to combine all components into a cohesive mixture.
Pour in the full-fat coconut milk and chicken broth, using the broth to adjust the sauce consistency according to personal preference. Some cooks prefer a thicker, more clinging sauce, while others favor a lighter consistency. Start with ½ cup broth and add more gradually as needed. The mixture should be brought to a gentle simmer over medium-low heat, where it will cook undisturbed for approximately 15 minutes.
Flavor Development and Finishing Touches
During the simmering period, the individual flavors meld and mature, creating a more harmonious and complex taste profile. After 15 minutes, return the cooked chicken pieces to the sauce along with any accumulated juices. These juices contain concentrated chicken flavor and should never be discarded. Add crushed red pepper flakes for additional heat and freshly chopped cilantro for brightness and herbaceous notes.
Allow the combined mixture to simmer for an additional 10-15 minutes on medium-low heat, which further tenderizes the chicken and allows it to absorb sauce flavors. Taste the dish before serving, adjusting salt and pepper as needed. The final texture should be tender enough to break with a spoon rather than requiring knife cutting.
Serving Suggestions and Accompaniments
Chicken tikka masala reaches its fullest potential when served with complementary starches that absorb the rich sauce. Steamed basmati rice provides a neutral foundation that allows the curry spices to remain prominent. Alternatively, naan bread—a traditional Indian flatbread—offers texture contrast and can be used to scoop the creamy sauce. Some preparations include both rice and bread, allowing diners to customize their consumption method.
Fresh garnishes applied immediately before serving enhance both visual presentation and flavor. A sprinkle of additional cilantro, a dollop of plain yogurt, or thinly sliced red onion each contribute distinct elements that elevate the dining experience. A squeeze of fresh lemon juice brightens the overall flavor profile without overwhelming the carefully balanced spice blend.
Common Technique Variations
While the fundamental approach remains consistent, numerous variations accommodate different preferences and available ingredients. Some cooks substitute heavy cream for a portion of the coconut milk, creating a lighter sauce while maintaining creaminess. Others incorporate fresh ginger paste instead of grating fresh ginger, which creates a more integrated texture. Vegetable oil can replace clarified butter for the initial searing, though ghee’s nutty flavor is difficult to replicate.
The spice quantities should be viewed as guidelines rather than absolute requirements. Individuals with heat sensitivity can reduce cayenne pepper and red pepper flakes, while spice enthusiasts might increase these components. Some regional interpretations include a small amount of kasuri methi (dried fenugreek leaves) added near the end of cooking, contributing an earthy undertone reminiscent of British curry house preparations.
Troubleshooting Common Issues
Sauce Too Thin: If the finished sauce lacks desired thickness, simmer uncovered for an additional 5-10 minutes to allow moisture to evaporate. Alternatively, create a slurry by whisking cornstarch with cold water and stir it into the simmering sauce.
Sauce Too Thick: Add chicken broth or warm water in small increments (¼ cup at a time) until the desired consistency is achieved. Remember that the sauce will thicken further as it cools.
Chicken Tough or Dry: This typically results from cooking at too high a temperature or for excessive duration. Ensure simmering occurs on medium-low heat, and cut the chicken into smaller pieces before adding it to the sauce to reduce cooking time.
Insufficient Flavor: Taste and adjust seasonings gradually. The dish may benefit from additional salt, a splash of lemon juice, or a pinch of additional spices stirred in just before serving.
Frequently Asked Questions
Can I prepare this dish in advance?
Yes, chicken tikka masala actually benefits from preparation several hours or even a day ahead. Allow it to cool completely before refrigerating in an airtight container for up to three days. The flavors continue developing during storage. Reheat gently on the stovetop over medium-low heat, adding a splash of water if the sauce has thickened considerably.
What can I substitute for coconut milk?
Heavy cream creates a richer, less coconut-forward sauce while maintaining creaminess. Cashew cream (blended soaked cashews and water) offers a neutral flavor profile. Greek yogurt added at the very end provides tang and creaminess, though it can curdle if heated too intensely.
Is this recipe suitable for dietary restrictions?
The base recipe is naturally gluten-free. For dairy-free versions, use coconut milk exclusively and ghee (which contains negligible dairy proteins) or vegetable oil. Vegan adaptations substitute tofu or chickpeas for chicken and maintain all other components.
How does this compare to restaurant versions?
The simplified home method eliminates time-consuming steps like yogurt marination while maintaining authentic flavor development. Restaurant versions often employ commercial spice blends and may include additional ingredients like cream or fenugreek, but the core technique remains fundamentally similar.
References
- Chef John’s Chicken Tikka Masala Recipe — Samsung Food. Accessed April 2026. https://app.samsungfood.com/recipes/101faad6a9825de27cd8235f70cfc0957f4a40eee77
- Chicken Tikka Masala – God Save the Curry — Food Wishes. October 2014. https://foodwishes.blogspot.com/2014/10/chicken-tikka-masala-god-save-curry.html
- How to make Chef John’s Chicken Tikka Masala Recipe — Slurrp. Accessed April 2026. https://www.slurrp.com/recipes/chef-johns-chicken-tikka-masala-1617376836