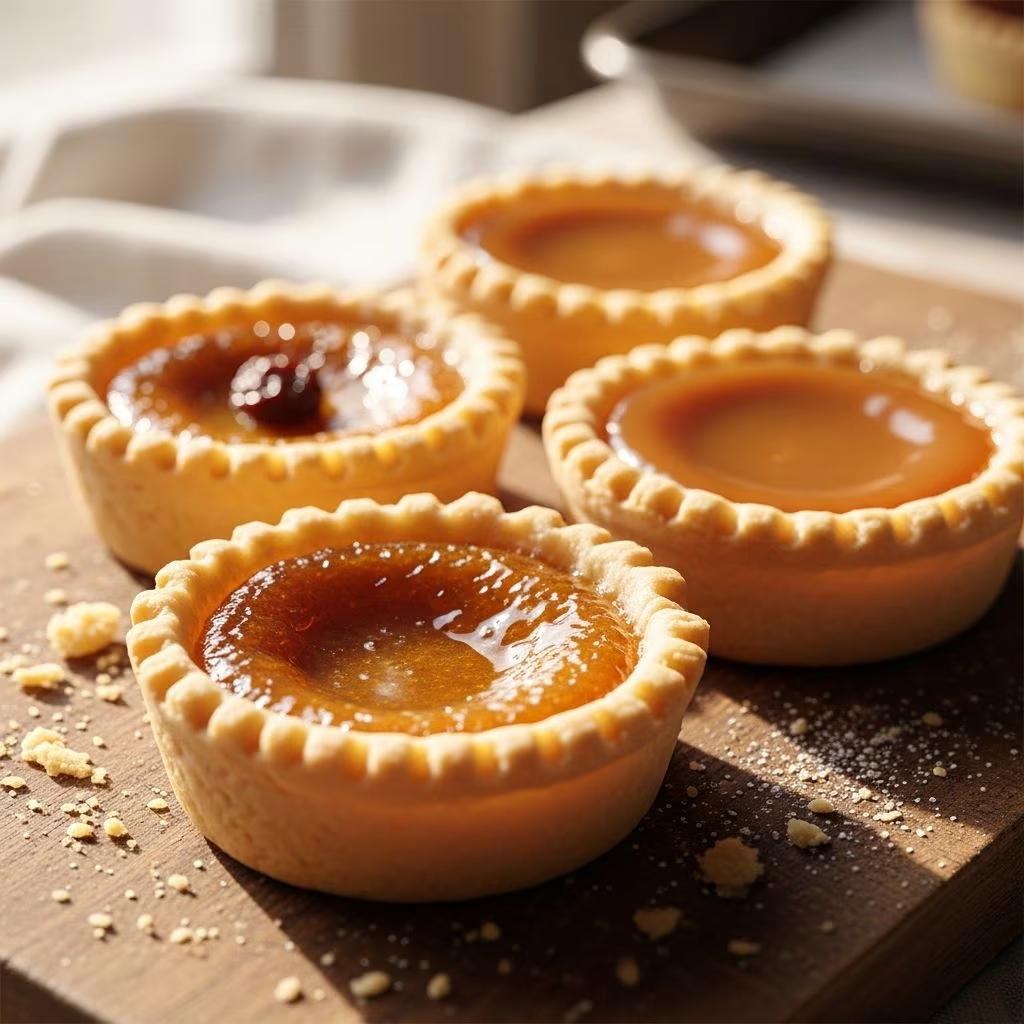
Butter tarts stand as a beloved staple in Canadian cuisine, cherished for their buttery pastry shells cradling a lusciously gooey filling made from brown sugar, syrup, and eggs. These petite desserts deliver a perfect harmony of flaky crust and caramel-like sweetness, evoking nostalgia with every bite. Originating from early settler recipes, they’ve evolved into a national treasure, often gracing holiday tables and bake sales across the country.
The Allure of Authentic Butter Tarts
What sets butter tarts apart is their signature texture: a crisp, tender crust that contrasts with a filling that’s either softly runny or pleasingly firm, depending on baking time and preference. Home bakers prize them for their simplicity—requiring basic pantry staples—yet they demand precision in technique to avoid common pitfalls like soggy bottoms or overflowed fillings. This guide draws from time-tested methods to ensure your batch rivals professional patisseries.
Essential Ingredients for Success
Gathering the right components is crucial for achieving that iconic flavor profile. For the pastry, opt for high-quality unsalted butter, chilled to maintain flakiness. All-purpose flour provides structure without toughness, while a touch of sugar enhances subtle sweetness.
Pastry Components
- 1¾ cups all-purpose flour (about 227g)
- ½ teaspoon salt
- 1 teaspoon granulated sugar
- ½ cup cold unsalted butter, cubed (112g)
- ⅓ cup ice-cold water (adjust as needed)
Filling Ingredients
- ½ cup brown sugar, lightly packed
- ½ cup golden corn syrup (or light corn syrup)
- ¼ cup unsalted butter, melted and cooled
- 1 large egg, lightly beaten
- 1 teaspoon vanilla extract
- 1 teaspoon white vinegar (or lemon juice for tang)
- Pinch of salt
- Optional add-ins: ½ cup raisins, chopped pecans, walnuts, or chocolate chips
These measurements yield 12 standard muffin-sized tarts. Scale up proportionally for larger batches, but maintain chilling times to preserve dough integrity.
Step-by-Step Pastry Preparation
Crafting the shell begins with cold ingredients to create steam pockets for flakiness. Avoid overworking the dough, which can lead to gluten development and toughness.
- Combine dry ingredients: In a large bowl, whisk flour, salt, and sugar.
- Incorporate butter: Add cold butter cubes. Use a pastry cutter or fingertips to rub until mixture resembles coarse crumbs with pea-sized butter pieces. This ensures tenderness.
- Add liquid: Sprinkle in 2-3 tablespoons ice water. Gently mix with a fork until dough just holds together. Add more water sparingly, 1 tablespoon at a time.
- Chill dough: Form into a disc, wrap in plastic, and refrigerate for at least 1 hour (up to 2 days). Chilling relaxes gluten and firms fat.
- Roll and cut: On a floured surface or parchment, roll dough to ⅛-inch thickness. Cut 3-3.5 inch circles using a cutter or glass.
- Shape shells: Press rounds into a greased muffin tin, fluting edges if desired. Freeze assembled shells for 15 minutes to prevent shrinkage.
Perfecting the Gooey Filling
The filling’s magic lies in its emulsion of sugar, syrup, and egg, which sets during baking into a shiny, caramelized pool. Vinegar prevents over-sweetness and aids stability.
- Melt butter: Gently melt ¼ cup butter and let cool slightly to avoid cooking the egg prematurely.
- Whisk wet base: In a bowl, beat egg, then stir in melted butter, corn syrup, brown sugar, vanilla, vinegar, and salt until smooth. No electric mixer needed—hand whisking suffices.
- Incorporate add-ins: Fold in raisins or nuts if using. Soak raisins in hot water first for plumpness, then drain.
- Fill shells: Spoon 1-2 tablespoons filling per shell, filling ⅔ full to allow bubbling without spillover. Place tin on a baking sheet for even heat.
Baking Techniques for Ideal Results
Preheat oven to 350°F (175°C). Bake on the lower rack for 20-25 minutes until pastry edges are golden and filling puffs slightly then settles. For runnier centers, check at 20 minutes; for firmer, go to 25. Cool in tin 10 minutes, then loosen with a knife and transfer to a rack. Full cooling prevents sticking.
| Bake Time | Filling Texture | Best For |
|---|---|---|
| 20 minutes | Runny, gooey | Traditionalists |
| 22-23 minutes | Semi-set | Balanced eaters |
| 25 minutes | Firm, chewy | Neat handheld treats |
Customizing Your Butter Tarts
While purists enjoy plain versions, variations add excitement. Raisins are classic, but try:
- Nutty twist: Pecans or walnuts for crunch (½ cup chopped).
- Chocolate delight: Dark chocolate chips that melt into the filling.
- Maple infusion: Swap half corn syrup for pure maple syrup.
- Fruit boost: Dried cranberries or currants for tartness.
- Gluten-free: Use a 1:1 gluten-free flour blend and xanthan gum.
Experiment cautiously—add-ins absorb liquid, so adjust filling slightly thicker if needed.
Storage and Make-Ahead Strategies
Freshly baked tarts shine brightest, but they freeze beautifully. Store at room temperature in an airtight container up to 3 days. Refrigerate for a week, though texture firms. For freezing:
- Freeze baked tarts in a single layer, then transfer to bags for up to 3 months.
- Thaw at room temp or warm gently in a 300°F oven for 5 minutes.
- Prepare shells ahead: Freeze unbaked up to 1 month, fill and bake straight from freezer, adding 2-3 minutes time.
Pro tip: Line tins with foil before freezing for easy cleanup.
Troubleshooting Common Issues
Even seasoned bakers encounter hiccups. Here’s how to fix them:
- Soggy crust: Always chill shells; bake on low rack.
- Filling overflow: Don’t overfill; use sheet pan to catch drips.
- Tough pastry: Handle minimally; ensure butter stays cold.
- Grainy filling: Use room-temp eggs; whisk thoroughly.
- Sticking tarts: Grease tin well; cool fully before removal.
Nutrition and Serving Suggestions
Each tart clocks around 300-350 calories, owing to butter and sugar. Pair with coffee or tea for balance. Serve at potlucks, Canada Day celebrations, or as holiday gifts in decorative tins. For lighter versions, reduce sugar by 2 tablespoons or use light corn syrup.
Frequently Asked Questions
Can I use store-bought pastry?
Yes, pre-made tart shells work in a pinch, but homemade yields superior flakiness. Roll store-bought dough thinner if needed.
Why add vinegar to the filling?
It cuts sweetness and stabilizes the emulsion, preventing separation for a smoother set.
Runny vs. firm: Which is authentic?
Both are! Runny is traditional Eastern Canadian style; firmer suits Western preferences. Bake time decides.
Vegetarian or vegan options?
Swap egg for flax egg (1 tbsp flax + 3 tbsp water). Use plant-based butter and syrup.
How far ahead can I make them?
Bake up to 3 days ahead or freeze unbaked shells for fresh baking anytime.
Scaling Up for Crowds
For 24 tarts, double ingredients and use two tins. Prep dough in batches to avoid warming. Bake one tin at a time for even results. These scale effortlessly for events, ensuring everyone enjoys the gooey goodness.
Butter tarts embody simple joy—flaky, sweet, and endlessly adaptable. With practice, they’ll become your go-to dessert, delighting family and friends season after season.
References
- Canadian Butter Tarts Recipe — The Recipe Rebel. 2023-05-15. https://www.thereciperebel.com/butter-tarts/
- Canadian Butter Tarts — The Beach House Kitchen. 2022-11-20. https://thebeachhousekitchen.com/canadian-butter-tarts/
- Butter Tarts Recipe — Blue Jean Chef. 2021-12-10. https://bluejeanchef.com/recipes/butter-tarts/
- Canadian Butter Tarts — Once Upon a Chef. 2023-08-05. https://www.onceuponachef.com/recipes/canadian-butter-tarts.html
- Old Fashioned Butter Tarts — An Italian in my Kitchen. 2022-10-12. https://anitalianinmykitchen.com/old-fashioned-butter-tarts/