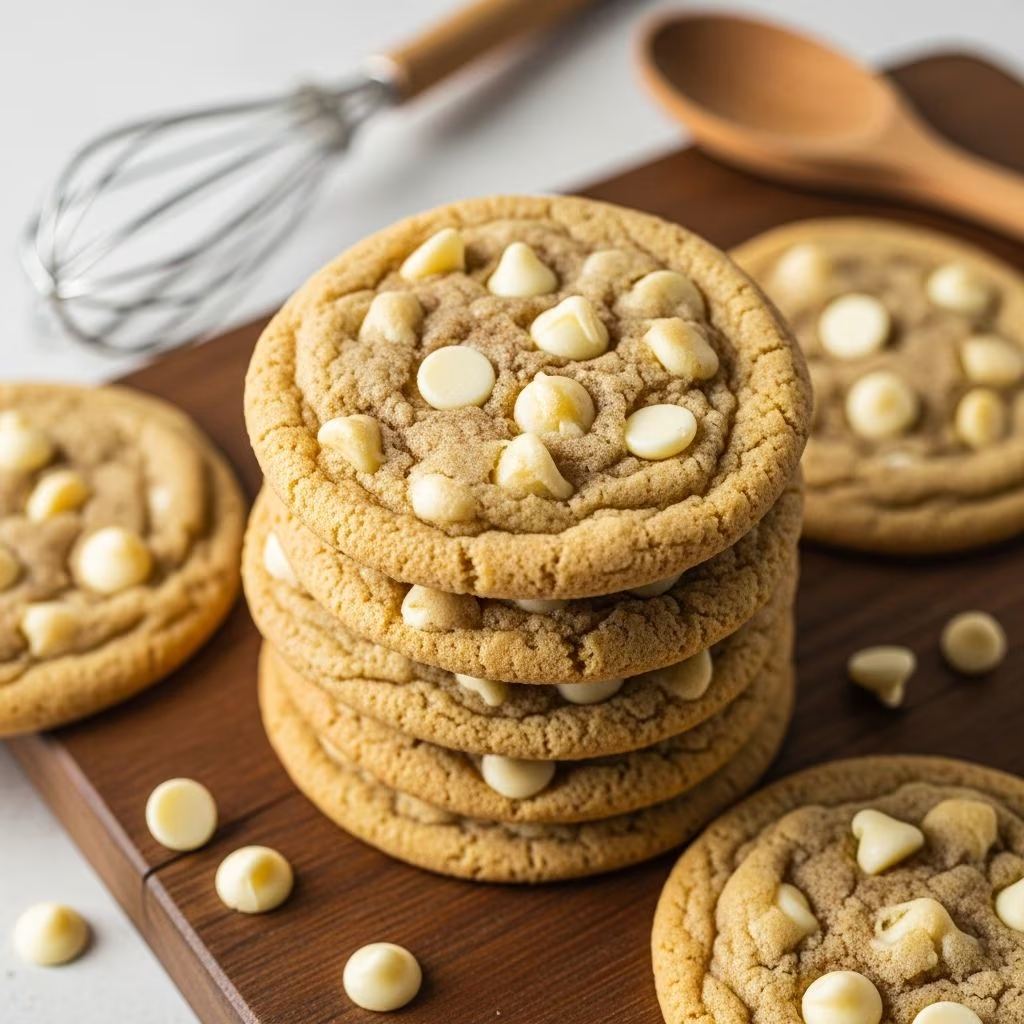
White chocolate chip cookies represent a delightful variation on the classic American cookie, offering a sweeter, more delicate flavor profile than their dark chocolate counterparts. These buttery, tender treats combine the richness of butter and sugar with the creamy sweetness of white chocolate morsels, creating a cookie that appeals to those who prefer milder chocolate flavors. Whether you’re a seasoned baker or someone just starting to explore cookie recipes, understanding the fundamentals of white chocolate chip cookie preparation can help you achieve consistent, professional-quality results in your own kitchen.
Understanding Your Core Ingredients
Successfully baking white chocolate chip cookies begins with recognizing the role each ingredient plays in the final product. The foundation of any quality cookie recipe starts with premium ingredients selected with intention and purpose.
The Importance of Butter Quality
Butter serves as the primary fat in cookie dough and contributes significantly to both texture and flavor. For optimal results, use unsalted butter that has been softened to room temperature before mixing. Room temperature butter creams more effectively with sugar, incorporating air into the dough and creating a lighter, more tender cookie structure. If your butter is too cold, it will be difficult to cream properly; if it’s too warm or melted, your cookies may spread excessively during baking and become thin and brittle rather than thick and chewy.
Sugar Selection and Its Effects
Most white chocolate chip cookie recipes benefit from a combination of both granulated and brown sugar. Granulated sugar provides sweetness and helps create crispness at the cookie edges, while brown sugar adds moisture and creates a chewier interior texture due to its molasses content. The ratio of these two sugars can be adjusted based on your texture preferences—more brown sugar yields chewier cookies, while more granulated sugar produces crispier cookies with lighter texture.
Flour and Structure
All-purpose flour provides the structural framework for your cookie dough. The gluten in flour develops when mixed, creating a network that holds the cookie together. Avoid overmixing once you add flour to your wet ingredients, as excessive mixing develops too much gluten, resulting in tough, dense cookies rather than tender ones. Measure flour correctly by spooning it into your measuring cup and leveling it off rather than scooping directly from the bag, which compacts the flour and results in using too much.
White Chocolate Chips
Quality white chocolate chips make an enormous difference in the final cookie. Look for products that contain cocoa butter rather than palm oil or other vegetable fats, as these create a more authentic, creamy chocolate flavor. Premium white chocolate chips will have a smoother texture and won’t leave a waxy feeling in your mouth. The amount of chips used can range from half a cup to over a full cup depending on your preference for how chocolate-forward you want the cookies to be.
Preparation Techniques for Success
The method you use to combine ingredients significantly impacts your finished cookies. Understanding proper techniques ensures consistent results each time you bake.
Creaming Butter and Sugar
Begin by creaming softened butter with your sugars. Using an electric mixer on medium to medium-high speed, beat these ingredients together for two to three minutes until the mixture becomes noticeably lighter in color and fluffy in texture. This creaming process incorporates air into the dough, which helps cookies rise slightly in the oven and develop a tender crumb. The mixture should resemble fluffy frosting when properly creamed.
Incorporating Eggs and Vanilla
Add eggs one at a time, beating well after each addition to ensure they incorporate fully. Room temperature eggs combine more smoothly with the butter mixture than cold eggs, creating a uniform dough. Vanilla extract should be added after the eggs are incorporated and beaten briefly into the mixture. This step adds flavor complexity and helps bind the ingredients together.
Combining Dry Ingredients
Before adding dry ingredients to your wet mixture, whisk them together in a separate bowl. Combining flour, baking soda, and salt beforehand distributes these ingredients evenly throughout the dough. When you add this dry mixture to your wet ingredients, use low mixer speed and mix only until just combined. Overmixing at this stage activates gluten development, which creates tough cookies.
Adding White Chocolate Chips
Fold white chocolate chips into your dough by hand using a spatula or wooden spoon after all other ingredients are combined. Hand-folding prevents overmixing while ensuring the chips are evenly distributed throughout the dough. If you notice small pockets of flour remaining, use the spatula to gently fold until no streaks remain.
Dough Preparation and Chilling
Many successful bakers advocate for chilling cookie dough before baking, a step that can dramatically improve your cookies’ texture and appearance.
Why Chilling Matters
Chilling cookie dough serves multiple important functions. First, it allows gluten in the dough to relax, preventing excessive spreading during baking. Second, chilling helps the flavors develop and meld together, creating more complex taste. Third, chilled dough is easier to scoop and shape, resulting in more uniform cookies that bake evenly. Finally, chilling slows the melting rate of butter during baking, giving cookies time to set structure before spreading too much.
Chilling Duration
Most recipes benefit from at least three hours of chilling time, though overnight chilling (eight to twelve hours) is even better. If you’re short on time, thirty minutes in a freezer can provide minimal benefit, though it’s not ideal. Cookie dough can be chilled for up to three days in an airtight container, making this an excellent make-ahead step for busy schedules.
Baking Temperature and Technique
Proper oven temperature and baking technique are crucial for achieving the perfect cookie texture.
Oven Temperature Considerations
Most white chocolate chip cookie recipes call for baking at 350°F, though some may vary between 325°F and 375°F. Use an oven thermometer to verify your oven’s actual temperature, as many home ovens run hotter or cooler than their dial indicates. An oven that’s too hot produces cookies with dark bottoms and underbaked centers, while an oven that’s too cool results in cookies that spread too much and bake unevenly.
Spacing and Sheet Preparation
Space cookie dough balls at least two inches apart on your baking sheet, as they will spread during baking. Use parchment paper or silicone baking mats to prevent sticking and promote even browning. Dark baking sheets conduct heat more aggressively than light-colored sheets, potentially causing over-browning on the bottoms of cookies.
Baking Time and Visual Cues
White chocolate chip cookies typically bake for nine to twelve minutes, depending on your cookie size and oven characteristics. Rather than relying solely on the timer, watch for visual cues: the edges should be set and slightly golden, while the centers may still appear slightly underbaked. Cookies continue cooking on the hot baking sheet after removal from the oven, so slightly underbaking is preferable to overbaking.
Cooling and Storage
Proper cooling preserves your cookies’ texture and helps develop their final character.
Initial Cooling on the Sheet
Leave baked cookies on the baking sheet for five to ten minutes after removal from the oven. This brief rest period allows the cookies to set and become firm enough to transfer without breaking apart. During this time, the cookies continue cooking slightly from residual heat, completing their bake.
Transfer to Cooling Rack
After the initial cooling period, transfer cookies to a wire cooling rack where air circulates around them, preventing the bottoms from becoming soggy. Never stack warm cookies, as they will stick together and the moisture will soften them.
Long-Term Storage
Once completely cooled, store cookies in an airtight container at room temperature for up to five days. For longer storage, freeze baked cookies in an airtight container for up to three months. Alternatively, freeze unbaked cookie dough balls and bake them fresh whenever desired for maximum flavor and texture.
Ingredient Variation Table
| Ingredient | Standard Amount | For Chewier Texture | For Crispier Texture |
|---|---|---|---|
| Butter | 1 cup | Same | Same |
| Granulated Sugar | ¾ cup | ½ cup | 1 cup |
| Brown Sugar | ¾ cup | 1 cup | ½ cup |
| White Chocolate Chips | 1 cup | 1-1.25 cups | ¾ cup |
| Baking Soda | ½ teaspoon | ½ teaspoon | ¾ teaspoon |
Troubleshooting Common Issues
Even experienced bakers encounter occasional problems. Understanding common issues and their solutions helps you adjust and improve your results.
Cookies Spreading Too Much
If your cookies spread excessively and become thin and flat, your dough may be too warm or contain too much butter. Try chilling the dough longer before baking, or verify that your butter wasn’t overly soft when creamed. Additionally, check your oven temperature with a thermometer, as an oven that’s too hot accelerates spreading.
Cookies Not Rising Enough
Flat, dense cookies that don’t rise may indicate old baking soda, which loses potency over time. Ensure your baking soda is fresh and has been stored in a cool, dry location. Additionally, make sure you creamed the butter and sugar adequately, as insufficient creaming reduces air incorporation.
Underbaked or Overbaked Cookies
Cookies that remain gooey in the center after cooling were removed from the oven too early. Next time, bake for an additional one to two minutes, watching for the edges to become golden and set. Conversely, cookies that are hard and brittle throughout were overbaked. Reduce baking time slightly and remove them when the centers still appear slightly underbaked, as they’ll continue setting as they cool.
Dry or Tough Texture
Dry cookies often result from overmixing the dry ingredients, which overdevelops gluten. Mix only until no flour streaks remain. Additionally, ensure you’re using room temperature eggs and butter, and avoid baking at a temperature that’s too high.
Frequently Asked Questions
Can I use salted butter instead of unsalted?
Yes, but reduce the amount of added salt in the recipe by half or eliminate it entirely, as salted butter already contains salt. This gives you better control over the total salt content in your cookies.
What’s the difference between white chocolate and white chocolate chips?
White chocolate is made from cocoa butter, milk solids, and sugar. Quality white chocolate chips contain these ingredients, while cheaper alternatives may use vegetable oils instead of cocoa butter. Check ingredient labels to ensure you’re purchasing products with cocoa butter for better flavor and texture.
Can I refrigerate the dough instead of freezing it?
Absolutely. Refrigeration works well for dough that will be baked within a few days. Freezing is better for longer-term storage of unbaked dough.
How do I prevent the bottom of cookies from browning too much?
Use a light-colored baking sheet, place it on the middle oven rack, and consider using a baking sheet liner. Dark sheets and lower oven positions promote bottom browning.
Can I add other mix-ins to this recipe?
Yes, consider adding macadamia nuts, dried cranberries, shredded coconut, or white chocolate chunks. Reduce the amount of white chocolate chips slightly if adding other mix-ins to maintain the right dough consistency.
Advanced Techniques for Cookie Enthusiasts
Once you’ve mastered the basic white chocolate chip cookie, several techniques can elevate your cookies to the next level.
Brown Butter Enhancement
Browning your butter before creaming adds a subtle, nutty flavor dimension to your cookies. To brown butter, melt it in a saucepan over medium heat, stirring occasionally until it turns golden brown and develops a rich aroma. Cool it completely before using in your recipe. This technique works particularly well with white chocolate, as the toasty flavor complements the creamy sweetness beautifully.
Fleur de Sel Finishing
A light sprinkle of fleur de sel (flaky sea salt) pressed onto the top of each cookie before baking creates a sophisticated flavor contrast. The salt enhances the sweetness of the white chocolate and adds visual interest to your finished cookies.
Texture Experimentation
Adjust your baking time by thirty-second increments to explore the range of textures possible with this recipe. Some bakers prefer thicker, cake-like cookies with softer centers, while others enjoy thinner, crispier cookies. Document your preferred baking time for future reference.
Conclusion
White chocolate chip cookies offer a delicious, approachable baking project that yields impressive results with basic ingredients and fundamental techniques. By understanding how each ingredient contributes to the final product, mastering proper mixing and chilling methods, and developing an intuitive sense for oven timing, you’ll consistently produce cookies that satisfy and impress. Whether you’re baking for personal enjoyment, special occasions, or gift-giving, these cookies provide a canvas for experimentation and creativity while delivering the comforting, homemade quality that makes baking so rewarding.
References
- Flour Science and Gluten Development in Baked Goods — University of Minnesota Department of Food Science and Nutrition. 2023. https://www.extension.umn.edu/health-nutrition/food-preparation-safety
- The Role of Sugar in Cookie Structure and Texture — Purdue University Department of Food Science. 2022. https://www.purdue.edu
- Butter Temperature and Emulsification in Cookie Doughs — Institute of Culinary Education. 2024. https://www.iceculinary.com
- White Chocolate: Composition and Quality Standards — International Organization for Standardization. 2021. https://www.iso.org
- Oven Temperature Accuracy and Baking Success — U.S. Department of Agriculture Food Safety and Inspection Service. 2023. https://www.fsis.usda.gov