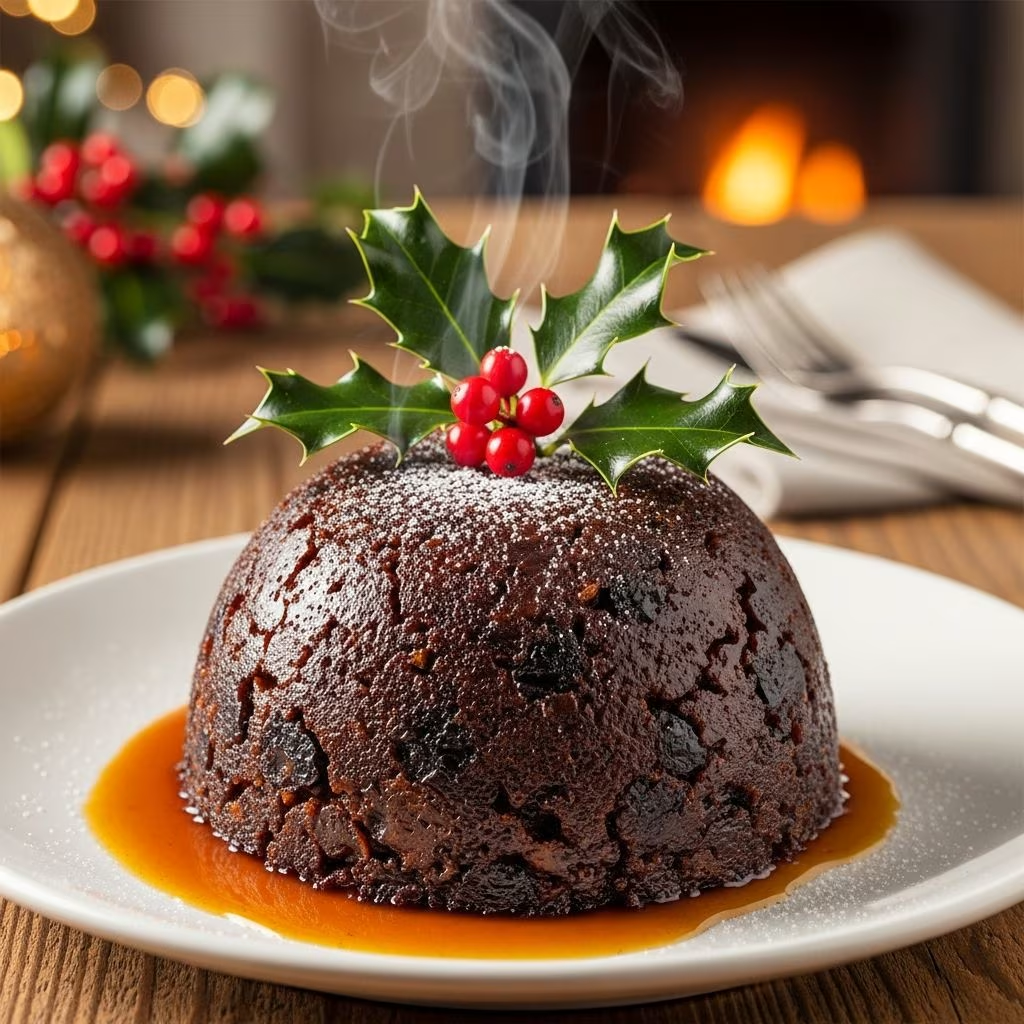
The distinctive appeal of Christmas plum pudding lies in its rich heritage and complex flavor profile that emerges from carefully selected dried fruits, warming spices, and quality spirits. This beloved British dessert represents centuries of culinary tradition and continues to be a centerpiece of holiday celebrations worldwide. Unlike modern desserts that prioritize simplicity, plum pudding demands patience, quality ingredients, and proper technique—but the result is a deeply satisfying treat that improves with age.
What makes plum pudding particularly special is its versatility. Whether you’re preparing it weeks in advance or making a simpler version closer to the holiday, this dessert accommodates various preparation methods and personal preferences. The steaming process creates an exceptionally moist crumb while the extended cooking time allows flavors to meld into something truly extraordinary.
Understanding the Foundation: Essential Components
The foundation of an exceptional plum pudding begins with understanding each ingredient’s role in the final product. The base mixture combines butter, brown sugar, eggs, and flour—creating a stable platform that holds the abundant dried fruits and spices. This isn’t a recipe where you can substitute ingredients casually; each component contributes to both texture and flavor development.
The fat content deserves particular attention. Traditional recipes call for suet, though butter provides an excellent modern alternative. Quality butter or suet ensures the pudding maintains its moisture throughout storage and reheating. The fat distributes heat evenly during steaming and helps preserve the pudding for extended periods, which is why aged plum puddings develop even more sophisticated flavors.
Breadcrumbs form another crucial element, providing structure while contributing to the pudding’s characteristic dense yet tender crumb. Fresh breadcrumbs work better than dried varieties, as they hydrate during the mixing process and absorb the liquid ingredients more effectively. This ingredient also helps distribute the dried fruits evenly throughout the mixture.
The Dried Fruit Selection
Dried fruits represent the heart of plum pudding’s identity. The typical combination includes sultanas (golden raisins), regular raisins, currants, and chopped prunes. Some recipes add candied peel, glacé cherries, or mixed candied fruit to increase complexity. These fruits contribute not just flavor but also moisture—they soften during steaming and release their natural sugars into the surrounding mixture.
Many recipes recommend soaking dried fruits in brandy or rum the night before preparation. This step intensifies flavors and ensures the fruits remain plump and juicy rather than drying out during the long steaming process. If you choose to soak the fruits, reserve the soaking liquid to incorporate into the final mixture, as it contains concentrated fruit flavors.
Spices and Aromatics
The spice blend distinguishes plum pudding from other desserts. Traditional mixed spice combinations typically include cinnamon, nutmeg, cloves, and allspice. These warm spices complement the dried fruits while adding depth that prevents the dessert from tasting one-dimensional. Fresh citrus zest—particularly orange or lemon—brightens these warming spices and adds an elegant counterpoint.
The citrus component deserves special emphasis. Freshly grated orange zest combined with fresh orange juice creates an aromatic quality that dried fruits alone cannot achieve. The acidity in citrus juice also balances the pudding’s richness, making each bite more complex and satisfying.
Ingredient Quantities and Proportions
| Ingredient | Amount | Purpose |
|---|---|---|
| Butter (unsalted) | ½ to 1 cup | Creates moisture and richness |
| Dark brown sugar | 1 cup | Adds depth and molasses notes |
| Eggs | 2-4 large | Binds ingredients and adds structure |
| All-purpose flour | ½ to ¾ cup | Provides structure without heaviness |
| Fresh breadcrumbs | 2 cups | Creates tender crumb and retains moisture |
| Dried fruits (combined) | 4-5 cups total | Provides signature flavor and texture |
| Mixed spice blend | 1-1½ teaspoons | Adds warming aromatic quality |
| Orange juice and zest | 5 oz juice + 2 tsp zest | Brightens flavor profile |
| Brandy or rum | 3-5 oz | Enhances preservation and flavor |
Preparation Method: Step-by-Step Instructions
Initial Mixing Phase
Begin by creaming together butter and dark brown sugar until the mixture becomes noticeably lighter in color and fluffy in texture—approximately 2-3 minutes with an electric mixer. This crucial step incorporates air into the mixture, which creates a lighter pudding despite its heavy ingredient list. Beat in eggs one at a time, adding a tablespoon of flour with each egg to prevent curdling. This technique helps create an emulsion that maintains smooth consistency throughout mixing.
Next, incorporate the dry ingredients. Combine flour, baking powder, mixed spice, and salt in a separate bowl before adding to the wet mixture. This ensures even distribution of leavening agents and spices. Mix on low speed until just combined—overmixing at this stage can develop gluten, resulting in a tough final product.
Fruit Integration
Add fresh breadcrumbs, then fold in the prepared dried fruits by hand if possible. This prevents the delicate fruit pieces from being crushed by vigorous mixing. If you’ve soaked the fruits in alcohol, add them along with their soaking liquid. Include grated apple, carrot (if using), and citrus zest at this stage. Hand-mixing at this point also allows you to ensure uniform distribution of fruits throughout the batter, preventing pockets of concentrated fruit.
Steaming Setup
Proper preparation of the pudding basin ensures successful steaming. Butter a 5-6 cup pudding mold thoroughly, then line the bottom with a disc of parchment or waxed paper, buttering this paper as well. Transfer the mixture into the basin, pressing gently to eliminate large air pockets while not compressing excessively. Flatten the top, then cover with a buttered disc of parchment paper.
Create a protective covering by layering parchment paper and aluminum foil over the basin top and sides. Make a pleat down the center of this covering—this allows the pudding to expand during steaming without cracking. Secure the covering with kitchen string tied under the basin’s lip, creating a handle across the top for easy removal from steaming water.
The Steaming Process
Christmas pudding steams for an extended period—typically 6 hours for a full-sized pudding. Fill a large pot with water to reach halfway up the pudding basin’s sides, then place a trivet or rack in the pot’s bottom to elevate the basin above direct heat. Bring water to a gentle boil and maintain this level throughout steaming, adding hot water as needed. This extended, moist cooking process distinguishes pudding from other baked desserts, creating its characteristic texture and allowing flavors to fully develop.
Storage and Aging: Flavor Development Over Time
One of plum pudding’s most remarkable characteristics is its ability to improve with storage. Once cooled, wrap the pudding in fresh parchment paper and store it in a cool, dry place or refrigerator for weeks or even months. Many enthusiasts prepare puddings in October or November for December consumption, allowing flavors to intensify and meld.
Some recipes suggest feeding the pudding—sprinkling it with additional brandy or rum every few weeks during storage. This moisturizes the pudding and deepens alcohol-enhanced flavors. While optional, this step produces noticeably superior results in puddings aged longer than three weeks.
Reheating and Serving Traditions
Reheating Methods
Before serving, the pudding requires reheating to restore its appealing texture. The traditional method involves steaming for an additional 2 hours in the same manner as the initial cooking. For convenience, microwave reheating works well—place a slice on a microwave-safe plate and heat for 1-2 minutes until piping hot. The microwave method suits individual portions and requires only minutes rather than hours.
Traditional Flambéing
Presentation of plum pudding traditionally includes flambéing, which creates dramatic tableside effect while slightly reducing alcohol content. Douse the warm pudding with warmed brandy and carefully ignite it in a safe area, away from overhead cabinets or curtains. The flame will extinguish naturally as alcohol burns away, leaving behind enhanced flavor complexity.
Accompaniments and Sauces
Plum pudding pairs beautifully with several traditional accompaniments. Brandy butter—softened butter beaten with powdered sugar and brandy—melts luxuriously over warm pudding. Custard sauce provides creamy richness that contrasts the pudding’s density. Whipped cream adds lightness, though it somewhat obscures the pudding’s distinctive character. Some serve it with a simple brandy sauce made from butter, sugar, and spirits, which complements rather than masks the pudding’s complex flavors.
Adapting Traditional Recipes
Vegetarian Modifications
Modern recipes typically use butter instead of suet, creating vegetarian versions without sacrificing quality. While suet produces a more traditionally textured pudding, high-quality cold butter creates excellent results. The key is ensuring adequate fat content—reducing butter quantity also reduces the pudding’s ability to retain moisture during extended storage.
Alcohol-Free Versions
For alcohol-free puddings, substitute the brandy or rum with additional fruit juice, stronger tea, or even milk. This modification changes the flavor profile somewhat but still produces satisfying results. Alcohol-free puddings have slightly shorter storage lives, so plan to serve them within 2-3 weeks rather than months.
Fruit and Spice Variations
While traditional combinations are proven, feel free to adjust dried fruit selections based on preferences or availability. Replace some raisins with chopped dried apricots, figs, or dates. Adjust spice quantities to suit your palate—some prefer warming spices intensified, while others prefer more subtle spicing.
Frequently Asked Questions
How long does Christmas pudding keep?
Properly stored Christmas pudding keeps for several months when aged in a cool location. Refrigeration extends storage life even further. The high sugar, spice, and alcohol content naturally preserve the pudding, making it ideal for advance preparation.
Can I make plum pudding without special equipment?
Yes, while a traditional pudding basin makes handling easier, you can substitute a heat-safe bowl covered with foil and parchment. Any deep, oven-safe dish works, though basin-shaped molds distribute heat most evenly.
What’s the difference between plum pudding and Christmas pudding?
These terms refer to the same dessert. “Plum pudding” historically referenced the prunes used, though modern recipes often omit them. “Christmas pudding” describes its holiday association. The terms are now used interchangeably.
Is the pudding supposed to be alcoholic?
Much of the alcohol burns away during extended steaming, so the pudding contains minimal alcohol content. The alcohol primarily enhances preservation and flavor development rather than producing an intoxicating result.
When should I make plum pudding?
Ideally, prepare pudding 4-8 weeks before serving to allow flavors to mature. However, pudding made 1-2 weeks ahead still tastes excellent. The extended preparation timeline also reduces holiday kitchen stress.
Success Tips and Techniques
- Use quality butter or suet—this significantly impacts final texture and flavor
- Don’t skip breadcrumb preparation—fresh breadcrumbs create superior texture to dried varieties
- Soak dried fruits in alcohol when possible—this step noticeably enhances moisture and flavor
- Maintain consistent water temperature during steaming—fluctuations can create uneven cooking
- Allow adequate cooling time before removing from basin—this prevents the pudding from breaking apart
- Keep steaming water at a gentle boil rather than vigorous rolling—overly intense heat can cause toughness
- Document your first preparation—note which adjustments you prefer for future batches
Conclusion
Creating traditional Christmas plum pudding represents more than following a recipe—it’s participating in a culinary tradition spanning centuries. The process demands patience and attention to detail, rewarding careful preparation with results impossible to replicate through commercial sources. Whether you choose to make pudding weeks in advance or adapt the recipe to suit modern preferences, the fundamental principles remain: quality ingredients, proper technique, and respect for the time-honored methods that create this remarkable dessert. Your homemade plum pudding will become a centerpiece of holiday gatherings, creating memories and traditions for future generations.
References
- Traditional British Christmas Pudding (a Make Ahead, Fruit and Brandy Filled, Steamed Dessert) — Christina’s Cucina. 2024. https://www.christinascucina.com/traditional-british-christmas-pudding-make-ahead-fruit-brandy-filled-steamed-dessert/
- Christmas Plum Pudding Recipe — Australian Food.com. 2024. https://www.food.com/recipe/christmas-plum-pudding-41555
- Traditional Irish Christmas Plum Pudding — Oregonian Recipes. 2024. https://recipes.oregonlive.com/recipes/traditional-irish-christmas-plum-pudding
- Easy English Plum Pudding — Savor the Flavour. 2024. https://savortheflavour.com/plum-pudding/
- Plum Pudding Recipe: Easy Christmas Dessert — YouTube. 2024. https://www.youtube.com/watch?v=dOGn3Jz2VrI
- Traditional Christmas Pudding — YouTube. 2024. https://www.youtube.com/watch?v=BrHL3qDpZvw