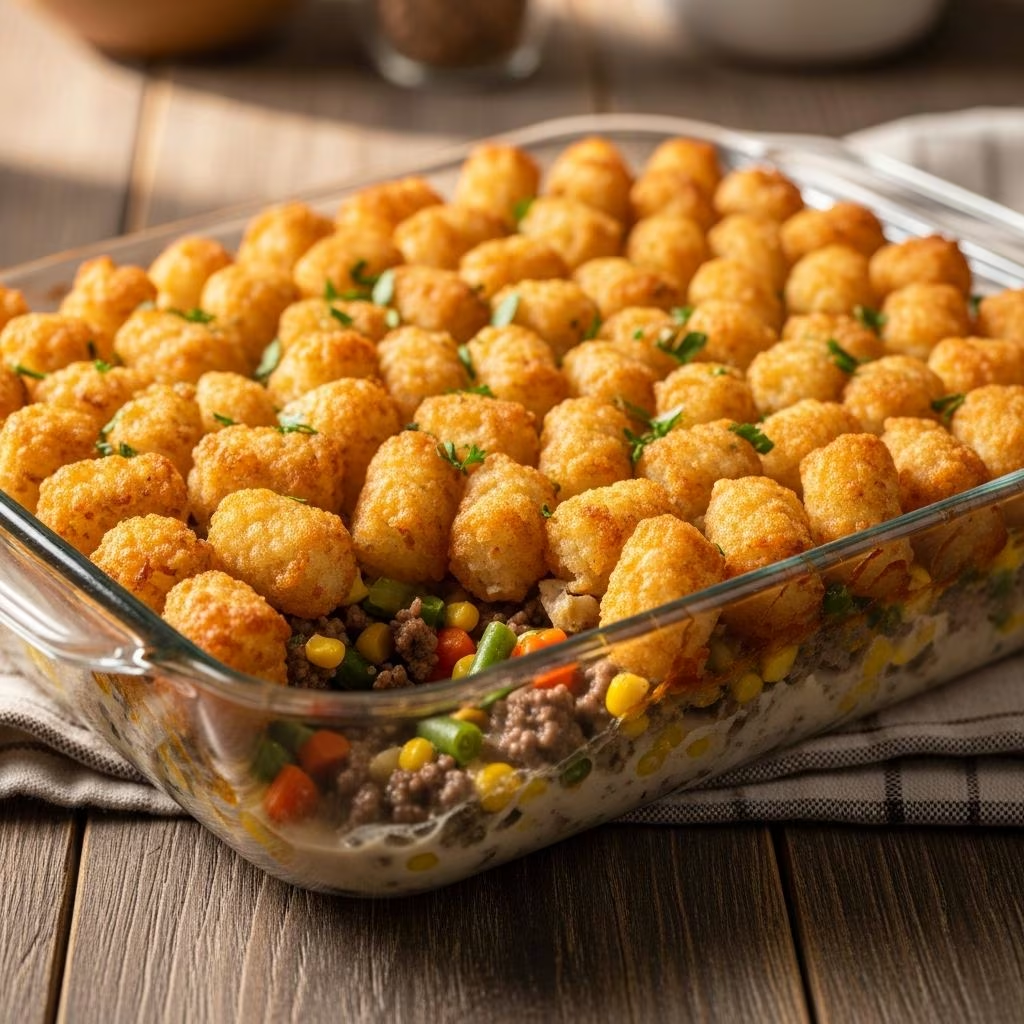
Tater tot hotdish stands as a beloved staple of American comfort food, particularly throughout the Midwest where this layered casserole has earned its place at countless family tables. This versatile dish combines seasoned ground beef, creamy sauce, vegetables, and a crowning layer of crispy, golden tater tots that transform during baking into a textural masterpiece. Whether you’re preparing dinner for a weeknight family meal or bringing a crowd-pleasing dish to a potluck gathering, this hotdish delivers consistent satisfaction with minimal fuss.
The beauty of tater tot hotdish lies in its adaptability and straightforward construction. Rather than requiring specialized cooking techniques or hard-to-find ingredients, this dish comes together using pantry staples and frozen components that most home cooks already have on hand. The result is a complete meal that satisfies multiple dietary preferences while remaining economical enough for regular preparation.
Understanding the Foundation: What Makes This Dish Special
A proper tater tot hotdish begins with understanding its layered structure. Unlike a traditional casserole that might feature mixed ingredients throughout, a hotdish respects distinct layers that maintain their individual characteristics while binding together through baking. The base layer typically consists of seasoned ground beef combined with aromatics like onions and garlic. Above this sits a creamy binding agent—either a homemade sauce or canned cream soup—enriched with vegetables. The top layer of frozen tater tots provides textural contrast and visual appeal when finished.
This architectural approach means each component contributes its own flavor profile while the overall dish achieves cohesion through heat and moisture. The beef layer provides savory depth, the creamy sauce carries flavor to every bite, the vegetables add both nutrition and brightness, and the tater tots contribute structural integrity along with satisfying crispness.
Preparing the Beef Foundation
Beginning with quality ground beef establishes the flavor foundation for your entire hotdish. Select beef with moderate fat content—neither the leanest option nor heavily marbled varieties work best. Medium-ground beef provides enough fat for flavor development while avoiding excess grease that would require extensive draining.
The cooking process matters significantly. Rather than simply browning the beef until it loses its raw appearance, develop it properly by allowing it to cook undisturbed initially. This creates flavorful browned surfaces through the Maillard reaction, which intensifies the meat’s savory character. Break the beef into small pieces as it cooks, aiming for uniform size that ensures even cooking and pleasant texture in the finished hotdish.
Once the beef achieves rich brown coloration and the meat juices have largely evaporated, transfer it to a plate using a slotted spoon. This separation allows you to control how much beef fat remains in your cooking vessel—typically reserving just enough to sauté aromatics without creating an excessively greasy base layer.
Building Aromatic Depth with Onions and Garlic
Onions and garlic form the aromatic backbone that elevates hotdish from basic to genuinely flavorful. After removing the cooked beef, add diced onions to the remaining fat in your cooking vessel. Cook these over medium heat until they transition from opaque to translucent and begin developing slight golden coloration at the edges. This process typically requires five to ten minutes and should happen gradually rather than rushing through high heat.
Minced garlic joins the onions near the end of their cooking time, requiring only one to two minutes to release its volatile compounds and perfume the entire mixture. Adding garlic too early can result in burnt, bitter flavors, while adding it too late means it never fully integrates with the other components.
This aromatic base becomes the flavor foundation that permeates every layer of your hotdish, transforming what might otherwise be a one-dimensional dish into something with genuine complexity and depth.
Creating the Binding Sauce Layer
The creamy sauce layer represents the crucial element that transforms individual components into a cohesive casserole. Two approaches work equally well: homemade gravy or canned cream soup combined with additional seasonings.
Homemade Sauce Method
For homemade sauce, begin by creating a roux using butter and flour. Add flour to your cooking vessel containing the onion and garlic mixture, whisking constantly as the flour cooks and browns slightly. This cooking process, which typically lasts one to two minutes, removes the raw flour taste while allowing the flour particles to fully hydrate and prepare for thickening liquid.
Gradually whisk in milk or beef broth while stirring constantly to prevent lumps from forming. Season this developing sauce with soy sauce for umami depth, Worcestershire sauce for complexity, hot sauce for subtle heat and flavor enhancement, salt, and black pepper. The soy sauce particularly contributes savory notes that resonate throughout the finished dish.
Simmer this sauce over medium heat for eight to ten minutes, allowing it to thicken and develop deeper flavor through gentle cooking. The mixture should reach a consistency thicker than milk but pourable enough to distribute evenly across the beef layer.
Simplified Soup-Based Method
The alternative approach leverages canned cream of mushroom or cream of chicken soup as your binding agent. Combine undiluted soup with the cooked beef and aromatics, stirring thoroughly to distribute evenly. Add the same seasoning elements—soy sauce, Worcestershire sauce, hot sauce if desired—along with salt and pepper. Some preparations include a spoonful of sour cream, which adds richness and prevents the sauce from becoming overly thick or pasty.
This method works perfectly well and reduces both cooking time and cleanup, making it practical for busy weeknights while delivering excellent results.
Incorporating Vegetables and Layering
Vegetables serve multiple purposes in tater tot hotdish: they add nutritional value, contribute textural variety, and provide color contrast in each serving. Frozen mixed vegetables work effectively because they maintain their texture during the baking process and require no preparation beyond thawing if desired (though many recipes use them frozen directly).
Spread the beef and sauce mixture evenly across your prepared baking dish, creating a uniform base layer. If using canned soup without additional liquid, the mixture may appear thick—this is appropriate as additional moisture will emerge during baking. Over this beef base, distribute your chosen vegetables in an even layer. Canned or frozen corn, peas, green beans, and carrots all work beautifully.
Season the vegetable layer lightly with salt and pepper before proceeding. This ensures vegetables receive their own seasoning rather than relying entirely on the sauce layer below.
Should your recipe include shredded cheese as an additional layer, distribute it over the vegetables now. Cheddar cheese provides classic flavor, though other varieties work equally well. This cheese layer partially melts during baking, creating pockets of rich, creamy texture throughout the hotdish.
The Critical Tater Tot Layer
Frozen tater tots form the distinguished crown of your hotdish, and their placement requires specific attention. Arrange tater tots in a single layer across the top of your casserole, working from one corner outward to ensure complete coverage. Spacing them slightly apart rather than packing them tightly allows hot air to circulate around each tot during baking, promoting even browning and crispness.
Resist the temptation to thaw frozen tater tots before baking. Their frozen state protects the interior from becoming overly soft while the exterior crisps. Additionally, frozen tater tots contain added moisture that helps the casserole stay moist during the baking process.
Baking Guidelines and Timing
Most tater tot hotdish recipes bake successfully at temperatures between 350°F and 375°F. Choose 350°F if your hotdish is quite deep or if you prefer a gentler, more even cooking process. Use 375°F if you want faster baking or prefer a more pronounced browning of both the tater tots and the edges of the casserole.
Baking time typically ranges from thirty-five to forty-five minutes, depending on your specific oven and the thickness of your hotdish. The hotdish reaches completion when the tater tots achieve golden-brown coloration and the mixture below is bubbling around the edges. If the tater tots brown too quickly while the interior remains cool, cover the casserole loosely with aluminum foil and continue baking, checking every five minutes.
Avoid opening the oven door frequently during baking, as this releases heat and extends cooking time unevenly. Check the hotdish only at the fifteen-minute mark and again at the twenty-minute mark to assess browning progress.
Customization Options and Variations
| Variation | Key Changes | Best For |
|---|---|---|
| Spicy Version | Increase hot sauce, add jalapeños, use pepper jack cheese | Heat-loving diners |
| Poultry-Based | Substitute ground turkey or chicken for beef | Lighter eating or dietary preferences |
| Vegetarian | Replace meat with lentils or crumbled tofu, use vegetable broth | Plant-based diets |
| Bacon-Enhanced | Add cooked bacon pieces to beef layer | Smoky flavor preference |
| Mexican-Inspired | Use taco seasoning, salsa, pepper jack cheese, black beans | Southwestern flavor profile |
The versatility of tater tot hotdish means you can adjust recipes based on dietary needs, ingredient availability, or flavor preferences. Ground turkey creates a lighter alternative while maintaining excellent texture and flavor when properly seasoned. Combinations of ground beef with ground pork or ground turkey provide interesting flavor variations.
Vegetable selections can shift based on seasonal availability and personal preferences. Broccoli, cauliflower, mushrooms, or zucchini all contribute valuable texture and nutrition when incorporated into the vegetable layer.
Make-Ahead and Storage Considerations
Tater tot hotdish accommodates advance preparation beautifully. Prepare the entire casserole—including all layers and frozen tater tots—several hours ahead of baking. Cover with aluminum foil and refrigerate until ready to bake. When you’re ready to cook, simply extend the baking time by approximately ten minutes to account for the casserole’s lower starting temperature.
Leftover hotdish stores well in the refrigerator for three to four days in an airtight container. Reheat individual portions in the microwave or warm the entire casserole covered in a 350°F oven until heated through.
Serving and Presentation
Tater tot hotdish shines brightest when served immediately from the oven while tater tots retain maximum crispness and the casserole still steams warmly. Top individual servings with fresh herbs such as chives, parsley, or green onions, which provide bright color and fresh flavor that balances the rich, creamy components.
A simple side salad or steamed vegetable brings freshness to the plate. Beverages ranging from cold milk to iced tea pair exceptionally well with this hearty comfort food.
Frequently Asked Questions
Can I use fresh tater tots instead of frozen? Frozen tater tots work best for this dish as they maintain structural integrity during baking. Fresh tater tots may become overly soft or lose their shape. However, you can use partially thawed frozen tater tots if they’re still quite cold.
What if my hotdish seems too thick or too thin? If the beef mixture appears too thick before baking, add an additional one-quarter cup of milk or broth. If it seems too thin, the tater tots may slide during baking; consider using cream of mushroom soup as a thickening agent.
Is there a difference between hotdish and casserole? In Midwest terminology, hotdish traditionally refers to a baked dish prepared in a single vessel and served directly from that vessel, while casserole sometimes implies individual components assembled in a dedicated casserole dish. The distinction matters primarily to regional food traditions rather than actual preparation methods.
Can I freeze tater tot hotdish? Yes, assemble the hotdish without tater tots, cover well, and freeze for up to three months. Thaw overnight in the refrigerator, add the tater tots, and bake as directed, adding approximately ten minutes to the baking time.
References
- The Science of Good Cooking — America’s Test Kitchen. 2015. Explores the Maillard reaction and flavor development in meat cookery.
- On Food and Cooking: The Science and Lore of the Kitchen — Harold McGee, Scribner. 2004. Discusses umami compounds in soy sauce and their flavor enhancement properties.
- The Joy of Cooking — Irma S. Rombauer, Marion Rombauer Becker, and Ethan Becker, Scribner. 2006. Provides foundational casserole and hotdish preparation techniques.