Sweet potato pie represents a cherished tradition in American cuisine, particularly celebrated during autumn months and holiday gatherings. This elegant dessert combines natural sweetness with warm spices, creating a comforting yet sophisticated treat. What elevates this classic preparation is the addition of a homemade marshmallow whip topping—a luxurious finishing touch that transforms an already delicious pie into a restaurant-worthy creation.
The contrast between the dense, creamy filling and the airy, cloud-like topping creates a memorable textural experience that distinguishes this version from standard preparations. This comprehensive guide walks you through each stage of the process, from selecting quality ingredients to mastering the techniques that ensure success.
Understanding the Foundation: Sweet Potato Selection and Preparation
The quality of your final dessert depends significantly on your starting ingredient. When shopping for sweet potatoes, look for specimens that are firm, free of soft spots, and uniform in size—this consistency ensures even cooking throughout the batch. Medium to large sweet potatoes work best, as smaller ones may cook unevenly, while oversized ones can develop fibrous or dry interiors.
Proper preparation involves several critical steps. Begin by thoroughly scrubbing the sweet potatoes under running water to remove any soil or debris. Using a fork, pierce the surface multiple times across each potato—this allows steam to escape during cooking and prevents the potatoes from bursting in the oven.
Two primary cooking methods yield excellent results:
- Oven roasting: Rub potatoes lightly with oil, place on a parchment-lined baking sheet, and bake at 400°F for approximately 50 minutes, turning halfway through. This method develops deeper flavor through caramelization of natural sugars.
- Boiling: Place unpeeled sweet potatoes in a large pot, cover with water, and simmer for 50-55 minutes until a fork or skewer slides through with minimal resistance. This approach is faster but yields slightly less concentrated flavor.
After cooking, cool the potatoes under running water until manageable, then peel away the skin. The flesh should be tender enough to break apart easily. Transfer the cooked potatoes to a blender and pulse for approximately one minute to create a smooth puree while removing any remaining fibrous strands.
Constructing the Silky Filling: Ingredients and Technique
The filling represents the soul of this dessert, requiring a careful balance of sweeteners, spices, and binding agents. The traditional approach combines mashed sweet potatoes with butter, eggs, milk, and a harmonious blend of warm spices that complement rather than overpower the natural vegetable flavor.
Core filling ingredients typically include:
- 2 to 2.5 cups pureed sweet potatoes (approximately 2 large potatoes)
- ½ cup softened butter or coconut oil for healthier variations
- ¾ cup brown sugar or granulated sugar, adjusted to taste preference
- ½ to 1 cup evaporated milk or regular whole milk for creaminess
- 2 large eggs as the binding and structure agent
- 1 teaspoon vanilla extract for depth and complexity
- 1 teaspoon ground cinnamon for warmth
- ½ teaspoon ground nutmeg for earthiness
- ¼ teaspoon ground allspice or ginger for additional dimension
- ¼ teaspoon sea salt to enhance sweetness perception
The mixing procedure demands attention to sequence and technique. Begin by adding the softened butter to the warm sweet potato puree, mixing thoroughly until the butter fully incorporates and melts from the residual heat. This initial step establishes a creamy base and aids even distribution of fat throughout the filling.
Next, gradually add the brown sugar on medium-low speed, allowing each addition to fully incorporate before adding more. This gradual approach prevents lumping and ensures uniform sweetness distribution. Scrape the bowl frequently to catch ingredients that collect at the bottom.
Introduce eggs individually, mixing well after each addition to ensure complete incorporation. Add vanilla extract and evaporated milk in slow streams while mixing, creating a silky batter with a pudding-like consistency. Finally, sprinkle in spices and salt, mixing until the filling achieves a uniform appearance with no visible streaks.
Pastry Preparation: Building the Perfect Crust
A well-constructed crust provides structural support and contributes textural contrast to the creamy filling. While store-bought unbaked crusts offer convenience, homemade versions deliver superior flavor and texture.
For a homemade crust, combine 1 cup whole wheat pastry flour (or all-purpose flour) with ½ teaspoon salt in a mixing bowl. Cut ¼ cup cold unsalted butter into small cubes and work into the flour using a pastry cutter or fork until the mixture resembles coarse breadcrumbs.
Create a liquid mixture by whisking together 2 teaspoons cold milk, 1 teaspoon cold maple syrup, ¾ teaspoon vanilla extract, and 1 teaspoon ice water. Drizzle this mixture over the flour combination, mixing gently until incorporated. Add additional ice water ½ teaspoon at a time as needed until the dough just comes together—overworking the dough develops gluten, resulting in a tough, dense crust.
Transfer the dough to plastic wrap, shape into a 4-inch-wide circle, and refrigerate for at least 30 minutes before rolling. This resting period allows the gluten to relax and the dough to firm, making it easier to handle and more likely to maintain its shape during baking.
Prepare the crust by pre-baking it in a 375°F oven for approximately 10-15 minutes until the edges are lightly set but not browned. This prevents the crust from becoming soggy during the extended baking time required for the filling.
The Baking Process: Temperature and Timing Mastery
Proper baking technique determines whether your filling achieves the desired creamy consistency or becomes overcooked and cracked. Begin by preheating your oven to 400°F and positioning the rack in the middle position for optimal heat circulation.
Pour the prepared filling into the pre-baked crust, filling it nearly to the rim. The filling will rise slightly during baking but should not overflow if you maintain proper oven temperature. Bake at 400°F for exactly 10 minutes, which sets the outer layer of the filling while maintaining a creamy interior.
Reduce the oven temperature to 325°F and continue baking for approximately 45 minutes more, until a knife inserted into the center emerges clean or with only the faintest residue adhering to it. A slight jiggle in the very center of the pie indicates proper doneness—the residual heat will continue cooking during cooling.
Allow the pie to cool to room temperature on a wire rack, then refrigerate for at least 4 hours, preferably overnight. This resting period firms the filling and develops the flavor profile, creating a more sophisticated taste experience.
Crafting the Marshmallow Whip Topping: Lightness and Stability
The marshmallow whip topping distinguishes this preparation from conventional sweet potato pie offerings. This cloud-like component requires precision in technique to achieve the ideal balance of airiness and structural integrity.
Traditional marshmallow whip combines egg whites with powdered sugar and vanilla, creating a stable foam that holds its shape. Some versions incorporate gelatin for additional stability, though this requires careful handling to avoid graininess. A modern approach uses aquafaba (the liquid from canned chickpeas) as an egg-free alternative, producing remarkably similar results while accommodating dietary restrictions.
To prepare marshmallow whip with egg whites, begin with room-temperature egg whites in an impeccably clean, grease-free mixing bowl. Even trace amounts of yolk or oil prevent proper volume development. Using an electric mixer on medium-high speed, beat the whites until soft peaks form—the mixture should hold gentle peaks that gradually collapse.
Gradually incorporate ¾ cup powdered sugar while maintaining mixing speed, allowing each addition to fully integrate. Continue beating until stiff peaks form, indicating maximum volume and stability. Add 1 teaspoon vanilla extract in the final moments of mixing, incorporating without overworking.
For enhanced stability, some bakers incorporate 1 tablespoon of cornstarch mixed with the powdered sugar, which prevents weeping and maintains the topping’s pristine appearance throughout the serving period.
Assembly and Presentation: The Final Flourish
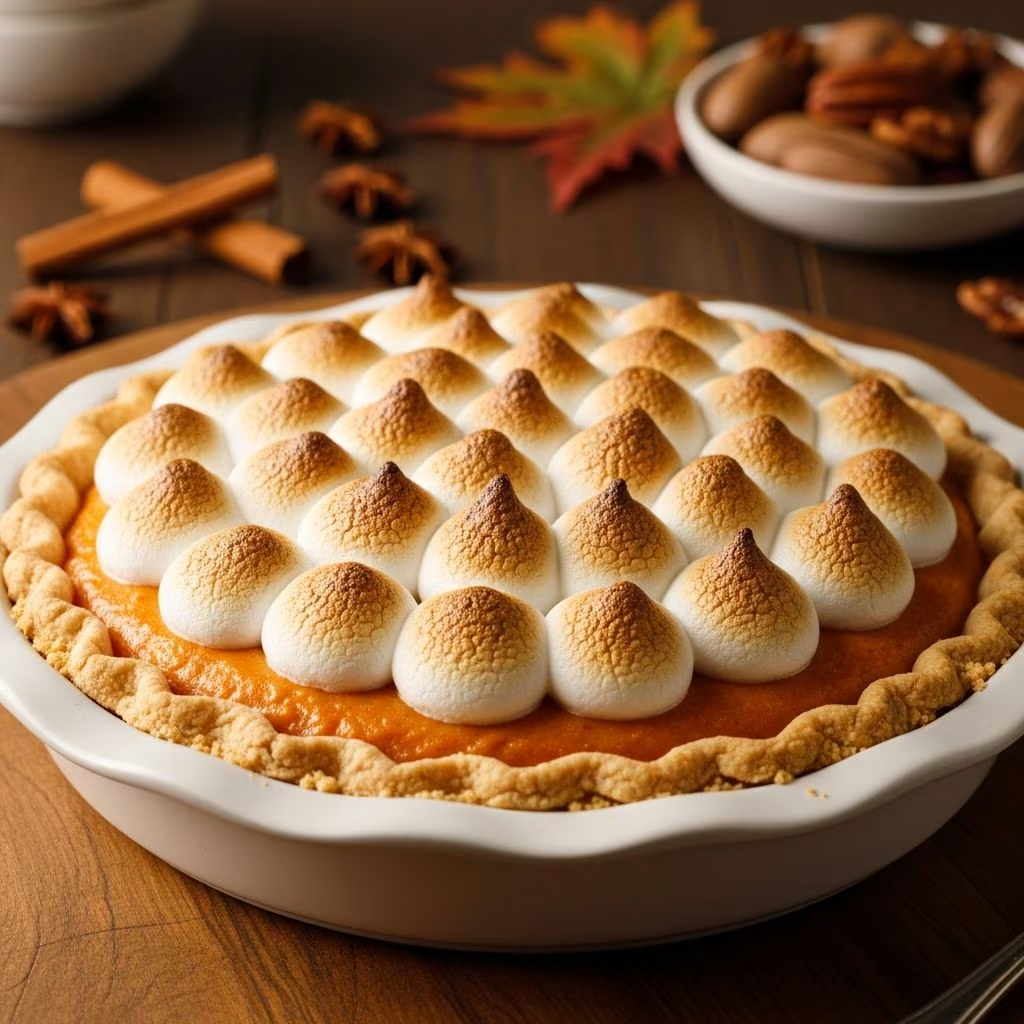
Remove the thoroughly chilled pie from the refrigerator approximately 20 minutes before serving—this slight warming allows the filling’s flavors to emerge more prominently. Using an offset spatula or the back of a spoon, spread the marshmallow whip evenly across the pie’s surface, creating peaks and valleys for visual interest.
For a professional presentation, use a kitchen torch to lightly toast the marshmallow topping, creating golden-brown peaks reminiscent of classic meringue. Work quickly and carefully, moving the torch in circular motions to ensure even browning and prevent scorching.
If torching is unavailable, place the topped pie in a preheated 375°F oven for approximately 5-8 minutes until the topping develops light golden-brown peaks. Watch carefully to prevent excessive browning.
Storage and Make-Ahead Considerations
Sweet potato pie maintains excellent quality when properly stored. Covered loosely with plastic wrap, the pie keeps refrigerated for up to 4 days. The marshmallow topping is best applied no more than 4 hours before serving to maintain optimal texture, though the pie itself can be prepared up to 2 days in advance.
For longer storage, freeze the unfilled pre-baked crust and prepared filling components separately. Thaw overnight in the refrigerator before assembling and baking. The marshmallow topping should always be freshly prepared immediately before serving.
Flavor Variations and Customizations
While the classic preparation deserves respect, thoughtful variations expand the dessert’s appeal:
| Variation | Key Changes | Effect |
|---|---|---|
| Bourbon-Enhanced | Add 2 tablespoons bourbon to filling | Sophisticated depth and complexity |
| Pecan-Praline Layer | Mix candied pecans into marshmallow topping | Textural contrast and richness |
| Spiced Intensified | Add ginger and cloves in addition to standard spices | More pronounced warming spice profile |
| Brown Butter Enhancement | Substitute brown butter for regular butter | Nutty undertones and deeper flavor |
Troubleshooting Common Issues
Watery or Separated Filling: Overbaking causes this condition. Ensure you remove the pie when a knife emerges nearly clean, not completely dry. The residual heat continues the cooking process.
Cracked Filling Surface: This typically results from excessively high oven temperature or rapid temperature changes. Maintain consistent, moderate heat and allow the pie to cool gradually away from drafts.
Marshmallow Topping Weeping: This occurs when moisture condenses and runs down the topping. Apply the topping no more than 4 hours before serving and store uncovered until serving time.
Crust Soggy or Underbaked: Insufficient pre-baking is the culprit. Pre-bake the crust until the edges feel set but not browned, creating a moisture barrier that protects against sogginess.
Serving Suggestions and Complementary Pairings
Serve generous slices at room temperature or slightly chilled, allowing the flavors to shine without the dulling effect of extreme cold. A dollop of additional unsweetened whipped cream complements without overwhelming. Coffee, particularly dark roast or espresso, provides an excellent flavor counterpoint.
For holiday entertaining, present the entire pie as a showstopper centerpiece. The marshmallow-topped presentation generates immediate visual appeal and conversation. Individual portions plated on simple white dishware allow the pie’s colors and textures to command attention.
References
- Low-Calorie Sweet Potato Pie — Our Farmer House. Accessed April 2026. https://ourfarmerhouse.com/low-calorie-sweet-potato-pie/
- Sweet Potato Pie — Skinnytaste. Accessed April 2026. https://www.skinnytaste.com/sweet-potato-pie/
- The Ultimate Healthy Sweet Potato Pie — Amy’s Healthy Baking. Accessed April 2026. https://amyshealthybaking.com/blog/2019/11/03/the-ultimate-healthy-sweet-potato-pie/
- Southern Big Mama’s Sweet Potato Pie recipe (Video) — Grandbaby Cakes. Accessed April 2026. https://grandbaby-cakes.com/sweet-potato-pie/
- How To Make Healthy Sweet Potato Pie — A Sweet Peach Chef. Accessed April 2026. https://www.asweetpeachef.com/sweet-potato-pie/