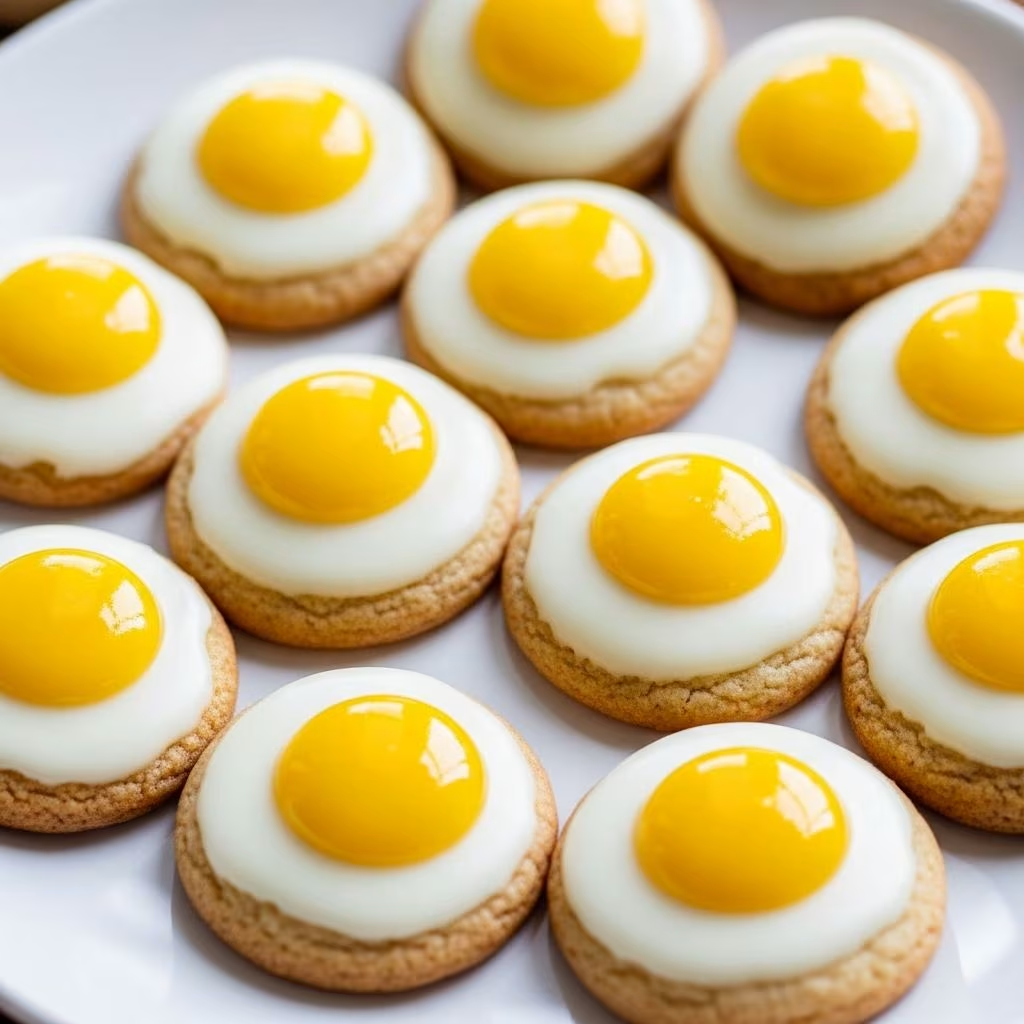
Imagine serving cookies that look exactly like sunny-side-up eggs, complete with gooey yellow yolks and crisp whites. These charming treats combine the buttery goodness of homemade cookie dough with simple candy accents to create a visual delight that’s sure to spark smiles and surprise at any gathering. Whether you’re preparing for a holiday brunch, an April Fools’ prank, or just a fun weekend baking session with kids, sunny-side-up cookies offer endless entertainment and flavor.
The Allure of Deceptive Desserts
Deceptive desserts have captivated bakers for years, turning everyday sweets into conversation starters. Sunny-side-up cookies fit perfectly into this category, mimicking a classic breakfast staple while delivering the rich taste of vanilla-infused dough. The magic lies in the contrast: a soft, golden cookie base represents the egg white, topped with a vibrant yellow center that oozes just enough to fool the eye. This recipe draws inspiration from creative home bakers who use accessible ingredients like cookie wafers and melts to achieve professional results without fancy equipment.
These cookies aren’t just visually striking; they’re versatile. Pair them with bacon strips for a salty-sweet breakfast illusion or tuck them into Easter baskets for a thematic surprise. Their appeal spans seasons, from spring celebrations to summer solstice parties, proving that playful baking knows no bounds.
Essential Ingredients for Authentic Results
Gathering the right components is key to nailing the look and taste. Focus on high-quality staples to ensure your cookies shine—literally and figuratively.
- Butter: Unsalted, softened to room temperature, forms the creamy base (about 1-2 cups depending on yield).
- Sugar: Granulated for sweetness and structure (1-1.5 cups).
- Eggs: 1-2 large eggs bind the dough and add moisture.
- Flour: All-purpose or cake flour for tenderness (2-3 cups).
- Leavening: Baking powder (1 tsp) for a slight lift without puffing too much.
- Flavorings: Vanilla extract, butter flavoring, or lemon zest for depth (1 tsp each).
- Candy Melts: White for egg whites, yellow for yolks (several bags).
- Wafers: Vanilla wafers serve as the perfect yolk base (one per cookie).
Optional add-ins like salt (1/2 tsp) balance flavors, while lemon elements introduce a fresh twist reminiscent of citrus curds in similar recipes. These ingredients are pantry-friendly, making this project accessible for novice and expert bakers alike.
Step-by-Step Guide to Baking Perfection
Follow these detailed instructions to create 24-36 cookies. Patience during cooling and assembly is crucial for the illusion to set properly.
- Prepare the Dough: In a large bowl, cream softened butter and sugar until fluffy, about 2-3 minutes. Beat in eggs, vanilla, and any flavorings. Gradually mix in flour, baking powder, and salt until a firm dough forms. If sticky, add flour 1 tablespoon at a time.
- Chill and Roll: Wrap dough in plastic and refrigerate for 1-3 hours. Roll to 1/4-inch thickness on a floured surface. Use an egg-shaped cutter for uniformity.
- Bake: Preheat oven to 350-375°F. Place cutouts on parchment-lined sheets. Bake 8-15 minutes until edges are golden. Cool completely on racks.
- Melt the Yolks: Microwave yellow candy melts in 30-second bursts, stirring until smooth. Dip vanilla wafers fully, tap off excess, and set on parchment to harden slightly.
- Assemble the Eggs: Melt white candy melts and spread or dip over cooled cookies to form the ‘white.’ Before fully set, gently place a yellow-dipped wafer in the center as the yolk. Let harden at room temperature or chill briefly.
For linzer-style variations, cut small circles in half the cookies before baking, then sandwich with lemon curd post-bake, dusting with powdered sugar for a snowy effect.
Customization Ideas to Elevate Your Cookies
Once mastered, experiment to match themes or preferences. Here’s a table of variations:
| Variation | Key Change | Best For |
|---|---|---|
| Lemon Zest Delight | Add zest and juice to dough; use curd for filling | Spring brunches |
| Summer Sun Burst | Press centers pre-bake, add curd dollops | Solstice parties |
| Chocolate Twist | Swap yellow melts for chocolate | Kid-friendly fun |
| Linzer Eggs | Cutouts with jam centers | Holiday gifts |
Troubleshooting Common Baking Hiccups
Baking mishaps happen—here’s how to fix them:
- Spreading Dough: Chill longer or add more flour; bake on lower racks.
- Pale Yolks: Use fresh melts; stir thoroughly to avoid streaks.
- Sliding Toppings: Ensure cookies are fully cooled; use a dab of melted candy as glue.
- Overbaked Edges: Watch closely after 8 minutes; rotate sheets midway.
- Sticky Assembly: Work in small batches; use forks for dipping.
Practice makes perfect, and even imperfect eggs add to the charm.
Perfect Pairings and Serving Suggestions
Serve these cookies strategically to maximize wow factor. For breakfast pranks, arrange with bacon, toast points, and fresh fruit. In treat bags, layer with tissue paper for gifting. At parties, display on tiered stands mimicking a diner platter.
Flavor pairings shine with coffee’s bitterness, milk’s creaminess, or iced tea’s refreshment. For holidays, nestle in baskets with chocolate eggs or pastel candies.
Storage and Make-Ahead Tips
Baked cookies store in airtight containers at room temp for 5-7 days. Freeze dough logs for up to 3 months—thaw, slice, and bake fresh. Assemble toppings day-of for best appearance, as candy can soften over time.
For crowds, double batches; yields vary by cutter size (2-4 inches ideal).
Why These Cookies Captivate Bakers Everywhere
Beyond looks, these treats teach techniques like candy tempering and dough handling, building skills for advanced projects. They’re forgiving for beginners yet rewarding for pros seeking whimsy. Families bond over assembly, turning baking into a shared memory-maker.
In a world of standard sweets, sunny-side-up cookies stand out, blending nostalgia with novelty. They’re not just food—they’re edible art.
Frequently Asked Questions
Can I make these dairy-free?
Yes, substitute vegan butter and dairy-free melts; use plant-based wafers.
How far in advance can I prepare them?
Dough up to 3 months frozen; assembled cookies 1 week stored properly.
What if I lack an egg cutter?
Freehand oval shapes or use oval linzer sets.
Are they gluten-free friendly?
Swap for 1:1 gluten-free flour blend; test small batch first.
Can kids help?
Absolutely—safe tasks include dipping and placing yolks.
References
- Sunny Side Up Egg Cookies!!! — EASYBAKED. 2015-03-31. https://easybaked.net/2015/03/31/sunny-side-up-egg-cookies/
- “Sunny Side Up” Cookies — Ricardo Cuisine. N/A. https://www.ricardocuisine.com/en/recipes/226–sunny-side-up-cookies
- Easter Egg Linzers, Sunny Side up! — Cup of Sugar Pinch of Salt. 2019-04-16. https://cupofsugarpinchofsalt.com/2019/04/16/easter-egg-linzers-sunny-side-up/