Southern cuisine has long been celebrated for its bold flavors and indulgent treats. Among the many beloved confections that emerge from this culinary tradition, crunch bars represent a perfect example of how simple ingredients can be combined to create something truly memorable. These layered treats have become a staple at gatherings, potlucks, and family celebrations throughout the South, representing the region’s commitment to comfort food and time-honored recipes passed down through generations.
Whether you’re a seasoned baker or someone exploring southern dessert traditions for the first time, understanding the fundamentals of creating these bars will help you achieve that perfect balance of textures and flavors. This comprehensive guide will walk you through everything you need to know about making, serving, and storing these delightful confections.
Understanding the Components of Crunch Bars
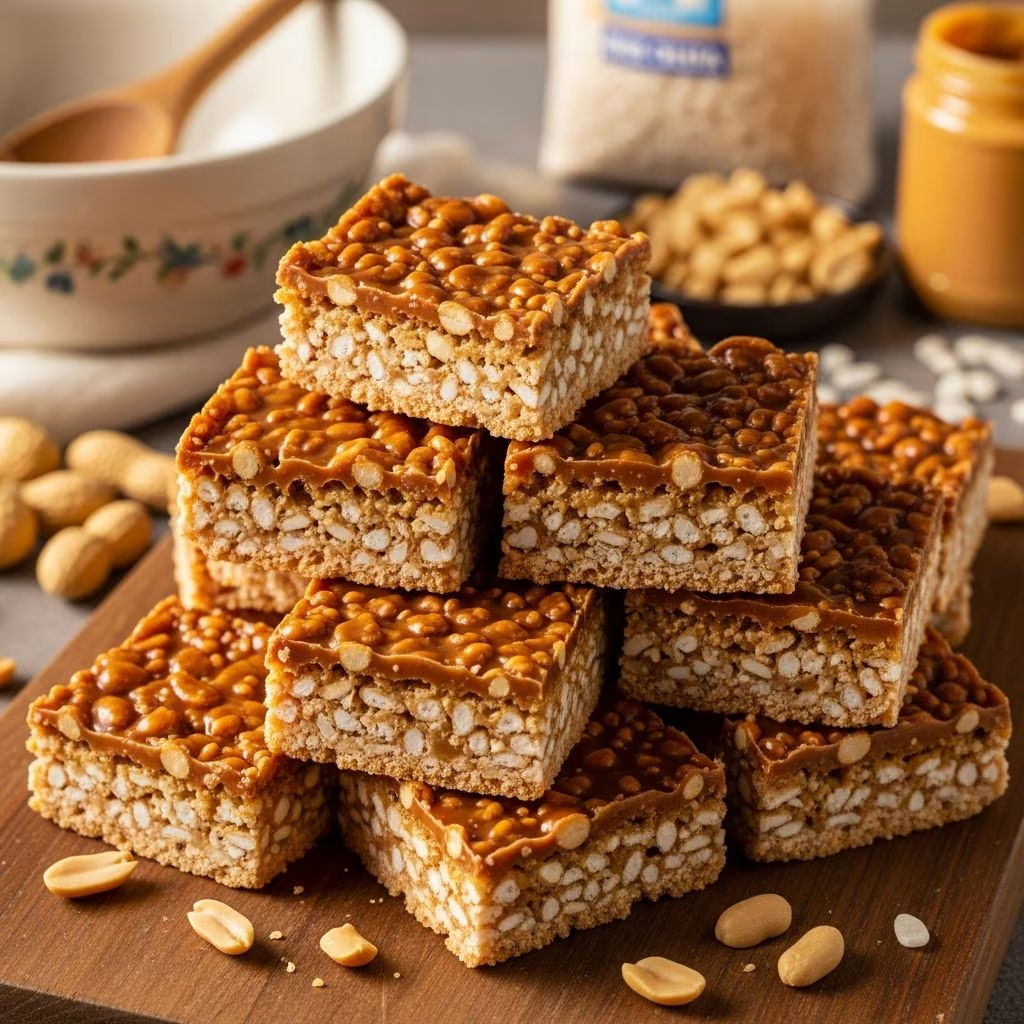
The beauty of crunch bars lies in their straightforward composition and the interplay of different layers that create visual appeal and textural variety. Unlike more complex desserts that require extensive culinary expertise, these bars rely on quality ingredients combined in specific ways to achieve their characteristic appeal.
The foundational layer typically consists of a buttery base that provides structural integrity and serves as the platform upon which other components rest. This layer should be dense enough to support additional ingredients without becoming soggy, yet rich enough to contribute meaningfully to the overall taste profile. The middle components often include a combination of sweetened condensed milk or similar binders mixed with various add-ins that provide both flavor and crunch.
The final component that gives these bars their signature quality is the topping layer, which introduces another dimension of flavor and texture. This might include chocolate, nuts, or a combination of ingredients that creates the distinctive crunch that gives the dessert its name. The arrangement of these layers is crucial to the final product’s success.
Essential Ingredients and Their Selection
Creating authentic southern crunch bars begins with choosing the right ingredients. While the specific components may vary based on family recipes or regional preferences, certain key elements are fundamental to the process.
The Base Layer Foundation
The base layer typically requires butter, flour, and often brown sugar or granulated sugar. When selecting butter, opt for unsalted varieties so you can control the salt content throughout your recipe. The flour should be all-purpose unless otherwise specified, as this provides the right gluten structure without being too dense. Many recipes incorporate graham cracker crumbs or similar ingredients mixed with the flour to create additional texture and flavor complexity.
Binding and Middle Layer Components
Sweetened condensed milk serves as an excellent binding agent that holds ingredients together while adding richness and sweetness. This ingredient is particularly popular in southern baking because of its ability to create a cohesive mixture without requiring additional liquids that might compromise texture. Depending on your specific recipe variation, this layer might also include shredded coconut, chopped pecans, or walnuts.
Topping Layer Elements
The topping layer often features chocolate—either semi-sweet or dark chocolate chips, or sometimes melted chocolate that’s drizzled over the bars. Some recipes incorporate toffee bits, butterscotch chips, or a combination of ingredients. Nuts such as pecans or almonds can be toasted and chopped to provide additional crunch and depth of flavor.
Ingredient Quality and Sourcing Considerations
The quality of ingredients directly impacts the final product. Purchase chocolate from reputable suppliers, as lower-quality chocolate may contain excessive additives that affect texture and taste. Fresh nuts are preferable to those that have been stored for extended periods, as nuts can develop rancid flavors over time. If possible, purchase nuts from bulk sections where turnover is rapid, ensuring maximum freshness.
When selecting butter, consider purchasing from local dairies or reputable brands known for quality. The butter’s flavor will noticeably impact your finished bars. Similarly, using pure vanilla extract rather than imitation versions will enhance the overall flavor complexity of your creation.
Step-by-Step Preparation Instructions
Following a systematic approach to preparation ensures consistent results and helps prevent common mistakes that can compromise your bars.
Preparation Phase
Begin by preheating your oven to the temperature specified in your recipe, typically between 325 and 350 degrees Fahrenheit. Line your baking pan—usually 9×13 inches—with parchment paper or aluminum foil, leaving an overhang that will make removal easier once baked. This step is crucial for preventing sticking and ensuring clean, professional-looking bars.
Creating the Base Layer
Combine softened butter with sugar and mix until the texture becomes light and fluffy. This process, known as creaming, incorporates air into the mixture and helps create a tender crumb structure. Add flour gradually, mixing until just combined to avoid overdeveloping gluten. Spread this mixture evenly across the bottom of your prepared pan, pressing firmly to create an even, compact layer. Bake according to your recipe until the base becomes lightly golden but remains slightly underbaked compared to a standalone cookie.
Assembling Middle and Topping Layers
Remove the base from the oven and allow it to cool for a few minutes. Evenly distribute your middle layer components—whether that’s sweetened condensed milk mixed with coconut and nuts or another combination. Use a spatula to spread these components uniformly, ensuring consistent thickness throughout. If using chocolate or other toppings that should remain distinct, distribute them carefully, pressing gently into the middle layer. Return the assembled bars to the oven and bake until the top becomes golden brown and any chocolate components are set but not burnt.
Baking Techniques for Optimal Results
Achieving perfect crunch bars requires attention to several technical details during the baking process.
Temperature Management
Oven temperature accuracy significantly impacts outcomes. If your oven tends to run hot or cool, use an independent oven thermometer to verify actual temperature. Bars baked at temperatures that are too high may brown excessively on top while remaining undercooked in the middle. Conversely, insufficient heat may result in a base layer that never becomes firm enough to support the upper layers.
Recognizing Doneness Indicators
Rather than relying solely on time, observe visual cues to determine when bars are properly baked. The top should appear golden brown, and if any chocolate elements are present, they should be set but still slightly soft when gently pressed. An internal temperature of approximately 190 degrees Fahrenheit indicates proper doneness. When removed from the oven, the bars should jiggle slightly when the pan is moved, indicating they’re set but not overbaked.
Cooling Procedures
Allow the baked bars to cool completely in the pan before cutting. This cooling period is essential because partially cooled bars will crumble when cut. Many bakers prefer refrigerating the bars for several hours or overnight before cutting, as this additional firming makes clean cuts easier and more precise.
Customization Possibilities and Variations
While traditional recipes provide excellent results, crunch bars are adaptable to personal preferences and dietary considerations.
Nut Selection and Substitutions
Different nuts offer distinct flavor profiles and textures. Pecans provide a slightly sweet, buttery note, while walnuts contribute an earthier dimension. Almonds offer a more neutral taste that allows other flavors to shine. For those with allergies, seeds such as sunflower or pumpkin seeds can provide similar textural elements.
Chocolate Variations
Beyond traditional semi-sweet chocolate, consider experimenting with dark chocolate for deeper, more sophisticated flavors, or milk chocolate for a sweeter profile. White chocolate adds creaminess without the cocoa notes. Some bakers create stunning visual effects by using a combination of chocolate types in distinct layers.
Flavor Enhancements
Adding a teaspoon of sea salt to the top layer creates an interesting contrast to sweet components. Almond extract or coconut extract can be incorporated into the base to complement other flavors. For those who enjoy spiced desserts, cinnamon or nutmeg in the base layer adds warmth and complexity.
Storage and Shelf Life Information
Proper storage extends the life of your bars and maintains their quality.
Room Temperature Storage
When stored in an airtight container at room temperature, crunch bars typically remain fresh for three to five days. Keep them away from direct sunlight and areas with significant temperature fluctuations.
Refrigeration Methods
Refrigerated bars remain fresh for up to two weeks when stored in an airtight container on a shelf away from foods with strong odors. The cooler temperature helps maintain the integrity of chocolate components and prevents the base from becoming too soft.
Freezer Preservation
Crunch bars freeze exceptionally well for up to three months when wrapped individually in plastic wrap and then placed in a freezer-safe container. Thaw at room temperature for approximately one hour before serving.
Frequently Asked Questions
What causes the bars to be too soft or falling apart?
Insufficient baking time often results in bars that lack structural integrity. Additionally, using room temperature ingredients when the recipe calls for melted or softened butter can affect binding. Ensure your base layer achieves proper firmness before adding upper layers.
Why is the bottom layer too hard or difficult to cut through?
Overbaking the base layer is the most common cause. Try reducing baking time by five minutes and check for doneness more frequently. The base should be set but still tender enough to slice cleanly.
How can I prevent the chocolate topping from cracking?
Cracks typically occur when chocolate is applied too thickly or when temperature changes too rapidly. Apply chocolate in a thinner layer and allow cooling to happen gradually at room temperature before refrigerating.
Can I make these bars without nuts?
Absolutely. Increase the amount of chocolate, coconut, or other mix-ins to compensate for the volume nuts would provide. The texture will be slightly different but equally enjoyable.
What’s the best way to cut clean pieces?
Use a sharp knife dipped in hot water and wiped clean between each cut. Some bakers prefer using dental floss, which cuts through layers without dragging. Cutting when the bars are cold or partially frozen produces the cleanest results.
Can I reduce the sugar content?
Modifying sugar levels can be done, but reducing it by more than ten to fifteen percent may negatively impact texture and structure. Experiment with small batches before making permanent changes.
Serving Suggestions and Presentation Ideas
These bars serve wonderfully as desserts for various occasions. For casual family gatherings, simply arrange on a platter with small plates nearby. For more formal presentations, dust lightly with powdered sugar or drizzle with decorative chocolate lines. Pairing with coffee or tea enhances the experience, as the richness of the bars complements these beverages beautifully.
Southern crunch bars represent a delightful intersection of simplicity and indulgence, making them perfect for both experienced bakers and newcomers to the craft. With the guidance provided in this article, you now have the knowledge to create impressive bars that capture the essence of southern baking traditions. The key to success lies in quality ingredients, attention to detail during preparation, and willingness to adjust recipes based on your preferences and results. Whether you’re preparing them for a special occasion or simply satisfying a craving for something sweet and satisfying, homemade crunch bars offer rewards that far exceed the effort required to create them.
References
- The Science of Baking: Understanding Ingredients and Their Interactions — America’s Test Kitchen. 2024. https://www.americastestkitchen.com/
- Food Storage Guidelines: Optimal Conditions for Baked Goods — U.S. Department of Agriculture (USDA) Food Safety and Inspection Service. 2023. https://www.fsis.usda.gov/food-safety/safe-food-handling-and-preparation/food-safety-basics/safe-food-storage
- Freezer Storage for Baked Products — Penn State Extension. 2023. https://extension.psu.edu/
- Temperature Management in Home Baking: Best Practices — King Arthur Baking Company. 2024. https://www.kingarthurbaking.com/
- Chocolate Selection and Quality Assessment for Baking — International Cocoa Organization. 2022. https://www.icco.org/