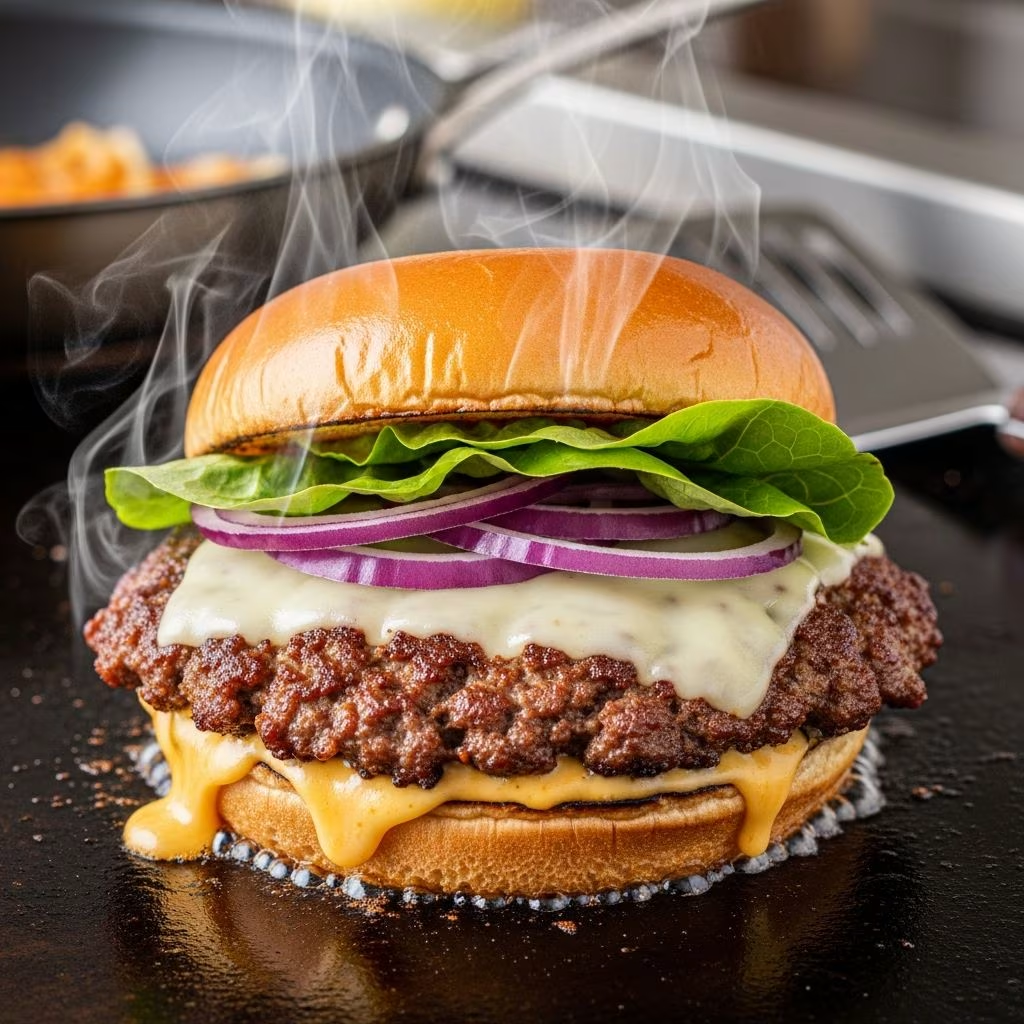
The smash burger has revolutionized casual dining and home cooking by proving that simplicity and technique can yield extraordinary results. Unlike traditional burgers that rely on thickness and lengthy cooking times, smash burgers achieve their distinctive character through aggressive flattening and rapid searing on a screaming hot cooking surface. This approach creates a thin patty with a dramatically increased surface area, allowing for the development of a crispy, caramelized crust while maintaining a surprisingly juicy interior. The result is a burger that delivers concentrated beef flavor and textural contrast that distinguishes it from conventional handcrafted patties.
The beauty of smash burgers lies in their accessibility. They require no special equipment beyond what most home cooks already possess—a griddle, skillet, or cast iron pan, a sturdy spatula, and quality ingredients. The cooking process demands just minutes from raw meat to finished sandwich, making them ideal for weeknight dinners or casual entertaining. Whether you’re looking to elevate your burger game or simply want to understand what makes these sandwiches so compelling, mastering smash burger preparation opens up a world of delicious possibilities.
Understanding the Foundation: Selecting Your Beef
The quality of your finished burger begins with selecting the appropriate ground beef. For smash burgers, the fat-to-lean ratio plays a crucial role in determining the final product’s juiciness and flavor development. An 80/20 meat-to-fat ratio represents the ideal balance for this cooking method. This proportion provides sufficient fat content to keep the patty moist during the brief, high-heat cooking process while maintaining enough protein structure to hold the patty together during the aggressive smashing step.
Ground beef labeled as “chuck” typically falls within the 80/20 range and comes from the shoulder and neck area of the animal, naturally delivering robust beef flavor. The higher fat content compared to leaner options like sirloin or round means the meat will remain tender even with the short cooking times required for smash burgers. If your butcher offers freshly ground beef, this option surpasses pre-packaged varieties in both flavor and texture, as the grinding process hasn’t oxidized the meat’s surface.
Purchasing whole chuck and requesting a fresh grind at the meat counter ensures you’re starting with the best possible ingredient. If this isn’t available, look for ground beef that appears bright red rather than brown, indicating freshness. The date on the package matters—purchase meat that will be used within one to two days of purchase for optimal quality.
Preparation Protocol: Portioning and Forming
Proper preparation sets the stage for success in smash burger cooking. Begin by dividing your ground beef into individual portions before cooking. For an 8-burger batch using 2 pounds of meat, this means creating 8 equal sections of approximately 4 ounces each. For a 4-burger serving from 1 pound, divide into 4-ounce portions.
The critical instruction here is to handle the meat minimally. Rather than packing the meat firmly into balls, use a gentle touch to form loose, barely cohesive spheres. Overworking ground beef develops gluten networks in the meat that lead to a dense, tough final texture rather than the tender, juicy result that smash burgers should deliver. Think of the meat balls as the loosest possible formation—they should hold together by gravity and slight adhesion rather than compression.
Form these meat balls just before cooking and keep them at room temperature. Cold meat won’t compress as readily on the hot griddle, so allowing the formed balls to sit for five to ten minutes before cooking improves the smashing process. Some cooks prefer chilling the formed balls for up to an hour, which actually works well as it makes them easier to handle and position on the griddle.
Equipment Essentials: Griddle Selection and Heat Management
The cooking surface dramatically influences your smash burger outcome. A flat-top griddle represents the ideal equipment, offering consistent, even heating across a broad cooking area. Cast iron skillets serve as an excellent alternative, providing heat retention and even distribution that stainless steel pans cannot match. Standard non-stick skillets are less than ideal, as their coating can degrade under the high heat required for proper smash burger execution.
Temperature control separates successful smash burgers from mediocre attempts. The griddle or skillet should reach 375 to 400 degrees Fahrenheit before any meat makes contact with the surface. At this temperature, the surface is hot enough to immediately sear the meat and create a crust before the interior dries out.
To test whether your cooking surface has reached adequate temperature, hold your hand above it—you should feel intense heat that forces your hand away in just 1 to 2 seconds. Alternatively, place a small piece of meat on the surface; it should immediately begin sizzling aggressively. If you’re using a thermometer, aim for the surface to reach at least 375 degrees before beginning.
Preparation of your cooking surface matters as well. A light coating of clarified butter, neutral oil, or even traditional rendered beef fat prevents sticking and adds flavor. Avoid olive oil or butter with milk solids, as these can burn at the required high temperatures. Clarified butter or vegetable oils work best.
The Critical Smash: Technique and Timing
The smashing moment represents the defining step in smash burger preparation. This is where technique truly matters. Place one or two meat balls directly onto your preheated griddle surface. Within one to two seconds, before the meat begins cooking significantly, position your spatula or burger press directly on top of the meat and apply firm, direct downward pressure.
The goal is to compress the meat ball into a thin patty approximately one-quarter inch thick. Many home cooks use a piece of parchment paper between the meat and their smashing tool to prevent sticking, a technique that works well but isn’t strictly necessary if you’re using sufficient surface fat. Apply pressure in a single, decisive motion rather than multiple gentle pushes—the meat should flatten in one decisive action.
Immediately release the pressure and lift your spatula away. The meat’s residual heat will continue cooking it on the bottom surface, developing that prized crispy crust. This is emphatically not the time to fidget, adjust, or re-smash the burger. Resist the urge to press the patty flat again or check on it excessively. The flattened patty should remain completely undisturbed for the first minute of cooking on this side.
Seasoning Strategy and Flavor Building
Seasoning timing in smash burger cooking deserves careful consideration. Rather than mixing salt and pepper into the raw meat before cooking—a practice that can increase toughness—apply seasoning to the flattened patty immediately after smashing, or even better, after the first side has cooked for 30 seconds.
Kosher salt and freshly ground black pepper form the foundation of smash burger seasoning. Some cooks add garlic powder or smoked paprika for additional depth. The exact amount depends on personal preference, but approximately one-quarter teaspoon of salt and a light grinding of pepper per burger provides a solid baseline.
The high heat of the griddle caramelizes these seasonings into the crust, developing complex flavors that represent a significant advantage over burgers seasoned before cooking. The exterior crust, with its concentrated surface area, essentially absorbs these seasonings at their most potent.
Cooking Progression: From Sear to Completion
Once your meat ball is smashed and undisturbed on the griddle, allow it to cook for approximately 60 to 90 seconds on the first side. You’re aiming for the bottom surface to develop a deep brown, caramelized crust. This crust contains tremendous flavor and represents one of the key characteristics that distinguish smash burgers from other burger styles.
After this first period of cooking, the moment arrives to flip. Using your spatula, carefully slide it under the entire patty, ensuring you scrape up the caramelized crust and keep it attached to the meat rather than leaving it on the griddle. Flip the patty in a single confident motion onto an uncooked section of the griddle if possible, or back to the same spot if your griddle space is limited.
Now immediately add a slice of cheese to the top of the patty. The residual heat and the still-hot bottom surface will begin melting the cheese as it cooks on this second side. Cook for approximately 45 seconds to 1 minute on the second side—notably shorter than the first side because the meat is already mostly cooked through.
If you prefer your cheese particularly melted and slightly browned, consider covering the patty with a small metal lid or even a loosely tented piece of foil during the final few seconds of cooking. This traps heat and helps the cheese reach peak meltiness.
Complementary Elements: Toppings and Assembly
The smash burger’s inherent simplicity means that each component you add should enhance rather than overwhelm. Classic American cheese represents the traditional choice, though cheddar, pepper jack, or Swiss work equally well. Add the cheese while the patty is still on the griddle, allowing the residual heat to begin the melting process.
Toasted buns elevate the finished burger significantly. Brush hamburger buns lightly with butter and place them cut-side down on the griddle for 30 to 45 seconds until they turn golden and crisp. This adds textural contrast and prevents soggy buns that can diminish an otherwise excellent burger.
Condiments deserve consideration as well. A simple combination of mayonnaise mixed with minced pickles and a touch of BBQ sauce creates a burger sauce that complements the intense beef flavor. Alternatively, classic ketchup, mustard, and fresh toppings like pickles, onions, or lettuce work perfectly.
Comparative Analysis: Smash Burgers Versus Traditional Methods
| Characteristic | Smash Burger | Traditional Burger |
|---|---|---|
| Thickness | Approximately 1/4 inch | 3/4 to 1 inch |
| Cooking Time | 60-90 seconds per side | 3-4 minutes per side |
| Crust Development | Crispy, lacy, deeply browned edges | Minimal exterior crust |
| Interior Texture | Juicy with concentrated beef flavor | Uniformly cooked throughout |
| Ideal Beef Ratio | 80/20 (higher fat content) | 85/15 or 90/10 (leaner) |
| Surface Area | Maximized for crust development | Minimal surface area |
Troubleshooting Common Challenges
Burgers sticking to the spatula: Ensure your griddle is adequately preheated and has sufficient fat coating. Parchment paper between the meat and spatula provides insurance against sticking without sacrificing results.
Dry, tough burgers: This indicates overcooking. Reduce your cooking time on the second side or lower your griddle temperature slightly. The total cooking time should rarely exceed 2 to 3 minutes per patty.
Patties falling apart during flipping: You may be overworking the meat during the formation stage or pressing too gently when smashing. Firm, confident pressure during smashing creates a cohesive patty that holds together well.
Insufficient crust development: Your griddle isn’t reaching adequate temperature. Ensure the surface reaches at least 375 degrees and avoid cooking multiple burgers simultaneously on a griddle that doesn’t have plenty of surface area.
Frequently Asked Questions
Can I use a grill instead of a griddle?
A traditional grill with grates works, though you’ll lose some of the crust development compared to a flat cooking surface. A baking steel or flat-top grill attachment provides better results if you’re committed to grilling.
How far in advance can I form the meat balls?
Form meat balls up to 1 hour before cooking. Refrigerating them makes them firmer and easier to handle, though they should sit at room temperature for about 10 minutes before cooking for optimal smashing results.
What’s the best cheese for smash burgers?
American cheese melts most efficiently and represents the traditional choice, though any good-quality cheese that melts readily works well. Avoid very hard cheeses that don’t melt easily.
Should I press the burger while it’s cooking on the second side?
Absolutely not. Pressing on the second side squeezes out moisture and toughens the patty. The only time you press is during the initial smashing step.
How do I make smash burgers for a large group?
Work in batches rather than cramming too many burgers on your griddle simultaneously. Proper spacing ensures each patty achieves optimal crust development. Keep finished burgers warm on a plate covered with foil while cooking subsequent batches.
Scaling Your Smash Burger Production
Making smash burgers for a gathering requires slightly different approach than preparing them for two or three people. Rather than attempting to cook all burgers simultaneously, work in batches of two to four depending on your griddle size. Maintain your griddle temperature between batches by reducing heat slightly while you’re not actively cooking, then bringing it back to full temperature before adding the next batch.
Prepare all your meat balls and organize your toppings before beginning to cook. Having everything ready means you can work efficiently and serve hot burgers to your guests. Consider setting up an assembly station where each person can customize their burger with preferred condiments and toppings after the patty and cheese are ready.
Conclusion: Elevating Everyday Cooking
Smash burgers represent more than just a cooking technique—they embody the principle that superior results come from understanding fundamental cooking principles and executing them with precision. The combination of proper ingredient selection, appropriate equipment, accurate temperature management, and disciplined technique transforms simple ground beef into a burger that rivals or exceeds what many restaurants deliver.
Once you’ve mastered the basic smash burger technique, you can experiment with flavor variations, different cheeses, creative toppings, and specialty sauces. The solid foundation you’ve built through understanding each step provides the platform for culinary creativity while maintaining the crispy-exterior, juicy-interior characteristics that define exceptional smash burgers.
References
- Ground Beef and Food Safety — United States Department of Agriculture, Food Safety and Inspection Service. 2024. https://www.fsis.usda.gov/food-safety/safe-food-handling-and-preparation/meat
- Best Practices for Cooking Ground Beef — National Cattlemen’s Beef Association. 2023. https://www.beefboard.org
- Food Temperature Guidelines for Consumer Safety — Centers for Disease Control and Prevention. 2024. https://www.cdc.gov/foodsafety/communication/people/consumer-training.html