Beef tenderloin stands as one of the most prized cuts in the culinary world, celebrated for its natural tenderness and elegant presentation. However, achieving the perfect balance between a buttery-soft interior and a flavorful golden crust requires understanding the nuances of cooking technique. The slow-roasting method has emerged as the gold standard for home cooks seeking restaurant-quality results without requiring specialized equipment or extensive training. This approach combines low-temperature precision with strategic finishing touches to deliver consistently excellent outcomes.
Understanding the Fundamentals of Low-Temperature Roasting
Low-temperature roasting represents a departure from traditional high-heat cooking methods. Rather than exposing the meat to intense heat that can cause uneven cooking and moisture loss, this technique maintains oven temperatures between 225°F and 300°F throughout most of the cooking process. This gentler approach allows heat to penetrate the meat gradually and uniformly, resulting in a more consistent doneness from edge to center.
The science behind this method centers on understanding how muscle proteins respond to temperature. At lower heat levels, the muscle fibers relax slowly, retaining moisture rather than expelling it rapidly through the tissue. This fundamental principle explains why low-temperature roasting produces such tender, juicy results compared to faster cooking methods.
The choice between oven temperatures matters significantly. Temperatures around 250°F to 275°F require longer cooking times but offer the most precise control over final doneness. Conversely, 300°F reduces cooking time to approximately 45-60 minutes while still providing excellent results. Most home cooks find the middle ground around 275°F to 300°F provides optimal balance between precision and convenience.
Preparation Steps That Ensure Success
Proper preparation represents the foundation upon which excellent roasted beef tenderloin is built. Beginning with quality meat selection matters, as this cut performs best when sourced from reputable suppliers. The tenderloin should be trimmed of excess external fat while maintaining enough marbling for flavor.
Temperature conditioning represents the first critical preparation step. Removing the tenderloin from refrigeration 45-60 minutes before cooking allows the interior to warm gradually to room temperature. This warming process is essential because cold meat placed in an oven cooks unevenly, with the exterior overcooked before the center reaches the desired temperature. Room-temperature meat cooks more uniformly throughout, resulting in better final texture.
Surface preparation follows temperature conditioning. Pat the roast completely dry using paper towels, as moisture on the surface interferes with browning. Season generously with kosher salt and freshly cracked black pepper on all sides. For larger tenderloin cuts, consider halving the roast to ensure even cooking and easier handling in standard home cookware.
Binding with butcher’s twine transforms an irregularly shaped roast into a uniform cylinder that cooks evenly. Tie the roast at regular 1.5 to 2-inch intervals, tucking any thin ends underneath and securing them with twine. This step prevents the thin ends from overcooking while the thicker center continues cooking.
The Searing Process: Creating Flavor Through Browning
Searing the exterior creates a flavorful crust through the Maillard reaction, a chemical process that develops complex flavors and appetizing browning. This step occurs before the main roasting phase and requires proper technique to achieve optimal results.
Select a heavy skillet, preferably cast iron, that can accommodate the tenderloin with minimal crowding. Heat the skillet over high heat until smoking slightly, then add a high-smoke-point oil such as avocado oil or refined canola oil. The oil should shimmer across the pan surface.
Carefully place the tenderloin in the hot pan, working away from your body to minimize splashing risk. Resist the urge to move the roast; allow it to develop an uninterrupted brown crust for 3-4 minutes. Turn the roast using heavy-duty tongs and sear each remaining side for 2-3 minutes until all surfaces display a rich golden-brown color. The entire searing process typically requires 8-12 minutes depending on the roast’s dimensions.
Transfer the seared roast to a plate and allow it to cool slightly for 5-10 minutes before the next step. This brief resting period allows the exterior to stabilize before additional handling.
Creating and Applying Aromatic Butter Coating
An herb-infused butter transforms the roasted tenderloin from simple to sophisticated, adding layers of flavor that complement the beef’s natural richness. This butter coating should be prepared while the roast cools from searing.
Combine softened unsalted butter with freshly minced garlic, chopped fresh rosemary, and chopped fresh thyme in a small bowl. The proportions typically include ½ cup softened butter, 6 cloves minced garlic, and 1 teaspoon each of fresh rosemary and thyme. Mix these ingredients thoroughly until the herbs distribute evenly throughout the butter.
Alternatively, some recipes prepare an infused butter by gently heating butter in a small saucepan with garlic cloves and whole herb sprigs, allowing the flavors to meld over gentle heat without browning. This method produces a more refined butter with cleaner herb flavors. Either approach works effectively; choose based on your preference for texture and flavor intensity.
Apply the butter mixture generously over the entire surface of the cooled tenderloin, ensuring complete coverage. Return the buttered roast to the same skillet used for searing, or transfer it to a roasting pan if the skillet lacks appropriate size.
The Low-Temperature Roasting Phase
With preparation and searing complete, the roast enters the main cooking phase where low-temperature precision determines the final outcome. Preheat the oven to the chosen temperature—275°F to 300°F represents the optimal range for most home kitchens.
Place the prepared roast in the center of the preheated oven. Position an oven rack at center height to ensure even heat circulation around the meat. Insert a meat thermometer probe into the thickest part of the roast, ensuring it does not touch bone if present.
The roasting duration depends on several factors including the roast’s size, starting temperature, and oven characteristics. A 3-4 pound tenderloin typically requires 45-60 minutes at 300°F or 60-70 minutes at 225-250°F. However, these times represent guidelines rather than fixed rules. Begin checking temperature at around 30 minutes and continue monitoring every 5-10 minutes thereafter.
Target internal temperatures for beef tenderloin are:
- 115-120°F for rare to medium-rare with a cool red center
- 125°F for medium-rare with a warm red center
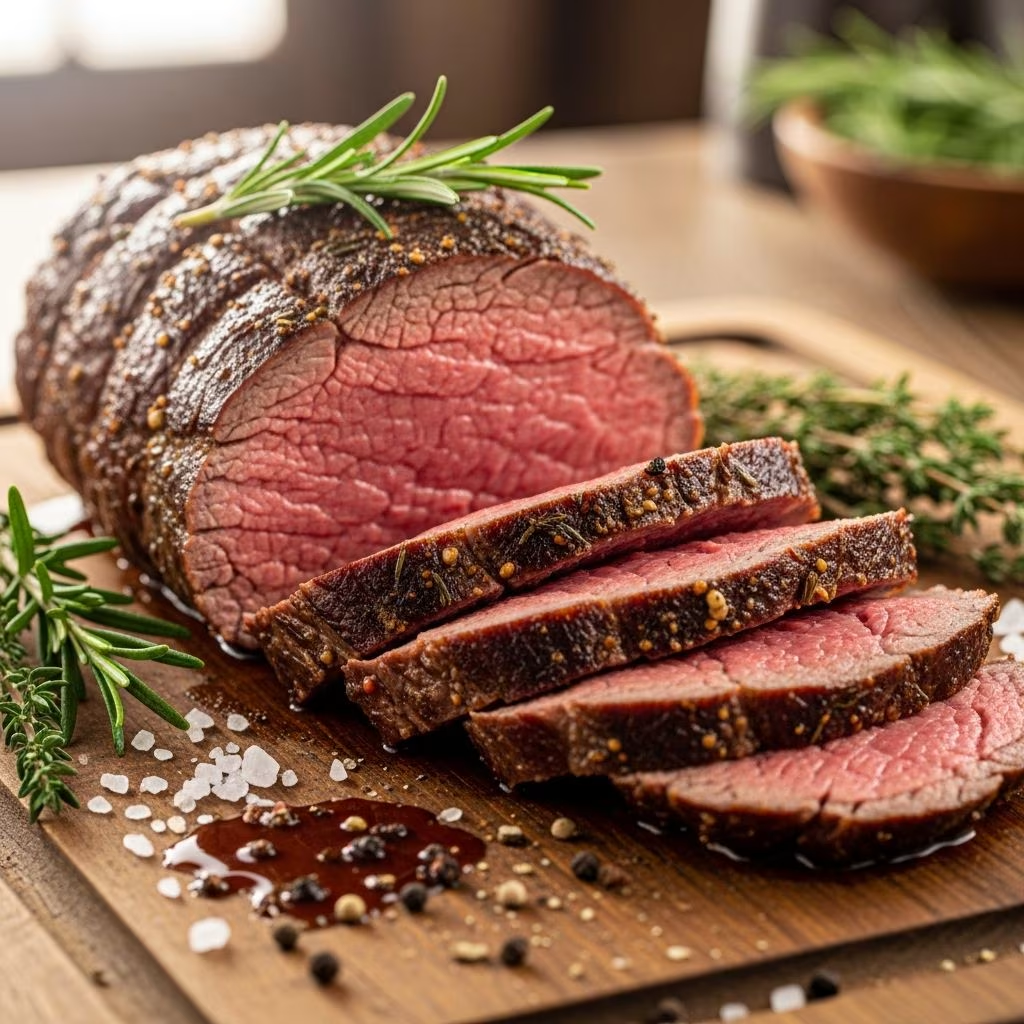
- 135°F for medium with a warm pink center
- 145°F for medium with mostly opaque color
Beef tenderloin remains tender and juicy only when cooked no more than medium. Higher temperatures cause the muscle fibers to contract excessively, expelling moisture and creating a drier, tougher texture that undermines the cut’s signature appeal.
Optional Finishing Techniques for Enhanced Crust
Some recipes incorporate an optional finishing step to develop additional color and flavor on the exterior. Once the roast reaches approximately 5-10 degrees below the target final temperature, remove it from the oven and increase the heat setting to broil.
Position an oven rack 4-6 inches from the broiler element. Return the roast to the oven and broil for approximately 2 minutes, watching carefully to prevent excessive browning or charring. This brief broiling phase creates a more pronounced crust while the interior remains undercookedrelative to the final target, compensating for residual carryover cooking.
Alternatively, some cooks employ a reverse-searing technique, completing the low-temperature roasting first, then performing a final sear in a very hot skillet just before serving. This method provides superior crust development and allows precise timing of the final sear to occur immediately before plating.
The Critical Resting Period
The resting phase after roasting plays an often-underestimated role in determining final quality. Remove the roast from the oven when it reaches the target internal temperature. Tent the roast loosely with aluminum foil and allow it to rest for at least 10-15 minutes, ideally up to 20 minutes.
During resting, the meat’s muscle fibers relax, and residual heat distributes evenly throughout the roast, raising the internal temperature an additional 3-5 degrees. More importantly, the meat’s juices redistribute throughout the tissue. If carved immediately after roasting, these juices run onto the cutting board rather than remaining in the meat, resulting in a drier eating experience. The resting period allows these juices to reabsorb into the muscle, creating a moister, more tender final product.
Slicing and Serving Recommendations
After resting, transfer the roast to a cutting board and remove the butcher’s twine carefully. Slice the tenderloin using a sharp carving knife, working against the grain with smooth, deliberate motions. Cut slices ½ to ¾ inches thick for elegant presentation and optimal texture.
The beautiful interior doneness achieved through precise low-temperature cooking deserves presentation that showcases this effort. Arrange slices slightly overlapping on a warmed serving platter, and drizzle any pan juices over the meat. Classic accompaniments include roasted vegetables, creamed horseradish, chimichurri sauce, or béarnaise sauce.
Troubleshooting Common Issues
Even with careful attention to technique, occasional challenges arise. If the roast appears undercooked when sliced, return it to a 300°F oven for an additional 10-15 minutes, monitoring closely. If overcooking occurs, slice the roast and serve with a complementary sauce to add moisture.
Uneven cooking—where the ends are more cooked than the center—typically results from inadequate tying or skipping the step of allowing the roast to reach room temperature before cooking. Ensure twine binds the roast securely at regular intervals, and always allow adequate warming time before roasting begins.
If the crust appears pale or underwhelming, extend the searing time slightly or increase oven temperature to 325°F to encourage more browning. If the crust burns while the interior remains undercooked, lower the oven temperature by 25 degrees and increase cooking time accordingly.
Scaling Recipes for Different Portion Needs
A 2-pound tenderloin typically serves 4 people generously, while a 3-4 pound roast accommodates 6-8 guests. Cooking times scale proportionally with weight; larger roasts require proportionally longer cooking times due to increased distance heat must travel to reach the center.
When increasing quantities, maintain the same oven temperature but extend cooking time by approximately 15 minutes per additional pound. Always rely on internal temperature readings rather than time estimates, as oven performance varies between appliances.
Storage and Make-Ahead Options
Cooked beef tenderloin stores well in an airtight container in the refrigerator for up to 4 days. Slice before storage to facilitate reheating. Gently warm slices in a 250°F oven wrapped in foil, or briefly warm in a pan with a small amount of butter or beef broth to restore moisture.
For make-ahead convenience, complete all preparation steps through the searing phase up to 8 hours in advance. Cover and refrigerate the seared roast, then allow it to return to room temperature before applying butter coating and roasting. This approach allows hosts to complete the time-consuming prep work during quieter hours while keeping final roasting for the last hour before serving.
References
- Easy Garlic and Herb Slow Roasted Beef Tenderloin — Big Delicious Life. 2024. https://bigdeliciouslife.com/slow-roasted-beef-tenderloin/
- Slow-Roasted Beef Tenderloin Recipe — GFF Magazine. 2024. https://gffmag.com/slow-roasted-beef-tenderloin-recipe/
- Slow Roasted Beef Tenderloin — A Well-Seasoned Kitchen. 2024. https://www.seasonedkitchen.com/slow-roasted-beef-tenderloin
- Slow Roasted Beef Tenderloin (Chateaubriand) — Food My Muse. 2024. https://foodmymuse.com/slow-roasted-beef-tenderloin/
- Slow Roasted Beef Tenderloin — Fox and Briar. 2024. https://www.foxandbriar.com/slow-roasted-beef-tenderloin/
- Foolproof Oven-Roasted Beef Tenderloin with Rosemary & Thyme — Plays Well With Butter. 2024. https://playswellwithbutter.com/roasted-beef-tenderloin/