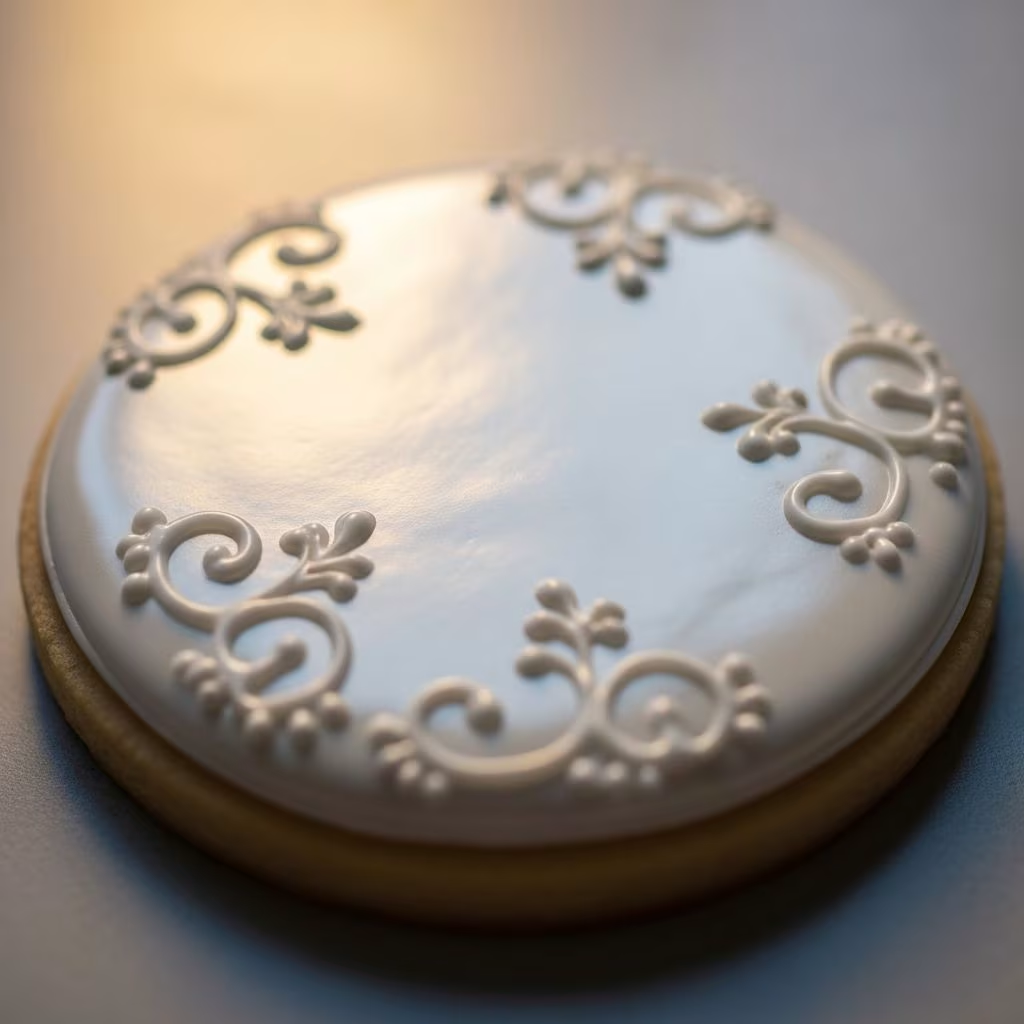
Shiny royal icing transforms ordinary cookies into professional-looking masterpieces with its hard-drying, glossy finish. This versatile frosting sets firmly for intricate designs while offering a smooth, reflective surface that catches the light beautifully. Bakers prize it for outlining, flooding, and stacking cookies without smudging.
Understanding Royal Icing Basics
Royal icing is a staple in cookie decoration, known for its ability to harden into a smooth shell. Unlike buttercream, it doesn’t require refrigeration and holds fine details like lace patterns or piped borders. The key to its shine lies in balancing ingredients for optimal texture and drying speed.
Traditional recipes use meringue powder or egg whites for stability, combined with powdered sugar and liquid. Meringue powder provides structure without raw egg risks, making it ideal for home use. This powder whips into peaks, trapping air for volume and firmness.
Essential Ingredients for Glossy Results
Achieving that coveted shine starts with quality components. Here’s what you need:
- Powdered sugar: The base, sifted for smoothness to avoid lumps.
- Meringue powder: Stabilizes and helps drying; use 2-5 tablespoons per batch.
- Water: Room temperature or warm for easy mixing; adjust for consistency.
- Light corn syrup: The shine secret—adds gloss and prevents rock-hard drying.
- Extracts: Clear vanilla, lemon, or almond for flavor without yellowing.
Optional white food coloring enhances purity for white designs. Avoid dark extracts to maintain brightness.
Step-by-Step Recipe for Shiny Royal Icing
This reliable recipe yields about 4 cups, enough for 2-3 dozen cookies. Prep time: 10 minutes.
| Ingredient | Quantity |
|---|---|
| Powdered sugar, sifted | 4 cups (480g) |
| Meringue powder | 3-5 tbsp |
| Warm water | 9 tbsp + more as needed |
| Light corn syrup | 1-2 tbsp |
| Clear vanilla extract | 1 tsp (optional) |
- Sift powdered sugar into a large bowl to remove clumps.
- Add meringue powder, water, corn syrup, and extract.
- Mix on low with a stand mixer (paddle attachment) or hand mixer until combined, about 1 minute.
- Increase to medium-high and beat 5-7 minutes until stiff, shiny peaks form. It should hold shape but ribbon off the beater.
- Test consistency: Drip icing; it should melt back into the bowl in 5-12 seconds. Thin with water drops or thicken with sugar.
Divide into bowls for coloring with gel food dyes. Cover tightly with damp cloths to prevent crusting.
Techniques for Maximum Shine
Shine isn’t just from ingredients—technique matters. Incorporate these for pro-level gloss:
- Corn syrup magic: 1-2 tbsp per batch creates elasticity and reflection without stickiness.
- Quick drying: Use fans or dehumidifiers; faster set locks in shine before dulling.
- Thick flood icing: Aim for toothpaste-like texture to minimize puddling and air bubbles.
- Smooth application: Flood within outlines, jiggle cookies gently to settle, then pop bubbles with a toothpick.
For outlining, use stiffer icing (10-second consistency); flood with thinner (12-15 seconds). Layer only after full drying, typically 4-24 hours.
Consistency Guide for Every Design
Mastering viscosities unlocks endless possibilities:
| Consistency | Drip Test Time | Best For |
|---|---|---|
| Stiff (piping) | 1-5 seconds | Outlines, details, flowers |
| Medium (10-second) | 5-10 seconds | Detail work, wet-on-wet |
| Flood (12-20 seconds) | 10-20 seconds | Filling bases |
| Thin | 20+ seconds | Lace, drips |
Always test: Lift beater, count until the ribbon disappears. Adjust incrementally—too much water ruins shine.
Coloring and Flavoring Tips
Gel colors won’t thin icing like liquids. Add post-mixing, stirring gently to avoid bubbles. For white icing, a drop of white gel brightens it.
Flavor with clear extracts: lemon adds tang without color shift. Vanilla enhances sweetness subtly. Taste-test small batches first.
Storage and Revival Methods
Fresh icing is best, but store extras airtight at room temp up to 2 weeks. Refrigerate up to a month, but humidity affects drying.
To revive: Add water drop-by-drop, re-beat until peaks reform. If separated, remix thoroughly. Discard if watery or off-smelling.
Pro tip: Plastic wrap pressed to surface prevents crusting in bags.
Common Mistakes and Fixes
Avoid pitfalls for flawless results:
- Dull finish: No corn syrup or slow drying—add syrup next time, use fans.
- Bleeding colors: Wait 24 hours between layers; use gel colors.
- Cracking: Too thick or dry environment—humidify slightly.
- Soft set: High humidity or insufficient beating—increase meringue powder.
Troubleshoot by noting environment: Ideal is 65-75°F, 40-50% humidity.
Creative Uses Beyond Cookies
Shiny royal icing shines (pun intended) on gingerbread houses, holding panels firmly. Pipe monograms on petits fours or assemble cake toppers. Its gloss elevates holiday treats, wedding favors, and themed parties.
Experiment with metallics: Gold leaf over wet icing for luxe effect. Marbled floods blend colors wet-on-wet for ombre designs.
Advanced Decorating Projects
Build stained-glass cookies: Outline, flood with thinned color, pipe lines atop. For 3D shapes, dry pieces separately before gluing.
Stenciling: Spread thin icing, press stencil, scrape excess for crisp patterns. Brush embroidery mimics fabric with pulled lines.
Frequently Asked Questions
What makes royal icing shiny?
Light corn syrup provides gloss and flexibility, while quick drying preserves the finish.
Can I use egg whites instead of meringue powder?
Yes, but pasteurize for safety. Meringue is easier and consistent.
How long does it take to dry?
Outlines: 1-4 hours; floods: 12-24 hours fully. Aids like fans speed it up.
Why is my icing yellow?
Dark extracts or unsifted sugar—use clear vanilla and sift well.
Is royal icing edible after drying?
Absolutely, though very sweet. Soft-bite versions with corn syrup taste better.
Scaling Recipes for Crowds
Double or triple for events: Maintain ratios strictly. Mix in larger bowls to avoid overflow. Bag in multiples for efficiency.
For 100 cookies, prepare 10 cups: Increase all by 2.5x, mix in batches if needed.
Practice on scrap cookies refines skills without waste. Document winning consistencies for repeats.
References
- How to Make Royal Icing Shiny — The Frosted Kitchen. 2023. https://www.thefrostedkitchen.com/how-to-make-royal-icing-shiny/
- Easy Royal Icing (Without Meringue Powder) — Fresh April Flours. 2023. https://freshaprilflours.com/easy-royal-icing/
- Famous Royal Icing – For Sugar Cookies — OwlbBaking.com. 2023. https://owlbbaking.com/royal-icing/
- Easy Royal Icing Recipe — Preppy Kitchen (YouTube). 2023. https://www.youtube.com/watch?v=1pliyGEj_yc
- Royal Icing Recipe for Decorating Cookies — Semi Sweet Designs. 2023. https://www.semisweetdesigns.com/blog/royal-icing-recipe-for-decorating-cookies
- My Favorite Royal Icing — Sally’s Baking Addiction. 2023-10-01. https://sallysbakingaddiction.com/royal-icing/
- Royal Icing Recipe — Sweet Designs Blog. 2023. https://sweetdesignsblog.com/royal-icing-recipe/
- How To Make Shiny Royal Icing? — Your Baking Bestie. 2023. https://www.yourbakingbestie.com/how-to-make-shiny-royal-icing/