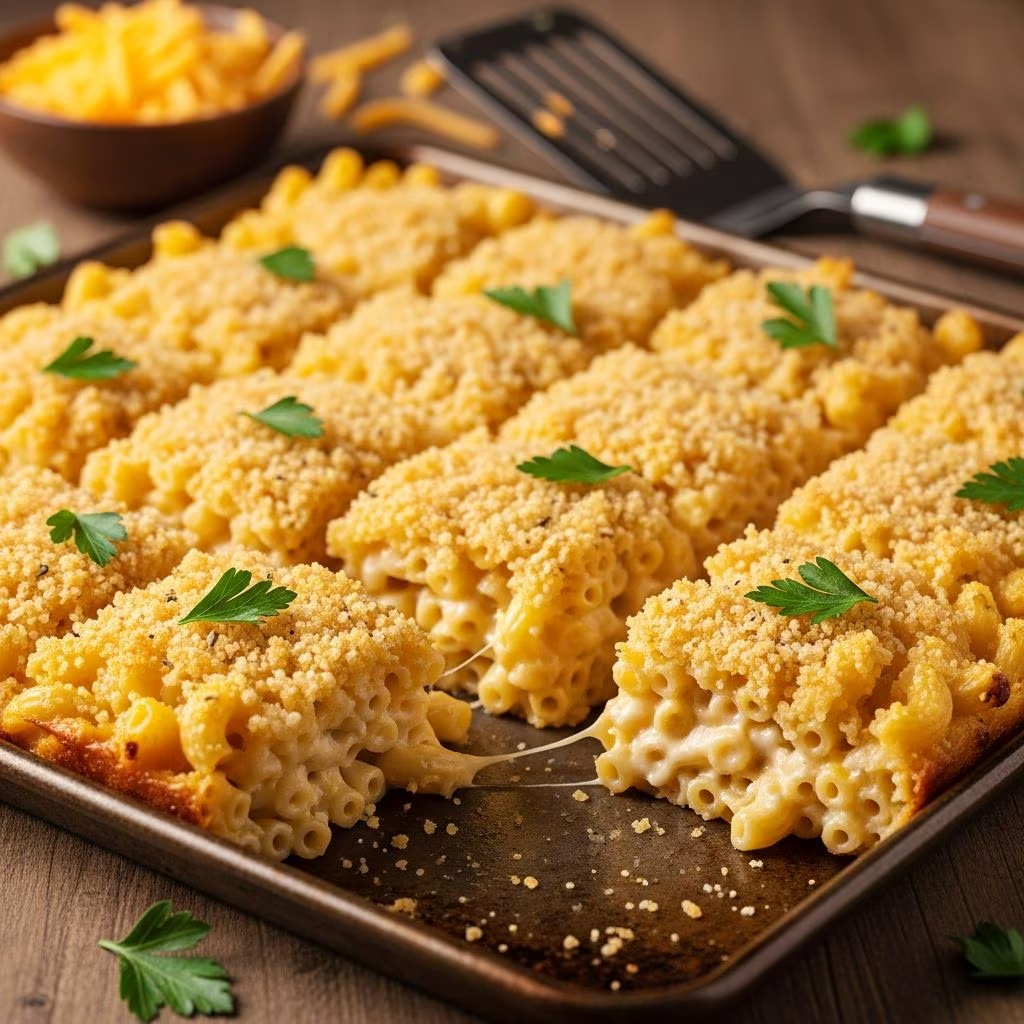
Sheet pan mac and cheese represents an elegant solution to the classic comfort food dilemma. By combining the traditional stovetop method with oven-baked finishing, this approach delivers the best of both worlds: a silky, luxurious cheese sauce paired with a golden, crispy top layer that satisfies every craving. The efficiency of using a single sheet pan also minimizes cleanup while maximizing flavor development and texture contrast.
Understanding the Foundational Technique
The success of sheet pan mac and cheese depends on mastering a few essential steps. Unlike traditional baked versions that rely entirely on oven time, the sheet pan method combines quick stovetop sauce preparation with strategic pan placement. This hybrid approach produces superior results by allowing the pasta to absorb the cheese sauce while the oven creates the desirable crusty exterior.
The process begins with cooking your pasta until just shy of tender. This deliberate undercooking prevents mushy noodles, as the pasta continues absorbing moisture from the cheese sauce during the final baking phase. The timing is crucial—aim for one minute less than package directions to maintain structural integrity and ensure each bite offers a pleasant firmness.
The Science Behind the Perfect Cheese Sauce
Creating a silky, stable cheese sauce requires understanding how dairy components interact with heat and cheese proteins. The foundation involves building a roux—a mixture of equal parts fat and flour cooked together. This step, often called “making a roux,” allows the flour granules to absorb the fat, creating a thickening agent that prevents lumps when liquid is added.
The ratio matters significantly. A light roux incorporating four to six tablespoons of butter with a quarter cup of flour creates the proper base for one and a half to two quarts of milk and cream. Cooking this mixture for one to three minutes until golden and fragrant ensures the raw flour taste dissipates while the thickening power activates fully.
Adding dairy requires patience and attention. Whisking slowly while streaming in milk prevents temperature shock and allows the roux to incorporate liquid gradually. This gradual incorporation creates a smooth sauce rather than a lumpy one. Heavy cream contributes additional richness and creates a luxurious mouthfeel that complements the cheese.
Cheese Selection and Combination Strategies
The most exceptional sheet pan versions employ multiple cheese varieties rather than relying on a single type. Each cheese contributes distinct flavors and melting characteristics that together create complexity impossible to achieve alone.
| Cheese Type | Flavor Profile | Melting Quality | Recommended Amount |
|---|---|---|---|
| Sharp Cheddar | Tangy, robust | Melts smoothly | 3-4 cups total |
| Gruyère | Nutty, sophisticated | Creates silky texture | 1.5-2 cups total |
| Fontina | Creamy, mild | Excellent meltability | 1-1.5 cups |
| Parmesan | Sharp, distinctive | Best for topping | 0.5-1 cup |
Sharp cheddar serves as the backbone, offering assertive flavor that prevents the dish from tasting one-dimensional. Gruyère adds sophisticated nuttiness and helps create that prized silky texture. Fontina contributes creaminess and melts almost effortlessly, while freshly grated Parmesan provides a sharp, umami-rich element particularly effective in the topping layer.
The processed cheese category, exemplified by products like Velveeta, plays a surprising role in some versions. These products contain emulsifiers that help achieve unusually smooth sauces, though purists debate their necessity. For those who prefer them, using a limited amount combined with natural cheeses creates benefits without compromising taste.
Building Textural Complexity Through Toppings
The topping transforms sheet pan mac and cheese from merely creamy to genuinely exciting. Creating textural contrast requires strategic selection of topping components that crisp up during baking rather than simply melting into the dish.
Crushed crackers—particularly Ritz or saltines—contribute both crunch and subtle saltiness that elevates the overall flavor profile. Panko breadcrumbs offer a coarser texture that crisps beautifully without absorbing too much grease. Mixing these elements together with grated cheese and melted butter creates an amalgam that browns gorgeously while maintaining its structural integrity.
Seasoning the topping layer deserves special attention. Fresh herbs like chives or basil added post-baking provide brightness that cuts through the richness. Dried herbs mixed into breadcrumbs beforehand infuse flavor throughout the topping. A pinch of paprika adds color and subtle warmth without overpowering other elements.
Pan Selection and Preparation Matters
Standard half-sheet pans, measuring approximately eighteen by thirteen inches, provide the ideal vessel for this dish. The dimensions allow the mac and cheese to spread to an appropriate thickness—roughly one and a half to two inches—creating optimal surface-to-volume ratios that encourage both creamy centers and crispy tops.
Proper pan preparation prevents sticking and ensures easy serving. Light coating with cooking spray, butter, or oil creates a protective layer. Some cooks prefer parchment paper for effortless removal and cleanup, though the direct contact method produces slightly crisper bottoms.
Pre-heating the sheet pan in the oven creates immediate heat contact when the mac and cheese mixture is added, encouraging the bottom layer to brown more effectively. This technique, particularly effective when using the broiler for finishing, creates restaurant-quality color and texture.
Temperature Control and Timing
Sheet pan mac and cheese typically bakes at three hundred fifty to four hundred twenty-five degrees Fahrenheit, depending on specific recipes and desired final texture. Lower temperatures around three hundred fifty degrees produce evenly creamy results with moderate browning over thirty to thirty-five minutes. Higher temperatures accelerate cooking, creating darker crusts in shorter timeframes—typically fifteen to twenty minutes.
The broiler finish technique, employed by many experienced cooks, adds dramatic browning in the final minutes. Setting the oven to broil and positioning the rack six inches from the heating element for two to three minutes creates impressive color and crispness. Careful attention prevents burning, as broiler intensity varies significantly among appliances.
Visual cues matter more than strict timing. The dish is ready when the cheese is actively bubbling around the edges and the topping layer achieves golden-brown color. The cheese sauce should appear glossy rather than oily, indicating proper emulsification.
Flavor Enhancement Through Ingredient Additions
While cheese forms the backbone, strategic additions elevate the complexity without overwhelming the core flavors. Dijon mustard contributes subtle tang that brightens the dairy components. Dry mustard powder offers similar benefits with less moisture addition. A modest dash of hot sauce or Worcestershire sauce adds depth and umami richness.
Aromatics introduced during the sauce-building phase build flavor foundations. Mincing garlic and shallots, then cooking them in butter for two minutes before adding flour creates savory undertones that support the cheese flavors. A pinch of freshly ground nutmeg, added to the thickened sauce, provides warmth and complexity characteristic of classical French béchamel.
Fresh herbs incorporated at the end provide brightness. Chives, basil, or parsley scattered over the finished dish add visual appeal and fresh herbaceous notes that contrast with the rich, warm core.
Practical Assembly and Serving Strategies
Organization streamlines the process significantly. Measure all ingredients and arrange them in logical order before beginning cooking. Have your cooked pasta ready, your cheese selections pre-grated, and your topping components combined in a separate bowl.
The assembly sequence prevents temperature loss and ensures components combine optimally. Add pasta to the finished cheese sauce, then immediately transfer to the prepared sheet pan for spreading. Distributing the topping quickly after spreading the mac and cheese mixture onto the pan prevents the bottom layer from drying excessively.
Cooling for five to ten minutes after removal from the oven allows the dish to set slightly, making it easier to portion and serve without excessive sliding. This resting period also permits the topping to achieve maximum crispness through residual heat.
Troubleshooting Common Challenges
A grainy or broken cheese sauce typically results from overheating or adding cheese too rapidly. Maintaining medium or medium-low heat and incorporating cheese in small amounts—stirring until each addition melts before adding more—prevents this issue. If graininess occurs, blending the sauce briefly with an immersion blender often restores smoothness.
Overly thick sauce results from using too much roux relative to liquid. Whisking in additional milk, one tablespoon at a time, recovers the proper consistency. Conversely, thin sauce indicates insufficient roux; a quick slurry of additional flour whisked with a bit of milk, then stirred into the sauce, provides correction.
Soggy toppings indicate insufficient heat or incomplete browning. Using a sheet pan preheated in the oven, finishing with broiler heat, or increasing the baking temperature typically resolves this. Tossing topping components with melted butter before application also improves browning and crispness.
Creative Variations and Adaptations
While the classic version remains excellent, variations allow personalization. Incorporating cooked bacon, sautéed mushrooms, or broccoli florets adds dimension. Using different pasta shapes—from small shells to penne—changes the mouthfeel and visual presentation while maintaining the fundamental appeal.
International inspirations can guide variations. Italian versions incorporate fontina and fresh basil, while French-inspired versions emphasize Gruyère and thyme. Mexican-influenced adaptations might include jalapeños and smoked paprika alongside traditional cheeses.
Storage and Reheating Guidance
Sheet pan mac and cheese stores well in the refrigerator for three to four days when covered properly. Transferring portions to individual containers maintains quality better than keeping the entire pan covered, as condensation can soften the topping.
Reheating in a three hundred fifty-degree oven for ten to fifteen minutes restores the dish to near-original quality. Covering with foil initially prevents over-browning, then removing it in the final minutes re-crisps the topping. Microwave reheating, while convenient, typically compromises the textural contrast that makes this dish special.
Frequently Asked Questions
Can I make sheet pan mac and cheese ahead of time?
Yes, you can assemble the dish completely, cover it with plastic wrap, and refrigerate for up to eight hours before baking. Add five to ten minutes to the baking time if baking from cold. Some cooks prefer this method, as it allows flavors to meld.
What pasta shape works best?
Elbow macaroni remains the traditional choice and is recommended for holding sauce optimally. Larger shells, penne rigate, or cavatappi also work well, as their shapes trap sauce effectively. Avoid thin, long pasta like spaghetti, which tends to clump.
Can I use milk alone without heavy cream?
While possible, the result will be less luxurious. A minimum of one cup heavy cream per quart of milk produces superior texture. Those avoiding cream entirely can substitute evaporated milk, which provides richness without additional cream.
How do I prevent the bottom from burning?
Place a baking sheet on a lower oven rack to shield the bottom heat if your oven runs hot. Alternatively, position the sheet pan on the center rack rather than the lowest position. Pre-heating the pan moderately helps, as does monitoring the bottom periodically.
Can frozen or fresh herbs be used?
Fresh herbs added post-baking provide superior brightness and visual appeal. Frozen herbs can be incorporated into the sauce itself, though they’re less effective as garnish. Dried herbs work well in the topping mixture or sauce but provide different flavor characteristics than fresh varieties.
References
- The Pioneer Woman: Ree Drummond’s Sheet Pan Mac & Cheese — The Pioneer Woman. https://www.youtube.com/watch?v=xrjEQM-sDLM
- Sheet Pan Mac and Cheese Recipe — How Sweet Eats. 2024. https://www.howsweeteats.com/2024/12/sheet-pan-mac-cheese/
- Sheet Pan Mac and Cheese — The Slow Roasted Italian. https://www.theslowroasteditalian.com/sheet-pan-mac-and-cheese/
- Sheet Pan Mac and Cheese — Damn Delicious. 2019. https://damndelicious.net/2019/09/14/sheet-pan-mac-and-cheese/
- The Best Sheet Pan Mac n’ Cheese — Alexandra’s Kitchen. 2014. https://alexandracooks.com/2014/01/28/sheet-pan-mac-n-cheese/