In contemporary cooking, culinary trends often emphasize complexity—layering multiple flavors, techniques, and ingredients to create sophisticated dishes. Yet sometimes the most remarkable meals emerge from profound simplicity. The salt-roasting method represents one of such elegant approaches, where a single primary ingredient—kosher salt—transforms an ordinary bird into something extraordinary. This technique challenges the conventional wisdom that more ingredients equal better results, instead proving that thoughtful preparation and quality ingredients can yield restaurant-caliber poultry at home.
Understanding the Salt-Roasting Philosophy
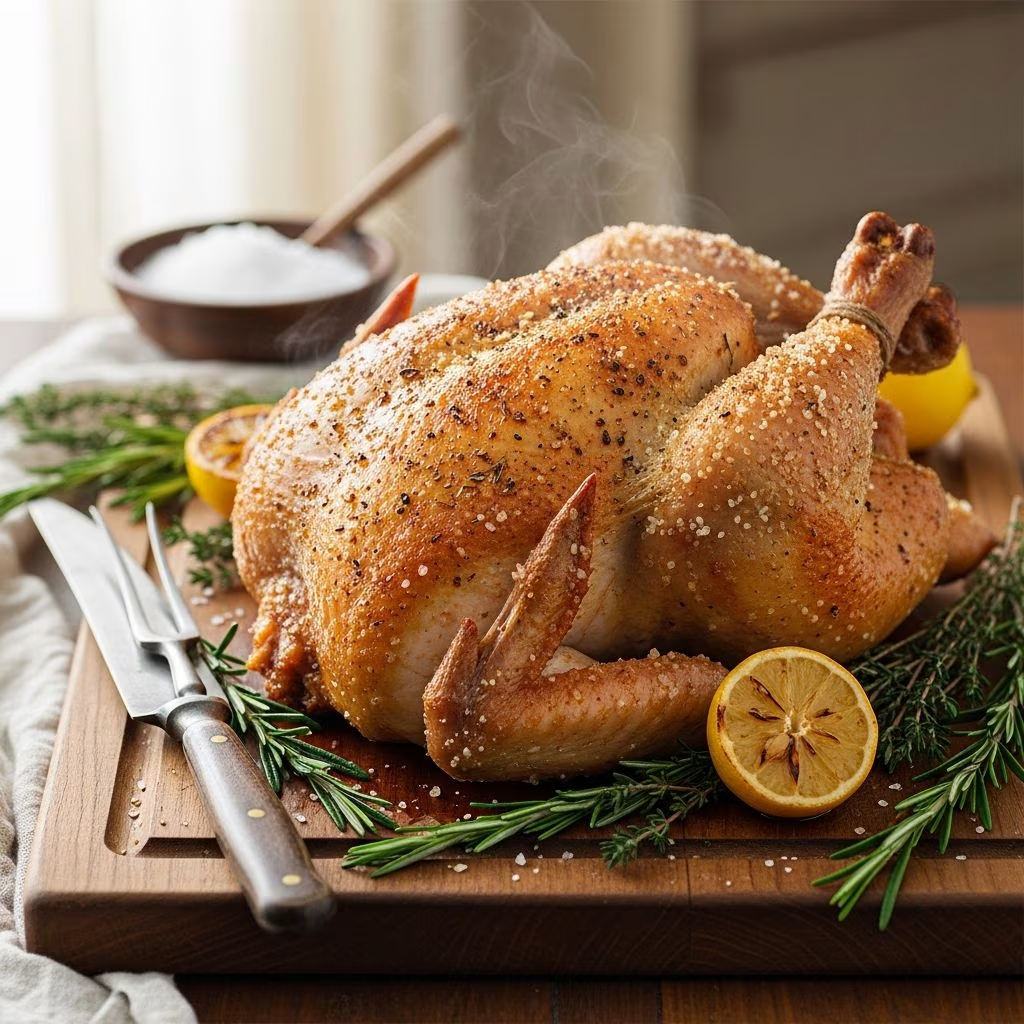
The philosophy behind salt-roasting diverges sharply from traditional roasting methods. Rather than relying on oil, butter, or elaborate seasoning blends, this approach strips away unnecessary components to reveal the chicken’s natural qualities. When applied generously to the bird’s exterior and interior, kosher salt creates an environment that locks in moisture while simultaneously allowing the skin to achieve optimal crispness. The coarse crystals of kosher salt work differently than table salt—their larger structure allows for more nuanced seasoning distribution and prevents the over-salting that might occur with finer alternatives.
The science underlying this method involves the salt’s interaction with chicken proteins. As heat penetrates the bird, salt particles dissolve and penetrate the meat, enhancing flavor development through a process similar to dry brining. Simultaneously, the salt’s hygroscopic properties draw surface moisture outward, which then evaporates under the intense heat of a preheated oven, resulting in skin that achieves a deep golden-brown color and satisfying crispness without any added fat.
Essential Preparation Steps
Success with salt-roasting begins well before the chicken enters the oven. Proper preparation ensures even cooking and optimal texture development throughout the bird.
- Temperature Acclimation: Remove the chicken from refrigeration approximately one hour before cooking. This allows the meat to reach closer to room temperature, promoting more even cooking throughout the bird. A cold chicken requires extended cooking time, which can result in the exterior overcooking while the interior remains undercooked.
- Pat Dry: Thoroughly pat the chicken’s exterior with paper towels. Any surface moisture inhibits browning and prevents the skin from achieving desired crispness. Pay particular attention to crevices and cavities where moisture tends to accumulate.
- Interior Preparation: Rinse the cavity thoroughly under cool running water and pat it completely dry. The interior environment should be as moisture-free as possible, as trapped steam can compromise skin crispness.
- Oven Preheating: Ensure your oven reaches 450°F before introducing the chicken. A properly preheated oven is non-negotiable—this temperature creates the thermal environment necessary for skin crisping while cooking the interior through.
The Art of Salt Application
Applying kosher salt correctly represents the technique’s most critical component. This step demands a different mindset than typical seasoning, requiring generous application that initially feels excessive.
Begin by coating the chicken’s interior cavity with a substantial layer of salt. Work the crystals into every surface, ensuring complete coverage. This interior salting begins the brining process and seasons the chicken from within. Next, address the exterior, starting with the legs and thighs. Apply salt generously to all surfaces, working it into crevices and under any loose skin. Progress to the wings, ensuring every accessible area receives thorough coverage. Finally, apply the most generous coating to the breasts—these lean areas benefit most from the salt’s moisture-retaining properties.
After complete coverage, use a paper towel to brush away excess salt that has accumulated in piles. This step prevents excessive saltiness in the roasting pan, which becomes important when preparing pan sauce later. However, remain conservative during this brushing—the goal is removing only truly excessive buildup, not reducing the overall salt coverage.
Roasting Technique and Timing
Place the prepared chicken breast-side up in a roasting pan. The bird should sit in the center of the oven, allowing air circulation on all sides for even cooking.
Roast at 450°F for 50 to 60 minutes, depending on the chicken’s size. A 3.5 to 4-pound bird typically requires approximately 55 minutes. The chicken is properly cooked when the thigh’s internal temperature reaches 160°F when measured with a meat thermometer inserted into the thickest part without touching bone. The skin should display a deep golden-brown color with a noticeably crisp texture.
Notably, this high-temperature, relatively brief cooking period produces superior results compared to lower-temperature roasting. The intense heat simultaneously crisps the exterior and cooks the interior efficiently, minimizing the risk of overdrying the meat.
Resting and Carving
Upon removing the chicken from the oven, resist the immediate urge to carve. Allow the bird to rest for 5 to 10 minutes—this crucial period permits carryover cooking to complete while allowing muscle fibers to relax. Resting allows the redistribution of internal juices, resulting in moister meat when finally carved. During this resting period, the pan drippings begin to cool slightly, making them more suitable for sauce preparation.
When ready to carve, use a sharp knife and steady cutting board. Begin by removing the legs by pulling them away from the body and cutting through the thigh joint. Separate the thighs from drumsticks by cutting along the line of fat separating these two portions. Remove the wings by pulling them upward and cutting where they join the body. Finally, slice the breast meat by cutting parallel to the breastbone, working from the top downward.
Creating a Complementary Thyme-Butter Sauce
While the chicken rests, transform the roasting pan’s drippings into an elegant sauce requiring minimal additional ingredients and effort.
Sauce Ingredients:
- Rendered chicken fat from the roasting pan
- 2 tablespoons cold butter, cut into small pieces
- 1 tablespoon fresh thyme leaves
- Juice from one lemon
- 1/3 cup chicken broth (supplemented with any additional juices from the chicken’s resting plate)
- Salt and pepper to taste
- Cayenne pepper to taste
Remove the roasting pan from the oven and place it over medium-high heat on the stovetop. Using a paper towel, blot away approximately 90 percent of the accumulated fat, leaving a thin coating for flavor. Add the thyme leaves and lemon juice, stirring briefly to combine. Pour in the chicken broth and the juices that have accumulated on the resting plate. Simmer briefly to allow flavors to meld and the liquid to reduce slightly.
Reduce heat to the lowest setting and add the cold butter pieces, stirring constantly. The cold butter must remain in motion as it melts—this constant movement creates an emulsion that gives the sauce its silky texture. Once the butter has fully incorporated, remove from heat and season with salt, pepper, and a pinch of cayenne. The finished sauce should taste richly flavored yet balanced, with the thyme providing herbal notes and the butter contributing luxurious mouthfeel.
Complementary Side Dishes
The simplicity of salt-roasted chicken pairs beautifully with straightforward side dishes that don’t compete for attention.
| Side Dish | Preparation Notes |
|---|---|
| Roasted Root Vegetables | Toss carrots, parsnips, and potatoes with olive oil, salt, and pepper. Roast alongside the chicken during the final 45 minutes, stirring halfway through. |
| Steamed Seasonal Greens | Prepare spinach, kale, or Swiss chard with minimal seasoning. The simple greens allow the chicken to remain the focal point. |
| Creamed Cauliflower | Steam cauliflower florets until tender, then fold into a light cream sauce with fresh thyme and a touch of Dijon mustard. |
| Simple Lemon Potatoes | Boil fingerling potatoes until tender, then toss with butter, lemon zest, fresh parsley, and fleur de sel. |
Frequently Asked Questions
Can this method work with smaller or larger chickens?
Yes, though cooking time requires adjustment. A smaller 2.5-pound bird may require only 40-45 minutes, while a larger 5-pound chicken might need 65-70 minutes. Always rely on internal temperature rather than time alone—aim for 160°F in the thigh.
Why use kosher salt specifically?
Kosher salt’s coarser crystal structure provides more even seasoning distribution compared to table salt, which can pack densely and result in over-salting. The larger crystals dissolve gradually, creating the desired brining effect throughout the cooking process.
What if the skin isn’t crispy?
Insufficient crispness typically results from insufficient oven temperature or inadequate surface drying before cooking. Ensure your oven reaches a full 450°F and that the chicken’s exterior is completely dry before salting. Humidity in your kitchen environment can also affect results—cooking on drier days may improve outcomes.
Can the sauce be made ahead?
The sauce requires fresh pan drippings and performs best when made immediately after removing the chicken from the oven. However, you can prepare all ingredients in advance, making assembly quick and straightforward once roasting concludes.
Is there a vegetarian adaptation?
While this technique specifically addresses chicken preparation, the salt-roasting concept applies to other proteins including Cornish game hens, smaller turkeys, and even some vegetables like cauliflower or squash.
Troubleshooting Common Issues
Understanding potential pitfalls helps ensure consistent success. If the chicken emerges undercooked, the oven temperature likely fell below the required 450°F—verify your oven’s accuracy with a separate thermometer and extend cooking time accordingly. Conversely, excessively browned or burnt skin suggests overly high temperatures or a chicken positioned too close to heating elements; adjust rack position accordingly on subsequent attempts.
Dry meat typically results from overcooking beyond 160°F internal temperature. Remove the bird as soon as it reaches target temperature rather than cooking to arbitrary time markers. The resting period is equally critical—skipping this step allows juices to escape, resulting in noticeably drier meat.
Conclusion
Salt-roasting exemplifies how culinary excellence needn’t require elaborate preparation or extensive ingredient lists. By stripping away unnecessary components and focusing on proper technique, this method reveals why roasted chicken remains a cornerstone of home cooking. The combination of generously applied kosher salt, proper temperature management, and adequate resting time creates chicken that rivals restaurant preparations. Whether serving a simple weeknight dinner or impressing guests at a gathering, salt-roasted chicken delivers consistently impressive results that prove simplicity, when executed thoughtfully, represents sophistication’s truest expression.
References
- Salt-Roasted Chicken – Tastes Like Chicken — Food Wishes Video Recipes. 2013. https://foodwishes.blogspot.com/2013/10/salt-roasted-chicken-tastes-like-chicken.html
- Roast Chicken with Thyme Butter Sauce — Food Wishes (YouTube). https://www.youtube.com/watch?v=d4z_N0GjqCY