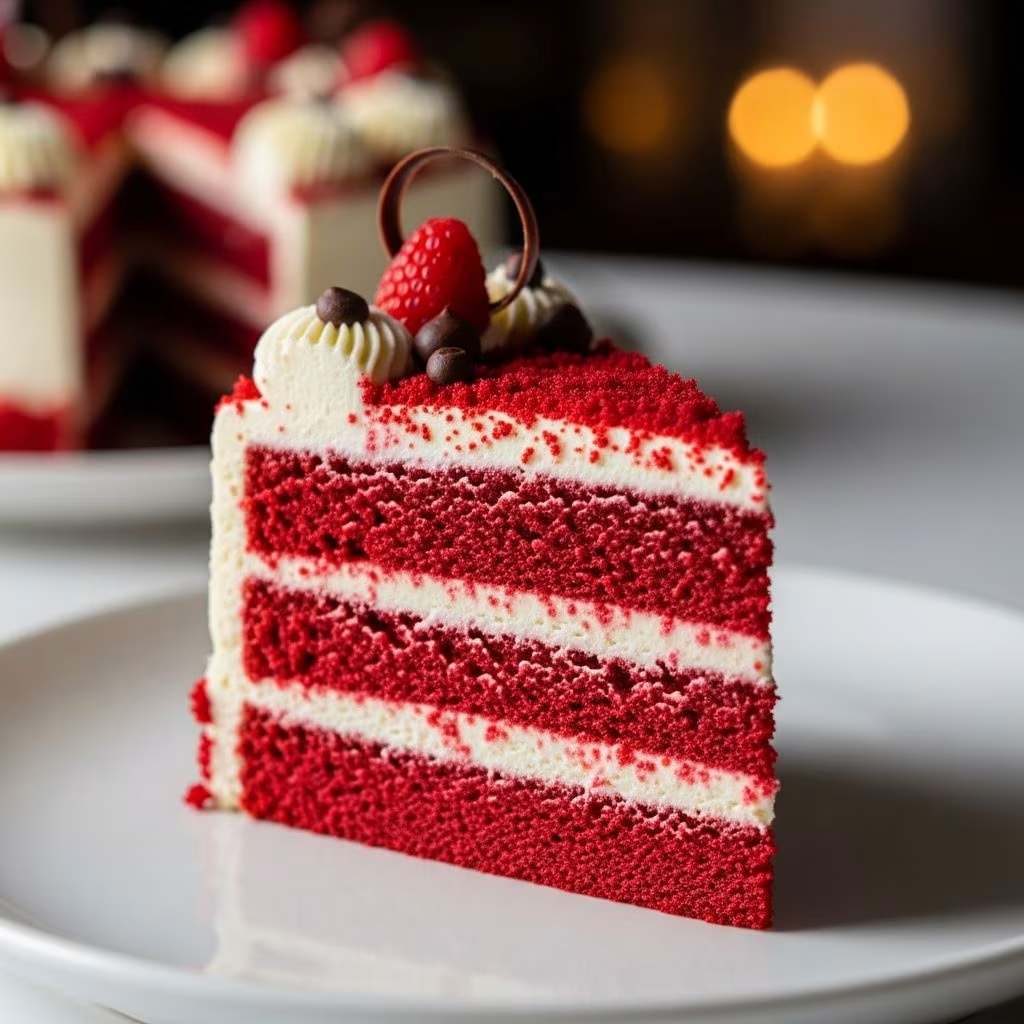
The allure of department store bakery items often extends beyond their taste—there’s something special about recreating beloved confections in your own kitchen. One such treat that has captivated home bakers for decades is the iconic red velvet cake variation that originated from premium retail establishments. This particular style of cake combines a distinctive colored cake layer with a rich, custardy topping that creates an indulgent dessert experience. What makes this version particularly appealing is its approachability; despite its sophisticated appearance and flavor profile, the actual preparation involves straightforward techniques and readily available ingredients that most home cooks already stock in their pantries.
Understanding the Origins and Appeal of This Classic Dessert
The red velvet cake has maintained its status as a beloved dessert choice for over a century, with its popularity remaining consistently strong across different regions and generations. The specific adaptation featured in this recipe draws inspiration from a layered bar-style preparation that emphasizes texture contrasts and elegant presentation. What distinguishes this particular interpretation from traditional red velvet cakes is its construction method, which employs a two-component approach that creates distinct layers with complementary flavors and textures.
The beauty of this cake lies in its versatility and the way it bridges casual home baking with more refined dessert-making. The recipe accommodates various skill levels, making it equally suitable for novice bakers seeking to impress and experienced pastry enthusiasts looking for a reliable formula. The visual impact of the deep crimson color paired with the pale cream topping creates a dessert that appears far more complex than its preparation actually requires.
Essential Ingredients for Your Baking Project
Creating this dessert requires a carefully selected collection of ingredients that work together to produce the desired flavor and texture. Understanding each component’s role helps ensure successful results:
- Cake Mix Base: One box of premium red velvet cake mix serves as the foundation, eliminating the need to measure individual dry ingredients while maintaining consistent color and flavor
- Eggs: Three large eggs contribute to the structure and texture of both the base and topping layers
- Butter: One stick of unsalted butter, melted, adds richness and helps bind the cake mix into a cohesive dough
- Cream Cheese: One full block of softened cream cheese creates the luxurious topping that defines this dessert’s character
- Powdered Sugar: Four cups of finely sifted powdered sugar sweetens and lightens the cream cheese layer
The ingredient selection reflects a philosophy that combines convenience with quality results. By using cake mix as the base, home bakers gain the advantage of reliability while maintaining complete control over the topping’s quality through the use of real cream cheese and fresh eggs.
Preparing Your Baking Equipment and Workspace
Successful baking begins before you combine any ingredients. Proper preparation of your workspace and equipment sets the stage for smooth execution:
- Preheat your oven to 325 degrees Fahrenheit, allowing adequate time for the oven to reach the precise temperature needed for even baking
- Select a 9×13-inch baking pan and thoroughly grease it with butter or nonstick cooking spray, ensuring complete coverage of the bottom and sides
- Gather all ingredients and allow cream cheese to soften at room temperature for at least thirty minutes before beginning the recipe
- Assemble mixing bowls, measuring cups, a sturdy whisk, and your electric mixer to streamline the preparation process
Temperature control proves particularly important in this recipe. The lower oven temperature of 325 degrees, as opposed to the standard 350 degrees used for many cakes, allows the cream cheese topping to set properly without over-browning the edges or creating an overly firm texture throughout.
Step-by-Step Preparation of the Base Layer
The foundation of this dessert establishes the texture and flavor that complement the topping. Begin by combining one box of red velvet cake mix with a single egg and the melted butter in a large mixing bowl. Stir these components together using a sturdy wooden spoon or hand mixer on low speed until a soft dough consistency forms. This mixture should resemble cookie dough rather than traditional cake batter—it will be thicker and more compact than you might expect from a typical cake preparation.
Transfer this dough mixture to your prepared baking pan, pressing it gently and evenly across the bottom surface. Use your fingers or the back of a measuring cup to ensure uniform thickness throughout, which promotes even baking and consistent texture. The goal is to create a compact, even layer that reaches all corners and edges of the pan without leaving gaps or thin spots.
Creating the Luxurious Topping Layer
The topping distinguishes this dessert and contributes the majority of its decadent character. Place your softened cream cheese in the bowl of a stand mixer fitted with the whisk attachment. Begin beating at medium speed for approximately two minutes to break down the cream cheese and create a smooth base. This initial mixing step prevents lumps in the final topping and ensures consistent texture throughout.
Add the remaining two eggs to the cream cheese while the mixer continues running at low speed. Add the eggs gradually, pausing briefly after each addition to ensure proper incorporation. This measured approach prevents the mixture from becoming overly aerated, which can create an undesirable texture in the finished product. Once the eggs are incorporated, add the four cups of powdered sugar gradually while continuing to mix at low speed.
Continue beating until the entire mixture becomes smooth, thick, and uniform in color and consistency. The topping should fall from the whisk in ribbons rather than dripping quickly or clumping. This stage typically requires three to four minutes of total mixing time. Once completed, carefully spread this mixture evenly over the cake base layer, using an offset spatula or the back of a spoon to create a smooth surface.
Baking Process and Temperature Monitoring
Transfer your prepared pan to the preheated 325-degree oven and bake for approximately forty minutes. Watch carefully during baking, as the visual cues matter more than the exact timing in this recipe. You’re looking for the edges to turn a light golden brown and the surface to develop a slight crust. The most important indicator is a slight wobble in the center when you gently shake the pan—the cake should not appear completely set in the middle.
This intentional underbaking is crucial to achieving the desired texture. Over-baking results in a dry, cake-like topping, while proper timing yields a custardy, slightly gooey center that contrasts beautifully with the firmer edges. Remove the pan from the oven when these visual cues are evident, rather than waiting for the topping to appear completely firm.
Cooling and Setting Your Finished Dessert
Once removed from the oven, place the baking pan on a wire rack and allow it to cool at room temperature for thirty minutes. During this initial cooling phase, the residual heat continues to gently set the topping while maintaining the desired tender interior texture. After thirty minutes, transfer the pan to your refrigerator and allow the dessert to chill for a minimum of two additional hours, though overnight cooling produces even better results.
This extended cold period serves multiple purposes: it fully sets the topping to the ideal consistency, allows the flavors to meld and develop more fully, and makes the bars significantly easier to cut into clean portions. Cold desserts naturally hold their shape better and present more appealingly when sliced.
Serving and Storage Recommendations
After adequate chilling time, remove the pan from the refrigerator and use a sharp knife to cut the dessert into individual bars. Wipe your knife blade clean between cuts to achieve neat, attractive portions. Serve directly from the pan or transfer portions to individual serving plates and allow them to sit at room temperature for five to ten minutes before serving, which enhances the flavor profile and topping texture.
Store leftover portions in an airtight container in the refrigerator for up to five days. These bars actually improve slightly after the first day, as the flavors continue to meld and develop. For longer storage, freeze individual portions wrapped in plastic wrap for up to two months, though they’re best enjoyed within the first week.
Variations and Customization Options
This recipe’s basic structure provides an excellent foundation for creative adaptations. Consider these variations:
- Substitute white or chocolate cake mix for the red velvet variety to create different flavor profiles while maintaining the same preparation method
- Add extract flavoring such as peppermint, almond, or coconut to the topping for seasonal or specialized variations
- Incorporate mix-ins like crushed candy, nuts, or chocolate chips into the topping layer before baking
- Dust the finished dessert with decorative toppings such as white chocolate shavings, crushed candy canes, or edible glitter
Troubleshooting Common Baking Challenges
| Issue | Likely Cause | Solution |
|---|---|---|
| Topping appears dry and cake-like | Over-baking in the oven | Reduce baking time by five minutes and watch for the slight wobble in the center |
| Edges brown too quickly | Oven temperature running hot | Place foil tent over the pan during the final fifteen minutes of baking |
| Topping separates or appears greasy | Overmixing or warm ingredients | Ensure cream cheese is softened, not melted, and avoid mixing longer than necessary |
| Bars stick to the pan when cutting | Inadequate cooling or improper pan preparation | Ensure complete chilling time and use a warm, wet knife for cleaner cuts |
Frequently Asked Questions
Can I make this dessert without a stand mixer?
Yes, an electric hand mixer works equally well for combining ingredients. The mixing process requires slightly more time and attention when using a hand mixer, but the results remain consistent. Ensure thorough incorporation of all ingredients, particularly when adding the powdered sugar to prevent lumps in the topping.
What type of cream cheese should I use?
Standard full-fat cream cheese works best for this recipe. Avoid whipped varieties or reduced-fat options, as they contain added air or stabilizers that can compromise the topping’s texture. Ensure the cream cheese reaches room temperature before beginning to mix, as cold cream cheese may remain lumpy even after extended mixing.
Can I prepare this dessert in advance?
This recipe is excellent for advance preparation. You can assemble the bars up to one day before serving and store them covered in the refrigerator. The flavors actually improve slightly with additional resting time, making this an ideal choice for entertaining or special occasions.
How does this compare to traditional red velvet cake?
This bar-style preparation differs from layer cake in both construction and texture. The cake mix base creates a denser, more cookie-like foundation compared to the lighter crumb of a traditional red velvet cake. The cream cheese topping replaces traditional frosting with a custard-like component that creates a unique texture experience.
What is the best knife for cutting these bars?
A long, thin-bladed serrated knife works best for cutting these bars. Dip the knife in hot water and wipe it clean between each cut to achieve neat portions. Allow the knife to heat slightly before each cut by keeping a cup of hot water nearby throughout the cutting process.
References
- Red Velvet Neiman Marcus Bars Recipe — Life is Better in Pink. Retrieved from https://www.lifeisbetterinpink.com/2014/01/red-velvet-neiman-marcus-bars.html
- Red Velvet Cake and The Great Neiman Marcus Cookie Hoax — Texas Cooking, by Patricia Mitchell. Retrieved from https://www.texascooking.com/features/may99redvelvet.htm
- Bar #68: Red Velvet Candy Cane Neiman Marcus — Mix & Match Mama. Retrieved from https://mixandmatchmama.com/2014/12/bar-68-red-velvet-candy-cane-neiman/