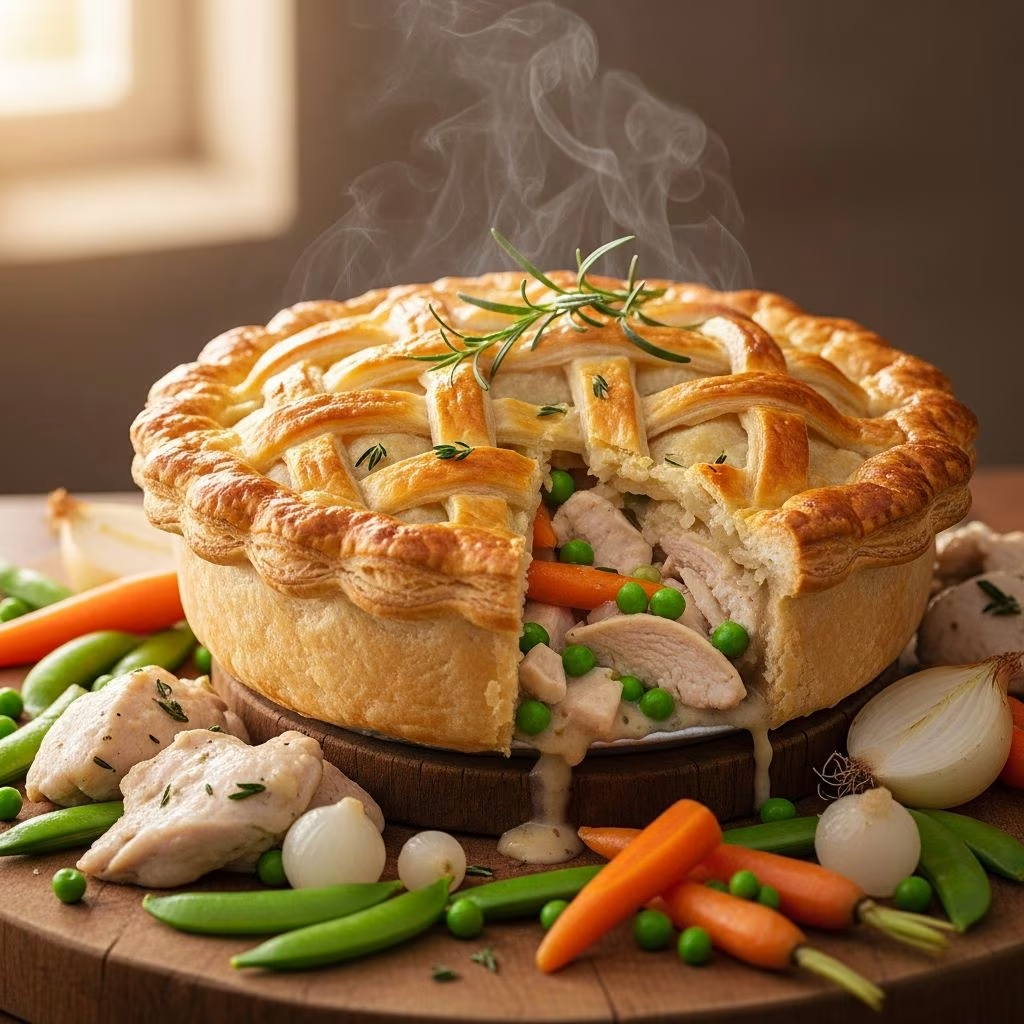
The marriage of tender poultry, aromatic vegetables, and velvety sauce beneath a shimmering golden crust represents one of culinary tradition’s most cherished combinations. This timeless dish bridges the gap between weeknight simplicity and entertaining elegance, offering home cooks an opportunity to create restaurant-caliber meals without requiring advanced technical skills. Understanding the fundamental components and preparation methods transforms this familiar comfort classic into a dish worthy of your finest dinnerware.
Understanding the Foundation: Building Your Base Filling
The essence of an exceptional pot pie begins with constructing a properly balanced filling that achieves the ideal consistency—thick enough to maintain structure yet rich enough to coat each ingredient thoroughly. This foundation consists of three critical elements: the protein component, aromatic vegetables, and the binding sauce that brings everything together harmoniously.
The cooking methodology for your filling requires methodical attention to sequencing. Begin by heating butter in a medium saucepan over moderate heat until it foams gently. This brief moment of melting creates the perfect medium for releasing flavors from aromatics. Introduce finely diced onions and allow them to soften gradually, typically requiring two minutes of gentle cooking while stirring periodically. This foundation layer builds the flavor profile that will permeate throughout your entire dish.
Once onions achieve a translucent appearance, incorporate minced garlic directly into the mixture, cooking for approximately thirty seconds while maintaining constant motion with your utensil. This brief window of heat is crucial—extending the cooking time risks transforming the garlic from aromatic to bitter. The goal is to warm the garlic sufficiently to activate its flavor compounds without allowing browning to occur.
Creating the Creamy Sauce: The Thickening Agent Strategy
The transformation from simple ingredients to cohesive filling occurs through a classical technique known as a roux—the combination of equal parts fat and flour cooked briefly to create a thickening agent. Whisk approximately six tablespoons of all-purpose flour into your aromatic mixture, stirring continuously for merely thirty seconds. This restraint prevents flour from scorching while ensuring even distribution throughout the fat.
The liquid addition phase demands attentiveness and continuous whisking to prevent lump formation. Gradually incorporate two and one-half cups of chicken broth combined with one cup of milk or cream, whisking steadily to integrate the liquid evenly with your thickened base. The mixture will initially appear separated; sustained whisking resolves this temporary state.
Bring the sauce to a gentle boil, maintaining consistent whisking throughout approximately two minutes of boiling. This duration allows the flour to fully hydrate and swell, achieving maximum thickening power while the heat neutralizes any raw flour flavor. The resulting sauce should coat the back of a spoon while still flowing slowly when tilted.
Incorporating Essential Components: Protein and Vegetables
Beyond the immediate saucepan preparation, your filling requires careful coordination of complementary ingredients. Three cups of shredded rotisserie chicken offers convenience without sacrificing quality—the pre-cooked poultry remains tender and juicy through the entire preparation and baking process. Alternatively, cooked turkey provides an equally valid substitution, offering comparable texture and flavor integration.
The vegetable component—typically one and one-quarter cups of frozen peas combined with diced potatoes or carrots—requires thoughtful handling. Frozen peas need not thaw before incorporation; the residual heat from your completed sauce provides sufficient warmth to gently thaw them while preserving their color and delicate texture. If incorporating root vegetables like potatoes or carrots, consider parboiling them separately until they yield slightly to a fork but retain structural integrity—this pre-cooking ensures they reach complete tenderness during the entire baking period without becoming mushy.
Season your filling composition generously with salt and freshly ground pepper, tasting as you add to achieve your preferred flavor balance. The completed filling should taste slightly bolder than your final serving preference, as the puff pastry topping will contribute subtle saltiness that tempers the overall seasoning profile.
The Transfer and Assembly Process
Transitioning your filling to its final cooking vessel requires selecting appropriate bakeware. An eight-by-eight-inch casserole dish accommodates standard puff pastry sheets while promoting even heat distribution. Some cooks prefer cast-iron skillets, which offer excellent heat retention properties and allow dramatic presentation served directly at the table. If using any baking vessel other than traditional ceramic or glass, position it on a parchment-lined rimmed sheet pan to catch any filling that escapes during the high-heat baking process.
Pour your completed filling into your chosen vessel while still warm, distributing it evenly throughout the container. The warmth of the filling provides an advantage—it begins warming the baking vessel immediately, promoting more even cooking of the pastry topping while the filling reaches its serving temperature efficiently.
Mastering Puff Pastry Preparation and Application
Puff pastry represents one of baking’s most magical transformations—hundreds of delicate butter-flour layers compressed into a manageable sheet. This engineered structure demands respectful handling to preserve the lamination responsible for its characteristic shattering texture.
Remove your puff pastry from the freezer and allow complete thawing at room temperature before manipulating it. Attempting to work with partially frozen pastry risks tearing and compromising the layer structure. Once fully thawed, gently roll it on a lightly floured surface, using minimal pressure to extend it sufficiently to cover your casserole with approximately half an inch of overhang on all sides. This slight excess provides insurance should shrinkage occur during baking and ensures edges seal properly with the filling.
For visual presentation and functional benefits, some cooks cut the pastry into squares arranged in overlapping patterns across the filling surface. This approach serves dual purposes: it creates an attractive mosaic appearance while allowing steam to escape through gaps between squares more naturally than a solid sheet would permit.
The Egg Wash Technique: Creating Golden Excellence
The glossy, deep golden-brown exterior characteristic of premium pot pie results from proper egg wash application. In a small bowl, whisk together one large egg with either one tablespoon water or heavy cream. The liquid medium reduces the egg’s tendency to create a thick, opaque finish—water produces a more subtle sheen while cream contributes additional richness to the final appearance.
Using a pastry brush, apply the egg wash evenly across all exposed pastry surfaces. Pay particular attention to corners and edges, where the wash promotes even browning and creates visual appeal. Some cooks enhance this step by sprinkling grated Parmesan cheese, freshly cracked pepper, or flaky sea salt across the egg-washed surface before baking, adding textural interest and subtle flavor complexity to each bite.
Baking Protocol: Temperature and Timing Considerations
Preheat your oven to 400 degrees Fahrenheit, allowing approximately fifteen minutes for it to reach full temperature. This moderately high heat strikes the optimal balance—sufficient intensity to achieve rapid pastry puffing and browning without burning the exterior before the filling heats completely.
Position your filled baking vessel in the preheated oven and bake for twenty-five to thirty-five minutes, depending on your specific oven’s characteristics and the thickness of your filling layer. The pastry should achieve a deep golden-brown color, with the filling beginning to bubble slightly around any gaps or edges where steam can escape.
Monitor your pot pie during the final minutes of baking—if pastry corners darken excessively before the center achieves golden color, tent the surface loosely with aluminum foil to deflect direct heat while allowing steam to circulate. This intervention prevents burning while permitting the filling to reach proper temperature.
The Critical Rest Period: Patience Rewards
Resist the temptation to serve immediately upon removal from the oven. Allow your completed pot pie to rest undisturbed for five to ten minutes at room temperature. This resting phase permits the filling to set slightly, transforming from pourable liquid to scoopable consistency while the puff pastry crust continues crisping through residual oven heat absorbed by the vessel.
Serving too hastily risks runny filling that escapes the pastry crust, disappointing both visually and texturally. Waiting that brief interval ensures each portion maintains structural integrity while the pastry remains warm and crispy rather than softening through prolonged exposure to steam.
Scaling and Serving Strategy
| Serving Size | Vessel Dimensions | Puff Pastry Sheets | Baking Time |
|---|---|---|---|
| 4 servings | 8×8 inches | 1 sheet | 25-30 minutes |
| 6-8 servings | 9×13 inches | 2 sheets | 35-40 minutes |
| 12+ servings | Multiple 8×8 | As needed | 25-30 minutes each |
When entertaining larger gatherings, doubling the filling and employing a nine-by-thirteen-inch casserole dish with two puff pastry sheets extends baking time slightly. Alternatively, preparing multiple individual eight-by-eight dishes provides elegant plating options for formal dining while simplifying baking management through consistent timing across multiple identical vessels.
Ingredient Selection and Quality Considerations
The quality of individual components directly influences your final result. Rotisserie chicken from quality sources—whether grocery store prepared or local prepared food establishments—typically exceeds the texture of boiled home-cooked chicken, offering superior moisture and flavor concentration. Low-sodium chicken broth allows you to control final salt levels more precisely than higher-sodium alternatives, preventing oversalting as reduction occurs during cooking.
Regarding puff pastry, thawing at refrigerator temperature overnight produces superior results compared to rapid room-temperature thawing, which can compromise the precise butter-flour structure responsible for optimal puffing behavior. All-purpose flour provides appropriate protein levels for sauce development without the excessive gluten development that bread flour would produce.
Frequently Asked Questions
Can I prepare this dish in advance?
Yes—assemble everything in your baking vessel up to eight hours before baking, covering with plastic wrap and refrigerating. Increase baking time by approximately five to ten minutes to account for filling temperature. Alternatively, freeze the completed dish before baking for up to three months; bake from frozen, adding fifteen additional minutes to baking time.
What substitutions work for rotisserie chicken?
Leftover turkey, rotisserie turkey, or shredded cooked chicken breast all substitute directly at equal volumes. For vegetarian options, replace chicken with diced firm tofu or substantial mushrooms for comparable textural results.
How do I prevent soggy pastry?
Ensure your oven reaches 400°F before introducing the dish. Position your baking vessel on a preheated baking sheet lined with parchment or aluminum foil. Avoid over-filling your dish, which can cause excess filling to escape and saturate the pastry exterior.
Can commercial pie dishes replace casseroles?
Yes—nine-inch pie dishes accommodate one puff pastry sheet comfortably. Baking time remains consistent with casserole dimensions of similar depth.
Conclusion: Achieving Culinary Excellence
Mastering puff pastry chicken pot pie transforms a straightforward combination of accessible ingredients into an impressive dish appropriate for both intimate family dinners and sophisticated entertaining. Success depends on respecting the established techniques, employing quality components, and exercising patience throughout each preparation phase. The result—individual bowls containing creamy filling studded with tender chicken and vegetables, topped with substantial portions of shattering golden pastry—justifies the modest effort required.
References
- Rotisserie Chicken Quality and Preparation Standards — U.S. Department of Agriculture Food Safety and Inspection Service. 2024. https://www.fsis.usda.gov/inspection/inspection-program-overview
- Sodium Content in Commercial Chicken Broths and Culinary Applications — Harvard School of Public Health Nutrition Source. 2024. https://nutritionsource.hsph.harvard.edu/
- Puff Pastry Structure and Thawing Methodology — Institute of Culinary Education Technical Standards. 2023. https://www.ice.edu/