Creating exceptional pizza begins with understanding the foundation: quality dough. Whether you’re preparing thin, crispy varieties or thick, chewy styles, the fundamentals of dough-making remain consistent. This guide explores the techniques and knowledge necessary to transform simple ingredients into restaurant-quality pizza bases in your own kitchen.
Understanding Your Ingredients
Pizza dough relies on a carefully balanced combination of basic ingredients that work together to create texture, flavor, and structure. Each component plays a specific role in the final product.
Flour Selection and Properties
The type of flour you select fundamentally affects your dough’s characteristics. Bread flour contains higher protein content—typically between 12% and 14%—which develops stronger gluten networks. This results in chewier, more structured crusts that hold up well to toppings and heat. All-purpose flour, with its moderate protein content around 10-12%, offers versatility and produces somewhat lighter results. Some bakers prefer cake flour for thinner, crisper crusts, though this requires technique adjustments.
When selecting flour, consider your climate and storage conditions. Flour absorbs moisture from humid environments, potentially requiring slight adjustments to hydration levels. Store flour in airtight containers away from direct sunlight to maintain consistency.
Water and Hydration Ratios
Water content dramatically influences dough behavior and final texture. Hydration percentages—calculated as water weight divided by flour weight—typically range from 55% to 65% for traditional pizzas. Higher hydration produces more open crumbs and lighter textures, while lower hydration creates denser, chewier structures.
Water temperature affects fermentation speed significantly. Warmer water accelerates yeast activity and bulk fermentation, while cooler water slows these processes. Most recipes call for water between 75-90°F for balanced fermentation timing.
Yeast and Leavening
Active dry yeast and instant yeast are the most commonly used leavening agents. Though they differ slightly in processing, they perform similarly in dough applications. Using less yeast with extended fermentation—a technique called cold fermentation—develops superior flavor complexity. This approach allows natural enzymatic processes to enhance the dough’s taste profile over 24 to 72 hours.
Salt and Oil
Salt serves multiple functions beyond adding flavor. It strengthens gluten networks, slows fermentation, and enhances browning during baking. Typically, 2% salt by flour weight provides optimal results. Olive oil adds richness, improves crust color, and contributes to the finished product’s mouthfeel. Some recipes include oil in the dough, while others brush it on surfaces or finishing touches.
The Mixing Process Explained
Proper mixing develops gluten networks essential for pizza dough structure. The mixing stage determines how well your ingredients combine and how efficiently gluten formation occurs.
Combining Dry and Wet Components
Begin by combining flour, salt, and yeast in your mixing vessel. This prevents salt from directly contacting yeast, which can inhibit fermentation. Add water gradually while mixing on low speed for approximately 3-4 minutes. This initial stage combines all ingredients and begins hydrating flour particles.
Once ingredients are incorporated, increase mixer speed to medium. Continue mixing for 8-10 minutes until the dough becomes smooth and elastic. During this phase, gluten strands align and develop strength. The dough should pull away from the bowl’s sides while still maintaining slight tackiness.
Achieving Proper Texture
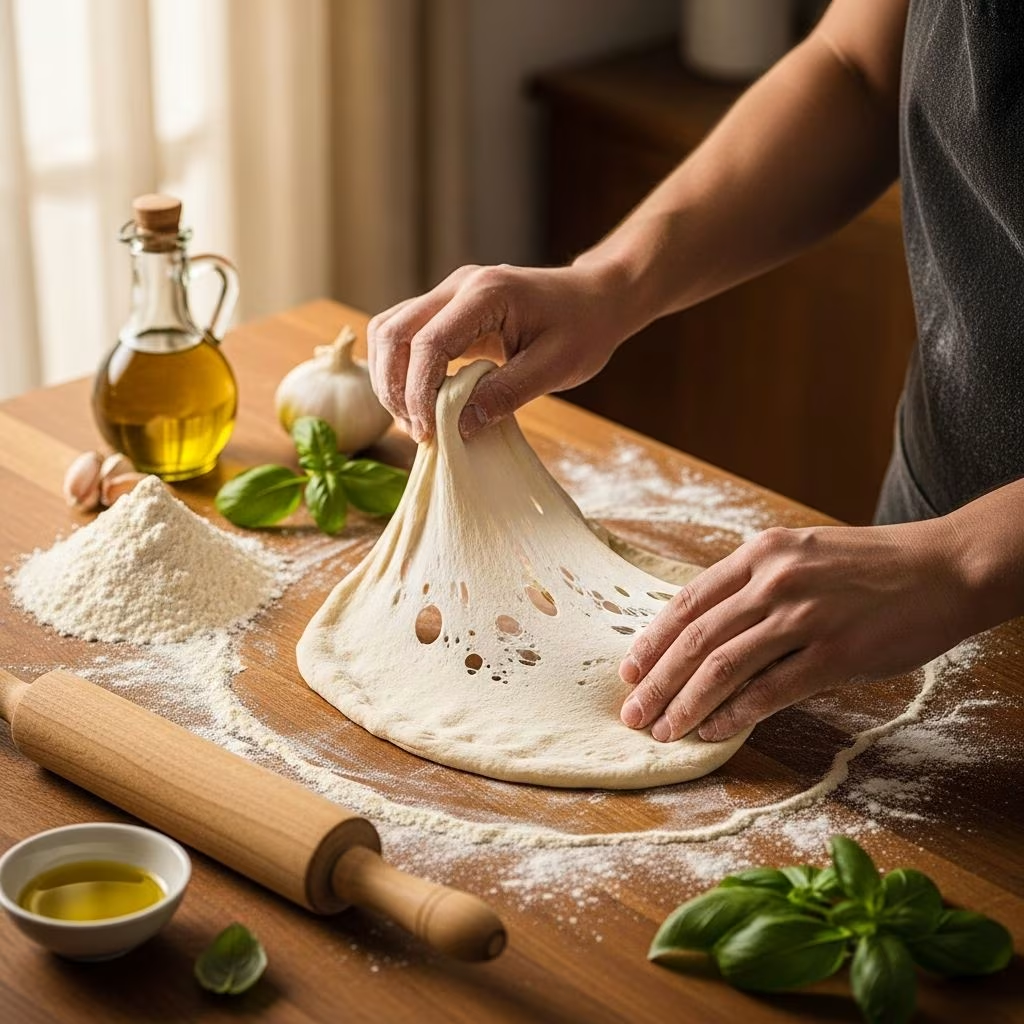
Well-developed dough should feel soft yet structured. When stretched, it should extend without immediately tearing. Press your fingertip into properly mixed dough; the indentation should slowly spring back partially rather than immediately or not at all. This indicates adequate gluten development.
Hand-mixing requires more time—typically 15-20 minutes—but produces equally excellent results. Many bakers prefer this method for connecting with their dough and developing intuitive understanding of consistency.
Fermentation: Building Flavor and Structure
Fermentation transforms basic dough into something with exceptional flavor and texture. This stage requires time and temperature management.
Bulk Fermentation Phase
After mixing, place dough in a lightly oiled container and allow it to rise at room temperature. Bulk fermentation typically requires 4-6 hours at 70-75°F, though this varies based on ambient temperature and yeast quantity. During this phase, yeast produces carbon dioxide gas, which creates rise and develops flavor through metabolic processes.
Perform fold-over motions every 30 minutes during the first 2-3 hours. These folds redistribute yeast and nutrients, strengthen gluten networks, and encourage even fermentation. Simply grab the dough’s edge and fold it toward the center, rotating the container and repeating from different angles.
Cold Fermentation Method
Refrigerating dough at 38-42°F dramatically enhances flavor development. This slow fermentation allows enzymatic breakdown of starches and proteins, creating complex taste profiles. Bulk ferment at room temperature for 1-2 hours, then refrigerate for 24-72 hours. Remove from refrigeration 1-2 hours before shaping to allow dough to reach proper consistency.
Cold fermentation also improves workability. Chilled dough stretches more easily without snapping back, making shaping less frustrating for beginners.
Shaping and Pre-Bake Preparation
Proper shaping determines crust thickness and texture distribution across your pizza.
Portioning and Rounding
After bulk fermentation, divide dough into portions appropriate for your desired pizza size. A standard pizza typically requires 250-350 grams of dough. Round each portion by pinching the bottom and rotating on your work surface, creating tension on the surface. Place rounded portions seam-side down on parchment paper, allowing them to rest for 15-30 minutes.
Stretching Techniques
Several methods work well for shaping pizza dough. The gentle stretch-and-drape approach involves picking up the rounded portion, allowing gravity to help thin it, then carefully stretching with your fingers. Work from the center outward, maintaining even thickness throughout.
The spinning method—where you toss and rotate dough in the air—works for experienced bakers but requires practice. Press the dough flat with your palm, gently toss, rotate mid-air, and catch. This creates dramatic thinning and develops beautiful leopard-spotted crusts during baking.
Alternatively, use a rolling pin for consistent, controlled thickness. While purists debate this method’s merit, it produces excellent results, especially for rectangular focaccia-style pizzas.
Final Rise and Pre-Bake Resting
After shaping, allow the formed dough to rest 10-20 minutes before adding toppings and baking. This permits the gluten network to relax, preventing excessive shrinkage during heat application. Properly rested dough rises evenly in the oven rather than pulling back toward the center.
Troubleshooting Common Issues
Even experienced bakers encounter dough challenges. Understanding solutions ensures consistent success.
Common Problems and Solutions
| Issue | Likely Cause | Solution |
|---|---|---|
| Dough too sticky | Excess water or high humidity | Reduce hydration by 2-3%, dust with flour during handling |
| Dough too dry | Insufficient water or rapid evaporation | Increase hydration by 1-2%, cover during fermentation |
| Dough lacks rise | Dead yeast, low temperature, or insufficient time | Check yeast freshness, increase fermentation time, warm environment |
| Crust too dense | Over-mixing or insufficient fermentation | Reduce mixing time, extend fermentation period |
| Dough shrinks when stretched | Insufficient rest or over-development | Allow longer resting periods, reduce mixing intensity |
| Pale crust coloring | Insufficient sugar or low oven temperature | Add 1% sugar, increase oven temperature to 475-500°F |
Essential Equipment and Setup
While pizza-making requires minimal specialized equipment, several items improve results and ease.
Recommended Tools
- Stand Mixer: Not essential but significantly reduces hand-mixing time and effort
- Digital Scale: Ensures consistent ingredient ratios and reproducible results
- Thermometer: Monitors water and dough temperature for predictable fermentation timing
- Pizza Stone or Steel: Provides even heat distribution and improves crust browning and crispness
- Parchment Paper: Prevents sticking and simplifies oven transfers
- Dough Scraper: Aids in handling and portioning dough
- Covered Container: Maintains moisture during fermentation phases
Frequently Asked Questions
Can I prepare dough in advance?
Yes. Bulk ferment at room temperature for 1-2 hours, then refrigerate for up to 72 hours. Remove 1-2 hours before shaping. This method actually improves flavor through extended fermentation.
What’s the difference between active dry and instant yeast?
Instant yeast contains finer particles and is slightly more concentrated than active dry yeast. They perform similarly in pizza dough; use the same quantities interchangeably.
Should I use warm or cold water?
Room temperature water (75-85°F) provides good fermentation balance. Colder water slows fermentation for extended development; warmer water accelerates the process for quicker results.
Why does my dough stick to everything?
Stickiness results from high hydration levels or excess flour moisture. Reduce water slightly, dust your work surface and hands with flour, or increase fermentation time to develop gluten strength.
Can I freeze pizza dough?
Absolutely. After bulk fermentation, portion dough and freeze individual portions in airtight containers or freezer bags for up to three months. Thaw overnight in the refrigerator, then bring to room temperature before shaping and baking.
What oven temperature works best?
Most home ovens perform well at 475-500°F. Preheated pizza stones or steels benefit from this temperature range. Professional ovens reach much higher temperatures (700-900°F), producing different crust characteristics.
Variations and Style Adaptations
Dough fundamentals adapt to various pizza styles and preferences. Understanding modifications helps create specific results.
Thin Crust Variations
Reduce hydration to 55-60% for crispier, thinner crusts. Use slightly less yeast and shorter fermentation times. Stretch dough thinner before baking and consider docking (piercing with a fork) to prevent excessive puffing.
Thick and Chewy Styles
Increase hydration to 62-65% and use slightly more yeast. Extend bulk fermentation to 6-8 hours. Allow shaped dough longer pre-bake resting (20-30 minutes) to develop the characteristic rise.
Pan Pizza Preparations
Dimple shaped dough with your fingertips before baking in oiled pans. This prevents large bubbles and creates the signature texture. Oil the pan generously for crispy, golden bottoms.
Storage and Preservation
Properly stored dough maintains quality for extended periods. Refrigeration extends usable life while enhancing flavor. Freeze portions individually in airtight containers or freezer bags for up to three months. Properly stored frozen dough thaws overnight in the refrigerator without quality loss.
References
- Bread Baking: An Artisan’s Perspective — McGill University Department of Food Science. 2024. https://www.mcgill.ca/foodscience/
- The Science of Gluten Development in Bread and Pizza Doughs — American Society of Baking. 2023. https://www.asbe.com/
- Fermentation Techniques in Traditional Bread-Making — Food and Agriculture Organization (FAO). 2023. https://www.fao.org/
- Temperature Effects on Yeast Metabolism and Dough Fermentation — Journal of Cereal Science, Elsevier. 2024. https://www.sciencedirect.com/journal/journal-of-cereal-science
- Pizza Production and Quality Standards — International Organization for Standardization (ISO). 2022. https://www.iso.org/