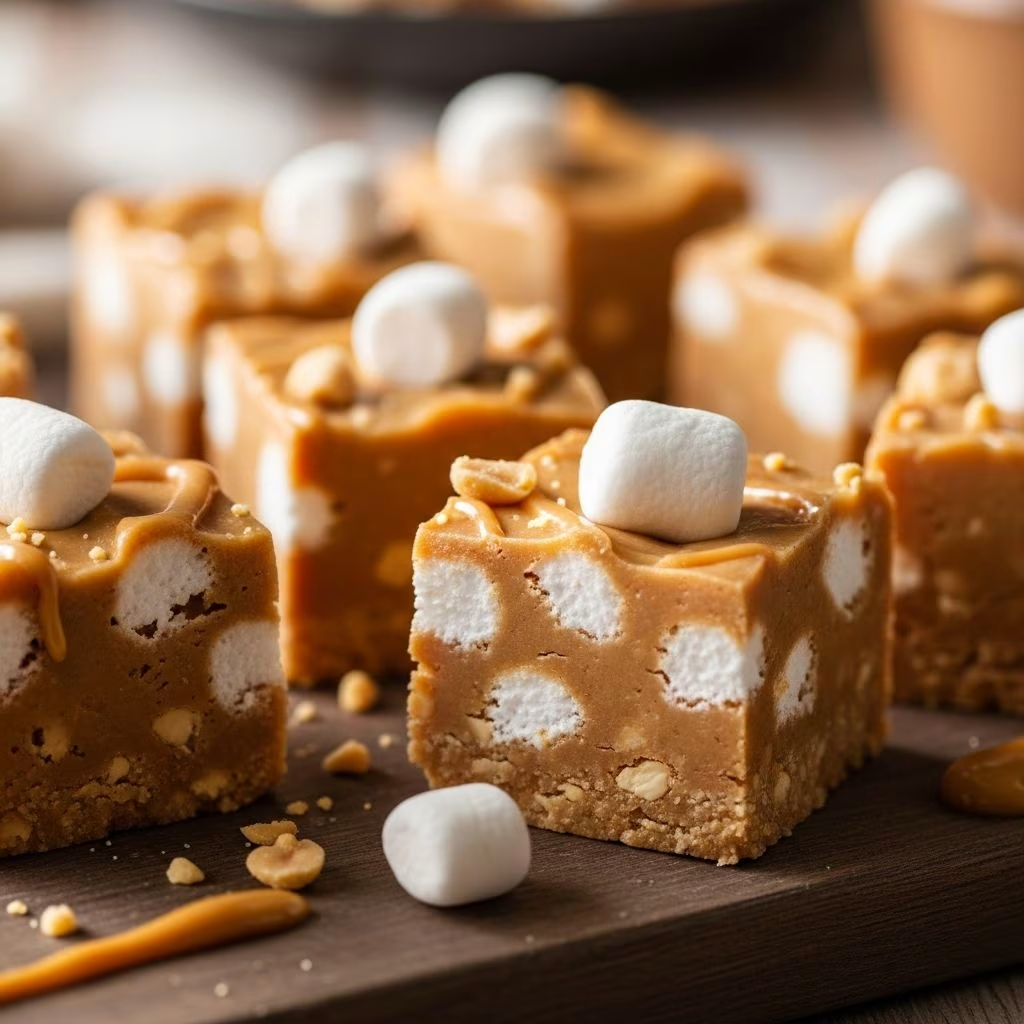
There’s something truly special about homemade fudge. Unlike store-bought varieties, candy you prepare in your own kitchen offers a level of indulgence and personalization that’s difficult to replicate. When you combine the rich, nutty appeal of peanut butter with the fluffy sweetness of marshmallow creme, you create a confection that appeals to both adventurous candy enthusiasts and traditionalists alike. This comprehensive guide explores everything you need to know about crafting the perfect batch of peanut butter fudge with marshmallow creme, from ingredient selection to storage techniques.
Understanding Your Key Ingredients
Creating exceptional fudge begins with understanding the role each ingredient plays in the final product. The foundation of this recipe relies on a few essential components that work together to produce the characteristic smooth, melt-in-your-mouth texture that defines quality fudge.
The Role of Sugar and Milk
Granulated white sugar serves as the primary sweetening agent and structure builder in your fudge. When combined with milk and heated to a specific temperature, sugar undergoes chemical transformations that create the dense, creamy foundation of finished fudge. The milk acts as both a flavor component and a medium that helps distribute heat evenly throughout the mixture. Using evaporated milk, rather than regular whole milk, provides a more concentrated dairy flavor and contributes to achieving the correct texture. The combination of these two ingredients must reach approximately 200 degrees Fahrenheit, just below the soft-ball candy stage, to create the ideal consistency that allows the fudge to set properly without becoming too hard or grainy.
Peanut Butter’s Contribution
Peanut butter serves multiple functions within this recipe. Beyond providing the distinctive nutty flavor that defines this confection, peanut butter contributes fat content that creates richness and smoothness. Creamy peanut butter works best in this application, as it blends seamlessly into the hot sugar mixture without leaving chunky texture. The amount of peanut butter used—typically between 1.5 to 1.67 cups—ensures that the peanut flavor remains prominent without overpowering the marshmallow sweetness. The fat from the peanut butter also helps prevent crystallization, which can result in grainy texture in finished fudge.
Marshmallow Creme’s Purpose
Marshmallow creme contributes both texture and flavor to this candy. The whipped structure of marshmallow creme introduces tiny air pockets that create a lighter, fluffier final product compared to traditional fudge. Beyond texture enhancement, marshmallow creme adds subtle sweetness and a delicate vanilla undertone that complements the earthiness of peanut butter. The marshmallow component also affects mouthfeel, making each piece dissolve more readily on the tongue. Choosing between marshmallow fluff and marshmallow creme is largely a matter of preference, though both work effectively in this recipe.
Butter, Salt, and Vanilla
Butter contributes richness and helps achieve the proper consistency, while also preventing the mixture from sticking to the pan during preparation. Salt, when included, balances the sweetness and enhances the peanut butter flavor. Vanilla extract rounds out the flavor profile, adding depth and complexity that prevents the fudge from tasting one-dimensional. These supporting players work quietly in the background but are essential for creating a well-rounded final product.
Preparation and Equipment Selection
Success in candy-making depends significantly on proper preparation and appropriate tools. Before you begin heating ingredients, ensure your workspace is organized and your equipment is ready.
Essential Equipment
- Candy thermometer: Achieving the correct temperature is crucial for proper texture, making a reliable thermometer indispensable. Attach it securely to the side of your pot, ensuring it doesn’t touch the bottom.
- Heavy-bottomed saucepan: A medium-sized, heavy pot distributes heat evenly and prevents scorching or uneven cooking.
- Wooden spoon or silicone spatula: These tools withstand high temperatures better than plastic alternatives and won’t conduct heat the way metal spoons do.
- Square baking pan: An 8×8-inch or 9×13-inch pan works well, depending on your preferred fudge thickness.
- Parchment paper or butter: Lining or greasing your pan prevents sticking and makes removal easier.
Preparation Steps Before Cooking
Begin by preparing your baking pan. If using an 8×8-inch pan, generously coat all surfaces with softened butter or line it with parchment paper, leaving slight overhang for easy removal. Some candy-makers prefer parchment paper for easier cleanup and more uniform piece cutting. Measure all ingredients in advance, placing them in small bowls near your cooking station. This practice, known as mise en place, ensures you won’t scramble to locate ingredients when timing is critical. Pay particular attention to removing the foil seal from marshmallow creme containers before you begin cooking, as this step becomes difficult when you’re actively stirring hot ingredients.
The Cooking Process Explained
The actual cooking method determines whether your fudge achieves the ideal texture or becomes either too soft or too hard.
Combining and Heating Initial Ingredients
Pour milk and sugar into your heavy-bottomed saucepan and stir to combine. Place the pan over medium-high heat and bring the mixture to a rolling boil, stirring occasionally to ensure even heating. Once the mixture reaches a full rolling boil, begin stirring constantly. This step is essential—maintaining constant stirring for approximately three minutes ensures proper sugar hydration and prevents crystallization. The constant agitation helps distribute heat evenly and prevents the mixture from sticking to the pan bottom. Setting a timer for exactly three minutes removes guesswork and ensures consistency across multiple batches.
Temperature Monitoring
Once the mixture has boiled for three minutes, attach your candy thermometer to the side of the pan, ensuring it doesn’t contact the bottom. Continue cooking over medium heat, allowing the temperature to gradually rise. The target temperature is 200 degrees Fahrenheit, which sits just shy of the soft-ball stage in candy thermometry. This specific temperature creates fudge with the proper crystalline structure—not so hard that it becomes difficult to bite, yet firm enough to hold its shape after setting. Reaching this temperature typically requires an additional five to ten minutes of cooking beyond the initial three-minute boil. Some variations in cooking time occur based on your specific stove, pan thickness, and altitude, so using a thermometer rather than timing alone is essential.
The Critical Addition Point
Once your mixture reaches 200 degrees Fahrenheit, immediately remove the pan from heat. Working quickly, add the peanut butter and marshmallow creme simultaneously, stirring vigorously to incorporate them thoroughly. This rapid incorporation is important because the residual heat in the sugar mixture will begin solidifying the ingredients if you delay. Use a wooden spoon or silicone spatula, as metal utensils become dangerously hot during this process. Stir until all visible marshmallow streaks disappear and the mixture appears uniformly smooth and slightly glossy. The complete incorporation typically requires two to three minutes of vigorous stirring. Add vanilla extract during the final moments of stirring, combining it thoroughly throughout the mixture.
Cooling and Setting Your Fudge
The cooling phase significantly impacts the final product’s texture and consistency. Rather than immediately transferring your fudge to the refrigerator, use a two-stage cooling process for optimal results.
Room Temperature Cooling
Immediately upon removing the mixture from heat, pour it into your prepared pan, spreading it into an even layer using the back of a spoon or an offset spatula. Don’t scrape the edges of the pot too aggressively; any dried or grainy bits at the pan edges should remain behind, as they can negatively affect your final product’s texture. Allow the fudge to cool at room temperature for approximately one to two hours. During this phase, the fudge begins setting but remains slightly pliable, allowing trapped air to escape and heat to dissipate gradually. Avoid the temptation to accelerate cooling by placing the pan in the freezer at this stage, as rapid temperature changes can cause the surface to set faster than the interior, creating an inconsistent texture.
Refrigeration and Final Setting
After cooling at room temperature, transfer the pan to the refrigerator for a minimum of two hours, though overnight cooling is preferable. Refrigeration allows the fudge to reach its final firm consistency without becoming brittle. Cold fudge is easier to cut into neat, uniform pieces and holds its shape better during storage and serving.
Cutting and Serving Techniques
Achieving uniform fudge squares requires the right approach. Remove the fully cooled fudge from the refrigerator and, if using parchment paper, lift the entire slab from the pan. Using a sharp, hot knife makes cutting dramatically easier—hold your knife under hot running water for several seconds, wipe it dry, then cut through the fudge. Wipe the knife between each cut and reheat it as necessary. This technique prevents sticking and creates clean edges on each piece. Cut your fudge into approximately one-inch squares for standard servings, though you can adjust size based on personal preference. Each piece should break cleanly, with a smooth surface and consistent color throughout.
Storage and Longevity
Proper storage extends your fudge’s shelf life and maintains its quality. Place cooled, cut fudge pieces in an airtight container, separating layers with parchment paper to prevent sticking. Stored at room temperature, your fudge remains fresh for up to two weeks. Refrigeration extends this timeline to three weeks, while freezing can preserve your fudge for up to three months. When removing frozen fudge, allow it to reach room temperature before opening the container to prevent condensation from affecting texture.
Troubleshooting Common Issues
Grainy or Crystallized Texture
Grainy fudge typically results from sugar crystals forming during cooking. To prevent this issue, ensure you stir constantly during the initial three-minute boil phase, and avoid scraping crystallized sugar from the pan edges into your mixture. Using a wet pastry brush to wipe the sides of the pan during cooking also prevents crystal formation.
Fudge Too Soft
If your finished fudge remains too soft to cut cleanly, your mixture likely didn’t reach the full 200-degree target temperature. Use a calibrated thermometer to verify accuracy, and ensure you’re reading the temperature at eye level. Slightly undercooked batches can sometimes be salvaged by reheating and cooking to the correct temperature.
Fudge Too Hard or Brittle
Conversely, fudge that becomes too hard resulted from cooking beyond 200 degrees. Hard fudge is still edible but less pleasant to eat. To prevent this, remove your mixture from heat the moment it reaches the target temperature, and avoid extended cooking times.
Variations and Creative Additions
Once you’ve mastered the basic recipe, experimentation becomes possible. Consider adding chopped nuts, cocoa powder mixed into the sugar mixture, or a small amount of espresso powder for complexity. Some enthusiasts swirl different-flavored batches together before setting for visual appeal. Storing different variations in clearly labeled containers allows you to create a selection for gift-giving.
Frequently Asked Questions
- Can I use natural peanut butter instead of creamy peanut butter?
- Natural peanut butter, which contains oil separation, can produce slightly different results. The oil may cause separation during cooking. For best results, use conventional creamy peanut butter, though you can use natural varieties if you accept potentially different texture.
- What’s the difference between marshmallow fluff and marshmallow creme?
- Marshmallow fluff typically contains slightly more air and lighter texture, while marshmallow creme is slightly denser. Both produce acceptable results in this recipe; choose based on availability and personal preference.
- Why did my fudge separate or have an oily appearance?
- Separation often indicates overstirring after combining all ingredients, or using peanut butter with excess oil. Stop stirring as soon as all ingredients are combined and evenly distributed.
- Can I make this recipe without a candy thermometer?
- While possible using the cold-water test method, using a candy thermometer provides accuracy and consistency that’s difficult to achieve otherwise. The investment in a thermometer pays dividends for future candy-making.
- Is this fudge suitable for gift-giving?
- Yes, this fudge makes an excellent gift. Package it in decorative boxes with parchment paper separating layers, and include storage instructions. The recipe’s relatively simple ingredients list and impressive presentation make it suitable for both casual and formal gift-giving occasions.
Conclusion
Creating peanut butter fudge with marshmallow creme at home transforms simple ingredients into an impressive confection that rivals commercial varieties. By understanding your ingredients, following the cooking process precisely, and employing proper cooling and storage techniques, you’ll consistently produce fudge with the ideal texture and flavor profile. Whether you’re preparing treats for yourself, creating gifts for loved ones, or exploring candy-making as a hobby, this straightforward recipe delivers professional-quality results. The combination of nutty peanut butter, fluffy marshmallow, and rich butter creates a flavor profile that endures as a beloved classic for good reason.
References
- Peanut Butter Fudge with Marshmallow Creme — Oh That’s Good. Accessed 2026. https://ohthatsgood.com/reeses-peanut-butter-fudge-with-marshmallow-creme/
- Marshmallow Fluff Peanut Butter Fudge Recipe — Mashed. Accessed 2026. https://www.mashed.com/456974/marshmallow-fluff-peanut-butter-fudge-recipe/
- Peanut Butter Fudge Recipe — The Food Charlatan. Accessed 2026. https://thefoodcharlatan.com/peanut-butter-fudge-recipe/
- Amazingly Easy Peanut Butter Fudge — Good in the Simple. Accessed 2026. https://goodinthesimple.com/amazingly-easy-peanut-butter-fudge-recipe/