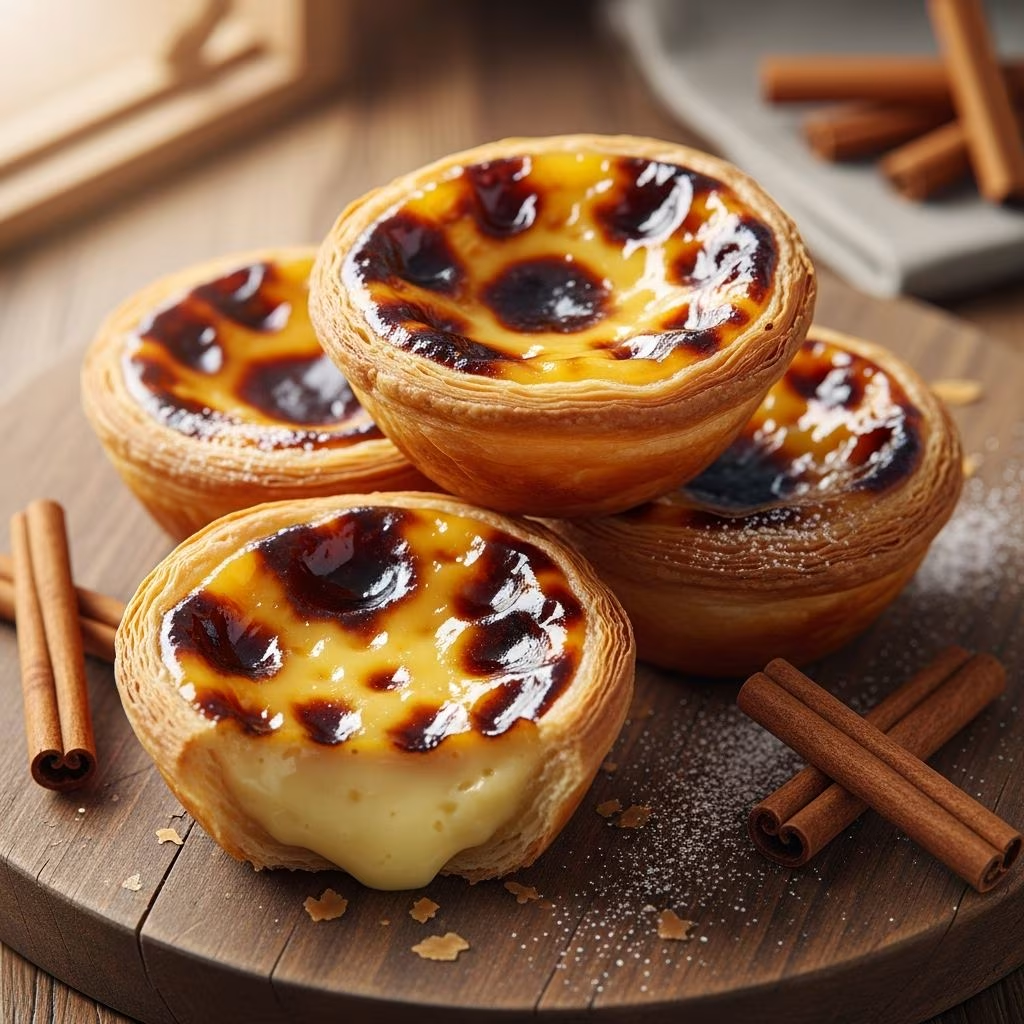
Nothing captures the essence of Portuguese pastry artistry quite like Pasteis de Nata. These delicate tarts feature shatteringly crisp pastry encasing a velvety, lightly caramelized custard filling. Originating from the sun-kissed streets of Lisbon, they have enchanted palates worldwide. Whether you’re a seasoned baker or a curious home cook, crafting these treats at home brings a slice of Portugal to your table. This guide dives deep into their creation, from selecting premium ingredients to achieving that signature blistered top.
The Alluring Origins of Pasteis de Nata
Pasteis de Nata emerged in the early 19th century at the Jerónimos Monastery in Belém, Lisbon. Monks, facing financial challenges, began selling these tarts to sustain the convent. The recipe, shrouded in secrecy, was passed down through generations. Even today, the original Pastéis de Belém bakery guards its formula closely, using only a handful of bakers sworn to silence.
By the 1830s, after the monastery closed, the recipe found new life in nearby shops. Its popularity soared, spreading across Portugal and beyond. UNESCO recognizes this culinary heritage as part of Portugal’s intangible cultural treasures. The tarts symbolize resilience and innovation, blending simple ingredients into something extraordinary. Understanding this backstory enhances every bite, connecting you to centuries of tradition.
Essential Ingredients for Authentic Flavor
Authenticity starts with quality components. For the pastry, opt for high-fat European-style butter (at least 82% fat) for flakiness. All-purpose flour provides structure without toughness. The custard demands fresh whole milk, heavy cream for richness, and egg yolks for silkiness—no whole eggs to avoid excess moisture.
Key is caster sugar, which dissolves seamlessly, and a touch of cornstarch for stability. Vanilla extract or seeds infuse aroma, while cinnamon and lemon zest add subtle warmth and citrus brightness. Skip substitutes; they dilute the pure profile.
| Component | Quantity (for 12 tarts) | Purpose |
|---|---|---|
| Pastry Dough | Flour: 250g, Butter: 125g, Water: 50ml | Crispy, layered shell |
| Custard Filling | Milk: 250ml, Cream: 250ml, Yolks: 6, Sugar: 150g | Creamy, smooth center |
| Flavorings | Vanilla: 1 pod, Zest: 1 lemon, Cinnamon: 1 stick | Aromatic depth |
Step-by-Step Pastry Preparation
Begin with the dough, the tart’s crunchy foundation. Combine flour and salt in a bowl. Incorporate cold, cubed butter using a pastry cutter until pea-sized lumps form. This creates steam pockets for lift. Add ice water gradually, kneading minimally to preserve butter flecks.
Roll into a 12×16-inch rectangle on a floured surface. Fold like a letter (thirds), rotate 90 degrees, and repeat thrice. Chill 30 minutes between folds. This lamination yields 81 layers, mimicking puff pastry. Final roll to 1/8-inch thick, cut into 4-inch circles. Press into a greased muffin tin, flute edges for grip.
- Chill formed shells 20 minutes to relax gluten.
- Prick bases lightly to prevent bubbles.
- Bake empty at 500°F briefly for crispness.
Mastering the Silky Custard Filling
Simmer milk, cream, cinnamon, and zest gently. This infuses flavors without curdling. Whisk yolks, sugar, and cornstarch separately until pale ribbons form. Temper by adding hot milk gradually, stirring constantly. Strain through a fine sieve to remove lumps or zest bits.
Return to low heat, stirring with a wooden spoon until it thickens like heavy cream (coats the back of spoon). Cool slightly before filling shells—too hot scorches bottoms. Aim for 2/3 full to allow rise.
- Infuse milks 10 minutes off heat.
- Temper yolks slowly over 2 minutes.
- Cook custard to 180°F, no higher.
Baking Techniques for Perfection
High heat is crucial: preheat to 550°F with a pizza stone for even conduction. Position rack low for bottom crispness. Bake 12-15 minutes until edges brown deeply and custard bubbles with dark spots. Rotate halfway for uniformity. Cool in tin 5 minutes, then on wire rack.
Humidity affects results—dry ovens yield better blisters. Convection fans help circulate heat. If tops don’t caramelize, broil 30 seconds watching closely. Freshly baked, they release steam, crisping further.
Common Challenges and Pro Tips
Soggy bottoms? Blind bake longer or use hotter pans. Runny custard signals undercooking—test doneness by jiggle (set edges, slight center wobble). Overmixed dough toughens pastry; handle gently.
- Use metal tins for conductivity.
- Measure precisely; scales beat cups.
- Freeze extra dough for quick batches.
- Dust with cinnamon-sugar post-bake.
Storage: airtight up to 2 days at room temp, or freeze baked tarts 1 month. Reheat at 350°F 5 minutes.
Delicious Variations to Explore
Classic is unbeatable, but innovate: chocolate ganache swirl, matcha-infused custard, or passionfruit curd topper. For holidays, add pumpkin spice. Vegan version uses coconut milk and aquafaba, though texture differs. Mini tarts suit parties; fill push-up pops for fun.
Pair with espresso or Madeira wine. Serve warm for molten centers.
Nutritional Insights and Serving Ideas
One tart (60g): ~250 calories, 12g fat, 30g carbs, 4g protein. Indulgent, yet portion-controlled. Gluten-free flour works with xanthan gum adjustment.
Host a tasting: alongside coffee, fresh berries. Kids love dusted versions.
Frequently Asked Questions
Can I use store-bought puff pastry?
Yes, but homemade lamination gives superior flakiness. Thaw fully, roll thin.
Why do my tarts leak custard?
Seal edges tightly; cool filling completely before pouring.
How to get the charred tops?
Blast at 550°F+; top rack broil if needed.
Are these tarts freezer-friendly?
Unbaked shells freeze well; bake from frozen, add 2 minutes.
What’s the difference from egg tarts?
Pasteis use yolk-only custard, higher bake temp for blisters.
References
- Portugal’s Intangible Cultural Heritage: Pastéis de Nata — Direcção-Geral do Património Cultural (Portuguese Ministry of Culture). 2022-05-15. https://www.patrimoniocultural.gov.pt/en/patrimoniomundial/pasteis-de-nata/
- The Original Pastéis de Belém History — Pastéis de Belém Official Site. 2023-01-10. https://pasteisdebelem.pt/en/history/
- Science of Custard in Baking — Institute of Food Technologists (IFT). 2024-03-20. https://www.ift.org/news-and-publications/food-technology-magazine/issues/2024/march/features/science-of-custard
- Portuguese Confectionery Traditions — University of Lisbon Food Studies Journal. 2021-11-08. https://doi.org/10.1007/s11947-021-02678-9
- High-Heat Baking Techniques — The Guardian (Food Section). 2025-02-14. https://www.theguardian.com/food/2025/feb/14/high-heat-baking-portuguese-tarts
(Word count: 1728)