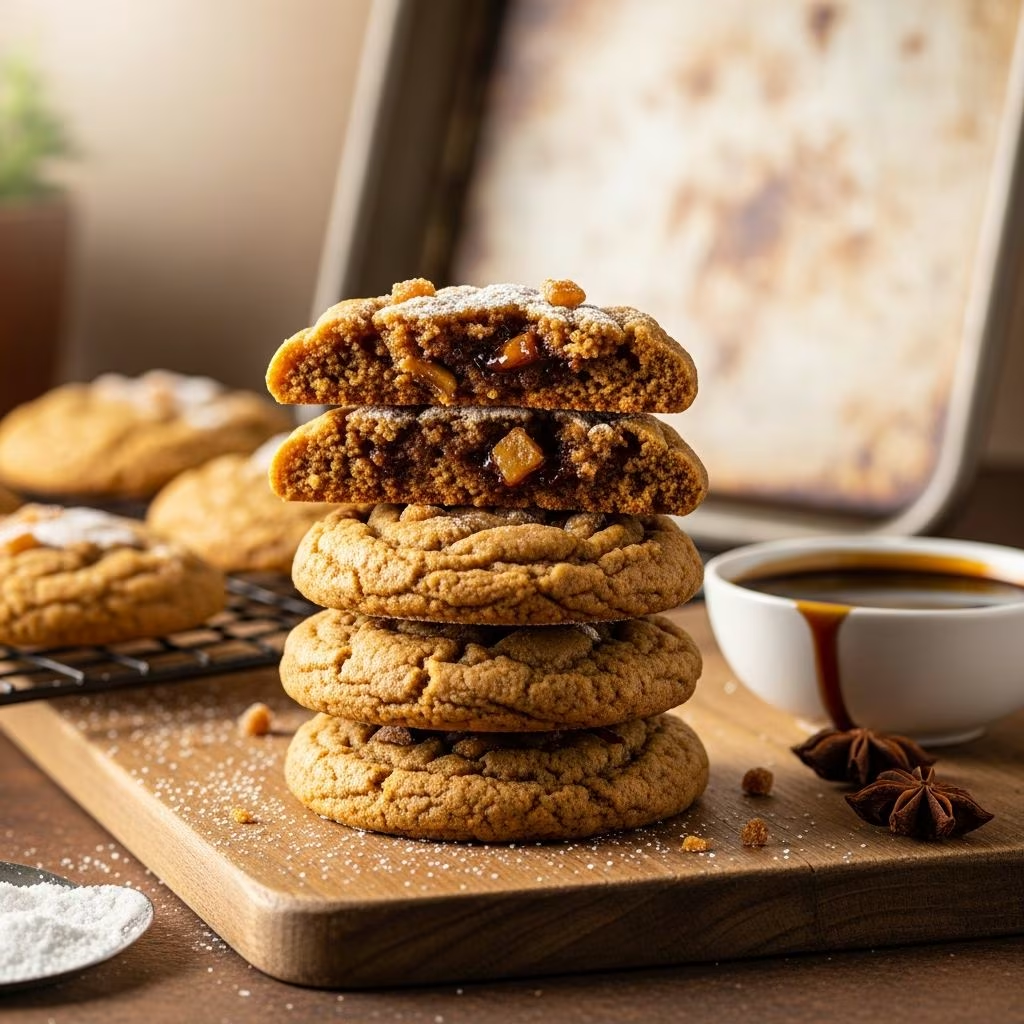
Ginger molasses cookies represent a beloved classic in the world of baking, combining warm spices with rich molasses to create a treat that appeals to both casual bakers and experienced pastry enthusiasts. What sets these cookies apart from standard recipes is the innovative pan-banging technique, a method that transforms an ordinary cookie into one with distinctive rippled edges and an invitingly chewy center. This approach, popularized by contemporary baking experts, has revolutionized how home bakers approach cookie texture and presentation, offering a way to achieve results that rival those found in professional bakeries.
Understanding the Distinctive Characteristics of Pan-Banged Cookies
The pan-banging method produces cookies that look visually striking and offer a superior eating experience compared to traditionally baked versions. The technique creates pronounced ridges and ruffles around the outer edges of each cookie while maintaining a softer, slightly underbaked center. This textural contrast is intentional and carefully crafted through a series of deliberate steps during the baking process. The edges develop a firm, crispy structure that provides resistance when bitten, while the interior remains moist and tender, creating a multi-sensory experience with each bite.
The visual appeal of these cookies cannot be overstated. The distinctive rippled pattern around the perimeter makes them instantly recognizable and professional-looking, even for home bakers attempting the technique for the first time. This aesthetic quality has contributed significantly to the popularity of pan-banged cookies in both home kitchens and professional establishments.
Essential Ingredients and Their Functions
Creating successful ginger molasses cookies requires an understanding of how each ingredient contributes to the final product. The formula balances structure, flavor, moisture, and spread to achieve the desired outcome.
- All-Purpose Flour (1 3/4 cups): Provides the structural foundation for the cookie dough, determining spread and texture
- Baking Soda (1/2 teaspoon): Acts as a leavening agent, promoting rise and creating the puffed center characteristic of this style
- Salt (5/8 teaspoon total): Enhances flavor complexity and controls spreading behavior during baking
- Ground Ginger (2-2.5 teaspoons): Delivers the signature warm, spicy flavor that defines these cookies
- Ground Cinnamon (3/4-1 teaspoon): Adds complementary warmth and complexity to the spice profile
- Ground Cloves (pinch): Provides subtle depth that enhances the overall spice character
- Unsalted Butter (12 tablespoons): Creates richness and contributes to the desired spread and texture
- Granulated Sugar (1.5 cups plus more for rolling): Sweetens the dough and encourages spreading and browning
- Molasses (2 tablespoons): Imparts deep, complex sweetness and moisture retention
- Egg (1): Binds ingredients and contributes to structure and rise
- Vanilla Extract (1 teaspoon): Rounds out flavors and adds aromatic complexity
Preparation Steps Before Baking
Success with pan-banged cookies begins well before they enter the oven. Proper preparation establishes the foundation for achieving the desired texture and appearance. The process begins with setting up your workspace efficiently, as the technique requires attention and timing during the baking phase.
Oven and Pan Setup
Adjust your oven rack to the middle position and preheat to 350°F. This temperature allows for proper spreading and browning while preventing over-browning of the edges before the centers adequately cook. Line three baking sheets with parchment paper, as you will bake the cookies one sheet at a time, requiring multiple prepared pans.
Dry Ingredient Combination
In a small mixing bowl, whisk together the flour, baking soda, salt, ground ginger, cinnamon, and cloves. This step ensures even distribution of the leavening agent and spices throughout the dry ingredients. Proper whisking prevents concentrated pockets of baking soda, which could create uneven browning or unpleasant flavors.
Creaming the Fat and Sugar
In the bowl of a stand mixer fitted with a paddle attachment, beat the room-temperature butter on medium speed until it becomes creamy and pale in appearance. This process, which typically takes about one minute, aerates the butter and prepares it to properly incorporate sugar. Add the granulated sugar and continue beating on medium speed for 2-3 minutes until the mixture becomes light, fluffy, and noticeably paler in color. This creaming process creates air pockets that contribute to the cookie’s rise and texture.
Wet Ingredient Integration
With the mixer on low speed, add the molasses, egg, and vanilla extract to the creamed butter mixture. Mix until the ingredients are combined, but avoid overmixing at this stage. The dough should incorporate these elements while maintaining its structure. After mixing, remove the bowl from the stand mixer and use a spatula to manually ensure that the molasses is completely integrated throughout the dough, creating a uniform color and consistent texture.
Final Dough Assembly
On low speed, add the prepared dry ingredient mixture to the wet ingredients, mixing until just combined. Overmixing at this stage can develop gluten unnecessarily, potentially resulting in tougher cookies. The dough should come together with no visible streaks of dry ingredients remaining.
Forming and Preparing Cookies for Baking
Proper portioning ensures consistent results across all cookies. Form the dough into uniform balls; most recipes call for either 2-ounce or 3-ounce portions depending on desired cookie size. Using a cookie scoop helps achieve consistency in sizing, which contributes to uniform baking throughout each sheet.
Roll each dough ball in granulated sugar to coat the exterior. This sugar coating serves multiple purposes: it adds sweetness and visual appeal, encourages browning during baking, and creates texture contrast with the interior crumb. Place the coated balls on prepared baking sheets, spacing them approximately 4 inches apart to allow adequate room for spreading during baking.
Executing the Pan-Banging Technique
The pan-banging method represents the defining characteristic of this cookie style, and mastering it ensures professional-quality results.
Initial Baking Phase
Place a single baking sheet in the preheated 350°F oven and bake for approximately 8 minutes, until the cookies are puffed slightly in the center. At this stage, the cookies will appear to have risen significantly, and the edges may be beginning to brown while the centers remain lighter in color.
First Pan Bang
After the initial 8 minutes, carefully remove the baking sheet from the oven. Lift one side of the sheet approximately 4 inches above the oven rack and gently let it drop against the rack with controlled force. This action causes the puffed cookies to collapse slightly, creating the characteristic rippled edges as the cookies settle. The motion should be deliberate but not violent; the goal is to set the edges while allowing the center to fall back down.
Continued Baking and Additional Bangs
Return the baking sheet to the oven for an additional 2 minutes. As the cookies bake, they will puff up again. Remove the sheet and repeat the pan-banging motion a total of 3-4 times throughout the baking process to create multiple ridges around the cookie edges. The total baking time will range from 13-16 minutes, during which the edges develop a golden-brown color while the centers remain notably lighter and slightly underbaked.
Determining Doneness
The cookies are ready to remove from the oven when the edges are distinctly golden brown and set while the centers appear much lighter in color and not fully cooked. This apparent underbaking is intentional; the residual heat and carryover baking will continue firming the centers after removal from the oven. Transfer the baking sheet to a wire cooling rack and allow the cookies to cool completely before removal from the pan, which typically requires 15-20 minutes.
Storage and Make-Ahead Considerations
These cookies maintain their quality effectively at room temperature when stored properly. Place cooled cookies in an airtight container, and they will remain fresh for up to one week. The molasses and butter content in these cookies makes refrigeration unnecessary before baking, unlike some other cookie varieties. This characteristic makes them convenient for bakers who prefer spontaneous baking without extended preparation or chilling time.
Variations and Flavor Enhancements
While the traditional version offers excellent results, several variations allow for creative experimentation within this recipe framework.
- Holiday Glaze Version: Apply a rum-butter glaze featuring confectioners’ sugar, butter, dark rum, and optional cinnamon for festive occasions
- Spice Intensification: Increase ground ginger quantities for those preferring more pronounced spice character
- Size Adjustments: Smaller 2-ounce portions create more delicate cookies, while 3-ounce portions yield heartier options
- Decorative Elements: Add edible sprinkles or additional sugar crystals before baking for enhanced visual interest
Troubleshooting Common Challenges
Understanding potential issues and their solutions helps ensure success when attempting this technique.
| Issue | Likely Cause | Solution |
|---|---|---|
| Cookies spread too much | Oven temperature too high or dough too warm | Verify oven temperature with a thermometer; use room-temperature butter |
| Minimal puffing observed | Insufficient baking soda or old leavening agent | Check expiration dates; measure baking soda accurately |
| Edges burn before centers cook | Oven temperature too high | Reduce temperature by 25°F and extend baking time accordingly |
| Ridges fail to form | Insufficient pan-banging force or timing | Use more deliberate motion; bang at specified intervals |
| Cookies too cakey | Overbaking or excess flour | Remove cookies earlier; use weight-based flour measurement |
Frequently Asked Questions
What is the primary purpose of the pan-banging technique?
The pan-banging technique creates the distinctive rippled edges that characterize this cookie style while maintaining a chewy, underbaked center. The motion sets the cookie edges by collapsing the initial puff, and repeated banging creates multiple ridges for visual appeal and textural interest.
Can this recipe be made without a stand mixer?
Yes, while a stand mixer simplifies the process, a hand-held electric mixer or manual beating with a wooden spoon can achieve comparable results. The key is adequately creaming the butter and sugar until light and fluffy, which may require slightly more effort with manual methods.
How important is the exact oven temperature?
Oven temperature significantly impacts results. A 25-degree variance can noticeably affect browning speed and spread. Using an oven thermometer helps verify actual temperature, as many ovens have calibration variations.
Is it necessary to roll cookies in sugar before baking?
While rolling in sugar is traditional and adds flavor and visual appeal, it is technically optional. Omitting sugar will reduce sweetness and alter the appearance but will not prevent successful pan-banging.
What should the dough consistency resemble?
The dough should be smooth, cohesive, and slightly sticky but not wet. It should hold together when formed into balls without excessive resistance or moisture.
References
- The Science of Baking: Temperature and Time — Purdue University Food Science Department. 2023. https://www.purdue.edu
- Professional Cookie Techniques and Specifications — Culinary Institute of America. 2024. https://www.ciachef.edu
- Understanding Leavening Agents in Baking — U.S. Flour Milling and Baking Association. 2024. https://www.asbmb.org