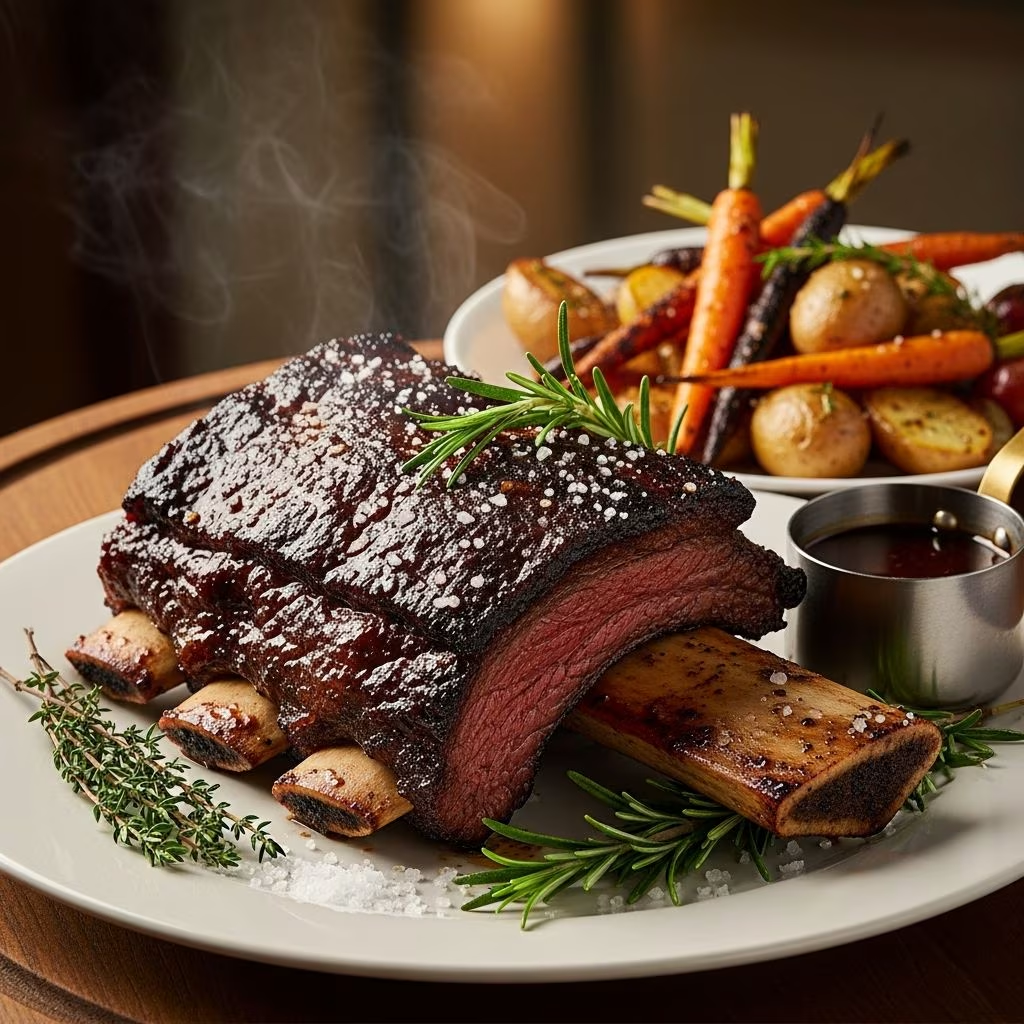
Beef ribs represent one of the most satisfying and impressive dishes you can prepare in a home kitchen. While many assume that exceptional ribs require outdoor grilling equipment or professional barbecue facilities, the truth is that your conventional oven can produce results that rival any professional smokehouse. The key lies in understanding the science of low-temperature cooking, proper seasoning techniques, and strategic timing to transform tough muscle fibers into melt-in-your-mouth tenderness.
Understanding Beef Rib Anatomy and Selection
Before beginning any cooking process, it’s crucial to understand what you’re working with. Beef ribs come in several varieties, each with distinct characteristics that affect cooking time and methods. Short ribs, often considered the gold standard for oven cooking, contain more meat and marbling than other cuts, making them ideal for low-and-slow cooking techniques. The connective tissue and collagen present in beef ribs transform during extended cooking at lower temperatures, breaking down into gelatin that creates the signature tender texture.
When selecting beef ribs at your butcher or grocery store, look for cuts that display good marbling—the white fat distributed throughout the meat. This intramuscular fat is essential for maintaining moisture during the long cooking process and contributes significantly to flavor development. A typical preparation uses between two to three pounds of beef short ribs, providing adequate yield for a family meal while fitting comfortably in standard baking equipment.
One preparatory step often overlooked by home cooks is the removal of the silver skin—the thin, tough membrane on the back of the rib slab. This membrane doesn’t break down during cooking and can create an unpleasant chewing experience. Using a sharp knife to carefully lift and peel away this layer requires only a few minutes but significantly improves the final product’s texture and dining experience.
The Foundation: Seasoning and Flavor Development
The difference between mediocre and exceptional oven-baked ribs often comes down to seasoning strategy. Rather than relying on a single aggressive spice application, sophisticated approaches layer flavors through multiple techniques. The first step involves coating the ribs with a light layer of oil, which acts as a binder for dry seasonings and promotes even heat distribution during cooking.
A well-balanced dry rub typically combines warm spices with savory and slightly sweet notes. Essential components include garlic powder and onion powder for aromatic depth, brown sugar for caramelization and sweetness, paprika for color and subtle smoky notes, and chili powder for gentle heat. Additional elements like oregano, cumin, or mustard powder can be incorporated based on personal preferences and desired flavor profiles.
The massage technique proves surprisingly important in the seasoning process. Rather than simply sprinkling spices over the meat, massaging them into the surface with your hands ensures better adhesion and more even distribution. This tactile approach also creates small tears in the surface, allowing seasoning to penetrate slightly deeper into the meat structure.
Many traditional recipes benefit from marinating the seasoned ribs for one to two hours before cooking. This resting period allows the flavors to penetrate the meat surface and begins the process of osmotic salt penetration, which can improve moisture retention during cooking. While optional, this step demonstrates noticeable improvements in final flavor complexity.
Temperature Control and Cooking Methodology
The fundamental principle underlying successful oven-baked ribs is low-temperature, extended cooking. This approach fundamentally differs from high-heat methods and represents the key to achieving tender results. The science is straightforward: collagen—the primary structural protein in connective tissue—begins breaking down into gelatin at approximately 160-170 degrees Fahrenheit. This transformation requires time at sustained lower temperatures rather than brief exposure to high heat.
Most expert approaches begin with a preliminary phase at moderate temperature. Initial baking at 350 degrees Fahrenheit for a short duration (typically 20 minutes per side) accomplishes several goals simultaneously. This phase allows the exterior to begin developing color through the Maillard reaction—the browning process that creates complex flavors and appealing appearance. The initial phase also starts rendering some of the surface fat, creating a flavorful base.
The critical transition comes when temperature is reduced to 250 degrees Fahrenheit. At this temperature, the ribs enter the slow-cooking phase where the breakdown of connective tissue occurs gradually and thoroughly. This extended duration—typically three to four hours—allows complete conversion of collagen into gelatin while maintaining moisture within the meat.
Moisture management during the low-temperature phase significantly impacts results. Many successful approaches involve tenting the ribs with aluminum foil to create a sealed environment, though some cooks prefer leaving them uncovered for the first portion of cooking and then covering them for the remainder. The sealed foil approach traps steam, which accelerates the breakdown of connective tissue and prevents surface drying. The steam created within the sealed packet acts as a gentle cooking medium, distributing heat evenly and maintaining internal moisture.
Strategic Sauce Application and Finishing Techniques
The timing of sauce application significantly influences final results and requires careful consideration. Applying barbecue sauce too early in the cooking process can lead to burning or caramelization that becomes bitter rather than flavorful. A strategic approach involves waiting until near the end of cooking to apply sauce, allowing multiple layers to build without excessive charring.
One sophisticated technique involves an initial sauce application approximately 20 minutes before the ribs are due to finish cooking, which allows the sauce to adhere and begin caramelizing. Following the removal from the oven, another sauce layer can be applied for additional depth. For those seeking a more caramelized crust, finishing under a high-temperature broiler for a brief period (one to two minutes per side) can create a glazed exterior with slightly charred edges that adds textural contrast.
For enhanced flavor complexity, consider preparing a sauce specifically tailored to your ribs rather than relying exclusively on commercial barbecue sauce. A simple approach combines soy sauce, red wine, minced garlic, brown sugar, and a pinch of curry powder—creating a tangy, slightly sweet sauce with depth and sophistication. This type of sauce caramelizes beautifully during final cooking stages and imparts restaurant-quality flavor profiles.
Critical Success Factors and Troubleshooting
Essential Elements for Perfect Results
- Complete drying: Thoroughly pat ribs dry before seasoning to ensure proper browning and spice adherence
- Adequate resting time: Allow marinated ribs to rest in refrigeration for optimal flavor penetration
- Consistent oven temperature: Use an oven thermometer to verify your oven maintains the target temperature throughout cooking
- Proper rib arrangement: Lay ribs in a single layer without overlapping for even heat distribution
- Mindful liquid smoke: Optional liquid smoke (if using) should be applied to raw ribs before other seasonings, in modest quantities to avoid overpowering
Common mistakes in oven-baked rib preparation often stem from temperature mismanagement or premature patience. Increasing oven temperature to accelerate cooking produces tough, dry results rather than the desired tenderness. The low-temperature approach cannot be rushed without compromising quality. Conversely, extending cooking time beyond the recommended duration rarely produces negative results—the ribs simply become increasingly tender without becoming mushy if the temperature remains appropriately low.
If ribs remain undesirably tough after the extended cooking period, examine your oven’s accuracy with a separate thermometer, as inaccurate temperature reading is a frequent culprit. Additionally, ensure the foil seal remains intact throughout cooking, as steam leakage can compromise the moist cooking environment necessary for optimal collagen breakdown.
Comparing Cooking Methods and Timing Variations
| Cooking Approach | Temperature Profile | Total Time | Best For |
|---|---|---|---|
| Low-and-Slow Standard | 250°F throughout | 3.5-4 hours | Maximum tenderness and flavor development |
| Two-Phase Method | 350°F (20 min/side), then 250°F | 3-3.5 hours | Enhanced browning with extended tenderness |
| Quick Oven Method | 350°F (60 min), then 400°F finish | 1.5 hours | Time-constrained preparations |
| Extended Finish | 250°F (2 hours), then 400°F glaze | 2-2.5 hours | Balanced results with glossy finish |
Ingredient Selection and Preparation Guidelines
Quality ingredient selection, beginning with the ribs themselves, fundamentally affects outcomes. Two to three pounds of beef short ribs serves as the standard base quantity for most recipes, providing adequate yield while remaining manageable in standard kitchen equipment. The ribs should display generous marbling and a deep red color, indicating proper aging and quality beef selection.
Oil selection influences both cooking results and flavor profiles. Olive oil provides a classic approach with subtle flavor contributions, while neutral oils like canola or vegetable oil work equally well if preferred. The oil’s primary function remains creating an adhesive layer for dry seasonings and promoting even heat transfer, so the specific oil choice represents a matter of personal preference rather than critical technique.
Brown sugar constitutes an essential sweetening agent in most dry rubs, contributing to caramelization during cooking while balancing savory elements. Packing the sugar ensures even distribution without clumping. Similarly, salt and pepper represent non-negotiable fundamentals, with many recipes specifying two teaspoons of salt for optimal seasoning penetration without over-salting.
Optional additions like curry powder, mustard powder, or oregano allow personalization based on cultural preferences or desired flavor destinations. A pinch of curry powder adds subtle warmth and complexity, while dry mustard contributes tangy undertones. These optional elements represent opportunities for experimentation and adaptation to individual taste preferences.
Frequently Asked Questions
How far in advance can I season the ribs?
Seasoned ribs can be prepared and refrigerated for up to 24 hours before cooking. The extended marinating period allows deeper flavor penetration. However, ribs prepared just before cooking produce satisfactory results—the marinating step represents an enhancement rather than a necessity.
Can I freeze seasoned ribs for later preparation?
Yes, seasoned ribs freeze successfully for up to three months. Thaw completely in the refrigerator before cooking, allowing at least 24 hours for large rib slabs. Frozen ribs may require an additional 30 minutes of cooking time.
What’s the significance of the foil seal during cooking?
The sealed foil environment traps steam, which accelerates the breakdown of connective tissue and prevents surface moisture loss. This moist cooking environment is fundamental to achieving fork-tender results within the allocated timeframe.
Can I cook ribs without foil sealing?
Uncovered ribs will develop more pronounced browning but require closer monitoring to prevent excessive drying. Extend cooking time by 30-60 minutes when cooking uncovered, and baste frequently with sauce to maintain moisture.
How do I know when ribs are properly done?
Properly cooked ribs exhibit meat that pulls cleanly from the bone with minimal resistance. The internal temperature should reach 190-205 degrees Fahrenheit at the thickest point. A fork should pierce the meat effortlessly.
Can I finish oven-cooked ribs on an outdoor grill?
Yes, partially cooked ribs can be finished on a preheated grill over direct heat for 1-2 minutes per side to add a charred exterior and smoky flavor. This finishing technique adds textural contrast and appeals to grill enthusiasts.
Serving Suggestions and Presentation
Properly cooked oven-baked beef ribs deserve thoughtful presentation and accompaniments. Arrange finished ribs on a wooden cutting board for a rustic presentation, or plate individually for more formal dining occasions. Garnish with fresh herbs—particularly cilantro or parsley—for color contrast and aromatic freshness.
Traditional accompaniments enhance the dining experience considerably. Coleslaw provides textural contrast and acidic balance to rich ribs. Cornbread or biscuits offer a neutral vehicle for enjoying accumulated pan drippings and sauce. Pickled vegetables contribute digestive benefits and palate-cleansing acidity. Simple green salads with vinaigrette-based dressings provide similar balance while maintaining focus on the star protein.
The pan drippings that remain after cooking deserve particular attention. These flavorful liquids can be strained, defatted, and reduced into a concentrated sauce to drizzle over plated ribs for added depth. This residual sauce represents concentrated beef and seasoning essence that amplifies overall dish quality.
Conclusion: Elevating Home Cooking
Mastering oven-roasted beef ribs represents an accessible gateway to advanced home cooking techniques. The method requires minimal special equipment—only a reliable oven and standard baking equipment—while producing results that rival professional establishments. The extended cooking time allows flexibility in meal planning and reduces active cooking demands, making this approach ideal for busy home cooks seeking impressive results with manageable effort.
Success relies primarily on understanding the science underlying low-temperature cooking, proper seasoning technique, and strategic moisture management. Armed with this knowledge and a commitment to precise temperature control, any home cook can transform economical beef ribs into restaurant-quality dishes that satisfy family and guests alike.
References
- Oven-Baked Beef Ribs Recipe (Tender Every Time) — Divas Can Cook. Accessed April 2026. https://divascancook.com/easy-oven-baked-beef-ribs-recipe-bbq/
- Easy, Fall off the Bone BBQ Ribs Recipe — 1855 Black Angus Beef. Accessed April 2026. https://1855beef.com/recipe/easy-fall-off-the-bone-bbq-ribs/
- Insane Oven Beef Ribs Recipe — Say Mmm. Accessed April 2026. https://www.saymmm.com/recipe/insane-oven-beef-ribs442
- No-Fuss Easy Oven-Baked Beef Ribs — Baking Mischief. Accessed April 2026. https://bakingmischief.com/no-fuss-easy-oven-baked-ribs/
- Oven Beef Ribs — Texas Farm Bureau Table Top. Accessed April 2026. https://tabletop.texasfarmbureau.org/2018/02/oven-beef-ribs/