There exists a particular magic in meals prepared entirely within one vessel—the kind of culinary simplicity that transforms a busy weeknight into something memorable. One-pot coconut chicken and rice represents exactly this philosophy: a harmonious blend of tender protein, fragrant grains, and creamy tropical flavors that emerges from a single Dutch oven or large, lidded cooking vessel. This approach eliminates excessive dishwashing while simultaneously enhancing the flavors through the layering of cooking techniques.
Understanding the Foundation: Why This Dish Works
The success of one-pot preparations hinges on understanding how individual components work together. When chicken thighs brown initially in oil, they develop a flavorful crust through the Maillard reaction—a chemical transformation that creates complexity and depth. As the rice then absorbs the liquid infused with both the browned chicken drippings and aromatic vegetables, each grain becomes a vehicle for layered taste. The coconut milk contributes richness and subtle sweetness, while chicken broth provides savory backbone, and lime juice offers brightness that prevents the dish from feeling heavy.
Selecting Your Core Components
Protein Considerations
Boneless, skinless chicken thighs serve as the foundation for this dish. Unlike chicken breasts, thighs contain more intramuscular fat, which keeps the meat moist during cooking and prevents the common problem of dry poultry. Thighs also benefit from longer cooking times without deteriorating in texture—a critical advantage when the meat must remain in the oven while rice cooks. Plan for approximately one pound of chicken thighs to feed four people comfortably, ensuring adequate protein distribution throughout the finished dish.
Rice Varieties and Their Characteristics
The choice between white rice varieties dramatically affects the final texture and eating experience. Long-grain white rice, including basmati varieties, produces individual grains that remain separate and fluffy after cooking. These rice types have lower starch content compared to short-grain options, allowing them to absorb liquid without becoming clumpy. For this particular preparation, where the rice absorbs both coconut milk and chicken broth rather than simple water, long-grain varieties prevent the dish from becoming overly thick or pasty.
Coconut Milk Quality Matters
Not all coconut milk products perform identically in cooking. Full-fat, unsweetened coconut milk—specifically the kind found in cans rather than cartons—creates the appropriate texture and richness. Beverages labeled as coconut milk contain stabilizers and significantly more water, resulting in a thinner final product. Light coconut milk reduces calories but may compromise the luxurious mouthfeel that distinguishes this preparation. Always shake the can thoroughly before opening, as the cream naturally separates during storage.
Aromatic Building Blocks
The flavor journey begins with humble ingredients that transform through heat and time. A medium onion, diced or grated, contributes natural sweetness that intensifies when cooked. Fresh ginger—approximately one inch of peeled, minced root—introduces warmth and subtle spice. Garlic (whether included fresh or as part of optional variations) adds pungency that mellows into savory complexity. Green onions serve as a finishing element, maintaining a fresh onion character without the sharpness of raw yellow onion. Together, these aromatics create a flavor foundation so complete that additional seasoning often proves unnecessary.
Step-by-Step Preparation Sequence
Phase One: Developing Flavor Through Browning
Begin by patting chicken thighs completely dry with paper towels. Moisture on the surface prevents proper browning and steam rather than sear. Heat approximately one teaspoon of olive oil in a large Dutch oven or similar oven-safe pot over medium-high heat. When the oil shimmers and moves freely across the surface, carefully place chicken thighs skin-side down. Resist the urge to move them; allow undisturbed contact with the hot surface for three to four minutes. This creates a golden, slightly crispy exterior while rendering some fat. Flip and brown the second side for an additional two to three minutes. The chicken need not be cooked through at this stage—it will finish cooking in the oven later. Transfer browned chicken to a clean plate, leaving behind all flavorful browned bits stuck to the pot’s bottom.
Phase Two: Aromatics and Flavor Development
Return the pot to medium heat and immediately add diced onion to the warm oil and chicken drippings. Stir occasionally as the onion softens and turns translucent—approximately five minutes. The onion absorbs flavors from the browned surface, deepening the overall taste profile. Add minced ginger and any other fresh aromatics, stirring constantly for about one to two minutes until the mixture becomes fragrant. This brief toasting step unlocks essential oils and compounds that would remain dormant if added raw.
Phase Three: Building the Cooking Liquid
Pour the full can of coconut milk into the pot, followed by 1.5 cups of chicken broth. Scrape the pot’s bottom with a wooden spoon or spatula, loosening all brown bits and incorporating them into the liquid. These deglazed particles, called fond, contain concentrated flavor compounds essential to the dish’s depth. Stir in 1.5 cups of uncooked rice, ensuring every grain receives a light coating of oil. This quick toasting—approximately one to two minutes—builds additional flavor complexity and prevents the rice from becoming mushy. If using optional ingredients like fish sauce or lime juice, add them now, stirring thoroughly to distribute evenly.
Phase Four: Arranging and Oven Cooking
Bring the rice mixture to a boil over high heat, stirring occasionally to prevent sticking. Once boiling, nestle the browned chicken thighs into the rice in a single layer, skin-side up if appearance matters for your presentation. Do not stir the chicken into the rice; instead, allow it to rest on top. Cover the pot with a tight-fitting lid or aluminum foil. Transfer to a preheated 400-degree oven and bake for 20 to 25 minutes. The rice should absorb nearly all liquid by this point, and chicken should reach a minimum internal temperature of 165 degrees Fahrenheit when measured in the thickest portion.
Phase Five: Resting and Finishing
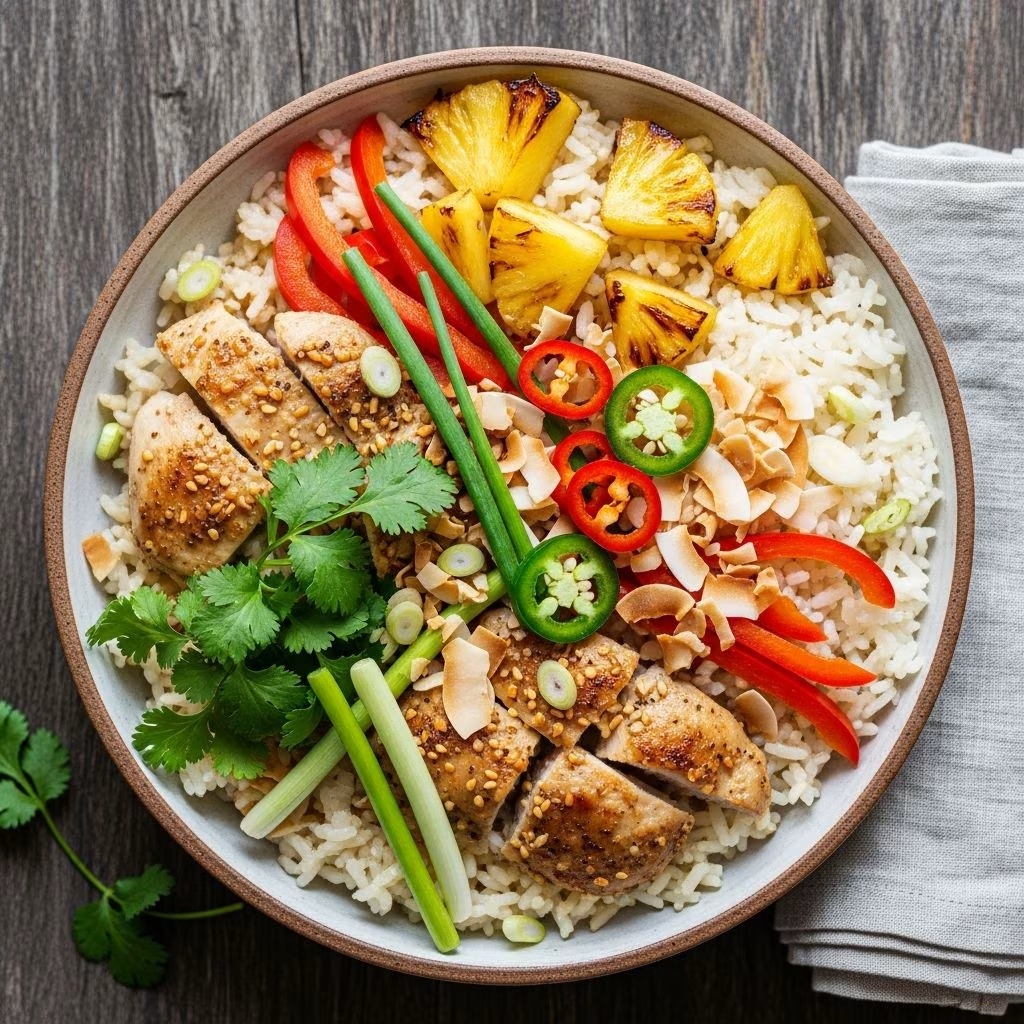
Remove the pot from the oven and allow it to rest, covered, for approximately 10 minutes. This resting period allows residual heat to finish cooking any remaining liquid and permits the rice to firm up slightly, making it easier to serve. If moisture remains visible, replace the lid and return to the oven for an additional five minutes. Once properly rested, remove the lid and fluff the rice gently with a fork, being careful not to shred the tender chicken. Garnish with chopped green onions, fresh cilantro, and additional lime juice squeezed to taste. Salt and pepper may be adjusted at this final stage, though the broth typically provides sufficient seasoning.
Flavor Variations and Customization Options
Adding Warmth and Depth
Incorporate turmeric into the aromatic stage, allowing the golden spice to toast briefly before adding liquid. This addition imparts earthiness and a subtle golden hue. Thai curry paste, added sparingly, introduces complex spice and depth. Fish sauce—merely a teaspoon—creates umami richness that amplifies existing flavors without creating a detectable fish taste. Coconut aminos, a soy sauce alternative, adds saltiness and depth when traditional soy doesn’t fit dietary parameters.
Textural Elements
Vegetables integrated into the rice absorb liquid and contribute nutrients. Thin carrot strips, bell pepper pieces, or snap peas maintain slight textural integrity when added with the rice. Toasted cashews scattered over the finished dish provide crunch that contrasts beautifully with the creamy coconut and tender chicken. Shredded coconut—approximately half a cup of unsweetened variety—may be sprinkled over both the chicken and rice before baking, crisping slightly as it toasts.
Fresh Brightness Elements
Lime juice appears in two stages: a portion mixing into the cooking liquid before baking, and additional juice applied after cooking for fresh, acidic brightness. Fresh cilantro performs similarly—half incorporated during cooking and remaining half used as garnish. This two-stage approach preserves some fresh herbaceousness while allowing the flavor to permeate the entire dish.
Practical Kitchen Techniques and Tips
Success with this preparation method depends on understanding a few essential techniques. Patting the chicken completely dry ensures proper browning rather than steaming. Using an oven-safe pot with a tight-fitting lid prevents excessive moisture loss during baking. Rinsing rice under cool water before cooking removes excess starch, allowing superior texture in the finished dish. Refraining from stirring once the chicken is nestled into the rice prevents breaking the tender chicken pieces and disrupting even rice cooking. Finally, measuring liquid carefully—slightly less rather than slightly more—prevents a mushy, soup-like final texture.
Serving Suggestions and Accompaniments
This complete one-pot meal requires minimal additional preparation or side dishes. However, offering lime wedges at the table allows guests to adjust acidity to personal preference. A small bowl of hot sauce—whether sriracha or another variety—provides optional heat for those desiring spice. Cooling yogurt or a simple cucumber salad offers textural and temperature contrast. For entertaining, this dish benefits from being served family-style directly from the pot, emphasizing the ease of preparation and creating an inviting, informal presentation.
Storage and Reheating Strategies
Leftover portions remain safe refrigerated for up to four days in an airtight container. The flavors actually deepen during storage as ingredients continue melding. Reheating occurs most successfully by transferring portions to a skillet with a splash of additional broth over medium heat, stirring gently until warmed throughout. Microwave reheating may cause uneven heating and slight texture degradation. Freezing is possible but may affect rice texture upon thawing, making this dish best consumed fresh or within a few days.
Frequently Asked Questions
Can I use chicken breasts instead of thighs?
While technically possible, chicken breasts dry out more easily during the extended oven time required for rice to cook. If using breasts, reduce oven time to 15 minutes and check internal temperature carefully to avoid overcooking.
What if my rice remains partially uncooked after baking?
This typically indicates insufficient liquid absorption. Replace the pot cover and return to the oven for an additional five to ten minutes. Alternatively, your rice variety may require a higher liquid-to-rice ratio than specified; adjust for future attempts.
Is this recipe gluten-free and dairy-free?
Yes, when using certified gluten-free broth and omitting soy-based additions. The natural ingredients—chicken, rice, coconut milk, vegetables, and herbs—contain no gluten or dairy products, making this dish suitable for various dietary needs.
How can I reduce the cooking time?
Using a pressure cooker or Instant Pot can significantly reduce cooking duration. Browning the chicken in the pot’s sauté mode, then cooking under pressure for 13 minutes with appropriate liquid ratios produces similar results in approximately half the time.
References
- Understanding the Maillard Reaction in Cooking — McGee, H. On Food and Cooking: The Science and Lore of the Kitchen. Scribner, 2004. https://www.scribner.com
- The Science of Cooking Rice — USA Rice Federation. 2024. https://www.usarice.com
- Culinary Uses of Coconut Products — International Coconut Community. 2023. https://www.icc.or.id
- Food Safety Guidelines for Poultry — U.S. Department of Agriculture. 2024. https://www.fsis.usda.gov
- Techniques for Optimal Browning — Myhrvold, N. Modernist Cuisine. The Cooking Lab, 2011. https://www.modernistcuisine.com
- Basmati Rice Characteristics and Cooking Methods — International Rice Research Institute. 2023. https://www.irri.org
- Nutritional Properties of Coconut Milk — USDA Food Data Central. 2024. https://fdc.nal.usda.gov
- Instant Pot Cooking Times and Techniques — Instant Brands. 2024. https://www.instantpot.com