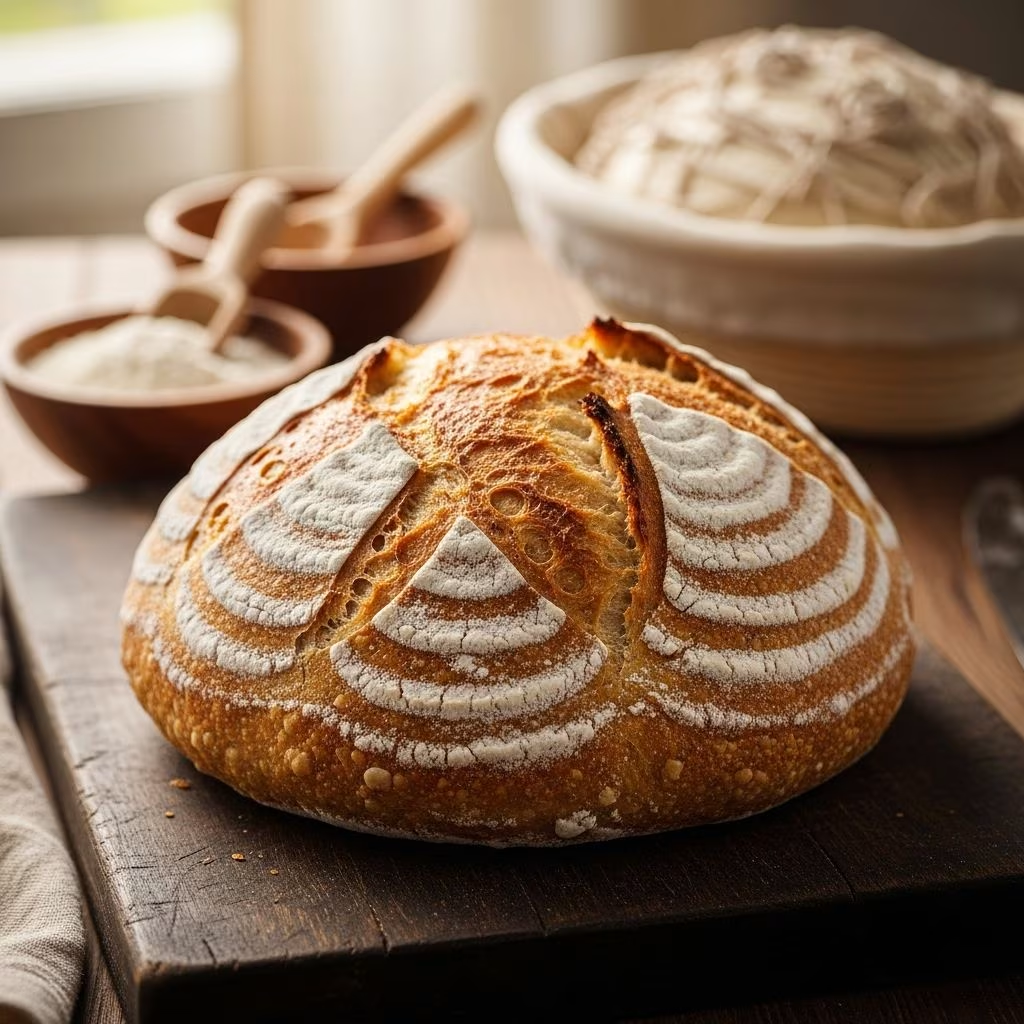
Creating exceptional white bread at home no longer requires extensive planning or overnight preparation. With the right techniques and understanding of fermentation principles, home bakers can produce restaurant-quality crusty loaves from start to finish within a single day. This approach combines straightforward ingredient management with proven dough-handling methods that yield impressive results, making it an ideal recipe for both beginners and experienced bakers looking to expand their skills.
Understanding the Foundation: Key Ingredients and Their Roles
The simplicity of ingredient selection distinguishes this bread-making approach from more complex recipes. Quality white all-purpose flour serves as the primary component, providing the structure necessary for developing an open crumb structure and crispy exterior. Standard all-purpose flour, rather than high-protein bread flour, works best because it achieves the desired texture balance that characterizes this particular style of loaf.
Water temperature plays a surprisingly critical role in the baking process. Using water heated to between 90 and 95 degrees Fahrenheit ensures proper fermentation speed and allows bakers to achieve consistent results. This temperature range activates the yeast effectively while supporting the development of flavor compounds during the bulk fermentation stage.
The formula employs minimal yeast—just a small amount of instant active dry yeast—because the extended fermentation period provides ample time for the microorganisms to work efficiently. Sea salt enhances both flavor and dough strength by tightening the gluten network, ultimately contributing to superior crust development and internal texture.
The Autolyse Phase: Why Resting Matters Before Mixing
The process begins with an autolyse period, a resting phase that allows flour and water to fully hydrate before salt and yeast enter the equation. During this 20 to 30-minute window, the flour absorbs water completely, initiating the development of gluten strands through hydration rather than mechanical mixing. This approach significantly reduces the amount of hands-on mixing required later and produces superior dough extensibility.
Many home bakers skip this step, assuming it wastes time. However, the autolyse phase actually accelerates the overall process by preparing the flour for the subsequent mixing stage. When salt and yeast are introduced after this resting period, they integrate more efficiently, and the dough develops better structure with minimal physical effort. This method demonstrates how understanding fermentation science improves results while reducing labor.
Incorporating Ingredients: The Mixing and Pincer Method
After the autolyse rest, the next critical phase involves incorporating salt and yeast into the dough. Rather than mixing these ingredients in advance, they are sprinkled evenly across the dough surface. This technique prevents the salt from coming into direct contact with the yeast prematurely, which could inhibit fermentation.
The incorporation process employs a hand-mixing technique where the baker reaches underneath the dough, stretches a quarter-section gently, and folds it over the top. This action repeats four times, creating an envelope-like structure that encloses the salt and yeast. Following this initial folding, the pincer method—a series of cuts across the dough mass—helps distribute ingredients thoroughly.
The pincer technique involves making cuts from one side of the dough to the other while simultaneously folding the dough over itself. This appears unusual to inexperienced bakers but proves highly effective for achieving complete ingredient integration without requiring a mechanical mixer. The entire mixing and incorporation process takes approximately five minutes when performed correctly.
Target dough temperature at the conclusion of mixing should reach 77 to 78 degrees Fahrenheit. If the final mixture feels cooler, fermentation will simply progress more slowly. Understanding this temperature relationship allows bakers to predict timing and adjust their schedules accordingly without compromising quality.
Bulk Fermentation: Building Flavor Through Strategic Folding
The bulk fermentation stage spans approximately five hours and involves two distinct folding sequences. These folds serve multiple purposes: they redistribute nutrients throughout the dough, strengthen the gluten network, and develop the open crumb structure characteristic of artisan bread.
The first fold occurs about ten minutes after mixing completes. Bakers wet their working hand by dipping it in water to prevent sticking, then reach underneath the dough and stretch one-quarter of it upward until feeling resistance. This section folds over the remaining dough. The process repeats four or five times, working around the entire mass until the dough tightens into a cohesive ball. The seam side then faces downward to maintain structural integrity.
The second fold typically occurs during the following hour of fermentation. The dough again relaxes slightly and flattens before the folding process repeats, strengthening the dough further. These strategic interventions, spaced during the first ninety minutes of bulk fermentation, establish the framework for excellent rise and crumb development.
As fermentation progresses, bakers should resist the urge to fold excessively during the final hour. Once the dough has tripled in volume—signaling readiness for shaping—additional folding disrupts the fermentation progress and can compromise the final product. This timing principle represents crucial understanding that distinguishes professional results from inconsistent home-baking outcomes.
Shaping Techniques: Preparing Dough for the Final Proof
When the dough reaches triple its original volume, typically five hours after mixing begins, the shaping stage commences. Using well-floured hands, the baker gently picks up the dough and eases it onto the work surface in a relatively even shape. The center of where the loaf will split receives a light dusting of flour to prevent sticking during the cutting process.
Shaping creates a medium-tight ball by gathering edges toward the center with controlled tension. This shaping technique generates sufficient surface tension to support good oven spring—the rapid expansion that occurs when heat causes steam and carbon dioxide to expand inside the sealed dough cavity.
The shaped dough then rests seam-side down in a floured proofing basket or improvised bowl lined with a towel. A light flour coating on the top prevents the towel from sticking. At this stage, the baker covers the dough and sets it aside for the final proof, typically lasting approximately one hour and fifteen minutes.
Oven Preparation and Baking Strategy
Professional results depend heavily on proper oven setup. At least forty-five minutes before baking begins, a Dutch oven should be placed on a middle oven rack with the lid secured. The oven preheats to 475 degrees Fahrenheit, allowing the vessel to become thoroughly heated. This high-temperature environment and trapped steam create the conditions necessary for excellent crust development and oven spring.
When the shaped dough reaches proper proof stage—showing visible expansion and responding with a gentle bounce when poked—it transfers carefully to the Dutch oven. The bread bakes initially with the lid sealed for approximately thirty minutes, during which the trapped steam gelatinizes the starch on the crust surface, creating a crispy exterior. The lid then removes for the remaining baking time, typically fifteen to twenty minutes, allowing browning and hardening of the crust.
Total baking time ranges from forty-five to fifty minutes depending on loaf size and desired crust color. Darker crusts require slightly longer baking, while pale golden exteriors develop more quickly. Interior crumb temperature should reach approximately 205 to 210 degrees Fahrenheit when fully baked.
Timeline and Scheduling: Organizing Your Baking Day
| Time Point | Task | Duration |
|---|---|---|
| 9:30 AM | Begin autolyse mixing | 5 minutes |
| 10:00 AM | Autolyse rest period ends; incorporate salt and yeast | 5 minutes |
| 10:10 AM | First fold | 3 minutes |
| 11:10 AM | Second fold | 3 minutes |
| 3:00 PM | Shape dough | 10 minutes |
| 4:15 PM | Bread enters oven | 45-50 minutes |
| 5:15 PM | Bread exits oven and cools | Ongoing |
This sample schedule demonstrates how a 9:30 AM start yields finished bread shortly after 5:00 PM. Bakers can adjust start times according to their preferences, maintaining the spacing between critical stages for optimal results.
Variations and Customizations
The basic white bread formula accommodates several modifications without compromising success. Incorporating whole-wheat flour—replacing 10 percent of the white flour with whole-grain flour—adds subtle nutty flavors and increases nutritional density. This substitution changes the crumb slightly, creating a denser interior while maintaining excellent crust quality.
Bakers producing a single loaf rather than two simply halve all ingredient quantities while maintaining the same timing and technique. The folding process and fermentation duration remain identical, though a smaller dough mass may show slightly faster development.
Different flour brands behave slightly differently due to varying protein content and absorption rates. Bakers should monitor their specific dough closely during bulk fermentation rather than relying exclusively on timing. If fermentation appears significantly slower or faster than expected, adjusting the final proof duration accommodates these variations.
Troubleshooting Common Challenges
Overly flat loaves often result from insufficient gluten development during the folding stage or over-proofing during the final stage. Tighter shaping and attention to dough readiness signals prevent this issue. Dense crumb typically indicates insufficient bulk fermentation time or inadequate folding, both of which limit gas development within the dough.
Pale crusts develop when oven temperature is too low or when baking duration is too brief. Ensuring the Dutch oven reaches full temperature before introducing dough helps achieve proper browning. Conversely, excessively dark or burnt crusts suggest either excessive baking time or oven temperature that runs hotter than intended.
Sticky dough during handling usually means water temperature exceeded specifications or humidity levels are particularly high. Wetting hands rather than adding flour to the work surface solves this problem effectively. Experienced bakers adjust hydration minimally based on local conditions, but for beginners, consistent technique using exact measurements produces more reliable results.
Why This Approach Works for Home Bakers
This single-day bread formula succeeds because it combines several principles that experienced bread professionals understand instinctively. The extended bulk fermentation period at room temperature allows flavor development and gluten network maturation without requiring equipment beyond a basic home oven. The minimal yeast amount means fermentation depends more on time and environmental conditions than on aggressive amounts of leavening agents.
The folding technique requires no special equipment beyond a kitchen scale and measuring cups, making the recipe accessible to all skill levels. Unlike bread machine recipes that demand specific equipment or no-knead approaches that require planning days in advance, this method fits naturally into a typical weekend schedule.
Most importantly, this approach teaches fundamental baking principles applicable to countless other bread varieties. Understanding autolyse, bulk fermentation, folding techniques, and proper oven setup provides the foundation for expanding into sourdough, enriched doughs, whole-grain breads, and specialty formulas.
Frequently Asked Questions
Can I refrigerate the dough to adjust timing?
Yes, refrigeration slows fermentation significantly. After shaping, the dough can be refrigerated for up to 24 hours, allowing bakers to adjust their schedule. Remove the dough 30-45 minutes before baking to allow it to return closer to room temperature.
What flour type works best?
Standard all-purpose white flour produces the intended results. High-protein bread flour creates tougher, denser crumb because it contains more gluten-forming proteins than this recipe requires.
How do I know when bulk fermentation is complete?
The dough should roughly triple in volume. Additionally, when you gently poke the surface, the indentation should slowly spring back partially but not completely, indicating adequate fermentation without over-proofing.
Can I bake this without a Dutch oven?
The Dutch oven creates essential steam that develops the crust. Alternative methods include using a covered baking stone or creating a makeshift steam chamber with a baking pan filled with hot water. Results may vary slightly.
Why does water temperature matter so much?
Water temperature directly affects fermentation speed. Cooler water slows fermentation, requiring additional time. Warmer water accelerates it. The 90-95°F range creates predictable fermentation timing that fits within one day.
Final Thoughts on Bread Mastery
Baking excellent white bread daily demonstrates that professional results don’t require complicated processes or exotic ingredients. Instead, understanding how fermentation works, respecting the timing of each stage, and employing proper technique consistently produces exceptional loaves. This recipe serves as an excellent entry point into serious bread baking, providing immediate gratification while establishing skills that extend far beyond this single formula.
References
- Flour Water Salt Yeast: Whole Grain Recipes for Dramatic Plant-Based Eating — Ken Forkish. W.W. Norton & Company, 2012. https://www.wwnorton.com/books/9780393239669/
- The Food Lover’s Companion to Bread Fermentation — Oregon State University Extension Service. 2023. https://extension.oregonstate.edu/
- Practical Aspects of Bread Fermentation and Baking Science — American Society of Baking. 2024. https://www.asbe.org/