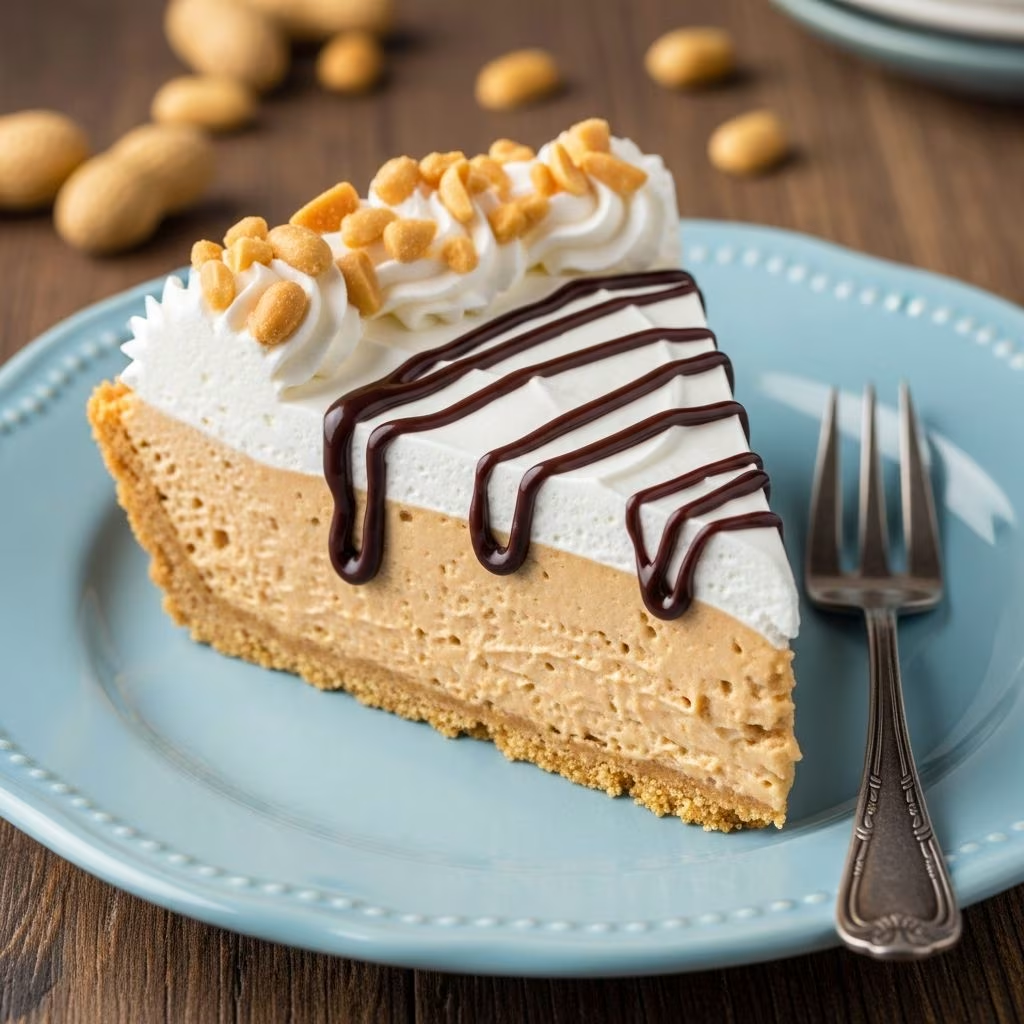
Indulge in the decadent simplicity of a no-bake peanut butter pie that delivers bold flavors without the fuss of turning on your oven. This dessert features a luscious filling of creamy peanut butter blended with smooth cream cheese and airy whipped topping, all nestled in a crisp crust. Ideal for summer gatherings, potlucks, or last-minute cravings, it comes together in under 20 minutes and chills to perfection.
Why This Pie Wins Every Time
No-bake desserts like this peanut butter pie stand out for their convenience and crowd-pleasing taste. The combination of salty peanut butter and sweet powdered sugar creates a balanced richness that melts in your mouth. Unlike traditional baked pies, there’s no risk of cracking or overcooking—just mix, chill, and serve. Home cooks rave about its versatility, from kid-friendly treats to elegant dinner party finales.
Key advantages include minimal prep time, pantry-staple ingredients, and endless customization options. Whether you’re avoiding heat on a sweltering day or need a make-ahead option, this pie chills for hours while flavors deepen, resulting in an even more irresistible texture.
Essential Ingredients for Success
Gathering the right components ensures your pie turns out flawlessly creamy every time. Focus on full-fat ingredients for the best mouthfeel, though lighter versions work for calorie-conscious bakers.
- Cream cheese (8 oz, softened): Provides structure and tanginess to balance the sweetness.
- Creamy peanut butter (1 cup): The star ingredient—use natural or standard for smooth results; avoid chunky unless desired.
- Powdered sugar (1 cup): Sweetens without graininess, dissolving perfectly into the mixture.
- Whipped topping or Cool Whip (8-16 oz, thawed): Adds lightness and volume; homemade whipped cream substitutes beautifully.
- Pie crust (9-inch): Graham cracker for classic neutrality or chocolate/Oreo for extra decadence.
- Optional add-ins: Vanilla extract, milk for thinning, chocolate syrup, nuts, or candy for garnish.
These basics yield 8 generous slices, making it perfect for sharing. Pro tip: Soften cream cheese at room temperature for 30 minutes to avoid lumps.
Step-by-Step Assembly Guide
Creating this pie is straightforward, requiring just a mixer and a spatula. Total active time is about 15 minutes, followed by chilling.
- Prepare the crust: Use a store-bought 9-inch graham cracker or Oreo crust. For homemade, mix 1.5 cups crumbs with 1/3 cup melted butter and press into a pie plate. Chill while preparing filling.
- Beat the base: In a large bowl, use an electric mixer on medium speed to combine softened cream cheese, peanut butter, and powdered sugar until fluffy and smooth, about 2-3 minutes. Scrape sides as needed.
- Incorporate lightness: Gently fold in thawed whipped topping (one 8-oz container) with a spatula. Avoid overmixing to maintain airiness.
- Fill and smooth: Spoon the mixture into the crust, spreading evenly with an offset spatula for a polished look.
- Chill thoroughly: Cover with plastic wrap and refrigerate for at least 4 hours or overnight. Freezing for 2-3 hours works for a firmer texture.
- Garnish and slice: Before serving, top with reserved whipped topping, drizzle chocolate syrup, sprinkle crushed peanuts or Reese’s pieces.
For a frozen twist, assemble as above but freeze instead of refrigerating, then let thaw slightly before cutting.
Crust Options: Graham vs. Chocolate
The crust sets the tone for your pie’s flavor profile. Here’s a quick comparison:
| Crust Type | Flavor Pairing | Prep Ease | Best For |
|---|---|---|---|
| Graham Cracker | Neutral, buttery | Store-bought or 5-min homemade | Classic PB lovers |
| Chocolate Oreo | Rich, indulgent | Crush cookies + butter | Reese’s-inspired treats |
| Shortbread | Buttery, crumbly | Store-bought | Subtle elegance |
Chocolate crusts amplify the peanut butter’s nuttiness, mimicking candy bar bliss.
Customizations to Elevate Your Pie
Transform the base recipe with these ideas for variety:
- Chocolate swirl: Melt 1/2 cup chocolate chips and ripple into the filling before chilling.
- Nutty crunch: Fold in 1/2 cup chopped peanuts or toffee bits.
- Fruity twist: Layer banana slices in the crust or top with fresh berries for contrast.
- Lightened version: Use reduced-fat cream cheese, Greek yogurt instead of some peanut butter, and light whipped topping.
- Adult upgrade: Stir in 2 tbsp bourbon or Baileys to the filling.
Experiment seasonally—peppermint extract for holidays or pumpkin spice for fall.
Storage and Make-Ahead Tips
This pie stores beautifully, extending its usability. Wrap tightly in plastic and refrigerate for up to 5 days; flavors improve after 24 hours. For longer storage, freeze slices individually for up to 2 months—thaw in the fridge.
Pro tips: Press plastic wrap directly onto the surface to prevent skin formation. Avoid room temperature exposure beyond 2 hours to maintain creaminess.
Nutritional Snapshot
Per slice (1/8 pie, chocolate crust): Approximately 450 calories, 30g fat, 40g carbs, 8g protein. Variations like light ingredients reduce this by 30%. Always calculate based on your exact ingredients.
Frequently Asked Questions
Can I use natural peanut butter?
Yes, but stir well to recombine oils and expect a slightly less firm set. Add 1-2 tsp milk if too thick.
How long does it need to chill?
Minimum 4 hours for clean slices; overnight is ideal.
Gluten-free option?
Swap for gluten-free crust and ensure peanut butter is certified GF.
Vegan substitute?
Use vegan cream cheese, peanut butter, and coconut whipped cream.
Why is my filling lumpy?
Cream cheese wasn’t fully softened—microwave in 10-second bursts next time.
Troubleshooting Common Issues
Encounter problems? Here’s how to fix them:
- Runny filling: Chill longer or add more powdered sugar next batch.
- Grainy texture: Sift powdered sugar and beat thoroughly.
- Soggy crust: Chill crust first and avoid overfilling.
- Not sweet enough: Taste batter and adjust sugar before folding in topping.
With practice, you’ll master a foolproof pie every time.
Pairing Suggestions
Serve chilled with coffee, vanilla ice cream, or fresh fruit. For parties, cut into bite-sized squares.
This no-bake peanut butter pie isn’t just a recipe—it’s a reliable go-to that sparks joy with every bite. Gather your ingredients and whip one up today!
References
- No-Bake Peanut Butter Pie – Mother Thyme — Mother Thyme. 2016-07-01. https://www.motherthyme.com/2016/07/no-bake-peanut-butter-pie.html
- Peanut Butter Pie Recipe (Easy No Bake Dessert) — Savoring the Good. N/A. https://www.savoringthegood.com/peanut-butter-pie-no-bake-recipe/
- No-Bake Peanut Butter Pie – The BakerMama — The BakerMama. N/A. https://thebakermama.com/recipes/no-bake-peanut-butter-pie/
- No Bake Peanut Butter Pie – Feels Like Home — Feels Like Home Blog. N/A. https://feelslikehomeblog.com/no-bake-peanut-butter-pie/
- No Bake Peanut Butter Pie – Grandbaby Cakes — Grandbaby Cakes. N/A. https://grandbaby-cakes.com/frozen-peanut-butter-pie/
- The BEST No Bake Peanut Butter Pie – Fantabulosity — Fantabulosity. N/A. https://fantabulosity.com/peanut-butter-pie/
- No Bake Peanut Butter Pie – Skinnytaste — Skinnytaste. N/A. https://www.skinnytaste.com/skinny-no-bake-peanut-butter-pie/