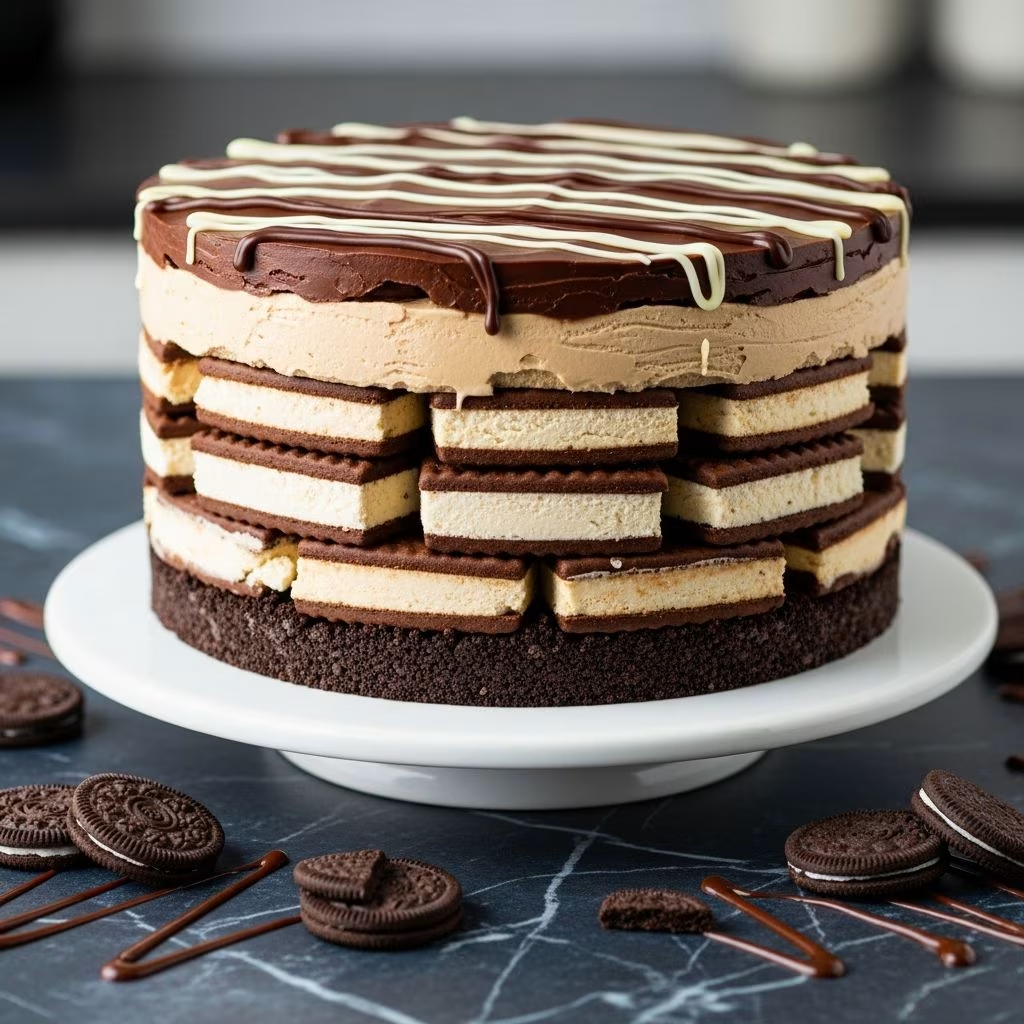
When you need an impressive dessert that requires minimal effort and delivers maximum flavor, few options rival the appeal of a frozen layered creation built entirely from ice cream sandwiches. This innovative approach to dessert-making transforms humble store-bought components into an elegant presentation that looks like you spent hours in the kitchen. Whether you’re hosting a summer gathering, planning a family celebration, or simply craving something cold and satisfying, this frozen confection offers the perfect solution for cooks of all skill levels.
Understanding the Building Blocks of This Frozen Creation
The foundation of this dessert rests on a deceptively simple concept: strategically layering pre-made ice cream sandwiches with complementary frozen and refrigerated ingredients to create depth of flavor and interesting textural contrasts. Unlike traditional cakes that require baking skills and precise measurements, this approach eliminates the oven entirely, making it accessible even to novice cooks. The beauty of this construction method lies in its flexibility—while the basic formula remains consistent, you can adapt nearly every component to match your preferences and dietary needs.
Essential Components: What You’ll Need to Gather
Creating this frozen dessert requires assembling a relatively short list of ingredients, all of which you can find in standard grocery stores. The star ingredient forms the structural base of your creation, while supporting ingredients add layers of complexity and visual appeal.
Primary Ingredients
- Ice cream sandwich units (typically 20-24 individual pieces) – These form the core structure and provide the frozen dessert element. Choose a quality brand with good flavor and sturdy construction to prevent crumbling during assembly.
- Whipped topping products (8-16 ounces, thawed) – Brands like Cool Whip provide a neutral, spreadable layer that binds components together and creates creamy texture without adding excessive richness.
- Chocolate-based sauce (11-16 ounces) – Hot fudge topping delivers intense chocolate flavor and attractive visual drizzling opportunities.
Secondary Flavor Enhancers
- Caramel sauce (8-12 ounces, optional) – Adds sweet complexity and amber color to create visual interest within the layers.
- Candy or confection pieces – Options include crushed Oreo cookies, toffee bits, Heath bar fragments, or chopped peanuts that provide crunch contrasts.
- Colorful garnishes – Sprinkles, mini chocolate candies, or maraschino cherries add decorative appeal and celebratory flavor notes.
Equipment and Container Selection
You’ll need a 9×13-inch baking dish or comparable rectangular container to accommodate the layering structure. Standard glass or metal baking pans work equally well. Have a sharp knife available for cutting ice cream sandwiches to fit the container edges, and consider parchment paper for easier removal if desired. No specialized baking equipment is necessary, making this project accessible with basic kitchen tools.
Step-by-Step Assembly Instructions
Preparing Your Workspace
Begin by positioning your baking dish on a flat freezer surface, ensuring you have adequate freezer space for at least one hour (longer if possible). Remove all ingredients from their packaging and arrange them within arm’s reach of your work area. If using whipped topping from frozen state, allow it to thaw in the refrigerator for at least 30 minutes before beginning assembly to ensure proper spreadability.
Building the Foundation Layer
Unwrap the first batch of ice cream sandwiches—approximately half your total quantity—and arrange them in your baking dish to create a complete bottom layer. Most recipes require cutting several sandwiches to fill corner gaps and create an even, complete foundation. Position pieces strategically so the entire dish bottom is covered with no exposed container surface. This step is crucial as it establishes the structural stability for all subsequent layers.
Creating Sauce Layers
Once your foundation is established, apply approximately half of your chocolate sauce across the sandwich layer, spreading it evenly with a spatula or spoon. Allow the sauce to settle slightly between sandwich pieces. If incorporating caramel sauce, layer it next, creating a visually distinct stripe that will be visible when you slice the finished product. The combination of multiple sauce types creates complex flavor profiles that single-sauce versions cannot achieve.
Adding Creamy Texture
Spread half of your thawed whipped topping over the sauce layer, creating an even, smooth surface. This component binds the layers together while providing a contrast to the frozen sandwich elements. The whipped topping also serves as a moisture barrier that prevents the sandwich layer from absorbing too much sauce, which could compromise texture and structural integrity.
Repeating the Sequence
Arrange your remaining ice cream sandwiches over the whipped topping layer, cutting as necessary to ensure complete coverage. Repeat the sauce application process with the remaining chocolate topping, followed by caramel sauce if using. Top this with the remaining whipped topping, spreading it smooth across the entire surface.
Finishing Touches
Apply your chosen garnishes to the top layer—crushed candies, nuts, sprinkles, or cherries all create appealing visual presentations. The garnish layer serves both decorative and functional purposes, adding flavor complexity and textural variety to the finished product.
Freezing and Storage Considerations
After completing assembly, cover the dish with plastic wrap or aluminum foil to prevent ice crystal formation and freezer odor absorption. Freeze for a minimum of one hour before serving, though overnight freezing produces superior texture and structure. The longer freezing time allows all components to solidify together as a cohesive unit, making slicing cleaner and eating more pleasant.
This frozen creation maintains quality in the freezer for up to two weeks when properly covered. Prepare it several days in advance of your event, allowing flexibility in meal planning. Remove from the freezer 5-10 minutes before serving to allow slight softening, which makes slicing easier and improves the overall eating experience.
Customization Possibilities and Flavor Variations
Sauce and Topping Alternatives
| Customization Element | Options | Flavor Profile Impact |
|---|---|---|
| Primary Sauce | Hot fudge, chocolate syrup, salted caramel, marshmallow fluff | Defines dominant chocolate or sweet notes |
| Secondary Sauce | Caramel, butterscotch, peanut butter syrup, dulce de leche | Adds complexity and sweetness dimension |
| Candy Mix-Ins | Oreo crumbles, toffee bits, Heath bars, Reese’s pieces, brownie chunks | Introduces textural contrast and brand-specific flavor |
| Nuts | Peanuts, pecans, almonds, walnuts (chopped) | Adds crunch and earthy, buttery notes |
| Decorative Garnish | Sprinkles, edible glitter, maraschino cherries, whipped cream dollops | Primarily visual appeal with minor flavor contribution |
Dietary Adaptations
Many components can be substituted to accommodate dietary preferences. Dairy-free whipped topping alternatives perform similarly to traditional Cool Whip, creating identical visual presentations and structural support. Sugar-free sauces work well for those monitoring sugar intake, though you may need to adjust freezing time slightly as these products sometimes freeze firmer than standard versions. Numerous specialty dietary options exist in modern grocery stores for nearly every ingredient category.
Serving Recommendations and Presentation Strategies
Slice this dessert while still frozen, as room temperature softening makes cutting difficult and presentation compromised. Use a sharp knife dipped in hot water and wiped clean between cuts for the cleanest, most professional-looking slices. Serve immediately on chilled plates to maintain structural integrity throughout consumption.
For entertaining, consider garnishing individual plates with additional whipped topping or a drizzle of extra sauce. This elevates presentation and demonstrates careful attention to detail. Allow guests to see the distinct layers within each portion, showcasing the construction work you completed.
Frequently Asked Questions
Can this dessert be made in advance?
Absolutely. This frozen creation is actually improved by advance preparation, as extended freezing time creates better structure and flavor integration. Prepare it up to one week ahead, keeping it covered in the freezer until serving time.
What happens if I don’t have hot fudge topping?
While hot fudge provides traditional flavor, regular chocolate syrup works as a direct substitute. Alternatively, explore caramel-only versions or even peanut butter sauce for completely different flavor profiles. The specific sauce matters less than having a flavorful, spreadable component.
How do I prevent my ice cream sandwiches from falling apart during assembly?
Keep all components—especially ice cream sandwiches—in the freezer until the moment you need them. Work quickly but carefully when placing and arranging sandwiches. Avoid excessive handling that can warm the components and compromise structural integrity.
Can I use homemade ice cream for this dessert?
While unconventional, homemade ice cream could replace the sandwich components. However, you’d lose the convenient sandwich structure, requiring creative alternative layering methods. Commercial ice cream sandwiches remain the most practical option.
What’s the best way to serve individual portions?
Remove the entire assembled dessert from the freezer 5-10 minutes before serving to allow slight softening. Cut into portions while still in the baking dish, then carefully transfer each slice to a serving plate using a spatula. The slight softening prevents shattering while still maintaining the frozen texture consumers expect.
How many servings does this recipe yield?
A standard 9×13-inch baking dish yields 12-16 servings depending on portion size. Cutting into smaller pieces works well for buffet-style serving or when providing generous dessert portions alongside other dishes.
Why This Dessert Remains a Timeless Choice
This frozen layered creation succeeds because it removes intimidation from dessert-making while delivering impressive results. No baking skills, specialized equipment, or advanced techniques are required. The ingredient list remains short and accessible, fitting typical grocery store budgets. Most importantly, the flavor outcome consistently impresses diners across age ranges and taste preferences.
From casual family gatherings to formal entertaining situations, this no-bake frozen composition adapts to any context. Preparation requires minimal active time, yet the finished product commands attention and appreciation. The customization possibilities ensure that repeated preparations never become monotonous—you can adjust components each time you make it while maintaining the essential structure and appeal.
Whether you’re introducing this dessert concept to your cooking repertoire or refining techniques you’ve already developed, this guide provides comprehensive information for successful execution. The combination of simplicity and impressive results explains why this frozen creation continues gaining popularity across diverse home-cooking communities.
References
- Cool Whip Product Information — Kraft Heinz Company. https://www.kraftheinzcompany.com/
- Food Safety Guidelines for Frozen Desserts — U.S. Food and Drug Administration (FDA). https://www.fda.gov/food/food-safety
- Storage and Handling of Frozen Foods — USDA Food Safety and Inspection Service. https://www.fsis.usda.gov/