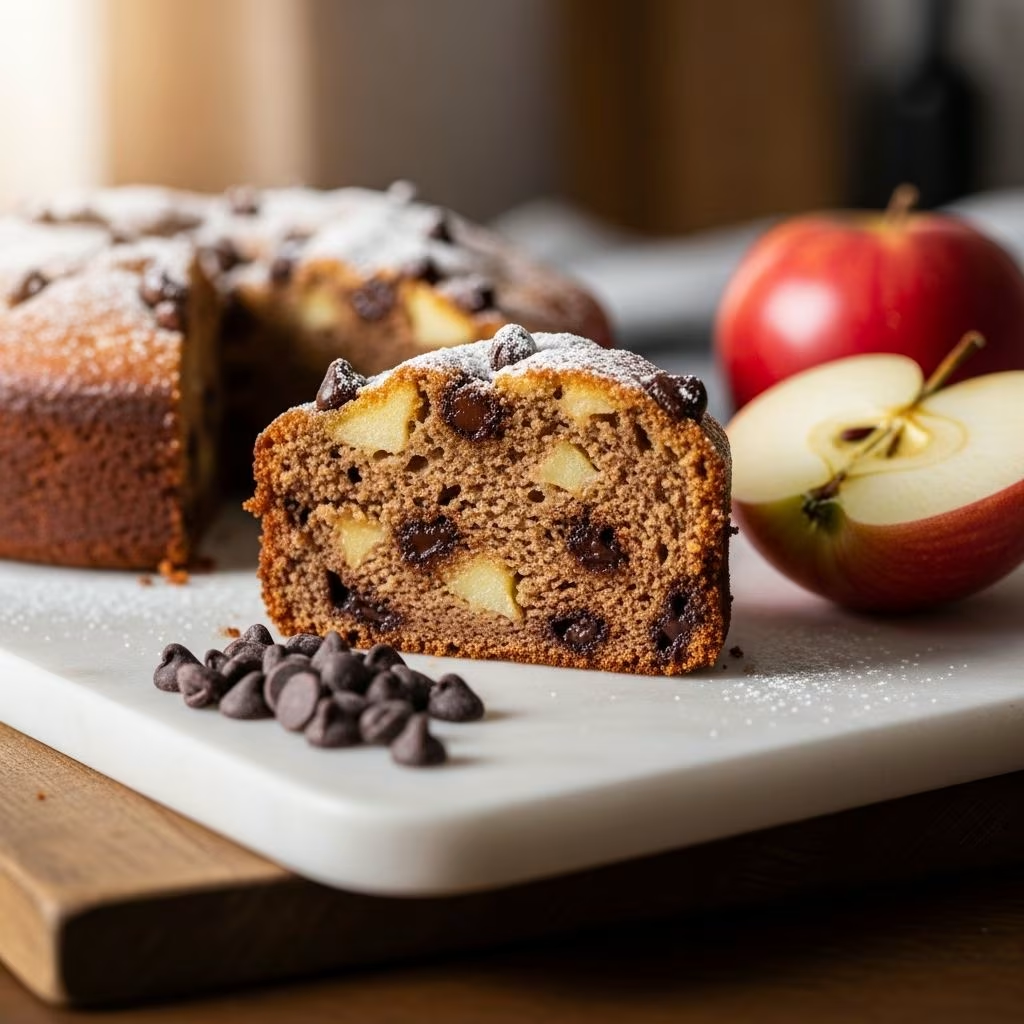
A chocolate chip apple cake represents one of the most versatile desserts for any occasion, combining the natural sweetness and texture of fresh apples with the indulgence of chocolate. Unlike traditional butter-based cakes, this particular variation relies on vegetable oil as its primary fat component, resulting in a consistently moist crumb that improves with time. This baking method has gained popularity among home bakers seeking desserts that maintain their tender quality without requiring refrigeration, making them ideal for potlucks, family gatherings, or simply satisfying a weekend craving.
The beauty of this cake lies in its simplicity and the way each ingredient plays a specific role in the final product. When properly executed, you’ll achieve a cake that balances the subtle tartness of apples, the richness of chocolate, and the warmth of spices into a harmonious whole that appeals to both adventurous and traditional palates.
Understanding the Oil-Based Foundation
The choice to use vegetable oil rather than butter fundamentally changes how this cake develops and ages. Oil-based cakes naturally retain moisture because oil remains liquid at room temperature, preventing the crumb from drying out as quickly as butter-based alternatives. This characteristic proves particularly advantageous in fruit-laden cakes where the produce releases moisture during baking.
Most recipes calling for this approach recommend using one to one and a quarter cups of neutral-flavored vegetable oil, though some variations incorporate a small percentage of walnut oil to introduce subtle nutty undertones. The combination of different oil types creates complexity without overwhelming the apple and chocolate flavors. When selecting oils, prioritize pure vegetable oils or canola oil, as these won’t impart competing flavors to your finished cake.
The creaming process differs significantly from traditional butter-based methods. Rather than aerating butter and sugar together, you’ll whisk together the oils, eggs, and sugar in a large bowl until fully incorporated. This process takes considerably less time than creaming butter, typically requiring only one to two minutes of vigorous whisking. The goal remains the same—achieving an emulsified mixture that provides lift during baking—but the mechanism differs fundamentally.
Selecting and Preparing Your Apples
The success of any apple-based cake hinges on choosing the right variety and preparing it properly. Granny Smith apples offer excellent structure and tartness that prevents the cake from becoming overly sweet, while varieties like Honeycrisp provide natural sweetness and tender texture. Many experienced bakers recommend combining two or three apple varieties to achieve optimal flavor balance and textural interest.
The process of preparing apples requires attention to detail. Begin by peeling the apples with a vegetable peeler or sharp knife, ensuring you remove the thin skin completely. Once peeled, core each apple using an apple corer or small knife, removing the central seed cavity. Finally, cut the apples into half-inch dice, creating uniform pieces that distribute evenly throughout the batter.
Some recipes call for allowing diced apples to macerate with sugar for fifteen minutes before incorporating them into the batter. This resting period allows the apples to absorb the sugar, which partially breaks down the fruit’s cell walls and intensifies its sweetness. This technique proves particularly valuable when using tart varieties that benefit from additional sweetening.
The Dry Ingredient Mixture
Creating a properly balanced dry ingredient blend ensures even distribution of leavening agents and spices throughout the cake. The typical formula combines two to two and a half cups of all-purpose flour with one to one and a half teaspoons of baking soda, depending on your recipe’s proportions. The baking soda serves as the sole leavening agent in oil-based cakes, reacting with acidic components to produce carbon dioxide bubbles that create lift.
Spicing plays a crucial role in enhancing the natural flavors of apples and chocolate. Cinnamon forms the foundation, typically appearing in quantities ranging from one to one and a half teaspoons. This warm spice complements both the fruit and chocolate beautifully. Some variations incorporate allspice, which adds depth and complexity, or a modest amount of nutmeg. These warm spices work synergistically with the apples, making each ingredient taste more like itself.
Salt, present in quantities from one-quarter to one-half teaspoon, functions not merely as seasoning but as a flavor enhancer. By balancing sweetness and amplifying other flavors, salt prevents the finished cake from tasting cloying. Always sift dry ingredients together, or whisk them thoroughly for at least thirty seconds, ensuring complete distribution of baking soda and spices.
Incorporating Mix-Ins for Texture and Flavor
The final texture and appeal of your cake depends largely on the thoughtful selection and distribution of mix-ins. Chocolate chips form the essential flavor component, with most recipes calling for between ten and twelve ounces of semi-sweet or milk chocolate chips. Some bakers prefer folding chocolate chips into the batter to maintain their structural integrity, while others sprinkle additional chips on top before baking for visual appeal and concentrated chocolate moments.
Nuts contribute textural contrast and nutritional value. Walnuts and pecans represent the most common choices, typically appearing in quantities from one-half to one cup, chopped into quarter-inch pieces. Toasting nuts before incorporating them intensifies their flavor, though this optional step adds an additional layer of complexity to the baking process.
The technique of folding mix-ins into the batter requires deliberation and care. After adding the dry ingredients to the wet ingredients, fold in mix-ins using a rubber spatula with gentle, sweeping motions. Cut down through the center of the batter, sweep across the bottom, and fold the bottom portion up and over the top. Rotate the bowl and repeat until the mix-ins appear evenly distributed. This gentle approach prevents overdeveloping gluten, which would produce a tough, dense crumb.
Baking Parameters and Pan Selection
Most chocolate chip apple cake recipes call for baking in either a nine-by-thirteen-inch rectangular pan or a ten to twelve-cup Bundt pan. The choice between these options affects baking time and visual presentation. Rectangular pans yield straightforward squares or rectangles requiring only plate-and-serve portioning, while Bundt pans produce elegant, decorative presentations suitable for more formal occasions.
Regardless of pan choice, proper preparation prevents sticking and facilitates clean removal. For rectangular pans, grease thoroughly with butter or cooking spray, then line with parchment paper for additional insurance. For Bundt pans, the task requires extra attention. Many bakers smear softened butter around all crevices and the central tube, then dust with flour, tapping out excess. This double-layer approach nearly eliminates the risk of sticking.
Baking temperature typically ranges from 325 to 350 degrees Fahrenheit, with most recipes calling for 350 degrees. Lower temperatures produce more evenly baked cakes but extend cooking time, while higher temperatures can create overdone exteriors before the center fully sets. Regardless of temperature, baking proceeds until a toothpick inserted into the center emerges clean or with only a few moist crumbs.
Timing Expectations and Doneness Testing
Baking time varies depending on pan size and depth, typically ranging from forty to sixty-five minutes. Rectangular pans typically bake in fifty-five to sixty-five minutes, while Bundt pans often finish in forty to fifty minutes due to reduced depth. Begin checking for doneness at the earlier end of your recipe’s specified range, inserting a toothpick or thin skewer into the center of the cake.
Properly baked cakes should produce clean toothpicks or toothpicks with only a few moist crumbs clinging to them. If your toothpick emerges with wet batter, return the cake to the oven and check again in five-minute intervals. Remember that carryover baking continues after removal from the oven, so slightly underbaking produces superior texture compared to overbaking.
Cooling and Finishing Touches
Immediately after removing your cake from the oven, allow it to cool in the pan for at least ten to fifteen minutes. This resting period allows the cake structure to set sufficiently for unmolding without breaking or crumbling excessively. After this initial cooling, turn the cake out onto a cooling rack, positioning it right-side up to cool completely before serving.
Complete cooling typically requires two to three hours. Attempting to cut or serve warm cake results in crumbling and an unappetizing appearance. Once fully cooled, dust the top generously with confectioners’ sugar, which adds visual elegance and a subtle sweetness that complements the cake’s deeper flavors.
Flavor Profile Variations Worth Exploring
While the traditional formula proves consistently delicious, numerous variations allow customization based on personal preferences or ingredient availability. Some bakers incorporate unsweetened applesauce into the batter, intensifying apple flavor while adding moisture. This addition typically replaces one-quarter to one-half cup of the oil.
Vanilla extract, appearing in quantities from one-half to two teaspoons, rounds out flavors and adds depth. Some recipes omit it entirely, while others emphasize it more heavily. Experimenting with different extract types—such as almond or maple—creates entirely new flavor dimensions.
For those preferring less sweetness, reducing sugar by one-quarter to one-half cup produces a more sophisticated, less cloying result. This adjustment works particularly well when using sweet apple varieties or when serving alongside coffee or tea.
Storage and Make-Ahead Strategies
One of the greatest advantages of oil-based cakes is their longevity at room temperature. Properly stored in an airtight container, these cakes maintain excellent quality for three to four days, with some bakers reporting continued improvement as flavors meld and mellow. The oil content prevents rapid moisture loss that typically plagues butter-based cakes.
For longer storage, wrap individual pieces tightly in plastic wrap before placing them in an airtight container, where they’ll keep refrigerated for up to one week. Freezing works excellently as well; wrapped pieces maintain quality in the freezer for up to three months. Thaw frozen cake at room temperature for approximately one to two hours before serving.
Frequently Asked Questions About Apple Chocolate Chip Cake
Can I prepare the batter in advance? Yes, you can prepare the dry ingredients several hours ahead and store them in an airtight container. However, combine wet and dry ingredients only immediately before baking, as the baking soda will begin reacting with acidic components as soon as they combine.
What apple varieties work best for this cake? Granny Smith apples provide excellent tartness and structure, while Honeycrisp or Gala apples offer natural sweetness. Combining two varieties—one tart and one sweet—produces optimal flavor balance.
Can I substitute the vegetable oil with butter? Yes, though the cake’s texture will change noticeably. Use slightly less butter (three-quarters cup instead of one cup), as butter contains water while oil doesn’t. The resulting cake will be less moist and may dry out more quickly.
Is this cake suitable for people avoiding dairy? Yes, this recipe naturally contains no dairy products, making it an excellent choice for those with dairy restrictions or preferences.
How should I serve this cake? Serve at room temperature, optionally with whipped cream, vanilla ice cream, or a simple glaze. The cake’s flavor profile makes it equally appropriate as a morning coffee cake or formal dessert.
Troubleshooting Common Baking Challenges
If your cake emerges dense and heavy, you may have overmixed the batter, developing excess gluten. Mix only until ingredients are just combined, no longer. Alternatively, insufficient baking soda could reduce lift; verify your baking soda hasn’t expired by testing its reactivity with vinegar.
Sunken centers typically indicate insufficient baking time or overfilled pans. Use pans specified in your recipe and avoid filling them more than three-quarters full. If centers consistently sink, reduce oven temperature by 25 degrees and extend baking time accordingly.
If the cake sticks stubbornly to your pan, you may have insufficient greasing or a pan with a compromised non-stick surface. For future baking, invest in high-quality pans and double-grease Bundt pans using both butter and flour.
Making This Recipe Your Own
While the basic formula provides reliable, delicious results, don’t hesitate to experiment within reasonable parameters. Adjust spices according to your preferences, try different apple varieties, or explore alternative mix-ins like dried cranberries alongside chocolate chips. Each variation creates a slightly different cake while maintaining the fundamental character that makes this recipe beloved.
The beauty of apple chocolate chip cake lies in its flexibility and the way it accommodates both strict adherence to instructions and creative experimentation. Whether you follow the recipe precisely or adapt it to your circumstances and preferences, you’ll likely create a cake worthy of a prominent place in your regular baking rotation.
References
- Chocolate Chip Apple Cake — The Fresh Market. 2025. https://www.thefreshmarket.com/inspiration/recipe-and-ideas/chocolate-chip-apple-cake
- Apple Chocolate Chip Cake — Mother Would Know. https://motherwouldknow.com/apple-chocolate-chip-cake/
- Chocolate Chip Apple Cake — Annie Falk. https://www.anniefalk.com/chocolate-chip-apple-cake/
- Chocolate Chip Apple Cake — Family Food on the Table. https://www.familyfoodonthetable.com/chocolate-chip-apple-cake/
- A Good Apple (Cake): Apple Chocolate Chip Cake — Jewish Boston. https://www.jewishboston.com/read/chosen-eats-a-good-apple-cake/