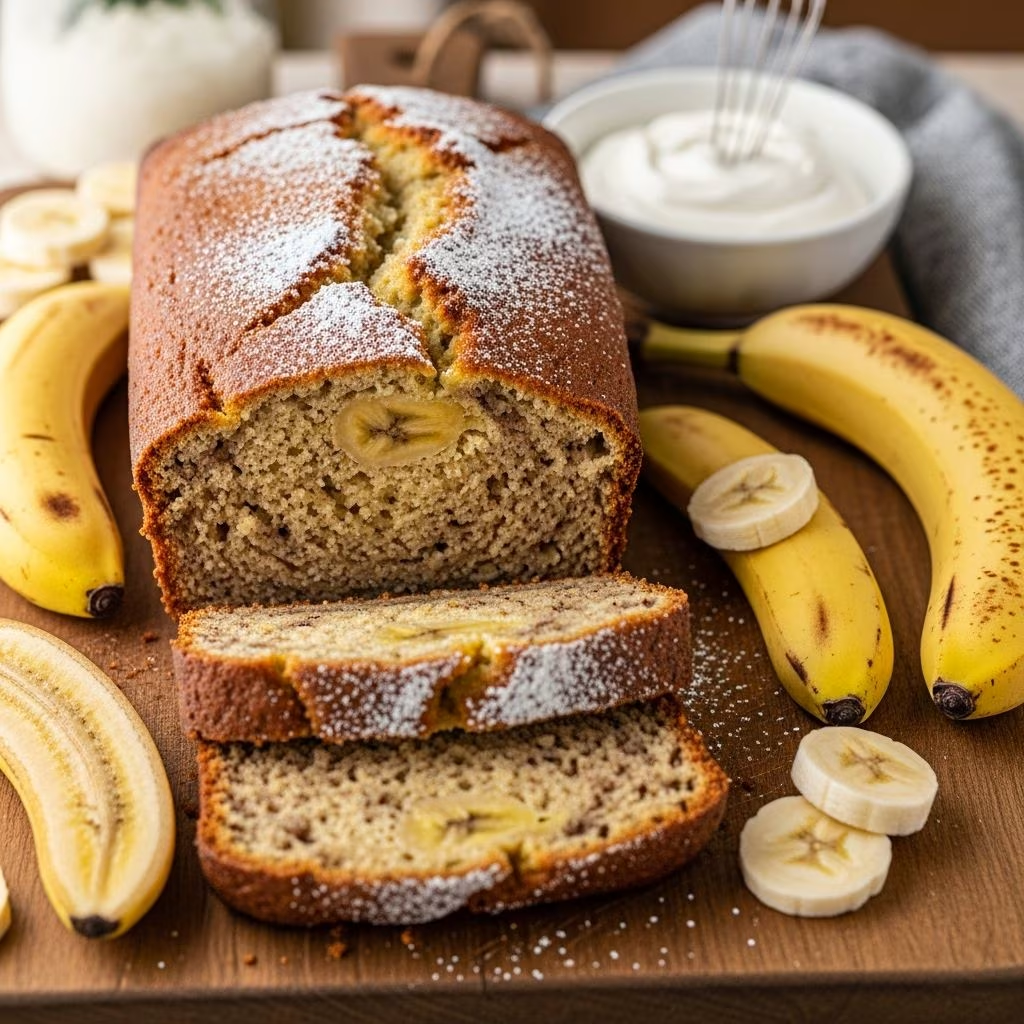
Banana bread represents one of the most beloved quick breads in home baking, and when enriched with sour cream, it transforms into something truly special. The addition of sour cream creates a remarkably moist crumb while introducing subtle tanginess that complements the natural sweetness of ripe bananas. This comprehensive guide explores everything you need to know about creating this timeless treat in your own kitchen.
Understanding the Role of Sour Cream in Quick Bread
Sour cream functions as more than just a flavoring ingredient in quick bread recipes. This dairy product serves multiple critical purposes that directly impact the final texture and taste of your banana bread. The acidity present in sour cream reacts with baking soda, creating lift and structure while simultaneously ensuring your bread rises evenly throughout the baking process.
Beyond its chemical properties, sour cream contributes significant moisture to the batter. This moisture retention prevents the bread from drying out during baking and keeps the loaf tender for several days after baking. The fat content in sour cream also enriches the crumb, creating a luxurious mouthfeel that distinguishes homemade banana bread from commercially produced versions.
Essential Ingredients for Superior Results
Creating outstanding banana sour cream bread begins with understanding each ingredient’s contribution to the final product.
Selecting the Right Bananas
The foundation of excellent banana bread relies on using properly ripened bananas. Overripe bananas with brown speckles and slightly darkened skin contain higher sugar concentrations and develop more complex flavor profiles compared to yellow or greenish bananas. These mature fruits mash more easily and distribute uniformly throughout the batter, ensuring consistent banana flavor in every slice. Plan to use approximately three to four large bananas, which yield roughly one and a half cups of mashed fruit.
Fat and Sugar Balance
Butter and sugar form the foundation of your batter’s structure. Traditional recipes typically employ a one-to-two ratio of butter to sugar, though this ratio varies depending on other ingredients. Softened butter creams more effectively with sugar, incorporating microscopic air bubbles that create a tender crumb. Using room-temperature butter ensures proper blending without overworking the mixture.
Flour and Leavening Agents
All-purpose flour provides the structural backbone for your bread, typically requiring two to two and a half cups depending on your specific recipe variation. Baking soda serves as your primary leavening agent, reacting with the acidic sour cream to produce carbon dioxide gas that creates rise. The typical ratio calls for one to one and a half teaspoons of baking soda per loaf, though some recipes incorporate small amounts of baking powder for additional lift.
Dairy Component
Sour cream quantities generally range from half to one cup, depending on desired moisture levels and recipe adaptations. Some bakers substitute Greek yogurt or plain yogurt for sour cream, which produces similar results while offering different nutritional profiles. The acidity remains crucial for proper chemical reactions during baking.
Step-by-Step Preparation Process
Preparing Your Baking Environment
Begin by preheating your oven to 350 degrees Fahrenheit, allowing adequate time for the heating element to reach optimal temperature. Prepare your loaf pan by thoroughly greasing all interior surfaces with softened butter or non-stick cooking spray, then lightly dusting with flour. This dual approach prevents sticking while ensuring easy removal after cooling. Some bakers use parchment paper liners for foolproof results.
Creaming the Base Mixture
Combine softened butter with sugar in a large mixing bowl, beating the mixture for two to three minutes using an electric mixer on medium-high speed. This process, called creaming, incorporates air throughout the batter while dissolving sugar granules. You’ll notice the mixture gradually lightening in color and becoming fluffy in appearance. Stop periodically to scrape down bowl sides, ensuring uniform blending.
Incorporating Eggs
Add eggs to your creamed mixture one at a time, mixing thoroughly between additions. This gradual incorporation prevents curdling and ensures smooth, even distribution throughout the batter. Eggs contribute structure, binding power, and additional moisture. After adding all eggs, the mixture should appear well-combined and slightly lighter than the initial butter-sugar base.
Combining Wet Ingredients
Fold in your mashed bananas, sour cream, and vanilla extract until just combined. Use a gentle folding motion rather than vigorous stirring to prevent overmixing at this stage. The batter should appear somewhat streaky, with banana pieces distributed throughout but not completely uniform.
Integrating Dry Ingredients
Whisk together flour, baking soda, and salt in a separate bowl before adding to the wet mixture. This pre-mixing distributes leavening agents evenly throughout the flour, preventing concentrated pockets of baking soda that can create off-flavors. Add the dry ingredients to the wet mixture, stirring gently until just combined. Slight flour streaks remaining in the batter indicate proper mixing—overmixing develops gluten, resulting in dense, tough bread.
Optional Additions
Chopped walnuts, pecans, or macadamia nuts add textural contrast and enhanced flavor. Chocolate chips provide indulgent sweetness for those preferring richer variations. Fold these additions in gently just before transferring batter to prepared pans, using approximately three-quarters to one cup of mix-ins per loaf.
Baking and Cooling Procedures
Pour prepared batter into your greased loaf pan, filling it no more than three-quarters full to allow for rise without overflow. Bake at 350 degrees Fahrenheit for fifty to sixty minutes for standard nine-by-five-inch loaves. Mini loaves require thirty-five to forty minutes, while muffin-size portions bake in approximately twenty to twenty-five minutes.
Your bread reaches doneness when a toothpick inserted into the thickest part emerges with moist crumbs but no unbaked batter. The top should appear golden brown and slightly domed. Remove from the oven and allow the bread to cool in its pan for ten minutes before turning out onto a cooling rack.
Complete cooling takes approximately two hours, during which the structure continues setting. Slicing warm banana bread may result in crumbling, so patience at this stage rewards you with neat, attractive slices.
Storage and Preservation Strategies
| Storage Method | Duration | Best Practices |
|---|---|---|
| Room Temperature | 2-3 days | Wrap cooled loaf in plastic wrap or store in airtight container |
| Refrigerator | 5-7 days | Wrap tightly to prevent moisture loss and odor absorption |
| Freezer | 2-3 months | Wrap in plastic wrap then aluminum foil; thaw at room temperature |
Properly stored banana sour cream bread maintains its moisture and flavor for several days after baking. Room-temperature storage works well for consumption within two to three days, while refrigeration extends freshness up to one week. For longer storage, wrap cooled loaves completely in plastic wrap followed by aluminum foil, then freeze for up to three months. Thaw frozen bread at room temperature for two to three hours before serving.
Common Challenges and Solutions
Dense, Heavy Crumb
This texture typically results from overmixing after adding flour. Excessive stirring develops gluten strands that tighten the crumb structure. Ensure you mix only until dry ingredients barely combine, leaving slight flour streaks visible. Additionally, verify that your baking soda hasn’t expired, as old leavening agents lose potency and cannot produce adequate rise.
Dry or Crumbly Texture
Insufficient sour cream or overbaking causes undesirable dryness. Check that you’re using the full amount of sour cream called for in your recipe, and verify oven temperature accuracy with a reliable thermometer. Remove bread from the oven at the precise moment the toothpick test shows moist crumbs. Slightly underbaking produces better results than overbaking, as carryover cooking continues after removal.
Uneven Browning
Rotate your pan halfway through baking to ensure uniform heat exposure. If the top darkens too quickly, tent loosely with aluminum foil for the final fifteen minutes of baking.
Banana Flavor Not Prominent
Using insufficiently ripened bananas produces weak banana flavor. Select bananas with brown speckles covering at least seventy-five percent of their skin. Some recipes incorporate additional vanilla extract or banana extract to intensify flavor.
Recipe Variations and Adaptations
Healthier Modifications
Substitute half the butter with neutral oil like vegetable or coconut oil to reduce saturated fat content. Replace half the all-purpose flour with whole wheat flour for added fiber and nutty flavor. Some bakers reduce sugar by up to one-quarter cup without significantly impacting results.
Flavor Enhancements
Add one teaspoon of ground cinnamon, one-quarter teaspoon of nutmeg, or one-eighth teaspoon of cardamom to complement banana’s natural sweetness. A pinch of sea salt in the dry ingredients enhances all flavors. Increase vanilla extract to one and a half to two teaspoons for more pronounced vanilla notes.
Mix-In Variations
Beyond walnuts and chocolate chips, consider crushed pineapple, shredded coconut, chopped dried fruit, or white chocolate chunks. Each addition creates unique flavor profiles while maintaining the recipe’s basic structure.
Frequently Asked Questions
Can I use frozen bananas?
Yes, frozen bananas work excellently for banana bread. Thaw them completely and drain excess liquid before mashing. Frozen bananas often become mushier than fresh ones, making them ideal for baking applications.
What if I don’t have sour cream?
Greek yogurt, plain yogurt, or buttermilk serve as suitable substitutes. Use the same volume as called for in your recipe, adjusting consistency as needed.
How can I make mini loaves or muffins?
Reduce baking time to thirty-five to forty minutes for mini loaves or twenty to twenty-five minutes for muffins. Check doneness earlier than standard loaves, as smaller portions bake faster.
Why did my bread crack on top?
Top cracking occurs naturally during baking as steam escapes. This doesn’t indicate a problem with your bread and creates appealing rustic appearance. If you prefer smooth tops, some bakers tent with foil for the final fifteen minutes.
Can I double this recipe?
Yes, doubling works well if you increase all ingredients proportionally. Ensure your mixing bowl is large enough to accommodate increased volume. Baking time may increase slightly for larger batches.
Why Banana Sour Cream Bread Deserves a Place in Your Baking Rotation
Banana sour cream bread represents an accessible entry point for novice bakers while offering enough sophistication to satisfy experienced home bakers. The combination of ripe bananas and tangy sour cream creates flavor complexity that simple banana bread cannot achieve. Whether served as breakfast accompaniment, afternoon snack, or dessert option, this versatile bread fits numerous occasions throughout your year.
The straightforward ingredient list, manageable preparation time, and reliable results make this recipe worthy of regular rotation in your baking repertoire. Armed with proper technique and understanding of how each ingredient contributes to the final product, you’ll confidently produce banana sour cream bread that rivals professional bakery offerings while filling your home with irresistible aroma.
References
- Banana Bread With Sour Cream — Love From The Oven. Retrieved from https://www.lovefromtheoven.com/banana-bread-with-sour-cream/
- Sour Cream Banana Bread — The Kitchen Sloth. Retrieved from https://thekitchensloth.com/sour-cream-banana-bread/
- Banana Walnut Sour Cream Bread — Daisy Brand. Retrieved from https://www.daisybrand.com/recipes/banana-walnut-sour-cream-bread-268/
- Seriously Moist & Tender Sour Cream Banana Bread — Plays Well With Butter. Retrieved from https://playswellwithbutter.com/sour-cream-banana-bread/