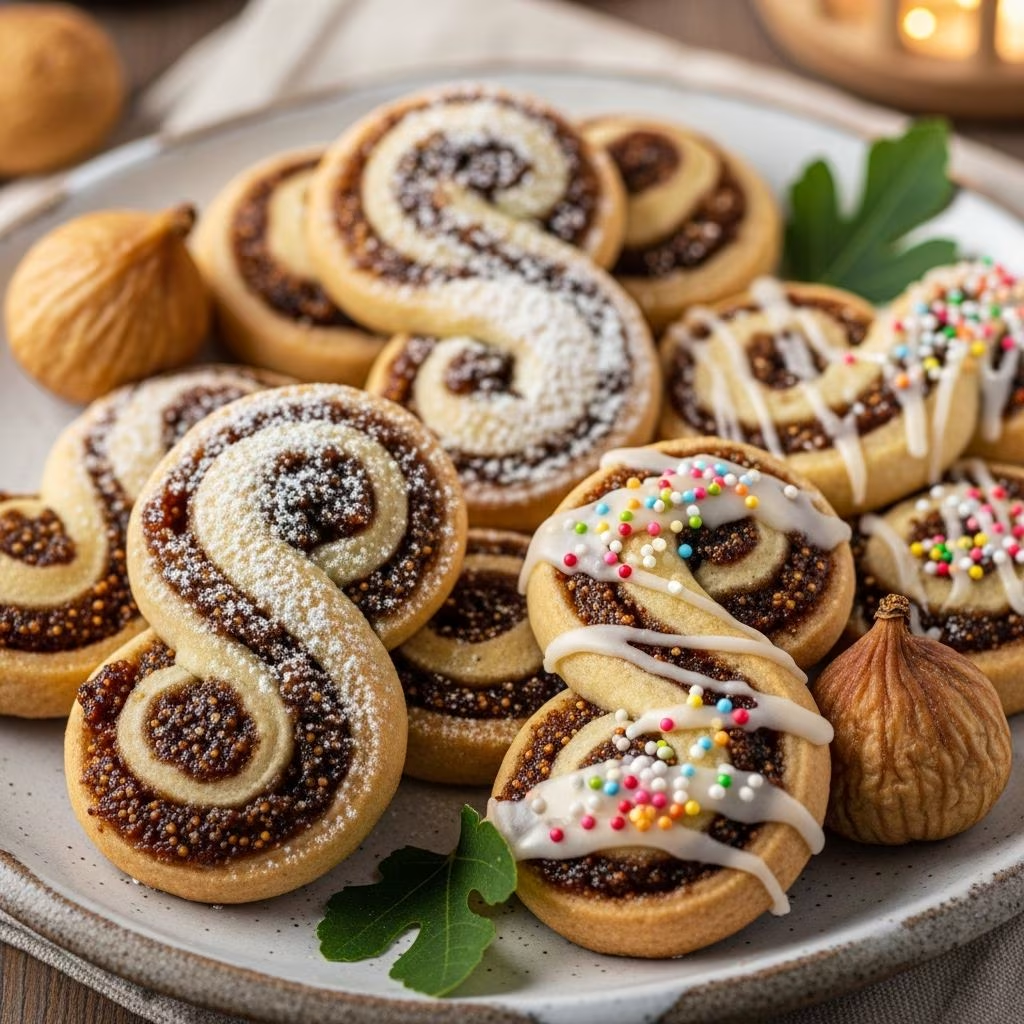
Italian fig cookies, known as cucidati or buccellati, represent one of the most cherished baked goods in Italian culinary tradition. These delicate pastries combine a tender, buttery cookie exterior with a sumptuous filling of dried fruits, nuts, and warm spices. Particularly popular during the holiday season, these cookies have been passed down through generations in Italian families, each adding their own regional variations and personal touches to the time-honored recipe.
The appeal of these cookies extends beyond their delicious flavor profile. They serve as edible representations of Italian heritage, bringing together ingredients that reflect the Mediterranean’s agricultural bounty. Whether you’re seeking to recreate family traditions or simply explore authentic Italian desserts, mastering the art of making cucidati is a rewarding culinary endeavor.
Understanding the Core Components
Creating exceptional Italian fig cookies requires understanding the role each component plays in the final product. The cookie dough must achieve a specific texture—sturdy enough to hold the fruit filling without breaking, yet tender enough to provide a pleasant eating experience. The filling, conversely, should be rich and dense, with each bite delivering complex flavors from the combination of ingredients.
The Cookie Dough Foundation
The dough for Italian fig cookies differs significantly from other cookie varieties. It functions more as a vessel than as the primary flavor element, which is why developing the right consistency is crucial. Most traditional recipes combine all-purpose flour with baking powder, creating a dough that has a slight rise without becoming airy or cake-like.
The butter-to-flour ratio plays an essential role in texture development. Softened butter combined with granulated sugar creates a creaming base that incorporates air and provides moisture. Eggs serve multiple purposes—they add richness, contribute to binding, and aid in creating the proper crumb structure. Vanilla extract adds subtle depth without overpowering the fruit filling.
One key distinction in making this dough compared to other cookie varieties is the chilling process. After mixing, the dough requires refrigeration—typically for one hour or longer. This resting period allows the gluten to relax and the flavors to meld, resulting in a more cohesive dough that’s easier to work with and produces superior texture in the finished cookie.
The Fruit Filling Essence
The filling represents the soul of Italian fig cookies. While figs provide the namesake ingredient, most traditional recipes incorporate a medley of dried fruits that create layers of flavor and complexity. The typical filling combines dried figs, raisins, and dates, with some recipes including additional elements like almonds or walnuts for textural contrast.
Beyond fruit and nuts, spices play a vital role in the filling’s character. Cinnamon provides warmth and depth, while some recipes incorporate allspice and nutmeg for additional complexity. Orange zest and juice contribute brightness and acidity, balancing the sweetness of the dried fruits. Honey acts as both a sweetener and binding agent, helping the filling maintain its shape during the cookie formation process.
The consistency of the filling is equally important as its flavor profile. When all filling ingredients are processed together, they should form a paste that’s dense enough to hold its shape when formed into ropes or placed onto the dough, yet moist enough to provide a tender eating experience.
Ingredient Selection and Preparation
The quality of ingredients directly impacts the final cookie. Selecting fresh, high-quality dried fruits ensures better flavor in the finished product. When choosing dried figs, look for ones that are plump and aromatic, as older stock may result in a dull-tasting filling.
Working with Dried Fruits
Dried fruits benefit from gentle processing before incorporating into the filling. Some recipes call for reconstituting figs and dates in a mixture of honey, brandy, and orange juice by simmering for a few minutes. This process plumps the fruit and allows the flavors to intermingle before they’re combined with other filling ingredients. Once cooled, these fruits become easier to process into a cohesive paste.
For those preferring a less involved approach, roughly chopping dried figs and dates before combining with other ingredients works equally well. The food processor handles the additional breaking down of these fruits, creating the desired filling consistency.
Selecting Nuts and Spices
Walnuts and pecans are the most common nut choices, though some recipes incorporate almonds or a combination of nuts. The choice between raw and roasted nuts affects the filling’s flavor intensity—roasted nuts provide deeper, more pronounced flavors. Rough chopping nuts before adding them to the food processor prevents over-processing and maintains some textural element in the filling.
Spices should be fresh and aromatic. Cinnamon, allspice, and nutmeg should be ground from whole spices when possible, or at minimum should have been purchased relatively recently to ensure maximum flavor potency.
Step-by-Step Cookie Construction
Dough Preparation Process
Begin by combining dry ingredients—flour, baking powder, and salt—in a mixing bowl. In a separate bowl or stand mixer, cream together softened butter and granulated sugar until the mixture becomes light and fluffy. This creaming process typically requires 3-5 minutes and incorporates air into the butter, which contributes to the cookie’s texture.
Add eggs individually, beating well after each addition. This gradual incorporation ensures even distribution and prevents the mixture from becoming curdled or separated. Once all eggs are incorporated, add vanilla extract and mix until fully combined.
Gradually add the dry ingredients to the wet mixture, mixing on low speed until just incorporated. The dough should come together without being overmixed, which can result in tough cookies. If the dough appears too dry—which can happen depending on egg size and humidity—add an additional egg as needed.
Divide the dough into four portions and wrap each in plastic wrap. Refrigerate for at least one hour before proceeding. This resting period is non-negotiable for achieving optimal results.
Filling Preparation
While the dough chills, prepare the filling. Process dried figs, dates, raisins, nuts, and spices until they form a relatively smooth paste. Add honey and citrus elements—orange zest and juice—to create moisture and flavor. Some recipes include optional elements like chocolate chips, marmalade, or spirits such as brandy or whisky for additional complexity.
The filling should be prepared far enough in advance to allow for chilling. Some recipes suggest using the filling immediately for freezer storage, or refrigerating overnight for next-day baking. Chilled filling is significantly easier to work with when forming cookies.
Forming and Baking
Preheat the oven to 325 degrees Fahrenheit. Form the chilled filling into ropes approximately the size of a small finger. Placing these ropes on parchment paper as you form them prevents sticking and makes handling easier.
Working with one portion of dough at a time—keeping remaining portions refrigerated—gently knead the dough a few times until it becomes smooth on a floured surface. Roll the dough quite thin, approximately 1/8 inch thick. Thinner dough allows more prominence of the filling flavor without an overwhelming cookie texture.
Place the filling rope along the edge of the rolled dough and roll the dough around the filling, sealing the seam gently. The resulting log can be left intact or cut into individual cookies, depending on preference. Some bakers prefer longer cookies while others prefer bite-sized portions.
Bake at 325 degrees for approximately 15-20 minutes, until the cookies achieve a light golden color. The moderate temperature prevents over-browning while allowing the filling to heat through.
The Finishing Touches
Glazing and Frosting
Once cooled, Italian fig cookies traditionally receive a simple glaze. Confectioners’ sugar combined with water—and optionally clear vanilla extract—creates a basic white glaze that coats the cookie’s exterior. Some variations incorporate lemon juice into the glaze, providing subtle citrus brightness that complements the fig filling.
The glaze should be thin enough to flow easily across the cookie surface but thick enough to adhere properly. Dipping the top of each cooled cookie into the glaze works effectively, as does carefully brushing the glaze across the surface.
Decorative Elements
The final crowning touch comes in the form of nonpareils—small, colorful round sprinkles that provide both visual appeal and textural contrast. Applied immediately after glazing, while the glaze remains slightly tacky, nonpareils adhere effectively and create the distinctive festive appearance associated with these cookies. Rainbow nonpareils offer a cheerful pop of color, though traditional white or single-color options work equally well.
Variations Across Regions and Families
Italian fig cookies demonstrate remarkable regional variation throughout Italy. Some areas favor using exclusively figs, while others incorporate dates and raisins for additional flavor dimension. Citrus preferences vary as well—some recipes emphasize lemon while others highlight orange.
Nut preferences reflect local agricultural traditions. Southern regions might rely heavily on almonds, while northern areas favor walnuts or hazelnuts. Some family recipes omit nuts entirely, allowing the dried fruits and spices to shine.
These variations represent not inconsistency but rather the living tradition of Italian cuisine, where recipes evolve within families and regions while maintaining core characteristics that define the cookie.
Storage and Gift-Giving
Properly stored Italian fig cookies maintain quality for extended periods. In an airtight container at room temperature, these cookies remain fresh for up to two weeks. For longer storage, freezing works effectively—place cooled cookies in a freezer-safe container with parchment between layers to prevent sticking. Frozen cookies maintain quality for several months.
The decorative appearance and festive nature of these cookies make them ideal for gift-giving. Arranged in decorative boxes or tied with ribbon, homemade Italian fig cookies serve as thoughtful, edible presents. Many families incorporate these cookies into their holiday gift boxes as a signature offering.
Frequently Asked Questions
Can I prepare the dough ahead of time?
Yes, cookie dough can be prepared and refrigerated up to two days in advance. For even longer storage, divide dough into portions, wrap well, and freeze for up to three months. Thaw frozen dough in the refrigerator before using.
Is it necessary to chill the filling?
Chilling the filling is highly recommended, particularly for same-day baking. A chilled filling holds its shape better when forming cookies and results in cleaner, more defined cookie shapes. However, some bakers successfully work with room-temperature filling.
What temperature should the oven be?
Most recipes call for 325 degrees Fahrenheit. This moderate temperature prevents over-browning the delicate dough while ensuring the filling heats through properly. Higher temperatures may result in burnt exteriors before the cookies bake through completely.
Can I substitute ingredients in the filling?
The filling offers considerable flexibility. Dried cranberries, apricots, or prunes can replace some of the traditional dried fruits. Nut selection is similarly flexible. However, maintaining adequate moisture through honey or fruit juices is essential for proper filling consistency.
How many cookies does this recipe typically yield?
Yield varies based on recipe proportions and cookie size. A full-batch recipe typically produces 60-96 cookies, depending on how thickly the dough is rolled and the length of each cookie.
Mastering the Art
Creating authentic Italian fig cookies represents an accessible entry point into traditional Italian baking. While the process involves several steps and requires adequate chilling time, none of the techniques demand advanced baking skills. Success comes from following proportions carefully, allowing proper chilling time, and using quality ingredients.
Whether you’re recreating a family recipe passed down through generations or discovering these cookies for the first time, the combination of buttery dough, fruit-filled interior, and festive toppings creates an experience that connects you to Italian culinary heritage. Each batch of homemade Italian fig cookies represents more than just dessert—it’s an edible expression of tradition and care.
References
- Italian Fig Cookies (Cuccidati or Buccellati) — Mary DiSomma. 2024. https://marydisomma.com/blogs/recipes/italian-fig-cookies-cuccidati-or-buccellati
- Cucidati (Italian fig cookies) – Caroline’s Cooking — Caroline’s Cooking. 2024. https://www.carolinescooking.com/cucidati-italian-fig-cookies/
- Cucidati (Italian Fig Cookies) — My Sequined Life. 2024. https://www.mysequinedlife.com/cucidati-italian-fig-cookies/
- Italian Fig Cookies Recipe | Baking with Mary DiSomma — Mary DiSomma (YouTube). 2024. https://www.youtube.com/watch?v=NQ9s8mLm1aI
- Italian Fig Cookies (Cucidati) — Don’t Sweat The Recipe. 2024. https://www.dontsweattherecipe.com/italian-fig-cookies-cucidati/
- Italian Style Fig Cookie Bundles (cucidati) — Olive & Mango. 2024. https://www.oliveandmango.com/italian-style-fig-cookie-bundles-cucidati/