Making fresh salsa at home doesn’t require hours of preparation or access to peak-season produce. With the rise of pressure cookers in modern kitchens, creating vibrant, restaurant-quality salsa has become remarkably accessible. Using canned tomatoes as your base ingredient opens up a world of possibilities, allowing you to enjoy homemade salsa year-round regardless of tomato availability in your local market. This approach combines convenience with genuine flavor, eliminating the need for tedious traditional canning processes while delivering results that satisfy even the most discerning palates.
Why Canned Tomatoes Transform Your Salsa-Making Experience
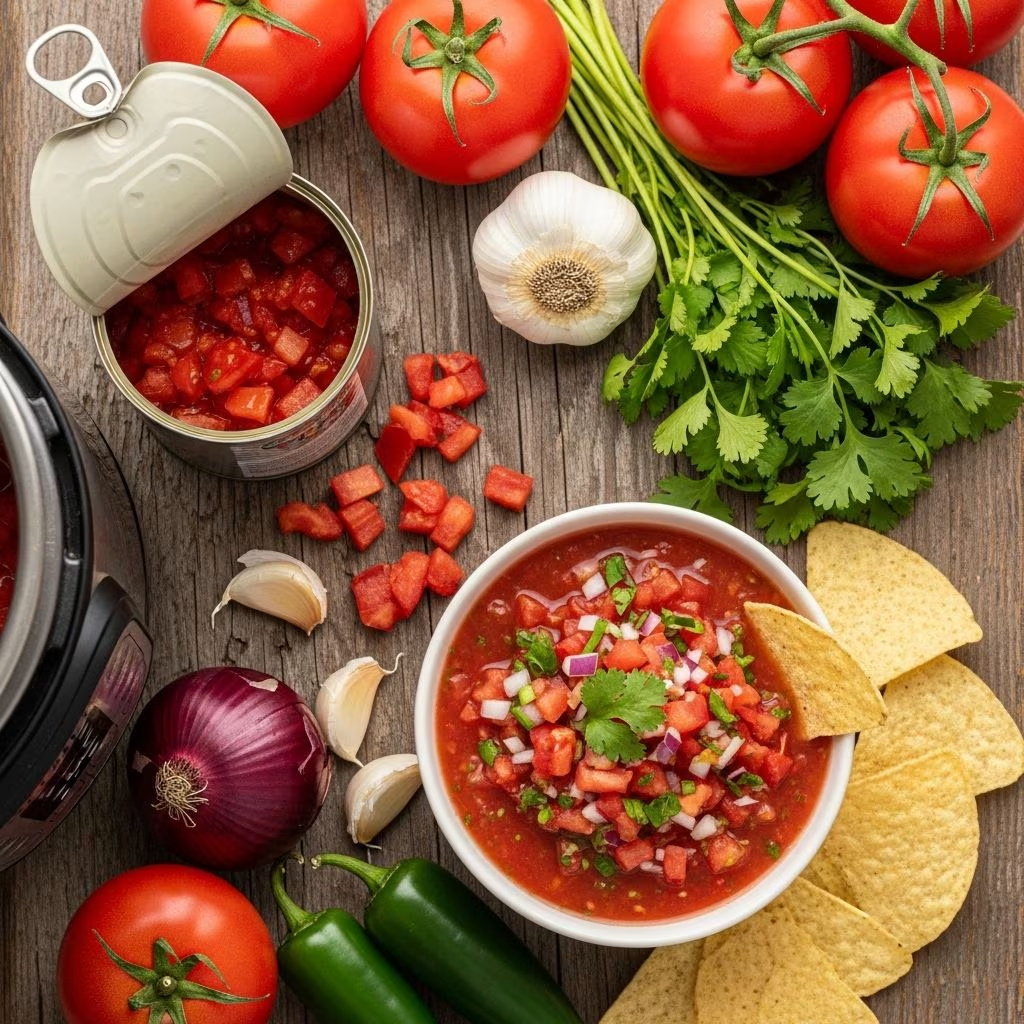
The decision to use canned tomatoes represents a practical shift in modern cooking philosophy. These preserved tomatoes are harvested at peak ripeness and processed immediately, locking in their natural sugars and acidity. This means your finished salsa benefits from tomatoes that were picked during their most flavorful moment, something fresh tomatoes may not always provide depending on the season. Canned varieties also eliminate the labor-intensive step of peeling fresh tomatoes, a process that traditionally required blanching and manual removal of skins.
Instant Pot technology amplifies these advantages by dramatically reducing cooking time. Traditional salsa recipes often require lengthy simmering to develop flavors and achieve the desired consistency. Pressure cooking accomplishes this in a fraction of the time through concentrated heat and steam, which intensifies flavors and breaks down vegetable fibers more efficiently than conventional stovetop methods.
Essential Ingredients for Pressure-Cooked Salsa
The foundation of any outstanding salsa begins with quality ingredients. Here’s what you’ll need to create a batch that serves approximately eight people:
- One 28-ounce can of crushed tomatoes (the primary base)
- One medium onion, finely diced
- Two jalapeño peppers, seeded and diced (adjust quantity based on heat preference)
- ¼ cup white distilled vinegar (provides tang and preservation)
- ¼ cup water
- Two teaspoons sea salt
- Two teaspoons minced garlic
- ½ teaspoon ground cumin (essential for authentic flavor)
- ½ cup fresh cilantro, chopped
- One tablespoon fresh lime juice
These ingredients work synergistically to create a balanced salsa with layers of flavor. The vinegar and lime juice provide acidity that brightens the tomato base, while cumin adds earthiness. Jalapeños deliver heat that can be customized by removing or retaining the seeds, and fresh cilantro contributes an herbaceous note that distinguishes homemade salsa from commercial varieties.
The Preparation Phase: Setting Yourself Up for Success
Before your Instant Pot comes into play, proper preparation ensures smooth cooking. Dice your onion into uniform, small pieces to promote even cooking and consistent flavor distribution throughout your salsa. For jalapeños, decide whether you prefer milder salsa (remove seeds entirely) or more noticeable heat (keep seeds and use additional peppers). Mince your garlic finely or use pre-minced varieties if you prefer convenience without sacrificing quality.
Measure all ingredients before beginning. This mise en place approach prevents scrambling to find ingredients once the cooking process starts. It also gives you the opportunity to adjust quantities based on personal preferences—those who love cilantro might increase it to ¾ cup, while heat-sensitive family members might reduce jalapeños to a single pepper.
Cooking Instructions: From Raw Ingredients to Finished Salsa
The cooking process divides into distinct phases, each serving a specific purpose in developing flavor and texture:
Initial Assembly and Pressure Cooking
Pour your canned crushed tomatoes into the Instant Pot, followed by the diced onion, jalapeño peppers, and minced garlic. Add the vinegar, water, sea salt, and ground cumin. Stir the mixture thoroughly with a wooden spoon, ensuring all dry seasonings distribute evenly and nothing sticks to the bottom of the pot. This step prevents the “burn” alert that can interrupt cooking.
Close the lid and set the valve to the sealing position. Select the pressure cook function and set the timer for five minutes at high pressure. The pot will require approximately five to seven minutes to reach full pressure before the actual cooking countdown begins. This preheating phase is normal and necessary for the pressure-cooking method to function properly.
Pressure Release and Seasoning Finalization
Once the cooking cycle completes, allow the pressure to release naturally for ten minutes. This gradual depressurization prevents the forceful release of steam and helps ingredients continue melding flavors during the cooling phase. After ten minutes, if pressure remains (indicated by the valve position), carefully switch the valve to venting to release any remaining pressure.
Open the lid cautiously, angling it away from your face to avoid steam contact. Stir the salsa, then add your fresh cilantro and lime juice. These final additions are best made after cooking to preserve their bright, fresh qualities—heat can dull cilantro’s herbaceous character and diminish lime juice’s crisp acidity.
Achieving Your Preferred Texture
The consistency of your finished salsa depends on personal preference and intended use. Some enjoy chunky salsa with visible vegetable pieces, while others prefer a smoother consistency resembling restaurant-style salsas. You have several options for adjustment:
For those who want minimal intervention, simply serve the salsa as-is directly from the Instant Pot. The five-minute pressure cooking will have softened vegetables while maintaining some structural integrity, creating a naturally medium-textured salsa.
To achieve a chunkier consistency, remove approximately one-quarter to one-third of the mixture and blend it separately using an immersion blender or food processor, then return it to the pot and stir. This technique maintains recognizable vegetable pieces while adding subtle creaminess from the blended portion.
For completely smooth salsa resembling restaurant preparations, use an immersion blender to puree the entire batch directly in the pot, or transfer the cooled salsa to a food processor in batches until your desired consistency is reached.
Storage and Shelf Life Considerations
Allow your finished salsa to cool to room temperature before transferring to storage containers. This cooling period also permits flavors to continue developing and marrying together, resulting in more complex, refined taste as ingredients reach equilibrium.
Refrigerated salsa maintains quality for up to seven days in airtight containers, though the flavor profile actually improves during the first two to three days as ingredients continue melding. For longer storage, freeze portions in ice cube trays or freezer-safe containers for up to three months. Frozen salsa thaws beautifully and retains its flavor integrity, though the texture becomes slightly softer—perfect for cooking applications even if less ideal for fresh chip dipping.
Customization Options for Personalized Flavor Profiles
The base recipe provides an excellent starting point, but numerous variations allow you to tailor salsa to specific preferences:
| Flavor Profile | Modifications | Best Used For |
|---|---|---|
| Extra Spicy | Add 3-4 jalapeños, include seeds, or add ¼ teaspoon cayenne pepper | Heat-tolerant crowds, tacos, nachos |
| Smoky Depth | Include 1 teaspoon smoked paprika and ½ teaspoon chipotle powder | Grilled meats, quesadillas, bean dips |
| Fruity Notes | Add ½ cup diced fresh pineapple before pressure cooking | Fish tacos, tropical dishes |
| Herb-Forward | Increase cilantro to 1 cup and add ½ teaspoon dried oregano | Vegetarian bowls, fresh applications |
| Tomatillo Variation | Substitute half the crushed tomatoes with one 15-ounce can tomatillos | Salsa verde preparations, chicken dishes |
Frequently Asked Questions About Instant Pot Salsa
Can I use fresh tomatoes instead of canned?
Absolutely. If you have access to quality fresh tomatoes, use approximately 3 to 4 pounds (roughly 12 medium tomatoes), chopped. You may need to increase the cooking time to 7-8 minutes to break down fresh tomatoes adequately and reduce excess liquid. The advantage of canned is consistency and convenience throughout the year.
What if my salsa is too watery?
Switch your Instant Pot to sauté mode and simmer the uncovered salsa for 5-10 minutes, stirring occasionally. This evaporates excess liquid without requiring re-pressurization. Alternatively, drain some liquid before adding the cilantro and lime juice.
Is this recipe suitable for canning?
While this recipe can be canned, proper canning requires specific acid levels and processing times determined by experts in food safety. If canning is your goal, consult established guidelines from the USDA or National Center for Home Food Preservation to ensure safety and prevent foodborne illness risks.
How can I make a larger batch?
The 6-quart Instant Pot capacity accommodates approximately double this recipe. Follow the same cooking time; the pressure cooker automatically adjusts for larger volumes. Don’t exceed the pot’s two-thirds fill line to allow proper pressure circulation.
What’s the best way to reheat stored salsa?
Thaw frozen salsa in the refrigerator overnight, then serve cold or warm gently in a saucepan over low heat, stirring frequently. Avoid high heat, which can degrade fresh cilantro flavors. Reheating in the microwave works if you stir every 30 seconds to ensure even warming.
Serving Suggestions and Creative Applications
Beyond the obvious pairing with tortilla chips, this versatile salsa enhances numerous dishes. Dollop it atop grilled fish or chicken, spoon it into breakfast tacos alongside scrambled eggs, or use it as a base for soups and stews. Many cooks add it to ground beef taco meat for extra flavor, simmer it with black beans, or swirl it into sour cream for a quick dip. The bright, fresh taste complements barbecue, enhances rice bowls, and transforms simple cheese quesadillas into restaurant-quality dishes.
Conclusion: Elevating Home Cooking with Pressure Cooking
Creating salsa in your Instant Pot using canned tomatoes represents the intersection of convenience and authenticity. This method respects busy modern schedules while refusing to compromise on flavor or quality. By mastering this fundamental recipe and understanding the variables that affect outcome, you gain the confidence to experiment with variations and adapt the formula to your unique preferences. Whether you’re hosting gatherings or simply stocking your refrigerator with homemade condiments, this approach delivers consistent, delicious results that outshine commercially prepared alternatives.
References
- Ball Home Canning Guide — Ball Corporation. https://www.freshpreserving.com/
- Instant Pot Official Recipe Collection — Instant Brands Inc. https://www.instantpot.com/blogs/recipes/
- USDA Complete Guide to Home Canning — United States Department of Agriculture. https://nchfp.uga.edu/how/can_home.html
- National Center for Home Food Preservation Food Safety Guidelines — University of Georgia. https://nchfp.uga.edu/
- Pressure Cooker Safety and Usage Standards — Underwriters Laboratories (UL). https://www.ul.com/