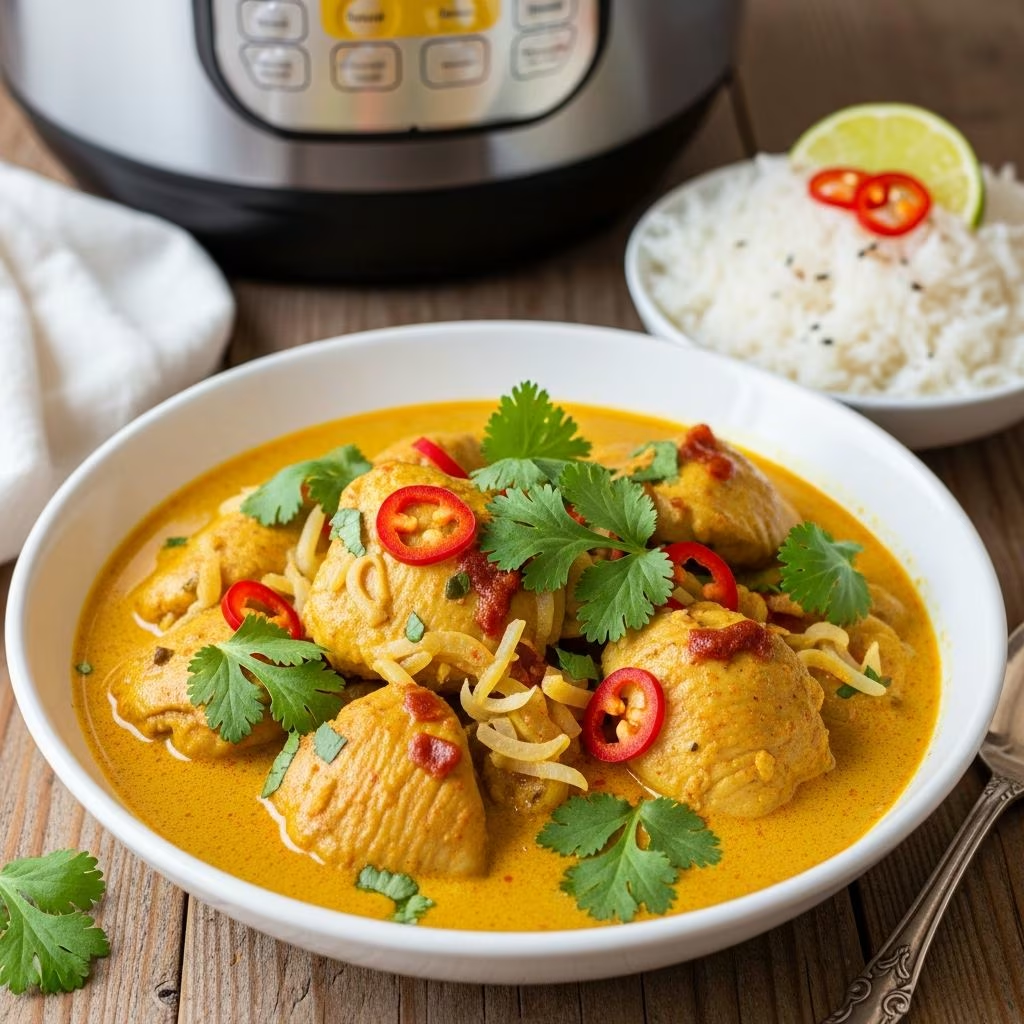
The Instant Pot has revolutionized weeknight cooking by transforming time-consuming recipes into quick, manageable meals. One standout dish that exemplifies this convenience is coconut curry chicken—a fragrant, creamy dish that traditionally requires simmering on the stovetop for extended periods. By harnessing the pressure-cooking capabilities of the Instant Pot, you can achieve the same depth of flavor and tender texture in a fraction of the time.
Coconut curry chicken combines the richness of full-fat coconut milk with the warmth of aromatic spices, creating a comforting meal that works beautifully over rice, with naan bread, or as a standalone protein-forward dinner. The beauty of this dish lies in its adaptability—you can adjust spice levels to suit your preferences, incorporate vegetables to boost nutrition, and experiment with different curry pastes or powder blends based on what you have available.
Understanding the Foundation: Key Ingredients Explained
The success of any Instant Pot coconut curry chicken recipe depends on selecting quality ingredients that work harmoniously together. Here’s a breakdown of the essential components:
- Chicken thighs are the preferred choice for this recipe because they remain moist and tender even with pressure cooking, unlike chicken breasts which can become dry. Boneless, skinless thighs provide ease of preparation without sacrificing flavor.
- Full-fat coconut milk provides the signature creamy texture and subtle sweetness that defines this dish. Avoid light varieties, as they lack the richness needed for an authentic curry sauce.
- Curry powder and complementary spices like coriander, turmeric, and cumin create the aromatic backbone. These spices are typically combined before cooking to release their essential oils and develop deeper flavor profiles.
- Aromatics including onions, garlic, and ginger form the flavor base. Ginger and garlic paste works particularly well in pressure cookers, as it distributes evenly throughout the dish.
- Tomatoes or tomato-based products add acidity that balances the richness of the coconut milk and brightens the overall flavor profile.
- Oil or ghee is essential for the sauté phase, helping to develop flavors before pressure cooking begins.
Preparation Strategy: Setting Yourself Up for Success
Proper preparation ensures smooth cooking and prevents common pitfalls like the “burn” notification that sometimes appears on Instant Pots. Begin by cutting your chicken thighs into uniform, bite-sized pieces—this promotes even cooking and makes portioning easier when serving.
Some recipes recommend marinating chicken pieces in spice blends for 15-20 minutes before cooking. This optional step allows flavors to penetrate the meat more thoroughly, resulting in more intensely seasoned chicken. Whether you choose to marinate or proceed directly depends on your time constraints and preference for pronounced spice flavors.
Organize all your ingredients in advance—a practice known as mise en place in cooking terminology. This prevents scrambling for items mid-recipe and ensures nothing is forgotten, particularly important when using an Instant Pot where pausing mid-cycle isn’t practical.
The Sauté Phase: Building Depth Through Heat
The initial sauté phase is critical for developing the curry’s flavor foundation. Set your Instant Pot to sauté mode and allow it to preheat. Add oil or ghee, then incorporate onions, cooking them for approximately 3-4 minutes until they soften and begin to caramelize.
Next, add ginger and garlic paste or minced garlic and ginger, sautéing for 30-60 seconds. This brief cooking time allows these aromatics to release their volatile compounds, which distribute throughout the sauce during pressure cooking. Be cautious not to overcook garlic, as it becomes bitter.
Then introduce your chicken pieces along with salt and curry powder. Stir continuously and cook for 3-4 minutes, allowing the chicken to brown lightly on the surface. This browning process, called the Maillard reaction, creates complex flavors that would be missed if chicken were added to raw ingredients. Even though the chicken won’t cook through during this phase, this surface treatment significantly impacts the final dish’s flavor complexity.
Add tomatoes or tomato puree next, stirring well and allowing the mixture to sauté for another 2-3 minutes. If your Instant Pot shows a burn warning, it’s acceptable to skip this step and add tomato products later. Pour in water or broth as needed, using a wooden spoon to deglaze the bottom of the pot—this prevents the burn notice and ensures nothing is stuck to the bottom.
Pressure Cooking: Timing and Technique
Once your base is prepared, it’s time to seal the Instant Pot and begin pressure cooking. Close the lid, ensuring the pressure valve is set to the sealing position. Select manual or pressure cook mode and set the time based on your chicken type.
For boneless, skinless chicken thighs:
- Thawed thighs: 8-10 minutes at high pressure
- Frozen thighs: 12 minutes at high pressure
Some recipes recommend cooking at low pressure for 5 minutes instead, which can yield equally tender results while being slightly gentler on the meat. The choice between high and low pressure often comes down to personal preference and the specific chicken thickness in your recipe.
Once the cooking cycle completes and your Instant Pot beeps, you have several pressure-release options. Quick release involves manually moving the pressure valve to venting immediately, which stops cooking instantly. Natural release means letting the pressure drop on its own over 5-10 minutes, which results in slightly more tender chicken but takes longer overall.
Finishing Touches: Transforming the Dish
After pressure is released and the lid is safely removed, stir in the coconut milk if you haven’t already added it. Some recipes add coconut milk before cooking for integrated flavor, while others introduce it afterward to preserve its delicate characteristics. If using canned coconut milk that’s been refrigerated for 24 hours, you can separate the thick cream from the liquid for better control over the sauce’s consistency.
Return the Instant Pot to sauté mode and simmer the curry for 4-5 minutes, allowing the sauce to thicken slightly and the flavors to meld. During this time, stir in garam masala if desired, along with any final seasonings like lime juice or additional salt and pepper.
If your curry seems too thin, several thickening options are available. Create a slurry by mixing cornstarch or tapioca starch with water and stirring it in while simmering. Alternatively, continue cooking on sauté mode until more liquid evaporates, achieving your preferred consistency.
Serving Suggestions and Pairing Ideas
Coconut curry chicken works beautifully with several serving options. Fragrant basmati rice is the traditional accompaniment, providing a neutral base that lets the curry shine. Alternatively, serve over jasmine rice for subtle floral notes, or cauliflower rice for a lower-carbohydrate option.
Naan bread, either store-bought and warmed or freshly made, adds textural contrast and helps soak up the flavorful sauce. For a lighter meal, serve the curry over quinoa or alongside steamed vegetables like spinach, green beans, or broccoli.
Garnish with fresh cilantro, additional lime wedges, or a sprinkle of red pepper flakes. These additions brighten the dish and add visual appeal to your finished plate.
Customization and Variation Possibilities
One advantage of making coconut curry chicken in the Instant Pot is how easily the recipe adapts to personal preferences and dietary requirements. For those seeking additional vegetables, add diced potatoes, bell peppers, or snap peas during the sauté phase. Heartier vegetables like potatoes should be layered beneath the chicken to prevent triggering a burn notice.
Spice enthusiasts can increase cayenne pepper, add fresh chili peppers during the sauté phase, or incorporate hot curry paste instead of mild powder. Conversely, those sensitive to heat can reduce or eliminate spicy elements entirely. The dish’s fundamental character remains unchanged whether you’re using Thai red curry paste or traditional Indian curry powder.
For dietary modifications, this recipe is naturally gluten-free and can be made dairy-free since it uses coconut milk instead of cream. Those avoiding nightshade vegetables can omit tomatoes and rely on the natural flavors of aromatics and spices.
Storage and Make-Ahead Convenience
Coconut curry chicken stores exceptionally well, making it ideal for meal preparation. Transfer cooled curry to airtight containers and refrigerate for up to four days. The flavors actually intensify after a day or two, as ingredients continue to meld.
For longer storage, freeze curry in portioned containers for up to three months. When reheating, thaw overnight in the refrigerator, then warm gently on the stovetop over medium heat or in the microwave at reduced power to prevent the coconut milk from separating.
You can also prepare the curry base—all ingredients except the coconut milk—up to two days ahead. Store it separately and combine just before pressure cooking for maximum freshness and customized flavor intensity.
Troubleshooting Common Issues
The “Burn” Notification: This indicates something is stuck to the bottom of the Instant Pot. Prevent it by deglazing thoroughly with water or broth after sautéing, using a wooden spoon to scrape up any stuck bits. Layer vegetables like potatoes underneath chicken to create separation from the heating element.
Overcooked or Dry Chicken: This typically results from cooking too long or using chicken breasts instead of thighs. Stick to the recommended cooking times and use thighs for superior moisture retention.
Thin or Watery Sauce: After pressure cooking, simmer on sauté mode longer to allow excess liquid to evaporate. Use a cornstarch slurry if you need immediate thickening without additional cooking time.
Separated Coconut Milk: Sometimes the liquid and fat in coconut milk separate during cooking, creating an unappetizing appearance. Whisk vigorously or use an immersion blender to recombine components.
Frequently Asked Questions
Can I use chicken breasts instead of thighs? While possible, thighs are strongly recommended due to their higher fat content, which keeps them moist during pressure cooking. If using breasts, reduce cooking time to 5-7 minutes at high pressure.
Is this recipe gluten-free? Yes, as long as you use gluten-free curry powder and verify that other ingredients like soy sauce don’t contain gluten. Most basic spices are naturally gluten-free.
How spicy is this dish? The heat level varies based on your curry powder choice and any added chili peppers. Start with less spice than you think you need, as it can be amplified when serving but can’t be removed once added.
Can I double this recipe? Yes, though don’t exceed your Instant Pot’s maximum fill line (usually indicated inside). Increase cooking time by just a minute or two, as pressure cooking is quite efficient.
What’s the difference between quick and natural pressure release? Quick release stops cooking immediately and produces tender chicken but can sometimes cause separation. Natural release cooks slightly longer but yields marginally more integrated flavors and often prevents separation issues.
References
- Instant Pot Official Website — Instant Brands Inc. Accessed 2026. https://instantpot.com/
- Pressure Cooking Safety and Techniques — National Center for Food Safety and Technology, Food Preservation Information. Illinois Institute of Technology. https://www.ncfst.iit.edu/
- The Science of Cooking: Understanding Heat and Food — McGee, Harold. Food and Cooking: Science and Lore of the Kitchen. Scribner. https://www.haroldmcgee.com/
- Coconut Milk Nutritional Profile and Culinary Uses — United States Department of Agriculture (USDA) Food Data Central. https://fdc.nal.usda.gov/
- Spice Chemistry and Flavor Development — Lawless, Harry T., & Civille, Gail Vance. Sensory Evaluation of Food: Principles and Practices. Springer. 2013.