Understanding the Evolution of German Chocolate Cake
German chocolate cake holds a unique place in American dessert history. Despite its name, the cake is not originally from Germany. The recipe was first introduced in a Texas newspaper during the 1950s using Baker’s German’s Sweet Chocolate. The name “German” actually derives from the brand of chocolate used in the original recipe, which was created specifically for use in baking applications. General Foods, the parent company of Baker’s Chocolate, recognized the recipe’s potential and distributed it widely to newspapers across the country. The marketing campaign proved remarkably successful, with chocolate sales increasing by 73% within just one year.
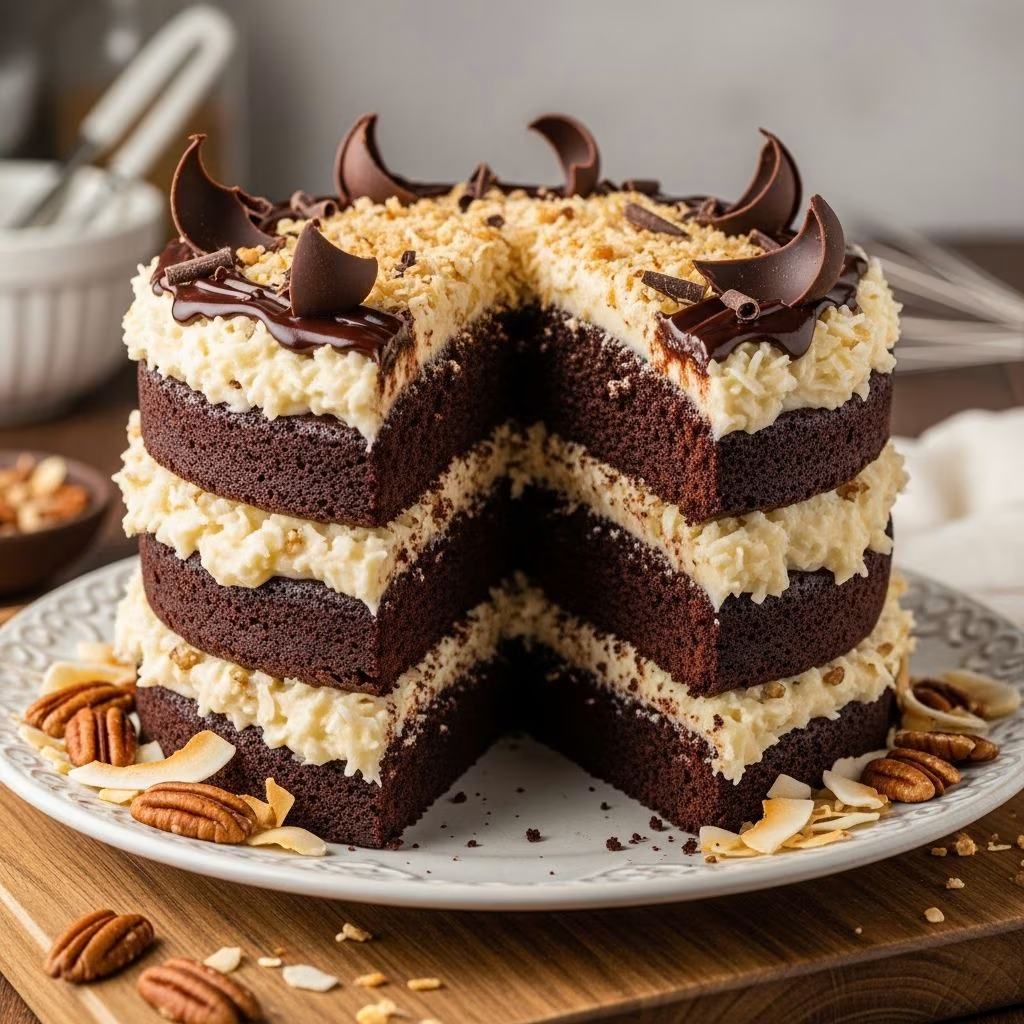
The traditional version features a distinctive coconut-pecan topping spread over the surface of the cake. However, contemporary bakers have reimagined this classic, creating an inside-out variation that inverts the traditional arrangement by placing the sweet filling between the layers rather than on top.
What Makes the Inside-Out Version Distinctive
The inside-out interpretation represents a significant departure from the conventional German chocolate cake while maintaining its essential character. Rather than reserving the coconut-pecan mixture for the top, this version incorporates it as an internal filling sandwiched between rich chocolate cake layers. This approach offers several advantages: it protects the delicate filling from exposure to air, maintains moisture throughout the cake, and creates a more uniform texture when sliced.
The filling in this variation typically begins with dulce de leche, a caramelized sweetened condensed milk that serves as the base. This ingredient replaces the traditional margarine or butter used in classic recipes, creating a more luxurious and intensely sweet component. The dulce de leche is combined with toasted coconut and pecans, then layered between three moist chocolate cake layers.
The exterior receives a coating of chocolate ganache, a smooth and glossy finish made from melted chocolate and butter. This creates a beautiful presentation and adds an additional layer of chocolate richness to balance the sweet filling.
Essential Ingredients for Your Cake Layers
Creating the ideal chocolate cake requires precision with quality ingredients. The cake layers themselves are relatively straightforward, utilizing Dutch-process cocoa powder for depth and complexity.
| Ingredient | Quantity | Purpose |
|---|---|---|
| All-purpose flour | 1.5 cups | Provides structure and crumb |
| Dutch-process cocoa powder | 0.75 cup | Delivers deep chocolate flavor |
| Granulated sugar | 1.5 cups | Sweetens and adds moisture |
| Whole milk | 0.75 cup | Creates tender crumb |
| Unsalted butter (melted) | 6 tablespoons | Adds richness and flavor |
| Eggs and egg yolk | 2 total | Provides binding and leavening |
| Boiling water | 0.75 cup | Blooms cocoa and creates moisture |
| Baking powder and soda | 1.5 teaspoons each | Ensures proper rise |
Preparing the Filling Components
The filling represents the heart of this innovative dessert. Preparing dulce de leche requires careful attention, as improper techniques can result in crystallization or burning. While traditional methods involve cooking sweetened condensed milk in a shallow pan within the oven, alternative approaches exist that minimize risk.
Once you have your dulce de leche prepared, the remaining filling components are straightforward. Toast the coconut and pecans separately before combining them with the dulce de leche. Toasting these ingredients enhances their natural flavors and creates depth that raw versions cannot achieve. The mixture benefits from the addition of vanilla extract, which rounds out the flavor profile and complements both the chocolate and caramel notes.
The filling should be thoroughly mixed until all components are evenly distributed throughout the dulce de leche. This ensures that each slice contains a balanced proportion of nuts, coconut, and caramel.
Creating the Perfect Chocolate Ganache
Chocolate ganache provides both the protective outer layer and the final visual presentation for your cake. This versatile component consists of only a few ingredients: unsalted butter, fine-quality semisweet chocolate, and light corn syrup.
The preparation process is critical for achieving the ideal consistency. Begin by melting butter in a heavy-bottomed saucepan, then remove from heat before adding the chocolate and corn syrup. The residual heat from the butter gently melts the chocolate without exposing it to direct flame, which can cause seizing or burning. Whisk until completely smooth and homogeneous.
For assembly purposes, you will need two different consistencies of ganache. The first portion remains at room temperature and becomes the crumb coat and base layer. The second portion chills for approximately one hour until it achieves a spreadable texture suitable for frosting the sides and interior layers. This two-stage approach prevents the filling from separating or sliding during construction.
Step-by-Step Cake Assembly Instructions
Preparing Your Pans and Initial Baking
Begin by preheating your oven to 350°F and positioning the rack in the center. Oil three 9-inch round cake pans generously and line the bottoms with parchment paper. The parchment paper ensures easy cake removal without sticking.
Combine all dry ingredients—flour, cocoa powder, baking powder, baking soda, and salt—in a large mixing bowl. In a separate vessel, whisk together the milk, melted butter, eggs, egg yolk, vanilla extract, and almond extract. The almond extract provides subtle complexity without being overtly noticeable.
Gradually incorporate the wet ingredients into the dry mixture using an electric mixer on low speed, then increase to high speed and beat for one minute. This ensures complete incorporation without overdeveloping the gluten. Finally, reduce the mixer to low speed and gradually add the boiling water until just combined. The batter will appear thin; this is normal and will yield a moist cake.
Baking for Optimal Results
Divide the batter equally among the three prepared pans. Arrange two pans on the lower oven rack and one on the upper rack. Bake for approximately 12 minutes, then rotate each pan 180 degrees and switch their positions between racks. This ensures even browning and consistent moisture levels throughout. Continue baking for an additional 10-12 minutes, until a toothpick inserted into the center emerges clean. Total baking time typically ranges from 20-25 minutes, though individual ovens may vary.
Once baked, allow the cakes to cool in their pans on a wire rack for 15 minutes. This cooling period allows the structure to set without becoming brittle. Run a thin knife around the edges of each cake and gently turn them out onto the wire racks. Carefully peel away the parchment paper and permit the layers to cool completely before assembly.
Layering and Frosting
Place the first cake layer on your serving plate and spread a portion of the chilled ganache evenly over the surface, leaving a small border around the edges. This prevents the filling from squishing out during subsequent layer placement. Spread half of the dulce de leche mixture over the ganache layer, ensuring an even distribution.
Position the second cake layer on top and repeat the process with ganache and the remaining dulce de leche mixture. Finally, place the third cake layer on top. Spread the remaining chilled ganache around the sides of the assembled cake.
Finishing with the Glaze
The final step involves applying the glossy chocolate glaze to the top and sides. Warm the reserved room-temperature ganache over low heat, stirring constantly, until it reaches a glossy, pourable consistency—approximately one minute. Pour the ganache over the top of the cake, allowing it to flow naturally down the sides. You may gently shake the serving plate to help distribute the ganache evenly.
Refrigerate the assembled cake for one hour to allow the ganache to set properly. This chilling period ensures clean slices with no sliding or separation of layers.
Frequently Asked Questions
Can I prepare this cake in advance?
Yes, the individual components can be prepared separately and refrigerated. The cake layers keep well in an airtight container for up to two days, the filling can be prepared a day ahead, and the ganache can be made 2-3 days in advance. Assemble the final cake no more than 8 hours before serving for optimal freshness.
What if I don’t have three cake pans?
You can bake the layers sequentially using two pans, adjusting baking times as needed. Allow the pans to cool slightly between batches before filling with fresh batter.
Can I use different nuts instead of pecans?
Absolutely. Walnuts, almonds, or a combination of nuts work well as substitutes. Maintain the same total quantity and ensure they are toasted for maximum flavor development.
How should I store leftover cake?
Keep leftover cake in a refrigerated, airtight container for up to five days. The ganache coating helps preserve moisture and prevents the cake from drying out. You may bring individual slices to room temperature for 15-20 minutes before serving for optimal flavor.
Can this cake be frozen?
Yes, unfrosted layers freeze well for up to three months when wrapped in plastic wrap and stored in an airtight container. Thaw at room temperature before assembly. It is not recommended to freeze the fully assembled cake, as the ganache and filling textures may be compromised upon thawing.
Professional Tips for Success
- Invest in quality Dutch-process cocoa powder, which offers superior color and flavor compared to natural cocoa
- Use fine-quality semisweet chocolate for the ganache; this makes a noticeable difference in the final taste
- Ensure all ingredients are at room temperature before beginning, except for the boiling water, which blooms the cocoa
- Do not overmix the batter after adding water, as this can result in a tough, dense crumb
- Allow adequate time for the ganache to chill before spreading; this prevents layers from sliding
- Use a turntable when frosting for more even application and professional presentation
- Warm your frosting knife between applications by dipping it in hot water and wiping dry for smoother frosting lines
Conclusion
The inside-out German chocolate cake represents a thoughtful reinterpretation of a beloved classic, offering home bakers an opportunity to create an impressive, elegant dessert suitable for any special occasion. While the recipe may appear complex due to its multiple components, each element is straightforward and manageable when approached systematically. The result—layers of moist chocolate cake surrounding a luscious dulce de leche and pecan-coconut filling, all encased in glossy chocolate ganache—delivers a sophisticated flavor profile that honors the original while standing confidently on its own merits.
References
- Inside Out German Chocolate Cake — Tastydesu. 2011-03-30. https://tastydesu.wordpress.com/2011/03/30/inside-out-german-cake/
- Inside-Out German Chocolate Cake — Andrea’s Recipes. https://andreasrecipes.com/inside-out-german-chocolate-cake/
- Inside-Out That Chocolate German — The Ulterior Epicure. 2007-12-12. https://ulteriorepicure.com/2007/12/12/inside-out-that-chocolate-german/
- Inside-Out German Chocolate Cake — Pancakes and Biscotti. 2016-06-01. https://pancakesandbiscotti.com/recipes/2016/06/german-chocolate-cake