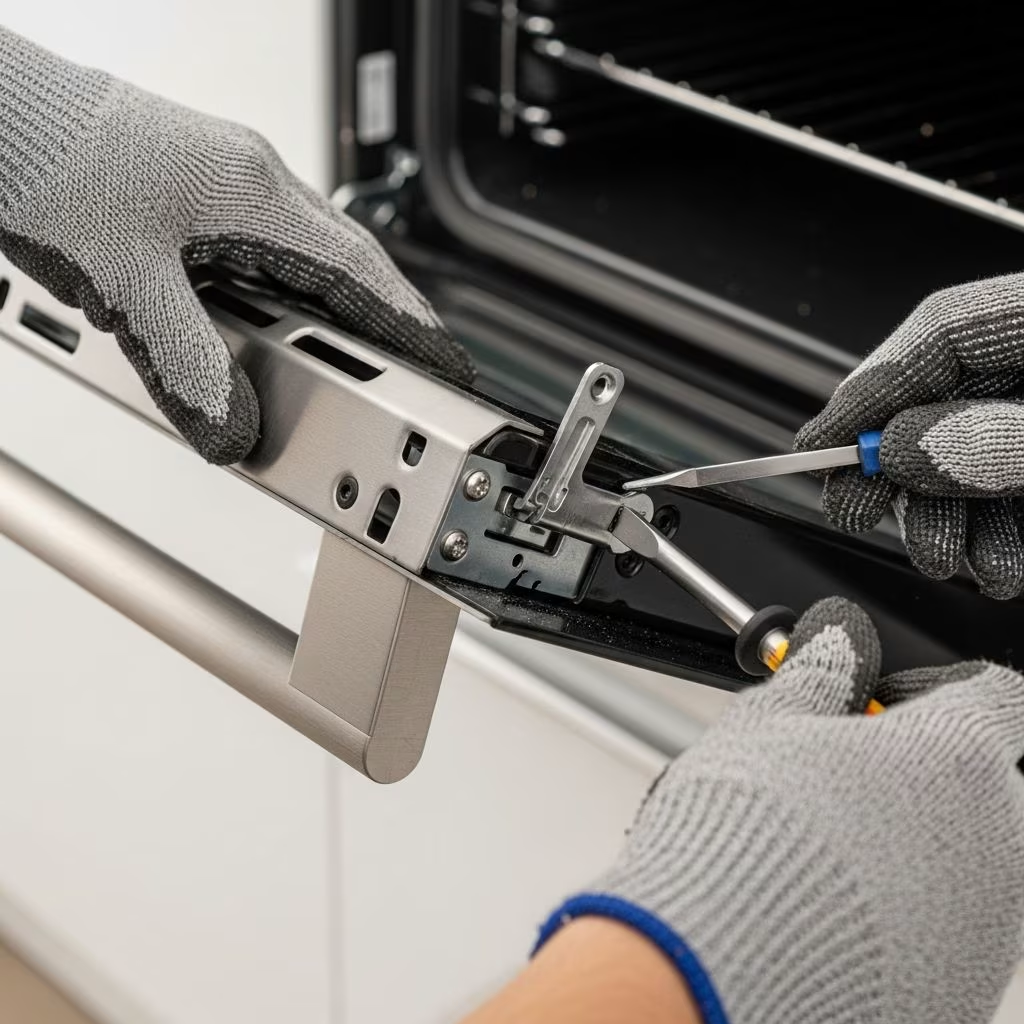
Cleaning the interior of your oven can be a challenging task, especially when you need to reach areas behind the door or between glass panes. One of the most effective solutions is to temporarily remove the oven door, which provides unrestricted access for comprehensive cleaning. However, many homeowners hesitate to remove their oven doors due to concerns about damaging the appliance or injuring themselves. Understanding the proper procedure makes this task manageable and safe for anyone willing to follow the correct steps.
Why Removing Your Oven Door Makes Cleaning Easier
When your oven door remains attached, reaching the back walls, upper corners, and sides becomes nearly impossible. Removing the door opens up the entire interior space, allowing you to clean surfaces that accumulate the most stubborn grease and burnt-on food particles. Additionally, if your oven has glass panels, removing the door provides direct access to the space between the glass layers, where dust and condensation often collect over time.
For many modern ovens with insulated glass doors, the glass panes themselves can become cloudy or discolored. By detaching the door, you can clean these surfaces thoroughly without straining your back or arms. This process is particularly beneficial for households that cook frequently or prefer deep-cleaning their appliances quarterly.
Essential Preparation Before Starting
Successful door removal begins well before you touch any hinges or latches. Taking time to prepare your workspace and gather necessary items prevents accidents and protects your oven and flooring.
Safety Precautions to Follow
- Ensure your oven has cooled completely before beginning any removal process
- Wear protective work gloves to shield your hands from sharp edges and heavy metal components
- Avoid working alone; having a second person present provides additional safety and assistance
- Clear the surrounding area of obstacles that could cause tripping or the door to fall unexpectedly
- Review your specific oven model’s instruction manual, as hinge mechanisms vary among manufacturers
Materials You’ll Need
- Heavy towels or blankets to protect the door and flooring
- Protective work gloves for hand safety
- Appropriate tools (Allen keys or screwdrivers, depending on your oven model)
- A spacious, flat work surface for resting the door during cleaning
- Optional: a helper to support the door weight during removal and reinstallation
Understanding Your Oven’s Hinge System
Oven manufacturers use several different hinge lock mechanisms, and identifying which type your oven has is crucial before attempting removal. The two most common systems are manual lever locks and hex key (Allen key) engagement systems.
Manual Lever Hinge Locks
Many modern ovens feature simple flip-style latches on both bottom corners where the hinges connect to the oven frame. These levers rest in the locked position, preventing the door from lifting away from the hinge slots. To engage the removal mode, you simply flip these levers upward, which disengages the mechanical lock and allows the door to be lifted out of its slots.
Hex Key Hinge Locks
Some oven models use Allen key holes positioned near the hinge mechanisms. These require you to insert the appropriate-sized hex key into each hole and engage it fully before the door can be removed. This type of lock system provides additional security but requires identifying the correct key size before starting.
Step-by-Step Door Removal Procedure
Once you’ve prepared your space and identified your hinge lock type, follow these sequential steps to safely remove your oven door.
Step One: Opening the Door Fully
Begin by opening your oven door completely until it reaches its maximum extension. For most ovens, this means positioning the door perpendicular to the oven frame, creating a 90-degree angle. This fully open position exposes the hinge locks located at the bottom left and right corners of the door frame.
Step Two: Engaging the Hinge Locks
With the door fully opened, locate the hinge lock mechanisms:
- For flip-style locks: grasp each latch firmly and flip it upward until it locks into the engaged position
- For hex key systems: insert the Allen key into each hole and turn it fully to engage the lock mechanism
- Verify that both locks are completely engaged before proceeding
Step Three: Positioning for Safe Removal
Slowly close the door to a partially open position, creating approximately a 75-degree angle. This intermediate position is crucial—closing the door too far can re-engage the locks, while not closing it enough makes removal difficult. You should feel slight resistance as the door reaches the correct removal angle.
Step Four: Lifting and Removing the Door
Position yourself directly in front of the oven and grasp the door firmly on both sides, near the top edge or at the midpoint if the door is particularly heavy. Use your entire hand to secure the door, not just your fingers. In one smooth motion, lift the door straight upward while maintaining slight pressure downward and away from the oven frame. The hinge arms should disengage cleanly from their slots.
Continue lifting until the door completely clears the oven frame, then carefully carry it to your prepared workspace where towels are already laid out. Place the door with its handle facing upward to prevent damage to the surface or the handle mechanism.
Cleaning Your Oven Door
With your door safely removed and positioned on protective towels, you can now access all cleaning areas effectively. Different oven door types require different approaches.
Single-Pane Glass Doors
For straightforward glass doors without insulation, use a degreasing solution and soft cloths to clean both the interior and exterior surfaces. Avoid abrasive scrubbers that can scratch the glass.
Multi-Pane Insulated Doors
If your oven has insulated glass with multiple panes, you can often access the space between them for deep cleaning. Some models allow removal of individual glass panels by gently pulling upward on the lower edges and lifting them free from their retention pins. Once removed, clean the interior surfaces thoroughly, then carefully reinsert the glass panes in reverse order, ensuring they seat properly in their retention grooves.
Reinstalling Your Oven Door
Proper reinstallation ensures your oven door functions correctly and maintains its seal. Follow these steps in reverse order from removal.
Preparing for Reinstallation
Before lifting the door, ensure the hex keys or latches are still in the engaged position. If using hex keys, leave them partially inserted as visual indicators that the locks are engaged. Have your helper ready to stabilize the door if necessary.
Positioning the Door
Grasp the door on both sides and lift it carefully, positioning the hinge arms at approximately a 45-degree angle toward the oven opening. This angled approach allows the hinges to align with their slots more easily than a perpendicular insertion would.
Sliding Into Place
While maintaining the 45-degree angle, slowly slide the door forward and into the oven frame. You should feel the hinge arms beginning to seat into their slots. Continue moving the door forward and downward simultaneously until you feel a slight drop sensation, indicating the hinges have fully engaged.
Locking the Hinges
Once the door is fully seated, disengage the hinge locks by flipping down the manual levers or removing and setting aside the hex keys. Open the door to verify it operates smoothly and closes securely. Check that the gap between the door and the oven frame is even on all sides, indicating proper alignment.
Common Challenges and Solutions
Door Feels Heavy or Difficult to Remove
This typically indicates the hinge locks aren’t fully engaged. Stop, ensure both locks are properly activated, and try again. Never force a door that feels stuck, as this risks damaging the hinge mechanisms.
Uneven Gap After Reinstallation
If the door doesn’t align properly after reinstallation, remove it again and check that the hinges are completely seated in their slots. Misalignment usually results from hinges that haven’t fully engaged.
Difficulty Identifying Hinge Locks
Consult your oven’s user manual or contact the manufacturer’s customer service for specific guidance. Photography of your hinge area can help technicians provide precise instructions remotely.
Important Maintenance Tips
- Remove and clean your oven door every 3-6 months for optimal cleanliness and visibility
- Avoid using harsh, abrasive cleaning products that can damage door finishes or glass
- Periodically inspect hinge mechanisms for wear or corrosion
- Never attempt to force a door that feels stuck, as this damages internal components
- Keep protective gloves nearby for future maintenance tasks
Frequently Asked Questions
How often should I remove and clean my oven door?
For typical household use, quarterly cleaning is sufficient. However, if you cook frequently or notice visible buildup, monthly removal and cleaning prevents grease accumulation that becomes difficult to remove over time.
Can I damage my oven by removing the door?
When you follow proper procedures and engage hinge locks before removal, oven doors are designed to be safely removed and reinstalled repeatedly without damage. Always consult your specific model’s manual for guidance.
What if my oven door won’t come out of the slots?
Ensure both hinge locks are completely engaged and the door is at the correct removal angle. If it still feels stuck, stop immediately and review your manual. Forcing a stuck door risks injury and appliance damage.
Do I need professional help to remove my door?
Most homeowners can successfully remove and reinstall oven doors by following proper procedures. Professional assistance is only necessary if you encounter mechanical problems or if your specific model has unusual hinge configurations.
Is it safe to clean between glass panes on an insulated door?
Yes, modern insulated doors often allow access between panes. However, always verify this capability in your manual before attempting to remove individual glass panels, as designs vary by manufacturer.
References
- How to Remove and Replace Your Oven Door — Statewide Appliance Spares. YouTube. https://www.youtube.com/watch?v=BfVdB8Rtig8
- How to Remove Your Oven Door | Oven Cleaning Hacks — Mr Gizmo. YouTube. https://www.youtube.com/watch?v=sdQhrK_galg
- Cleaning Between the Oven Door Glass — YouTube. https://www.youtube.com/watch?v=WzdRBcXFhsc
- Removing Your Oven Door — Platinum Appliances. YouTube. https://www.youtube.com/watch?v=g9h-32Qbsc8
- How to Clean & Maintain | Smeg Ovens — ReleMat. YouTube. https://www.youtube.com/watch?v=ZdPSVOiIpyY
- How Do I Clean My Oven Door — Bosch Home Indonesia. YouTube. https://www.youtube.com/watch?v=7kLIC2KysF8