Whipped cream stands as one of the most versatile and beloved toppings in the culinary world. Whether adorning a slice of pie, crowning a hot beverage, or complementing fresh fruit, this airy confection elevates any dessert experience. Yet many home cooks believe that creating quality whipped cream requires special equipment or mysterious culinary skills. The truth is far simpler: with basic ingredients, minimal equipment, and understanding of fundamental techniques, anyone can produce restaurant-quality whipped cream in their own kitchen.
The distinction between homemade and commercial whipped cream is significant. Store-bought varieties often contain stabilizers, emulsifiers, and preservatives that alter both texture and taste. Homemade versions, crafted from pure ingredients, deliver a cleaner flavor profile and superior mouthfeel that justifies the minimal effort required.
Essential Components for Success
Creating exceptional whipped cream begins with understanding the three fundamental ingredients that form its foundation. Each plays a distinct role in achieving the desired consistency and flavor.
Understanding Heavy Cream
The foundation of whipped cream is heavy cream, also labeled as heavy whipping cream. This ingredient contains between 36 and 40 percent butterfat, making it ideal for whipping. The high fat content is crucial because fat particles stabilize the air bubbles incorporated during whipping, creating that characteristically light and fluffy texture. When selecting cream, choose products labeled as heavy cream or heavy whipping cream—regular whipping cream contains less fat and may not achieve optimal results.
Temperature significantly impacts whipping success. Cold cream whips more efficiently than room-temperature cream because the fat remains solid, allowing better air incorporation. For best results, chill both the cream and the mixing bowl in the freezer for 10 to 15 minutes before beginning. Some bakers prefer using metal bowls over glass because metal conducts cold more effectively and maintains lower temperatures throughout the whipping process.
The Role of Powdered Sugar
Confectioners’ sugar, commonly known as powdered sugar, serves dual purposes in whipped cream preparation. It sweetens the final product while the fine powder structure dissolves smoothly without creating grittiness. Unlike granulated sugar, which requires longer beating to dissolve completely and can result in a sandy texture, powdered sugar integrates seamlessly into the whipped cream during the beating process.
Typical proportions range from ½ cup to ¾ cup powdered sugar per 2 cups of heavy cream, though personal preference dictates the exact amount. Those preferring lighter sweetness can reduce the sugar quantity, while those with a sweeter tooth may increase it slightly. Adding the sugar at the beginning of the mixing process allows it to dissolve gradually as the cream whips.
Vanilla Extract as Flavor Foundation
Pure vanilla extract adds aromatic depth and vanilla flavor to the whipped cream. Typically, 1 to 2 teaspoons per 2 cups of cream produces a noticeable vanilla presence without overpowering other flavors. For optimal flavor, select pure vanilla extract rather than imitation varieties, which lack the complexity of genuine vanilla.
| Ingredient | Quantity (per 2 cups cream) | Purpose |
|---|---|---|
| Heavy Cream (chilled) | 2 cups | Base ingredient; creates texture through fat content |
| Powdered Sugar | ½ to ¾ cup | Sweetens and dissolves smoothly |
| Pure Vanilla Extract | 1 to 2 teaspoons | Adds aromatic flavor |
Equipment Requirements
While whipped cream can be prepared with multiple equipment options, each offers distinct advantages and limitations.
- Stand Mixer with Whisk Attachment: Provides consistent, hands-free beating and maintains optimal speed throughout the process. The whisk attachment incorporates air efficiently while the mixer maintains steady rotation.
- Hand Mixer: Offers portability and control for smaller batches. Requires active participation but uses less counter space than stand mixers.
- Whisk and Bowl: Traditional method requiring manual effort but providing complete control over whipping progression. Best for small quantities and when experiencing the tactile process is desired.
Regardless of equipment choice, the mixing bowl should be chilled beforehand and preferably made from metal or glass. This temperature retention prevents the cream from warming during the beating process, which could interfere with proper whipping.
Step-by-Step Preparation Methodology
Pre-Preparation Phase
Success in whipped cream preparation begins before any mixing occurs. First, place your mixing bowl and beaters or whisk attachment in the freezer for 10 to 15 minutes. This cooling phase is not optional—it significantly impacts the final result. While the equipment chills, remove the heavy cream from the refrigerator and verify it is thoroughly cold.
Combining Ingredients
Once the bowl reaches proper temperature, add the chilled heavy cream, powdered sugar, and vanilla extract simultaneously. There is no advantage to adding ingredients sequentially; combining them at the outset allows even distribution and consistent sweetness throughout the finished product.
The Whipping Process
Begin beating at low speed for approximately 30 seconds. This initial phase initiates air incorporation without creating excessive foam. After this brief period, increase the speed to medium. At this stage, visible changes begin occurring within 1 to 2 minutes. The cream transforms from liquid to slightly frothy, then gradually thickens as air bubbles become trapped within the fat structure.
Continue medium-speed beating for another 2 to 3 minutes, watching carefully for visual cues. When soft peaks form—meaning the whipped cream holds its shape momentarily but the peaks droop slightly when the beaters are lifted—the whipped cream reaches ideal consistency for most applications. This stage typically occurs around the 3 to 5 minute mark from starting the mixer.
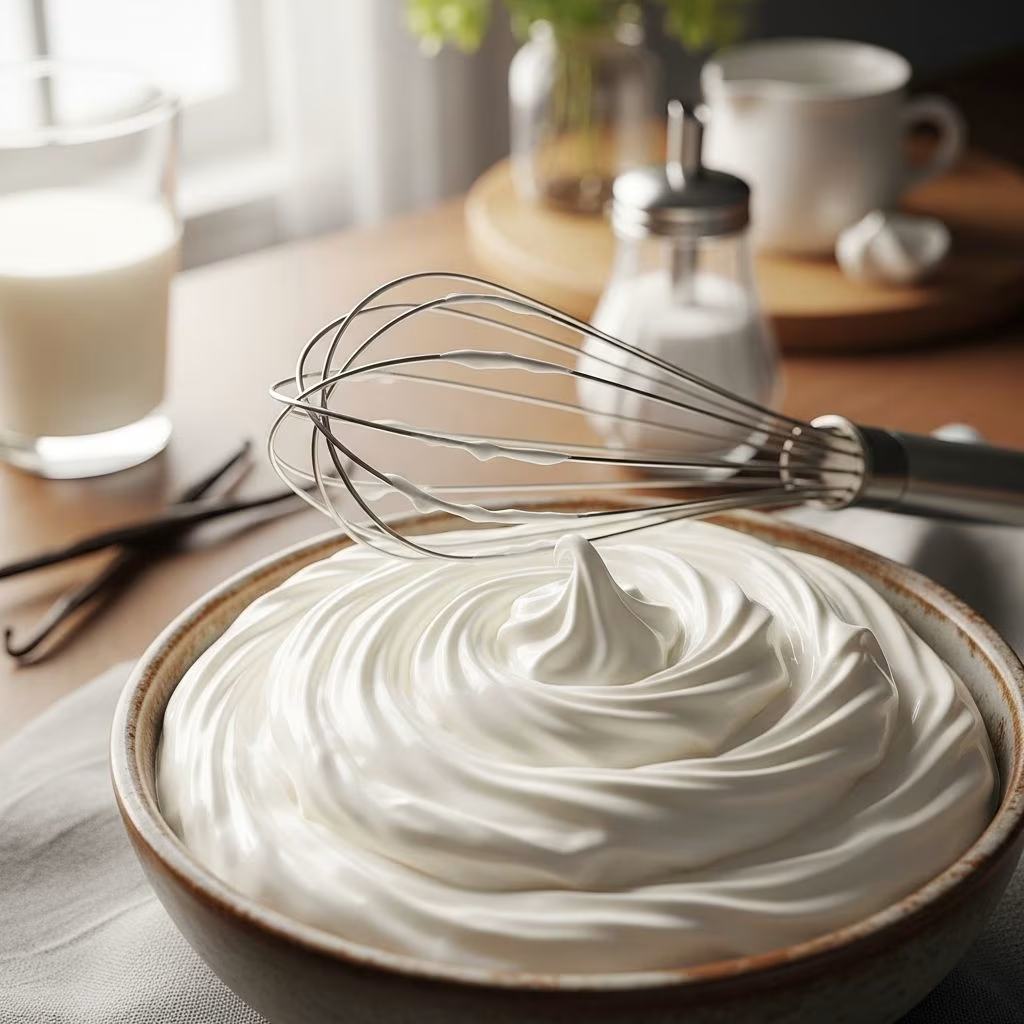
Transition to medium-high speed for the final 30 seconds to 1 minute to refine the texture and achieve a billowy, cloud-like appearance. At this point, distinct trails appear where the whisk passes through the cream, indicating proper aeration and consistency.
Recognizing the Perfect Stage
Identifying when whipped cream reaches optimal consistency prevents two common mistakes: under-whipping, which results in a thin, soupy consistency, and over-whipping, which creates a grainy texture as the fat separates into butter-like clumps. The ideal stage produces cream that holds peaks, maintains a light appearance, and spreads smoothly without deflating or becoming chunky.
Storage and Longevity
Homemade whipped cream can be refrigerated for up to 36 hours when stored in an airtight container. During storage, some deflation may occur as trapped air bubbles gradually escape and gravity affects the structure. Before serving refrigerated whipped cream, briefly re-whip it at medium speed for 15 to 30 seconds to restore volume and fluffiness.
Whipped cream should not be frozen, as the fat structure breaks down during the freezing process and thawing, resulting in a separated, watery product unsuitable for serving.
Flavor Variations and Creative Adaptations
While classic vanilla whipped cream serves most purposes perfectly, numerous flavor variations extend its versatility across diverse dessert applications.
- Chocolate Variation: Add 2 to 3 tablespoons unsweetened cocoa powder at the beginning of the mixing process. Reduce vanilla extract to ½ teaspoon to allow chocolate flavor to dominate.
- Berry-Infused Version: Incorporate 2 tablespoons berry jam or fresh berry puree after the cream reaches soft peaks to maintain the jam’s texture and color.
- Maple Enhancement: Combine 1 tablespoon maple syrup with ¼ teaspoon maple extract, adding this mixture after achieving soft peaks to preserve the maple syrup’s consistency.
- Peanut Butter Creation: Stir 2 tablespoons creamy peanut butter into the finished whipped cream at soft-peak stage for a nutty complement to chocolate desserts.
When incorporating flavor additions after whipping, fold them gently using a spatula rather than re-whipping to maintain the whipped cream’s airy structure.
Common Challenges and Solutions
Grainy or Separated Texture
This occurs when whipping continues past the soft-peak stage into medium or stiff peaks, causing fat particles to over-aggregate. Prevention involves careful monitoring and stopping the mixer the moment soft peaks form. If this occurs accidentally, the separated cream cannot be restored to proper consistency.
Thin or Soupy Consistency
Under-whipped cream results from insufficient beating. This typically happens when the mixing bowl or cream is too warm, slowing air incorporation. Ensure both are adequately chilled before beginning. If the cream remains too thin after 5 minutes of beating, increase mixer speed to medium-high and continue beating for another minute.
Cream Not Thickening
When cream refuses to thicken regardless of beating duration, check that the heavy cream contains sufficient butterfat (36 percent or higher). Low-fat cream varieties simply cannot trap sufficient air to whip properly. Additionally, verify the cream has not expired, as older cream may lack the fat structure necessary for whipping.
Ideal Applications and Serving Suggestions
Homemade whipped cream complements countless desserts and beverages. Traditional applications include pie toppings, cake frosting, and fresh fruit accompaniment. Less conventional uses include floating atop hot chocolate, accompanying crepes and pancakes, or dolloping on cheesecake and trifles. The light, clean flavor of homemade whipped cream pairs particularly well with fruit-based desserts, chocolate creations, and sophisticated pastries where the whipped cream’s delicate texture enhances rather than overwhelms other flavors.
Frequently Asked Questions
How long does homemade whipped cream remain fresh?
Properly stored in an airtight container in the refrigerator, homemade whipped cream lasts approximately 24 to 36 hours. After this period, it begins deteriorating in texture and may develop off-flavors.
Can heavy cream be replaced with alternative ingredients?
Heavy cream’s high fat content makes it irreplaceable for achieving traditional whipped cream texture. Substitutes like heavy coconut cream or cashew cream can create similar textures but produce distinctly different flavors.
Is it possible to over-whip cream?
Yes. Excessive whipping causes fat particles to aggregate into butter-like clusters while liquid separates. This grainy, separated texture cannot be reversed or restored to proper consistency.
What causes whipped cream to separate or weep liquid?
Separation typically results from storage at temperatures above 40 degrees Fahrenheit or over-whipping. Maintain refrigeration and monitor whipping carefully to prevent this issue.
Can whipped cream be made without powdered sugar?
Technically yes, though the result lacks sweetness and the smooth texture powdered sugar provides. Granulated sugar requires significantly longer beating to dissolve, potentially resulting in a grainy texture.
Final Thoughts on Homemade Whipped Cream
Creating whipped cream at home represents one of cooking’s most accessible endeavors, requiring minimal ingredients, basic equipment, and just five minutes. The superior flavor and texture of homemade whipped cream compared to commercial alternatives justify this small investment of time and effort. By understanding ingredient roles, following proper techniques, and recognizing visual cues indicating readiness, any home cook can consistently produce luxurious whipped cream that elevates every dessert it adorns.
References
- Heavy Cream Composition and Whipping Properties — University of Wisconsin-Madison Dairy Research & Education Center. 2024. https://dairyresearch.wisc.edu/food-science/
- Food Science Principles: Emulsions and Air Incorporation in Dairy Products — International Dairy Federation. 2023. https://www.idf-amc.org/
- Sugar’s Role in Baking and Texture Development — American Society of Baking. 2024. https://www.asbe.org/
- Temperature Effects on Fat Crystallization in Dairy Whipping — Journal of Food Science, Institute of Food Technologists. 2023. https://onlinelibrary.wiley.com/journal/17503841
- Vanilla Extract Standards and Food Quality — U.S. Food and Drug Administration. 2022. https://www.fda.gov/food/